Showing posts with label cover die. Show all posts

Saturday, May 16, 2026

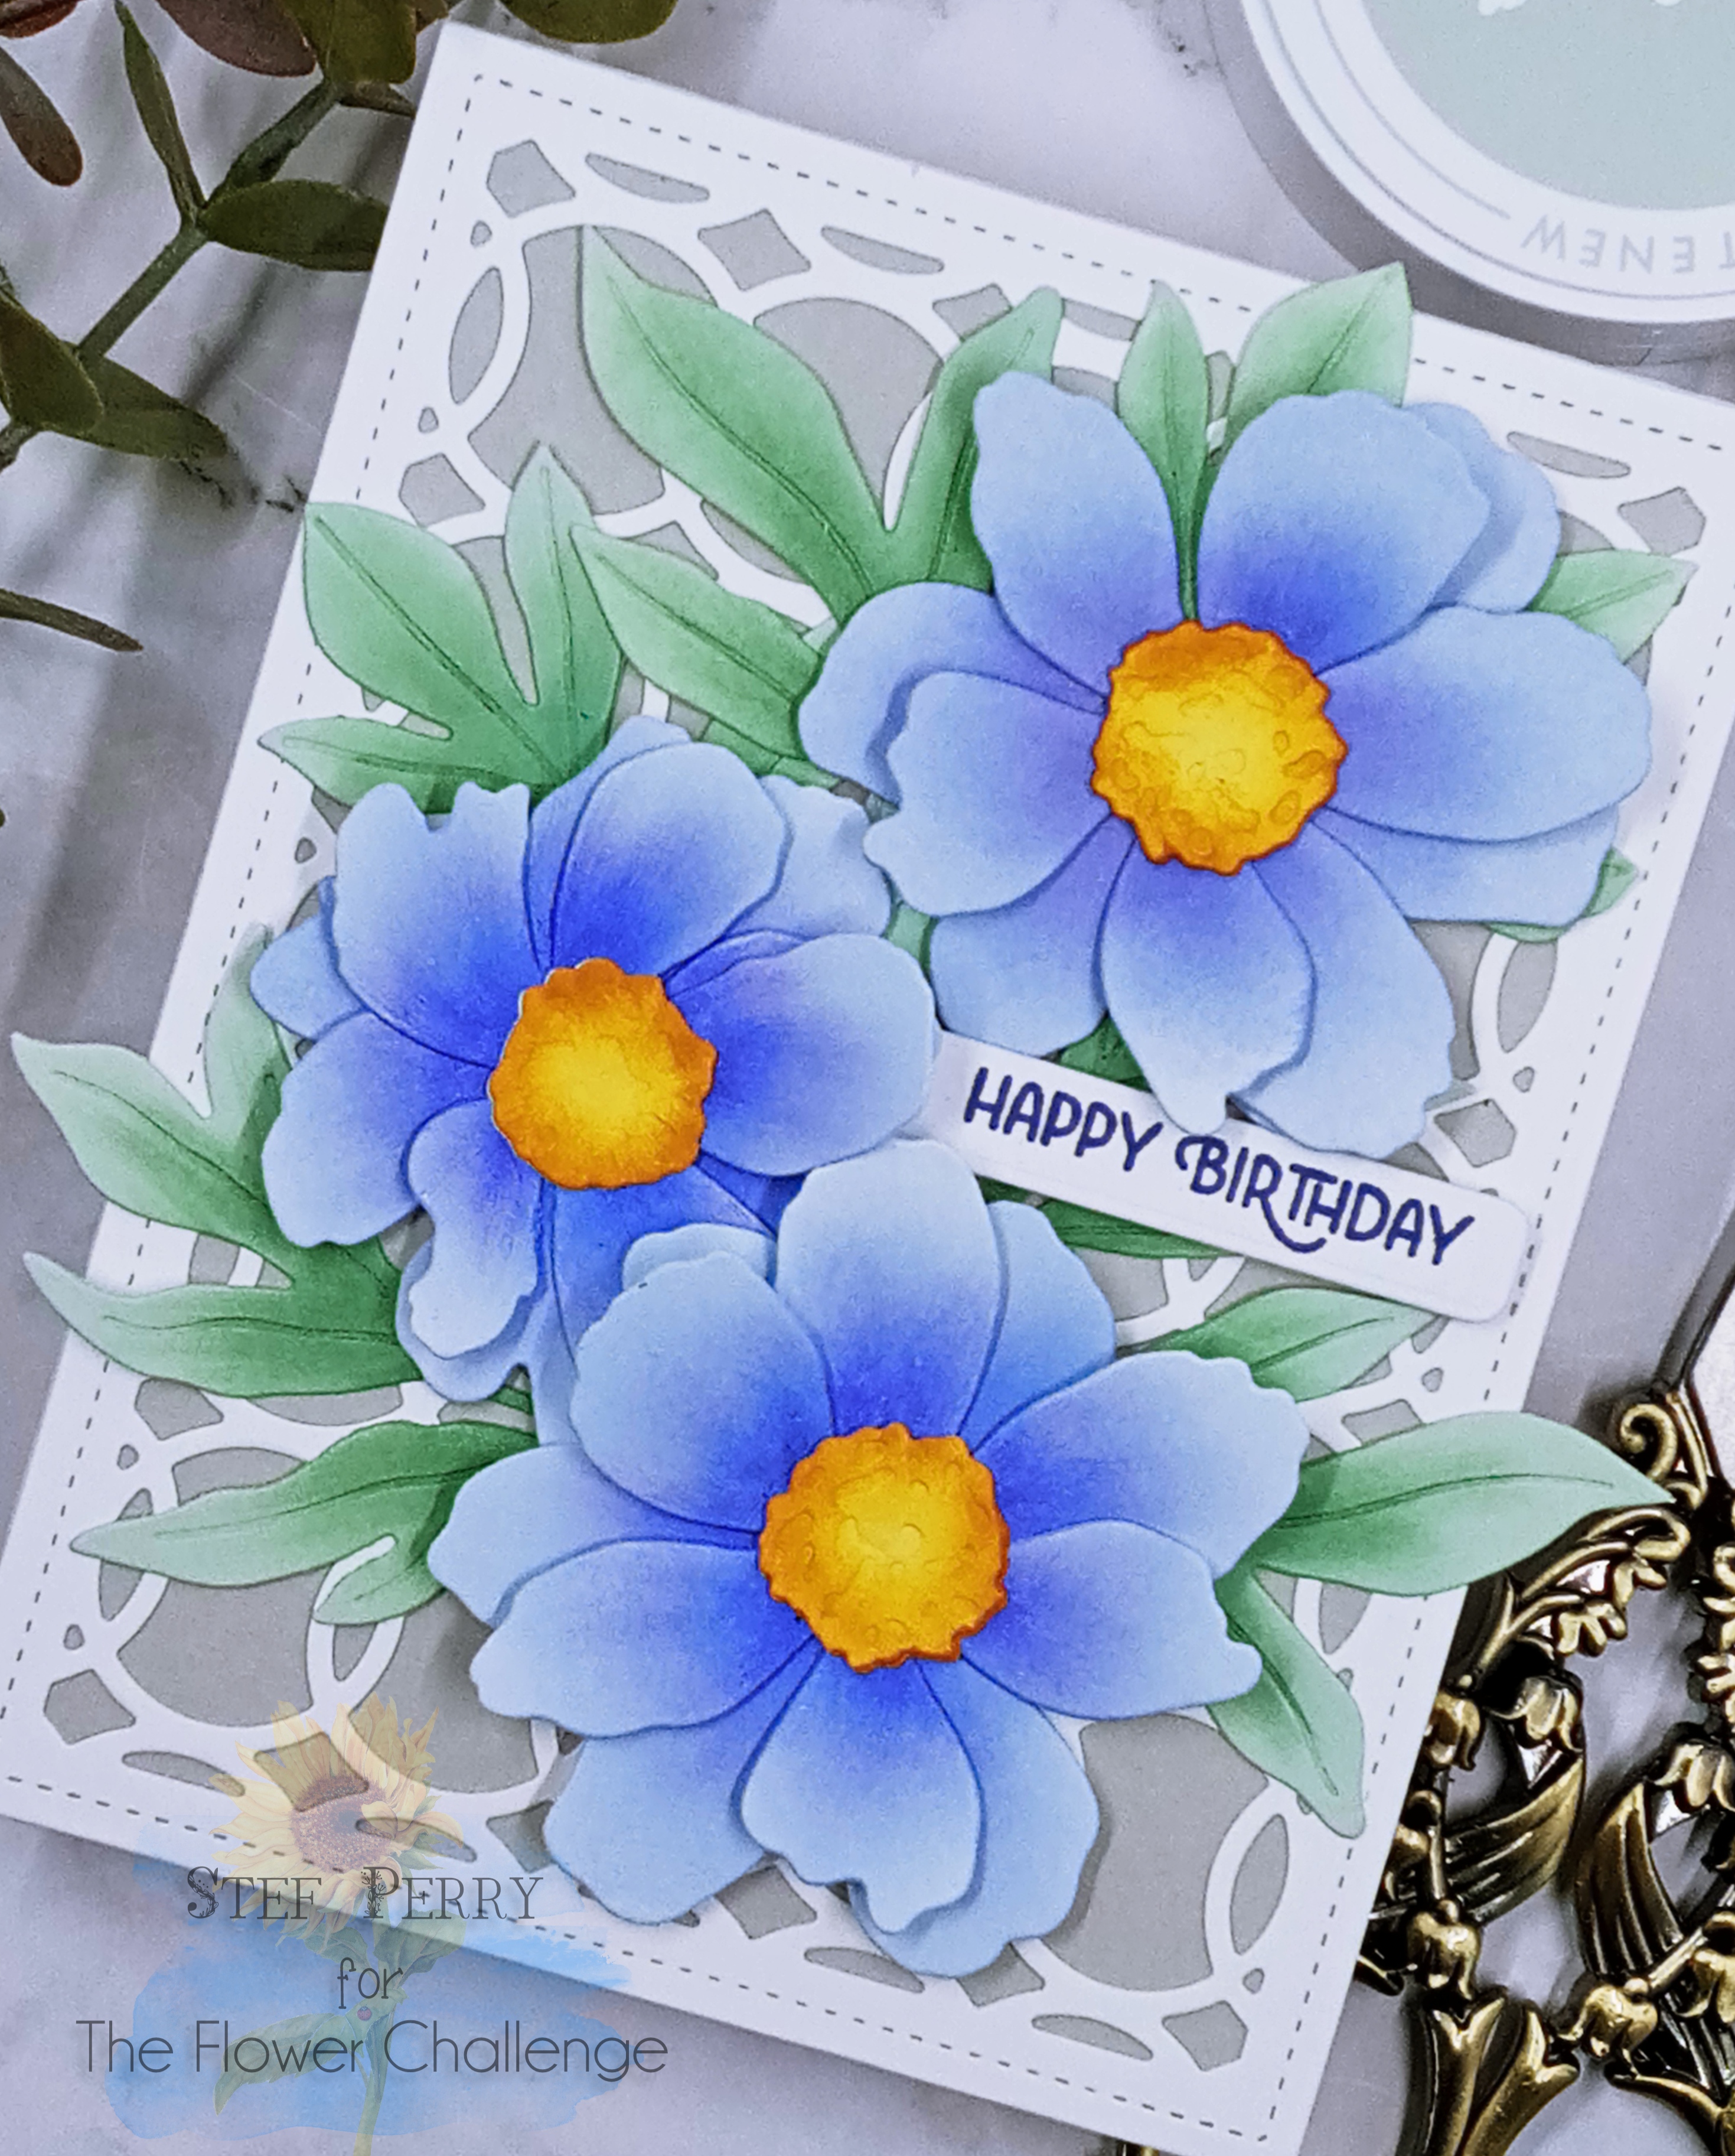
Meadow Flower Birthday for CH133

Hello friends!  We have a new Color Hues Challenge and this time the fabulous Tracey is hosting.  She's chosen a gorgeous color combination of Lime Green and Violet.

I'm also joining the lovelies at Just Us Girls, where Lisa has chosen Flowers for their Word Week Challenge and the Anything Goes option at Seize the Birthday.


I ended up combining mostly some old and new Simon Says Stamp products for my card.


I couldn't help but go with flowers with this color combination and decided I should use one of the older flower dies in my collection.  The dies were cut from white cardstock then inked with both SSS and Altenew inks.  

I was itching to use the new Scalloped Arches dies and thought they would create the perfect landing spot for the flowers.  The smaller die was cut from Spellbinder Fairytale cardstock and the larger with white.  The sentiment was stamped using the EZ Strips Birthday stamp and cut out with the matching die.

For the background, I liked the scalloped look that coordinated well with the arches dies.  The panel was cut from a light green cardstock then layered on the card base. With everything adhered to the card, the final step was to add some sparkle...I may have gotten a tiny bit carried away. 😁


Thanks for stopping by and I hope you'll take a moment to visit the challenge blog, where my amazing teammates have some wonderful inspiration for you.  The challenge will remain open until Friday May 29th at 3pm EDT.  Please come join us, won't you?

Stef

  • Etched Meadow Flower dies
  • Scalloped Arches dies
  • Altenew Dotted Scales Embossing Cover die
  • EZ Strips Birthday Stamp and die
  • Honey Bee Stamps Aurora Borealis gems
  • SSS Heather, Violet and Iris inks
  • Altenew Limeade, Lime and Fresh Leaf inks

Thursday, April 16, 2026

Charmed Birthday for Color Hues

Hello friends!  Today the lovely Sheri is hosting our new challenge at Color Hues.  She has chosen some wonderful spring colors.

Remember that you can use any hues of these colors and you'll see that with the gorgeous cards by the other design team members, as well as mine.


I've always found coral to be a bit tricky to create with using inks or alcohol markers.  But then Jennifer McGuire came to my rescue in a video earlier this year, using three shades of Altenew inks (listed below).  So that's what was used to ink blend all the die cut petals on the flower. (If anybody that has suggestions for coral Copic marker combos that don't look too red, I'd appreciate knowing!)

After the ink blending of both the leaves and flower petals was complete, the flower was assembled, all six layers (!) plus the center pieces.  I didn't care for the shape of the top flower center die that was part of the die set so I substituted one from another set.

Both the Betterpress sentiment and the flower center were inked using Altenew Antique Gold pigment ink.  Texture was added to the green background with a cover plate die, then a die cut lattice became the landing spot for the peony.  Other than fussing with the flower center, this card came together very quickly!


The challenge will remain open until Wednesday April 29th at 3:00 pm EDT.  For more inspiration, I encourage you to visit the challenge blog to see all those gorgeous cards created by my amazing teammates and our guest designer Kelly. I hope you'll join us!

Thanks for stopping by!

Stef

  • Altenew Coral Charm Peony dies
  • Spellbinders Woven Lattice Texture die
  • Pinkfresh Studio Stitched Diamonds Cover die
  • Spellbinders A Little Message Sentiments Press Plate and die
  • Altenew Pink Pearl, Coral Bliss and Coral Red inks
  • SSS Lime, Limelicicous and Pearfection inks

Sunday, March 1, 2026

Magical Day for the Paper Players

Hello friends!  The weeks just fly by and here we are on the 1st of March!  This week at the Paper Players the amazing Christy is hosting, and she has chosen a really fun theme of Mythical Creatures. Think fairies, elves, leprechauns, dragons, aliens (I guess?), unicorns, mermaids...anyway, I think you get the picture!


I have a few "mythical creatures" in my crafty stash but I've been working on cards for children and teens to contribute to the Cards for Cubs card drive for children in the foster system, so I pulled out an old favorite stamp and die set from MFT (which is now closed, sadly).


I love this cute dragon flying with the little child on his back.  I decided to go with a purple dragon just for fun.  I like this image because child could be a boy or a girl.  

After coloring and die cutting the image, I added some fun dots on the dragon with my white gel pen.  The next step was to create a background.  Oh boy, did I fuss around with this, but finally decided to crop the stenciled cloudy sky background down with a circle die, then adhere the dragon and child directly to it.  I wanted a little bit of texture on the card base and found this panel already cut with a cover die.  I wasn't sure if I liked it or not but, in the end, thought it worked okay, especially in the light green color. Let me know what you think. 

The sentiment is from an old Lawn Fawn stamp set.  It was cut with a label die then I fished tailed the ends.  Both it and the circle were then added to the card front with foam tape, and I finished things off with a few purple enamel dots.  


I hope you'll join us for this fun challenge!  For more ideas and inspiration, take a moment to visit the challenge blog to see the fabulous cards by my talented teammates. The challenge will remain open until Friday, March 6th at 3pm EST.  

Thanks for visiting and if you have a chance, please come back by later for my new DT post for Color Hues.


Stef

PS  I'd also love it if you'd come visit on Thursday, March 5th, when I have a very, very special post to share!

  • MFT Birdie Brown Magical Friends stamp and die
  • Lawn Fawn Fairy Friends Sentiment stamp
  • MFT Mini Clouds stencil
  • Hero Arts Nested Circle die
  • Pinkfresh Studio Stitched Diamonds cover plate die
  • Copics - YG67, 17, 03, E29, 37, 33, 04, 21, 000, B39, 37, 34, 01, 000, 0000
  • OLOs - V2.7, 2.6, 2.4, 1.1
  • Altenew Shades of Purple Enamel Dots

Saturday, October 4, 2025

Joyful Bouquet for The Flower Challenge

Hello friends!  The Flower Challenge is back for the month of October and this time we'd like everyone to add purple on your floral card.  Since I love purple, I didn't have to think twice about that!

I have a sweet bouquet stamp purchased during Stamptember that I decided to use.  It was a collaboration stamp between Simon Says Stamp and Altenew.  Since I keep adding to my NBUS collection, I guess I better send it over to Darnell's NBUS blog lol!


I used mainly blue violets but I did manage to add a pop of yellow along with the purple flowers.


The pretty floral spray was colored with Olo and Copic markers, then die cut with the matching die.  I love the angle of the stamp, it could fit so many ways on a card, but the placement I used seemed to make the most sense so I could add the sentiment, which also from the same stamp set.

The cover panel was die cut from SSS Lavender and adhered to the card base.  Another die from the same set was cut from white and popped up with foam tape.  After adding the spray and the sentiment I added a few Opal Dazzling gems to finish things off.


Okay all you purple and flower lovers, we'd love to see your cards in the gallery this month!  Be sure to stop by the challenge blog (linked above) to see all the gorgeous inspiration from my oh, so talented teammates.  So many beautiful cards!  The challenge will remain open until Saturday October 25th.  Please join us this month!

Thanks for stopping by!

Stef  

  • Altenew/SSS Joyful Bouquet stamps and dies for Stamptember 2025
  • Honey Bee Stamps Spring Vine Layering Frames dies
  • SSS Opal Dazzling Gems
  • Olos - BV1.7, 1.4, 1.2, 1.1, BG2.7, 2.5. 2.4, 2.1, YO 2.5, Y2.3, 2.2, 1.1
  • Copics - YG67, 17, 03, E37, 33, V17

Tuesday, March 4, 2025

Peruvian Lilies for The Flower Challenge

Hello friends!  It's a special time over at The Flower Challenge because we are celebrating our 100th challenge!  And there are prizes to be won!  All you need do is create a card featuring flowers and using our theme this month which is Add Circles.

To go along with the theme, I decided to use a Waffle Flower cover die behind my flowers.


I love this new Peruvian Lily set from Altenew, the floral bouquet is so pretty.  Did you know that the scientific name for these flowers is the Alstroemeria?  I kept looking at the stamp, thinking I didn't have any lilies such as this in my garden (and we have many!) so I looked it up.  Alstroemeria are used extensively in cut flower arrangements because they are long-lasting.  And very pretty too.

So, on to the actual creation of the card.  After stamping the image, I used the simple coloring stencils with two colors per petal and leaf to create some dimension, then it was die cut with the matching die.  The sentiment is also from the same stamp set and was die cut with its matching die as well.

The Ring Panel cover die was cut from a panel of white and layered on the card base.  I tucked the end of the stem underneath a corner of it, then added foam tape under the flowers and the sentiment.  The final touch was to add some sapphire gems.


I hope you're excited to play along and share how you add rings to your card, and for further inspiration, look no further than my very talented teammates over on the challenge blog (linked above).  More information about how the prize winners will be chosen is over there along with photos of the prizes. The challenge will remain open until Tuesday, March 25th. Hope to see you there!

Thanks for visiting and take care.

Stef

  • Altenew Peruvian Lily stamps, dies and stencils
  • Waffle Flower Ring Panel cover die
  • Altenew Water Hyacinth, Indigo Skies, Honeydew Glow, Lemonade Stand, Firefly and Mountain Pine inks
  • Lucy's Little Things Dark Sapphire gems

Wednesday, October 16, 2024

Thinking of You for Color Hues

Hello, friends!  Today brings a new challenge at Color Hues and this time the amazing Jules has chosen Mustard and Olive, a great fall combination.

I decided to use a set that's been waiting to be inked up for a while - Brighter Days Gerbera Daisy from Picket Fence.  I know Gerbera daisies come in a plethora of colors so I decided why not mustard yellow? 


This is a lovely, large floral image and so easy to color.  Of course, I used my Copic markers, making sure my yellows were more of a golden color.  I know mustard can be a bright yellow, I guess I was thinking Dijon? ;-)  Anyway, with the coloring complete it and the sentiment (also from the same set) where cut out with coordinating dies.

I really fiddled around to get a background that I liked.  At first the double plaid die was cut from brown cardstock and layered on white, but I didn't like that and finally settled on the white over kraft.  It's very subtle, but before the kraft panel was layered with the cover die, I stamped a text background stamp with white pigment ink, then used a blending tool to ink around the edges.  It adds just a little interest and a nice softness to the kraft.

With everything adhered to the card base, I finished things off with some yellow gems and used a white gel pen for the stamen (anthers?).


I do hope you'll join us and share what you were inspired to make with these two colors!  The challenge remains open until 9am on Tuesday October 29th.  And I encourage you to visit the challenge blog, where fabulous inspiration from my very talented teammates awaits you.

Thanks for visiting and take care!

Stef

  • Picket Fence Brighter Days Gerbera Daisy stamps and dies
  • Simon Says Stamp Double Plaid Cover Die
  • SSS Friendship Text background stamp
  • HoneyBee Stamps Vintage Love Gems
  • Copics - YR27, 24, 23, Y15, 11, YG99, 97, 95, E37, 35, 33, 31


Wednesday, September 4, 2024

Graceful Flowers for The Flower Challenge

Hello friends!  Wow, here we are in September already - the year is truly flying by now, right?  

The Flower Challenge is back and this month we have something easy - include a stamped flower.

I used a large floral image so rather than cut it down, I decided to make a slimline card.


This was a super easy card to pull together.  After stamping my floral image, it was colored with Copic markers and die cut with the matching die.  The sentiment is from the same stamp wet and also cut with it's coordinating die. 

At this point I had to make a decision on the background.  Embossing?  Cover plate?  Well, as you can see, I went with the cover plate, but from aqua cardstock and then adhered directly to the card base, for a card size of 3.5" x 8.5".  The flowers were adhered to two additional die cuts for dimension and added to the card front along with the sentiment.  A few clear sparking gems completed my card.


What are you inspired to make for this challenge?  Although this time I used a newer stamp set, I think for my mid-month card I'll be pulling out an older set I haven't used for a while - this challenge was a good reminder for me to do that.  I hope you join us this month, the challenge remains open until Wednesday, September 25th.

Thanks for visiting and take care!

Stef

  • Simon Says Stamp Graceful Flowers Stamps and Dies
  • SSS Filigree Slim Plate die
  • Altenew Crystal Clear Gem Sparkles
  • Copics - V09, 17, 15, 01, RV09, 17, 06, 04, 02. B69, 66, 63, YR23, Y15, 11, BG 09, 15, 11

Sunday, June 16, 2024

Joyful Day for Color Hues

Hello friends!  Mid-month brings a new challenge over at Color Hues and this time the lovely Marcia has chosen pink and sage.

I'm also sharing with the Time Out Challenge, where the theme is based on this wonderful quote by one of the great Impressionist painters, Henri Matisse. 
 "There are always flowers, for those that want to see them."


And I'm sharing my card at Seize the Birthday for the Anything Goes choice.


No surprise, with the CH colors, I went with leafy branches and flowers, which also worked perfectly with the TOC challenge.


Pinkfresh Studio's new release included those pretty leafy branches, which I couldn't resist (wink, wink).  They were stamped, stenciled with three muted greens, then die cut with the coordinating die.  The sentiment and matching die are from the same set.  One additional die cut was added to the leaf branches and two were added to the die cut sentiment, nice for a bit of dimension and also stability on the die cut background.

Next I die cut several tiny flowers from a Memory Box and Poppystamps die sets and ink blended them in pink.  I used the same pink on the front of the card base, then added the die cut trellis over which I adhered to branches, leaving room for the sentiment.  At first, I just had a few flowers on the branches but kept adding more and more until I'd used almost all of them, and liked how it looked much better.  After they were adhered, I curled up the petals a bit, then added a sparkly gem to the middle of each.  After adding the sentiment, I decided to finish things off with a couple more flowers - why not lol?


What are you inspired to create with these colors?  For more inspiration, be sure to visit the challenge blog, where my wonderful teammates have some fabulous cards to share with you.  The challenge will remain open until 9 am EDT June 29th - hope to see your card in the gallery!

Take care!

Stef

  • Pinkfresh Studio Joyful Day stamps, dies and stencils
  • Memory Box Layered Impatiens
  • Poppystamps Petite Blooms Flower set
  • Altenew Garden Trellis Cover die
  • Altenew Blush Rose, Silver Sage, Jade and Eucalyptus Fresh Dye Inks
  • Honeybee Stamps Aurora Borealis Gem Stickers

Wednesday, May 1, 2024

Tulip Pattern for Color Hues

Hello friends!  Well, here we are at the beginning of May and it's time for a new challenge at Color Hues!  This time the amazing Julie B. has chosen the beautiful color combo of Lilac and Lime.

I'm also joining the current Simon Says Stamp Wednesday Challenge where the theme is Feminine. 

For my card, I'm using a Hero Arts stencil and die set that was released in February, I believe.


The stencil set is a layering one, so I found two ink shades each of purples and greens and went to work.  After the stenciling was complete, the panel was trimmed to just slightly smaller than A2 size.  The cover die was used on two panels of white, layered up and then adhered over the stenciled panel.  It would also be fun to use the cover die to cut the stenciled panel then use inlay but I wasn't up that task the day I was working on this card lol!

I had a die cut sentiment that I was going to use on the heart, but it was too big, so I went on "the search" for a sentiment and found the perfect match with another Hero Arts stamp set.  Most of the words are meant for Valentine's day but these worked out fine, stamped in gray ink.  

The dragonfly is having it's first outing on this card, cut from white then inked with the same purples.  I then used a shimmer pen on the wings, glued it together and added to the heart.  I liked the glitter look so much I then proceeded to go over all the tulips as well, then for the last touch, added some sparkly gems.


I hope I've provided a little bit of inspiration and for even more, be sure to visit the challenge blog and see all the beautiful cards by my very talented teammates!  The challenge will remain open until 9 am EDT Tuesday 5/14.  We would love to have you join us!

Take care!

Stef

  • Hero Arts Tulip Pattern Layering Stencils and Fancy Cover Die
  • Hero Arts You're Mine Stamp set
  • Simon Says Stamp Nested Round Heart die and Etched Dragonfly die
  • Altenew Lavender Fields, Deep Iris, Lime and Fresh Leaf inks
  • Versamark Clair Morning Mist pigment ink
  • Tonic Aqua Shimmer pen
  • Honeybee Stamps Aurora Borealis gems

Thursday, April 4, 2024

Garden Tapestry for The Flower Challenge

Hello friends!  Here we are in beginning of April and at The Flower Challenge this month we are adding layers along with our flowers!

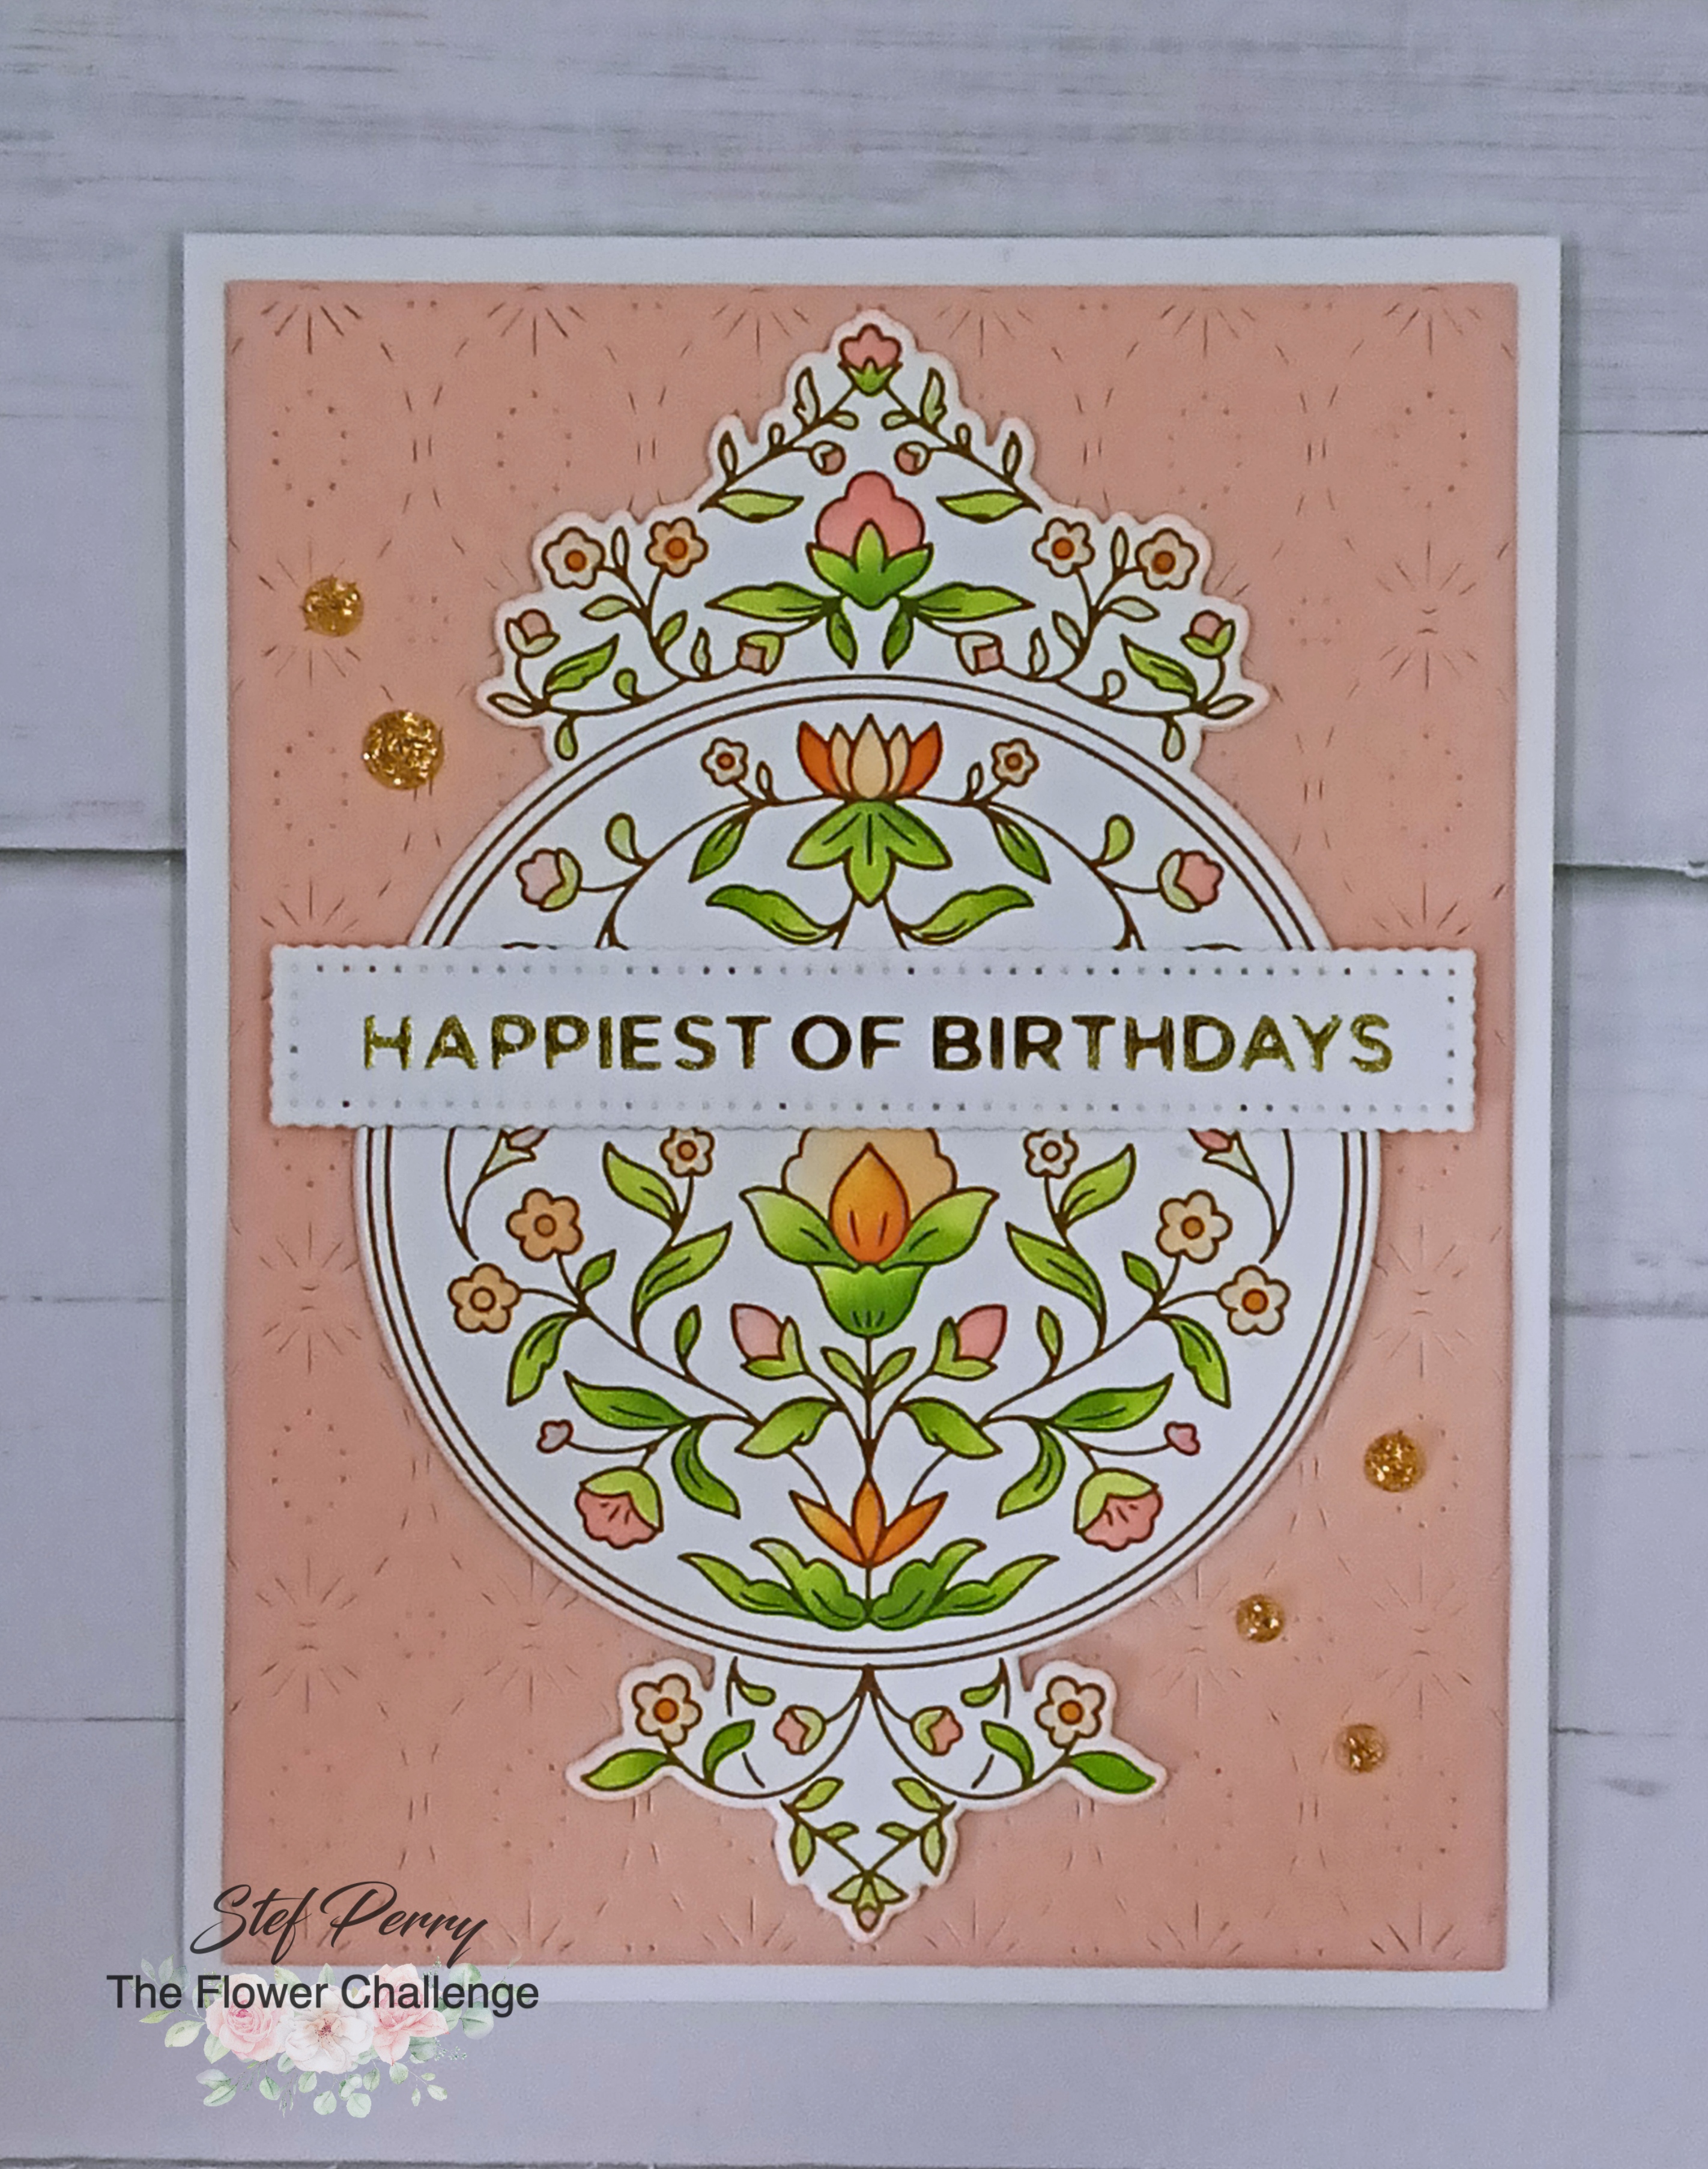
There are many ways to add layers and for this card, I added a panel cut with a cover plate die and also added layers under my main image for dimension.


The first step was to use the beautiful and intricate Pinkfresh Studio Garden Tapestry press plate with my BetterPress.  It was inked with Spellbinders Bark BetterPress ink, then I used the coordinating stencil to color the flowers and leaves.  I just love this delicate design.


Next came the die cutting.  The PFS Intricate Stitched Ovals Cover plate die left a subtle and beautiful design on the light peach panel, then added to the card base.  The stenciled image was die cut along with three additional layers, adhered together, the layered on the peach panel.  The sentiment was from a previous foiling session using SB More Sentiments foil plates and cut with the coordinating die, and I liked how the border seemed to coordinate with the background stitched design.  Lastly we couldn't go without a little bling, so I added some Studio Katia Gold Glitter drops, which also tied in the gold from the sentiment.


How would you add layers to your floral card?  Die cut flowers?  Layers of patterned paper? Frame?  All of the above? There are so many ways to go with this and for some wonderful inspiration, be sure to take a look at all the beautiful creations by my fellow DT members over at the challenge blog, then come play along with us!  The challenge will remain open until 5pm GMT (1 pm EDT) April 25th.  Be sure to swing back by on the 15th when I'll have my reminder post with a different way to add layers!

Take care!

Stef

  • PFS Garden Tapestry Press Plate, Die and Stencil
  • PFS Intricate Stitched Ovals Cover Plate die
  • Concord and 9th Nectar cardstock
  • PFS Peach Fuzz, Coral Berry and Clementine inks; SSS Limelicious and Pearfection inks; SB Bark BetterPress ink
  • Studio Katia Gold Glitter Drops

Friday, March 15, 2024

Blooming Delight for The Flower Challenge

Hello friends!  It's mid-month and that brings about our reminder post at The Flower Challenge.  


This time I decided to go big with a 5.5"x 5.5" square in order to accommodate the big blooms I used.


I'm always drawn to Altenew's Build-A-Garden stamps and the Blooming Delight was no exception, so it found its way into my craft room!  I stenciled the image with inks from the Fresh Dye selection - I really love how the purple-blue and dusty rose colors look together.  The image was then die cut with the coordinating die.


As I looked through my cover dies, I found this trellis and despite it being A2 sized I thought it would be a great anchor for these blooms.  It was die cut from kraft cardstock then sprayed with Crooked Broom Distress Mica spray.  While that dried, I embossed a panel of ivory cardstock with Altenew's Masonry Wall 3D folder, then used my brayer to apply a brown ink just to the raised portion.  I'm afraid the photos don't catch for embossed detail well.  The die cut trellis was attached to the embossed panel, then the florals were added with foam tape.  The sentiment is from a Spellbinders Betterpress set.  Lastly, I added a few gems that seemed to go perfectly with the brown colors.


You still have until the 25th at 5pm GMT to play along and in the meantime, be sure to visit the challenge blog as my amazingly talented teammates have oodles of inspiration to share with you!

Take care!

Stef

  • Altenew Blooming Delight BAG stamp, die and stencil set
  • Altenew Garden Trellis Cover Die and Masonry Wall 3D ef
  • Spellbinders Fancy Sentiment Strips Betterpress plate and die
  • Neenah Desert Storm and Hero Art Ivory cardstocks
  • Altenew inks - Sunray, Chamomile, Pumpkin Pie, Yellow Ochre, Jade, Eucalyptus, Frayed Leaf, Forest Glades, Pink Sand, Dusty Rose, Toasted Mauve, Water Hyacinth, Alpine Aster, Crystal Violet, Rocky Shores and Obsidian Pigment ink
  • Crooked Broomstick Distress Mica Spray
  • HoneyBee Vintage Love Gem Stickers


Sunday, March 3, 2024

May It Be Happy

Hello friends!  Today I'm sharing a card that I made for the current color challenge at Color Throwdown.  The colors were too pretty to pass up and I actually had time this weekend to just play.

I'm also joining in over at the Simon Says Stamp Wednesday Challenge where this week's theme is Anything Goes.

I combined some new products with an older cover die to create my card.


I recently obtained the HoneyBee Stamps Lovely Layers: Rose die set and it seemed to fit the bill perfectly for the challenge colors.  All the components were die cut from white cardstock then ink blended.  The pinks were as close as I could get to rose and the green inks are definitely in muted, sage-like colors.  I also ink blended a white panel in pink.


The background element was die cut from Stampin' Up Merry Merlot cardstock using a retired cover die from Simon Says Stamp.  After adhering it to the pink inked panel, it was added to the card front.  With such a busy background I needed a place for the rose to be grounded, so a scallop circle was die cut from white, layered on the card, then the rose was attached.  It's a different kind of die from what I'm used to in that the bloom, bud and the leaves are all separate components, but they line up perfectly of course.  After layering on the sentiment, I added a few pink gem stickers for some sparkle.


Thanks for visiting and I hope you'll have a chance to swing by tomorrow when I post my card for the March challenge at The Flower Challenge!

Take care!

Stef


  • HoneyBee Stamps Lovely Layers: Roses and Be Still stamp and die
  • SSS Marilyn Full Card Cover die
  • Hero Arts Scallop Circle Infinity die
  • Altenew Silver Sage, Jade and Eucalyptus inks; Concord & 9th Carnation and Sweet Pea inks; SSS Carbernet ink
  • HoneyBee Stamps Vintage Love Gem Stickers

Monday, September 4, 2023

Fragrant Peony for The Flower Challenge

Hello friends!  It's the fourth of the month, which brings a new challenge over at The Flower Challenge!  This month we are asking everyone to use a die.


I'm also playing along with Addicted to Stamps and More where the challenge is to make a birthday card.


Finally, I'm also joining the Anything Goes Challenge at Simon Says Stamp Wednesday Challenge.


For my card, I went all in with dies, using the lovely Fragrant Peony dies from Altenew, along with a couple others.


I recently decided to buy a few of the new Altenew Fresh Dye inks and this card was the perfect way to test them out, and quite honestly, they are wonderful.  I love my Crisp Dye inks and they work fine, but I did see a bit brighter results from ink blending and a clearer image when stamping the sentiment.

I started by ink blending the lightest blue, Water Hyacinth and the lightest green, Silver Sage, on white cardstock, then die cut the petals and leaves.  I then used the next two darkest inks from both ink families to add shading to the die cuts.  The center was die cut separately from a scrap of white and blended with Sunray and Yellow Ochre.  Putting the flowers together is easy with Altenew's keyhole design for lining up the layers.


With the flowers and leaves ready to go, I die cut the Waffle Flower Ring Panel die from white and layered it on a panel of Simon Says Stamp Fog cardstock, which was then added to a white card base.  The sentiment, from MFT's Stylish Sentiments stamp set, was stamped in Indigo Skies, the darkest blue, then die cut with label die.  The flowers were arranged around the sentiment and I was done.


No doubt you have a die in your collection and we'd love to see what you create with it.  But before you head off to your crafty place, be sure to check out the stunning array of cards the design team has created over at the challenge blog!

Take care!

Stef


Stamps:  MFT Stylish Sentiments
Paper:  Neenah Solar White, SSS Fog
Ink:  Altenew Yellow Ochre Crisp Dye ink, Sunray, Water Hyacinth, Alpine Aster, Crystal Violet, Indigo Skies, Silver Sage, Jade and Eucalyptus Fresh Dye inks
Dies: Altenew Fragrant Peony and Featured Sentiment dies, Waffle Flower Ring Panel die

Sunday, July 23, 2023

Glitter Birthday for Sunday Stamps

Hello and welcome back!  It's time for a new challenge at Sunday Stamps and this time Lisa has given us a fabulous sketch to play with.  Be sure to pop over to the challenge blog to see the creative ways the other DT members used it.


To me this design said "use dies" so that's what I did, both for the background and the sentiment.


A week ago I spent the afternoon just playing with Distress Spray Stains and the background panel of this card is one of the results.  Starting with a panel of Distress Watercolor, I sprayed it with Kitsch Flamingo and Wilted Violet, along with squirts of water to get the spray moving.  When I was satisfied with how it looked, I dried it with my heat tool, sprayed it with a shimmer spray, then set it aside to dry while I created the rest of the card components.


Using the Altenew Geo Tiles Cover die, three panels were die cut then adhered together for some girth, and added to the sprayed panel after it dried.  I also die cut a panel of purple glitter paper with the same die, kept the frame for another day, then added the glitter centers to the circles on the card.  The last step was to die cut the sentiment from the same glitter paper and the shadow from vellum and add that to the card front.  All that glitter kind of plays with the camera so the focus isn't as sharp as I'd like but the card is so pretty IRL - lots of purple goodness!


I hope I've given you a bit of inspiration to play along with us - we'd love to see your card in the gallery! 

Take care!

Stef


Paper:  Neenah Solar White, Distress Watercolor, Simon Says Stamp Winter Glitter 6x6 pack, Lawn Fawn Pearl Vellum
Dies:  Altenew Geo Tiles Cover and Versatile Greetings 2 dies
Spray:  Kitsch Flamingo and Wilted Violet Distress Spray Stain, Hero Arts White Iridescent Shimmer Spray