Tuesday, February 23, 2021

Big Birthday Wishes

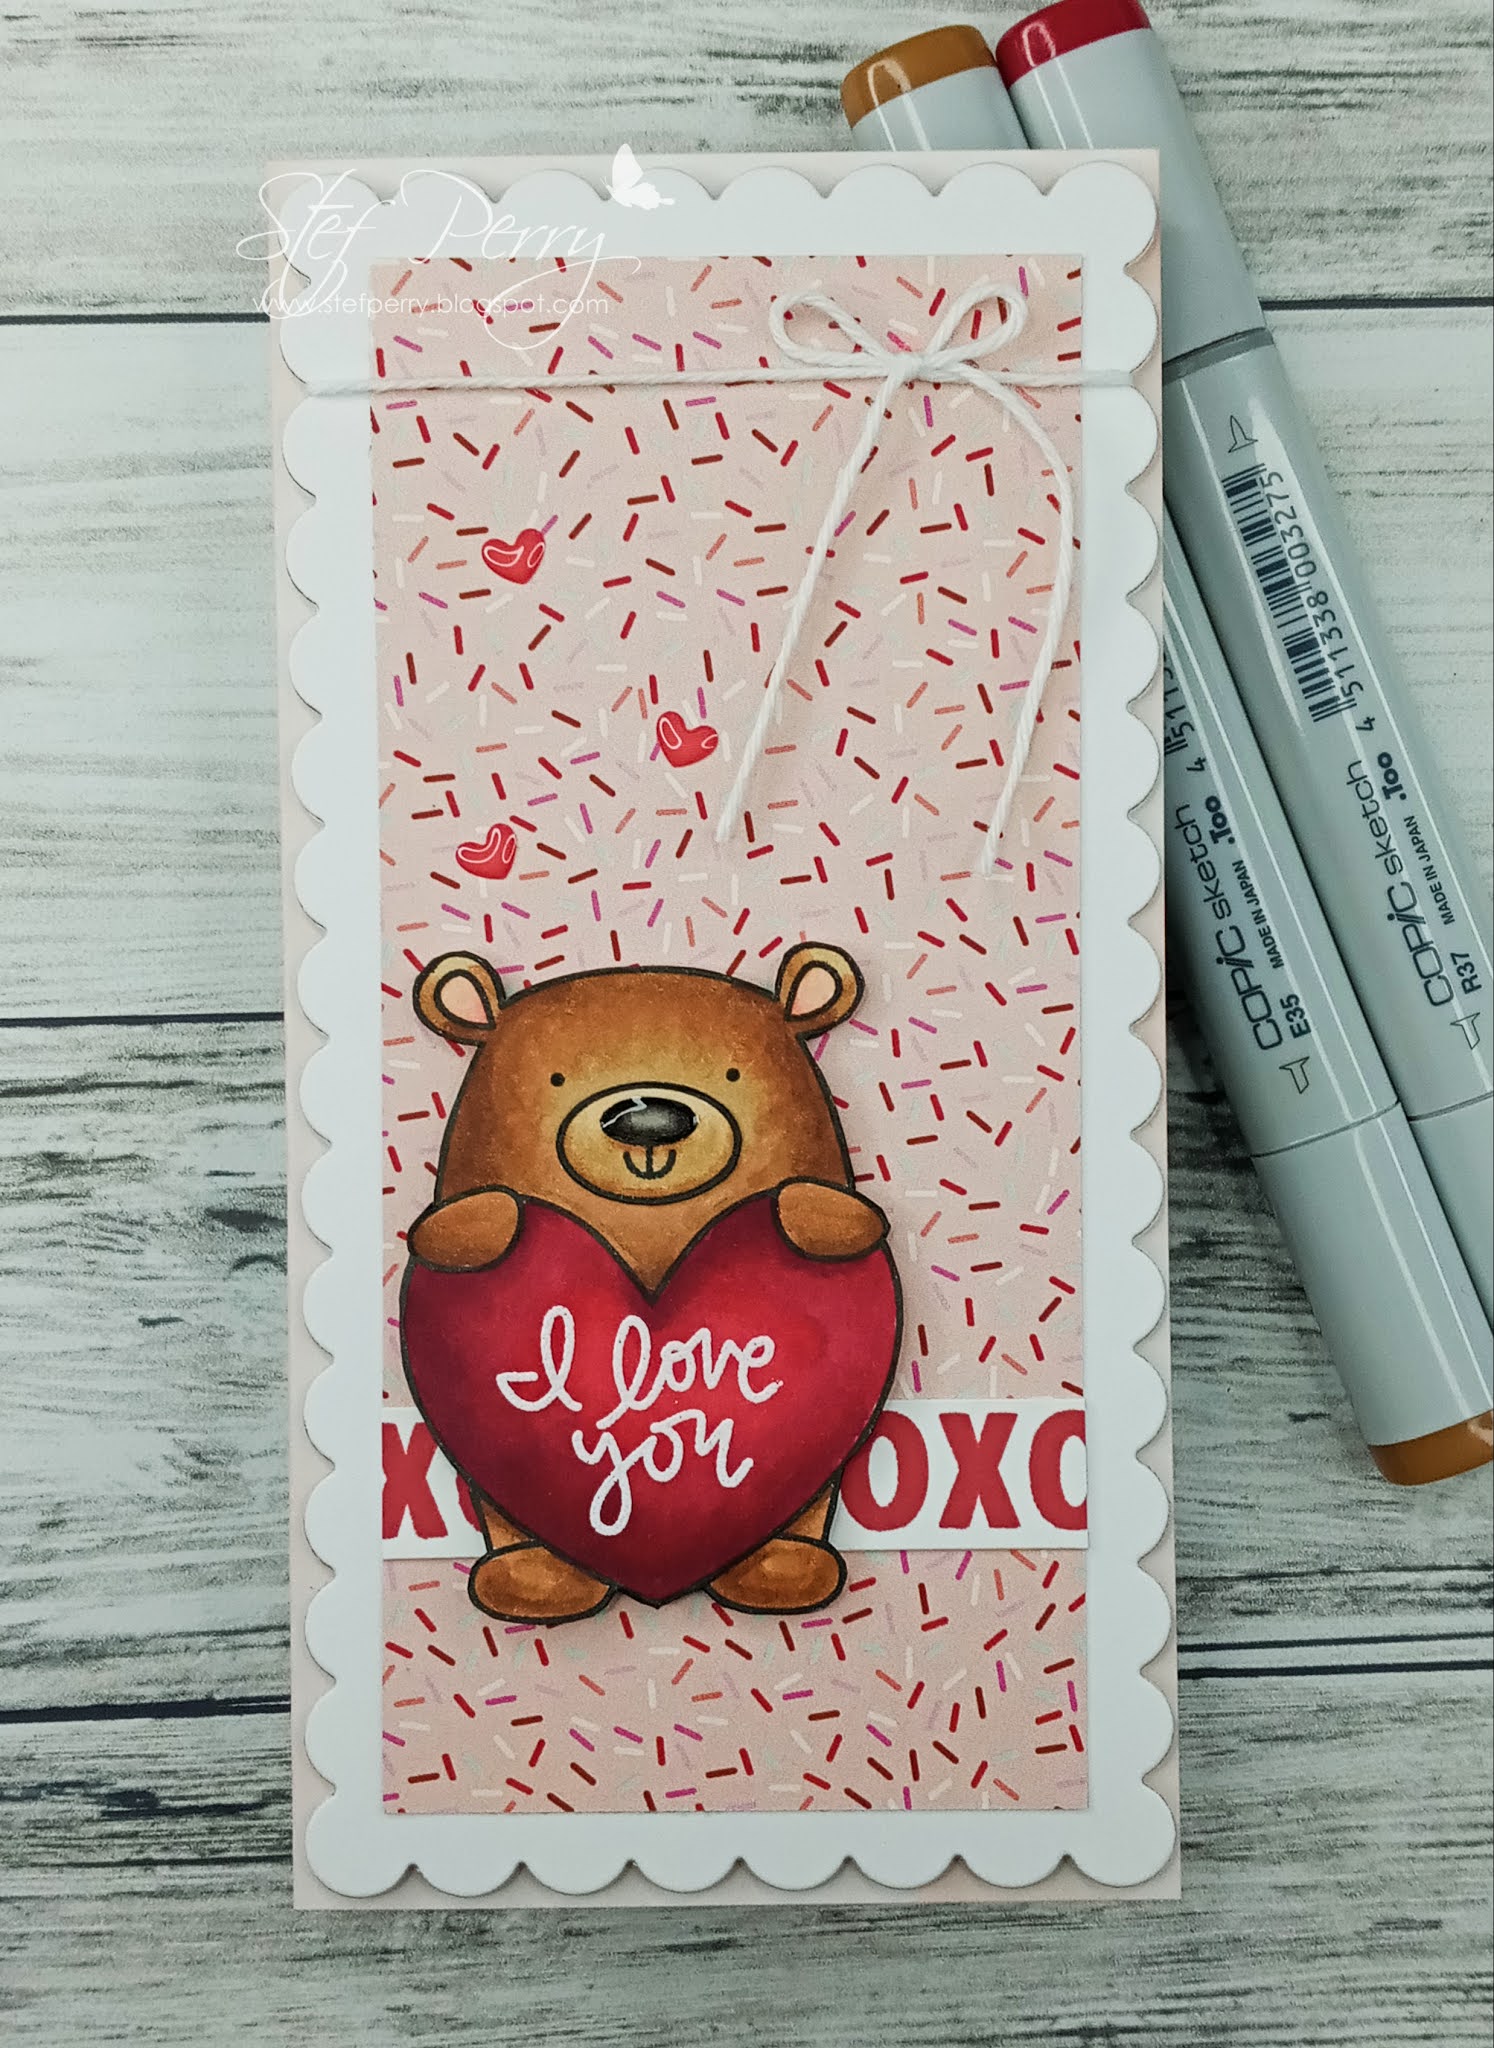
Hello friends and welcome to my second post for today, where I am sharing a card created for Seize the Birthday and Addicted to Stamps! If you want to take a peek at my other card you can find it here.


I made a festive birthday card for a dear friend who is a big car lover.  Originally I was going to make it a scene card, which is the "Toppings" option at Seize the Birthday, but it just didn't come together, so I'm going with the Anything Goes option.


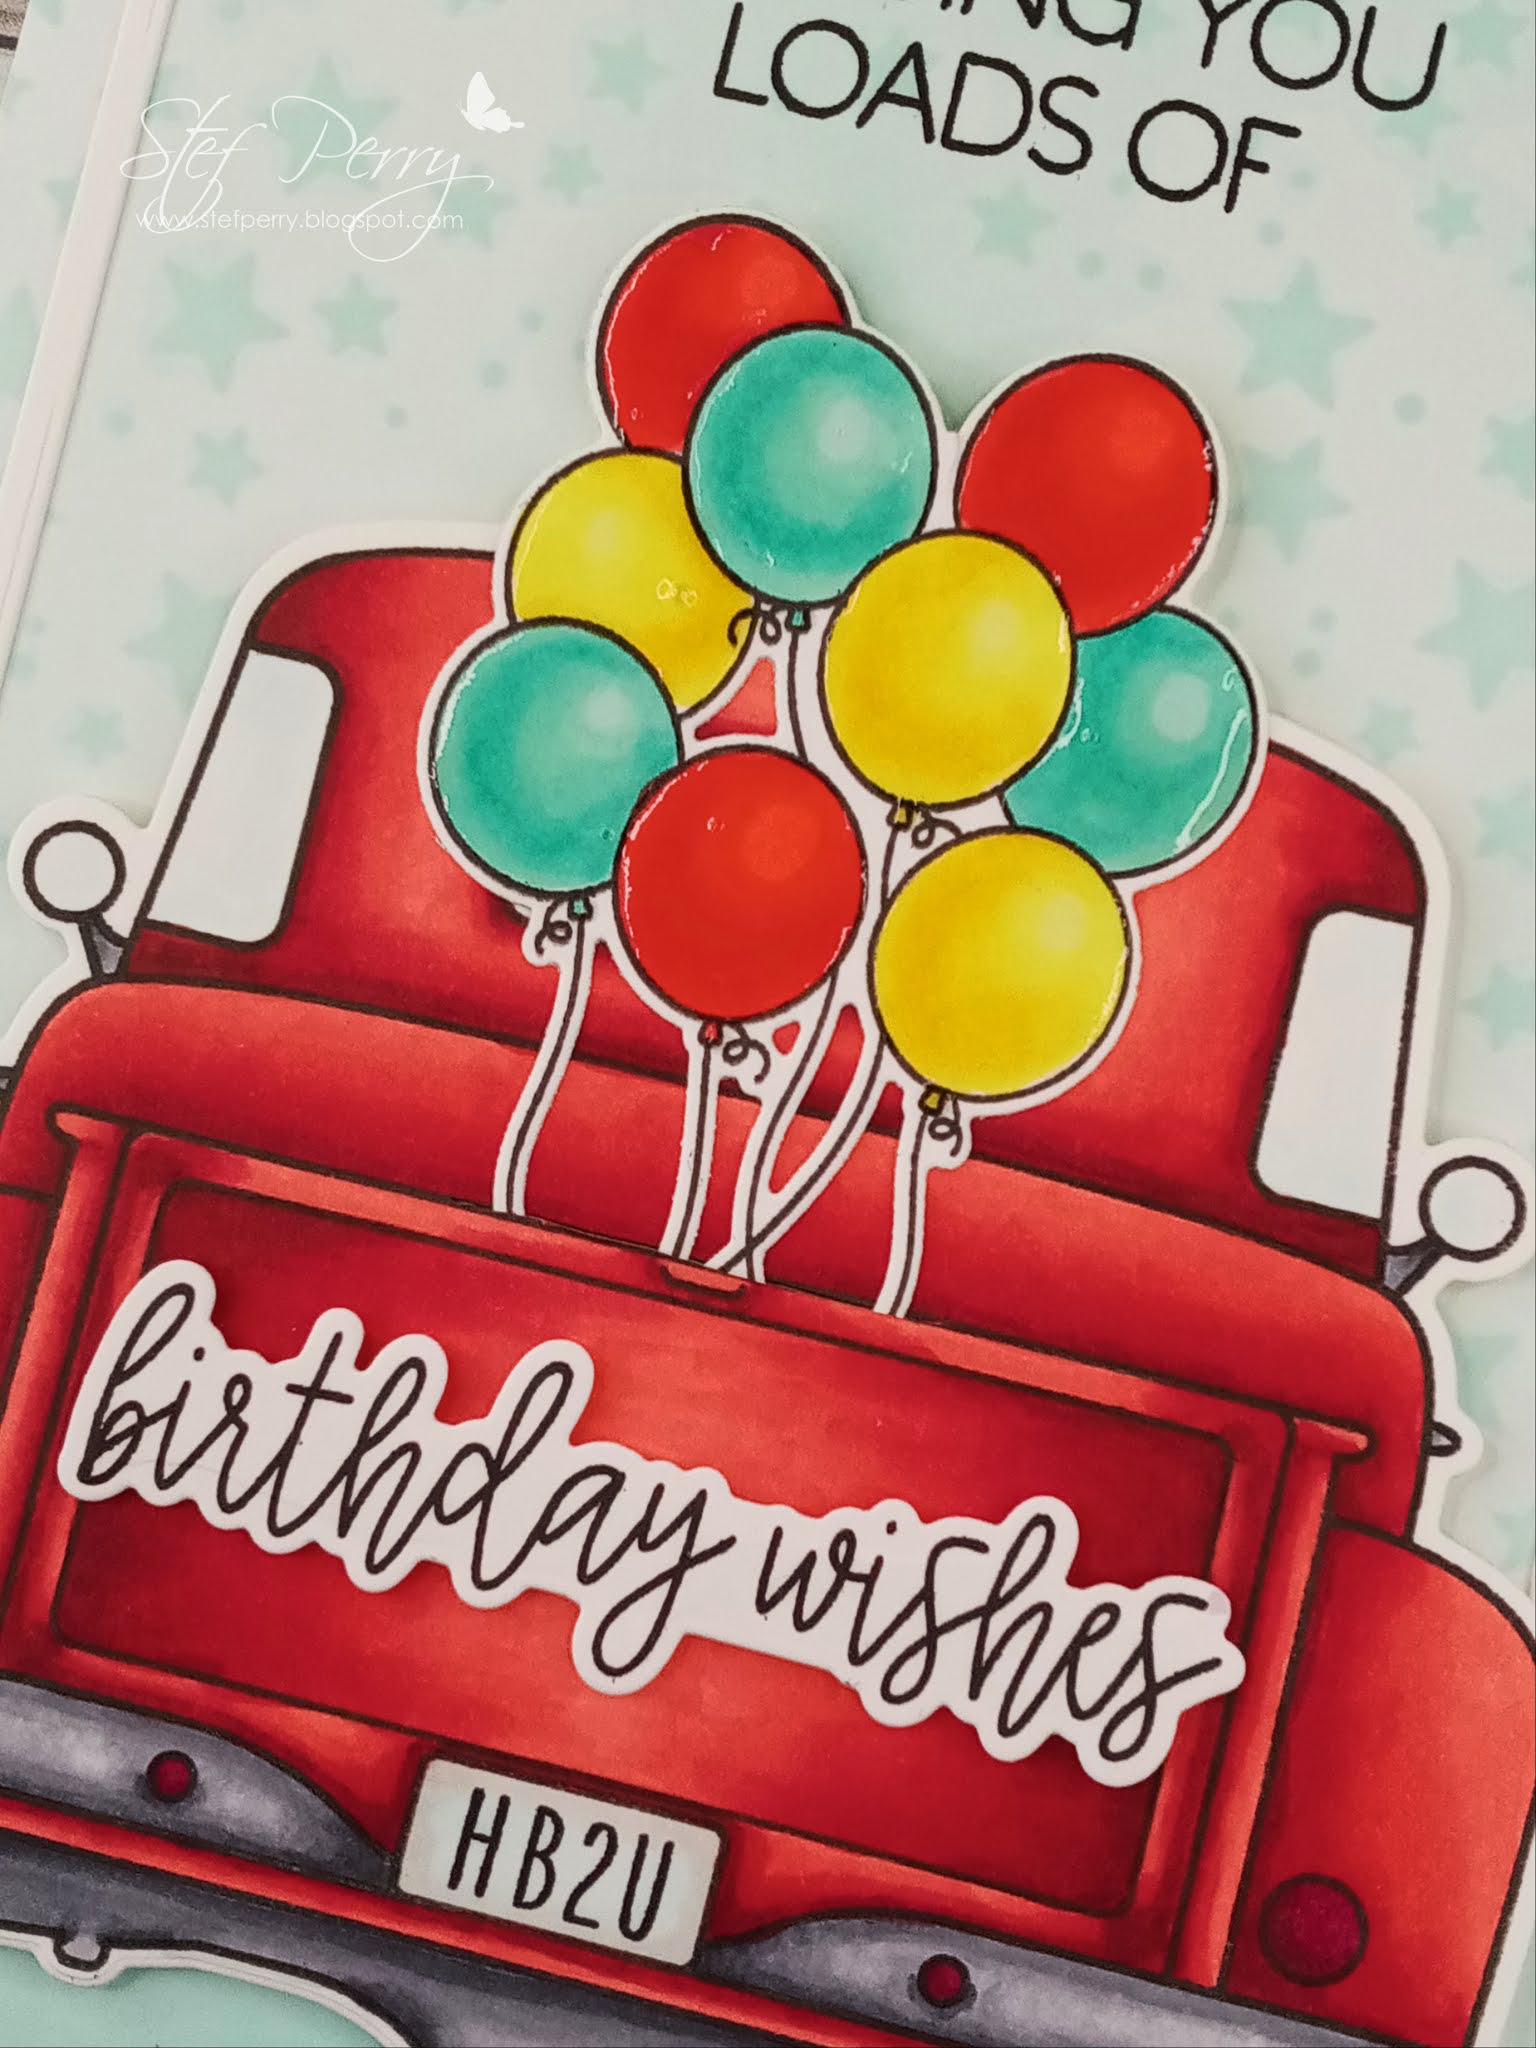
I love those balloons floating out of the back of the pickup tailgate.  We can only assume they are strongly tied down so they won't fly away as the pickup merrily drives down the road LOL!  The pickup was stamped and colored with Copic markers, as was the group of balloons, then both were cut with their coordinating dies.  To add the balloons to the back of the pickup, I used an Exacto knife to cut a slit at the top of the tailgate and slid in the string tails, then adhered to the pickup underside with a bit of washi tape.


To create the base I ink blended a 5x7" panel of white with a light blue/aqua ink, then added stenciled stars to the top two-thirds using a stronger application of the same ink.  Next a frame was created using two sizes of A7 rectangle dies and adhered on the panel.  The first part of the sentiment was stamped at the top then the panel was added to a white card base.  Foam tape was added to the back of the pickup and the balloons floating above the truck, then adhered to the base.  The second half of the sentiment was die cut and added to the back of the tailgate.  Finally, to finish off the card, Glossy Accents were added to the balloons to make them shiny.


Thanks so much for visiting, I always appreciate it!  Take care and I hope the rest of your week is wonderful!

Stef


Stamps:  Big Pickup Tailgate (Honey Bee), Pickup Lines (HB), Balloon Bundle (MFT)
Paper:  Neenah Solar White
Ink:  Gina K Obsidian Amalgam, Versafine Clair Nocturne, Dew Drops (Altenew)
Other:  Big Pickup Tailgate and Pickup Lines Coordinating dies (HB), Balloon Bundle Coordinating die (MFT), Scattered Stars stencil (Simon Says Stamp), A7 Rectangle dies (Waffle Flowers)
Copics:  R39, 29, 24, 14, BG23, 11, 10, Y15, 04, 00, W9, 7, 5, 3, 1, C7, 5, 3, 1, RV69, 19

The Beginning of Something Else

Hello, friends!  I hope you are doing well.  I have two posts to share with you today, so be sure to come back a little later and check out the second one.  For this post, I'm sharing a card made for Inspired By, where the theme is to use a quote on your card.  The other challenge is Color Hues, where they have the delightful combination of peach and green.


My card is what I consider fairly clean and simple, without a lot of background busyness.  Maybe it's too spare?  I don't know, you tell me in the comments.


I find the sentiment quite a lovely note of encouragement. Of course, Mr. Rogers had many, many good and uplifting things to say during his lifetime.  My daughter used to watch his show when she was young and loved it.  He just had a way, didn't he?  

Anyway, the sentiment was stamped on the upper left of a panel of white, then the dogwood flowers were originally stamped onto the same panel. However, when I started to color with my Copics, I made a big mistake in my color blending.  So, I move to "Plan B", stamped the flowers again on a separate piece of white cardstock, colored them up and die cut with the coordinating dies. 


The main panel was trimmed down and layered on a panel of peach cardstock.  Originally, I was going to make this an A2 sized card, but couldn't bear to cut off any of the dogwood image, so it became a 5x7"/A7 sized card. The floral image was popped up on the panel with thin adhesive squares, then the entire thing was added to the white card base with foam tape.  A few clear dew drops were added as the final touch.


Thank you for visiting, I really appreciate it!  I hope you enjoy the remainder of your week.  Take care!

Stef


Stamps:  Thank You Dogwood Tree (Colorado Craft Company), Beginning (sentiment/Impression Obsession)
Paper:  Neenah Solar White, Peekaboo Peach (ret. SU)
Ink:  Gina K. Chocolate Truffle Amalgam
Other: Thank You Dogwood Tree matching dies, Small Clear Dew Drops (Honey Bee)
Copics:  R02, 12, 00, YG67, 25, 17, 03, 01, E97, 47, 44, 42

Sunday, February 21, 2021

Warm Hello for Sunday Stamps

Hello, friends, I hope you're doing well! It's time for a new challenge at Sunday Stamps and this week we have some luscious, citrusy colors to play with.


I'm also joining The Flower Challenge, where this month's theme is to use your latest stamps or dies.


It's been a long time since I shared a card at the flower challenge but it worked perfectly for this card, as I recently got a beautiful new floral set from Altenew.


I decided to try my hand at "no-line" coloring with these images, as the petals are nice and big, with lots of room for shading and contrast from one to the next.  I've tried no-line coloring before but never liked the results. 

The flowers were stamped on white with Gina K Warm Glow ink, a very light color, then I used my Copic markers. I also used a brown colored pencil to add more contrast to the yellow flower center.  I found this technique much more time consuming but oh, so satisfactory when the coloring was complete.


Next I lightly stenciled a geometric pattern on a separate panel of white card stock (hard to see in the photo but nicely subtle IRL), trimmed it down and added a white die cut garland.  The sentiment was die cut from Fog cardstock 3 times and layered for dimension, then added to the panel. The flowers, having been die cut with coordinating dies, were layered on the panel with foam tape.  Finally, the entire thing was mounted on a white card base with foam tape.


Thanks for visiting, I always appreciate it so much! Be sure to head over to Sunday Stamps to check out the amazing cards by the other DT members and hopefully join us this week for our color challenge!

Stef


Stamps:  Airbrushed Flowers (Altenew)
Paper:  Neenah Solar White, Fog (Simon Says Stamp)
Ink:  Fog, Gina K Warm Glow Amalgam
Other:  Airbrushed Flowers matching dies, Leafy Garland die (Altenew), Hello Beautiful Gorgeous die (SSS), Star Grid stencil (MFT), Polychromos Colored Pencil
Copics:  [YR07, 15, 21] [R46, 27, 24, 05], [YR24, Y19] [W5, 3, 1]

Thursday, February 18, 2021

Beautiful Wings

Hi there, friends!  I hope you're doing well!  Today I'm sharing a card made for two challenges - a color challenge from the lovely Jaydee at The Paper Players and a great sketch challenge at Fab Friday. 


I decided to go with pink, black and silver, and loosely based the card design on the sketch, but adding an offset layer of silver foil.


I started by using a rose stencil on a piece of white heavyweight cardstock, using the new Kitsch Flamingo Distress Oxide ink for the roses, then adding a soft layer of Spun Sugar DOX over the entire panel, almost giving it a look of vellum in the photos.  Both this panel and the silver foil one were cut with a deckled rectangle die then added to the black card base.


Next, the large dragonfly and the sentiment were heat embossed on black cardstock, then die cut.  A strip of silver was adhered directly to the stenciled panel, then the sentiment and the dragonfly both adhered with foam tape.  The last step was to add a few silver and crystal baubles for a bit of sparkle.


Thanks for visiting, I always appreciate it so much!  Take care and have a great weekend!

Stef


Stamps:  Beautiful Wings (Gina K)
Paper:  Black, Silver Foil, White Heavystock (Tim Holtz)
Ink:  Kitsch Pink and Spun Sugar Distress Oxide, Versamark
Other:  Beautiful Wings coordinating die, Bed of Roses stencil (Trinity Stamps), Deckled Frames rectangle and A7 Labels small rectangle dies (Waffle Flower), Crystal Collection Night Sky (Little Things by Lucy's Cards)

L' Artiste for the Tic Tac Toe Challenge

Hello, friends!  I hope this finds you doing well.  It's time for a new Tic Tac Toe challenge!  This week, Jeanne is hosting and she has give us a clever board for a fun time creating.


For my card I went up the diagonal left to right - colored/pencils, dots, vellum.  I used Julee's fabulous Mojo sketch for a mini-slimline card (be sure to use the link below to check out her darling card!).  


In a recent order from Colorado Craft Company, I received the most darling free gift of an Anita Jeram mini stamp and thought it worked perfectly with the sketch and for the Tic Tac Toe challenge as well.


So cute!  I began by stamping L'Artiste in black pigment ink on Stonehenge drawing paper and colored her with Polychromos colored pencils.  I still have a lot of work to do to improve my skills, trying to find the balance for enough versus too much contrast.  Still, I think it's a sweet image.  Once the coloring was complete I used a square die to cut it out, then mounted it on a larger square cut from Melon Mambo.  The sentiment was stamped on a scrap of Ivory card stock then cut out with a circle die and eventually layered on a same size circle of Melon Mambo.


To create the mini-slimline card base, a piece of Ivory cardstock was cut to 6 x 6.5" and scored at 3.25", with the final size of 3.25 x 6" card.  Next a layer of striped patter paper was trimmed down to leave a nice border around it.  Before adding to the card base, I adhered a panel of polka dot embossed vellum. I layered a large sheet of vellum on an adhesive sheet then trimmed out the size I needed and embossed it.  Using the adhesive sheet hides the adhesive and adds it securely to the project.  The scalloped horizontal piece was adhered and a hemp twine bow wrapped and tied around it.  The section was then added to the base with foam tape, then finally the main image and sentiment added.  My teenage granddaughter is a budding artist, so this card will be heading off to her.


Thanks so much for visiting, I always appreciate it!  Please be sure to use the link above to check out all the fabulous cards by the other DT members and hopefully you are inspired to join us this week!

Stef


Stamps:  The Artist Mini (Anita Jeram/Colorado Craft Company)
Paper:  Ivory, Melon Mambo, Sweet Talk 6x8" paper pad (Simple Stories), Pearlescent Vellum (Lawn Fawn), Stonehenge drawing paper
Ink:  Versafine Clair Nocturne
Other: Essential Squares (Ellen Hutson), Infinity Nested Circle die (Hero Arts), Slim Lacy Layers die (Waffle Flower), Polka Dot embossing folder (ret. SU), Hemp Twine
PolyChromos Colored Pencils:  129 Pink Madder Lake, 123 Fuchsia, 274 Warm Grey V, 272 Warm Grey III, 270 Warm Grey I, 187 Burnt Ochre, 154 Light Cobalt Blue, 264 Dark Pthalo Green

Monday, February 15, 2021

Special Delivery

Hello, friends! I hope this finds you doing well.  Today I'm sharing a card made for Inspired By, which is a new-to-me challenge, and Just Us Girls. I'm also joining the current Simon Says Stamp Wednesday Challenge where the theme is to make a slimline card.


It's funny, I had been looking through some of my stamp sets and was longing to find the opportunity to use one particular set.  Then, the very next day, I followed a link to Inspired By and found my chance to use this image! I was inspired by the pitcher and all the pretty pink.


I absolutely adore this pitcher and pretty bouquet of flowers and had fun coloring it with Copic markers, after which it was cut out with coordinating dies.  The sentiment is from a separate stamp set and was also cut out with a matching die. 


As I began to put the card together, I remembered I had the stitched and scallop edged slimline panels left over from another project.  The pink scalloped panel has a diamond design stenciled on it with white pigment ink.  Those two panels were adhered directly to the 8 3/4" x 3 3/4" white card base.  I embossed a piece of Desert Storm card stock with a wood plank folder, trimmed it down, lightly ink blended some Distress ink on the edges, then added it to the base to give the pitcher something to "stand" on.  Next, the flowers and sentiment were popped up on foam tape, and finally I added a couple of pink clay hearts above the sentiment and scattered a few dew drops around the rest of the card.


Thanks so much for visiting, I really appreciate it!  Take care, especially those of you getting hit with the ice and snow storms.

Stef


Stamps:  Farm Fresh Flowers, Pickup Lines (both Honey Bee)
Paper:  Neenah Solar White and Desert Storm, Cotton Candy (SSS)
Ink:  Gina K Obsidian Amalgam, Versafine Clair Nocturne, Walnut Stain Distress, Unicorn White pigment (Hero Arts)
Other:  Farm Fresh Flowers and Pickup Lines coordinating dies, Slim Lacy Layers dies (Waffle Flower), Diamond Motif Slim Stencil (Pinkfresh Studio), Small Clear Dew Drops (HB), Pink Hearts Clay Confetti (PPP)
Copics:  RV [91, 21, 10, 00] [99, 69, 17], BV02, 00, 0000, YR24, Y19, V15, 12, T4, 2, 0, W7, 5, 3, 1, G46, 43, 40, YG67, 17, 03, BG99, 96, 93

Friday, February 12, 2021

Wreath Birthday Wishes

Hello, my friends!  I hope you're continuing to stay safe and healthy.  Today I'm sharing a card made for four challenges-Seize the Birthday and Inkspirational Challenges, where the theme is hearts, Addicted to Stamps, where the theme is birthdays, and CAS Colours & Sketches, with a great sketch upon which I based my card design.


I used a heart shaped wreath to make a CAS birthday card.


The wreath was stamped on white cardstock then colored with Copic markers.  After it was die cut I used a gold glitter watercolor paint to color the berries on the wreath.  While the paint dried, the sentiment was gold heat embossed on a piece of vellum which was die cut with a label sentiment die.


The base is heavy weight white card stock upon which I layered a panel of gold mirror.  A panel of white was cut with the Dotted Scales Debossing cover die then trimmed down and adhered to the gold layer.  The sentiment strip was added to the wreath by adding glue behind the letters in the sentiment that covered part of the wreath.  I then added foam tape to the back of the wreath, which was pretty fiddly but worth it for the dimension.  After that was popped up on the card, the final touch was to adhere a few gold sparkle crystals.


Thanks for visiting, I appreciate it so much!  Take care and have a great weekend!

Stef


Stamps: You Have My Heart (Simon Says Stamp), Pickup Lines (Honey Bee)
Paper:  Neenah Solar White, Vellum, Tonic Gold Mirror
Ink:  Versamark, Gina K Obsidian Amalgam
Other:  You Have My Heart matching die, Sentiment Labels die (SSS), Dotted Scales Debossing Cover die (Altenew), Antique Gold embossing powder (Altenew), Glitter Watercolor Dots Sheet (Iuile on Etsy), Gold Sparkle Crystals (Studio Katia)
Copics:  BG 99, 96, 93, 78, 75, 72, R89, 85, 83, 81

Tuesday, February 9, 2021

Loads of Love

Hello, friends!  I hope all is well with you.  Today I'm sharing a card made for the current theme challenge at The Paper Players, where lovely Anne Marie has asked us to use hearts or stars.  I'm also joining the Double D challenge, where the theme is Valentine Love, and the current Just Us Girls Word Week Challenge, which is "Valentine".


I recently bought the Big Pickup Tailgate stamp and die set, knowing it would be a fun one for lots of cards for different occasions, especially since we have lots of friends and family members that love cars and trucks. Using the big die, I made a shaped card for my husband for Valentine's Day, because he's one that loves his pickup. There's also a separate stamp set with the front of the truck, which just might have to make its way to my craft room one day in the near future LOL!


How fun is that?  I started by stamping the pick up along with the pile of hearts that came from another coordinating stamp set.  They were colored with Copic markers then cut with the matching dies. Next I took a sheet of white card stock for the base, folded it in half and die cut the pickup except for the very top, leaving a top fold hinge.  The colored tail gate was also die cut with it's own separate die, then I stamped and white heat embossed the large LOVE U.  After that cooled down, I used a Copic marker to add a bit of shading on the right side of the letters so they would stand out a bit better.


The colored pickup was adhered to the pickup card base, then the tailgate and pile of hearts added with foam tape.  I used a white gel pen to add highlights to the hearts, the rear lights and the windows to finish things off.  Below is a photo of the card standing up and taken at an angle so you can see part of the card base.  This was so much fun to make, I look forward to doing more in the future!


Thanks so much for visiting, I always appreciate it!  Take care and stay safe!

Stef


Stamps:  Big Pickup Tailgate, Loads of Love (Honey Bee)
Paper:  Neenah Solar White
Ink:  Gina K Obsidian Amalgam, Versamark
Other:  Coordinating dies for the truck and heart pile, Sakura White Gelly Roll Pen, Simon Says Stamp Fine Detail embossing powder
Copics:  BG49 13, 11, 72, 000, 0000, R59, 46, 39, 37, 35, 24, 05 C7, 5, 3, 1, T8, 6, 4, E41, 40

Sunday, February 7, 2021

Love & Kisses for Sunday Stamps

Hello friends, I hope this finds you doing well!  It's time for a new challenge at Sunday Stamps where Lisa has created this fun sketch.


I'm also joining the current challenges at Double D, with a theme of Valentine Love, and the current Simon Says Stamp Wednesday Challenge, where the theme is Love Is In The Air.


When I saw Lisa's sketch, I knew exactly what I wanted to do.


These little heart balloons just tickle me and are perfect for a valentine or for birthdays, weddings, you name it.  I stamped and colored them with Copic markers, then used the coordinating dies to cut them out.  The sentiment was stamped with black pigment ink then cut out with matching dies.  The words "and kisses" is separate from "love" so it can be paired up with "hugs" as well.


To put the card together, the red heart patterned paper was layered on a slightly larger panel of black and then adhered directly to the card base.  The panels under the heart balloons were centered on the card base, then the heart balloons were added with a bit of foam tape just under the balloon part, then a strip of black and white heart paper adhered horizontally. The sentiment was then added using thin foam squares. A few tiny red hearts were scattered about then the balloons were covered with Glossy Accents for some wonderful shine.


Thanks so much for visiting, I really appreciate it!  Be sure to use the link above to check out the beautiful cards by the other DT members and hopefully join us for the challenge as well!

Stef


Stamps:  Loads of Love, Pickup Lines (Honey Bee Stamps)
Paper:  Neenah Solar White, Black, Stacked with Love (ret. SU), Sweet Talk 6x8" paper pad (Simple Stories)
Ink:  Gina K Obsidian Amalgam, Versafine Claire Nocturne
Other:  Honey Bee Coordinating dies, Sizzex Love Struck sequins, Glossy Accents
Copics:  RV25, 23

Thursday, February 4, 2021

Love You Beary Much

Hello friends, I hope this finds you doing well!  Today I have a cute Valentine card to share with you that I've made for the Valentine Love challenge at Double D Challenges.


I'm also joining the Love Is In The Air challenge over at Simon Says Stamp Wednesday Challenge.


I created a pretty simple card to showcase this cute bear.  It's a mini-slimline size, so it's smaller than the regular slimline, measuring 3 1/4" x 6 3/8".  I used a scallop die meant for a slimline size card, but I just used partial die cutting to cut one end of the panel, then flip the die around to cut the other end of the panel so it came out to the shorter length.  

Next a piece of cute confetti patterned paper was trimmed down and layered on the top of the scallop panel, then I tied on a bow of white Baker's Twine.  I decided to create a little contrast between the scallop panel and the white card base, so the front of the card base was ink blended with Tattered Rose Distress Oxide Ink before adding the panel with foam tape.


The bear was stamped and colored with Copic markers.  He's so cute and cuddly, I just love him!  I used Versamark to stamp the sentiment on the heart, then heat set it with white embossing powder.  Because I didn't have the matching dies at the time, the image was then fussy cut.  To ground him on the card, the XOXO border was stamped in red then trimmed down and added to the panel, then the bear was popped up with from tape.  The last touch was to add three tiny hearts for a little embellishment and cover his nose with Glossy Accents.


That wraps it up.  Thanks so much for visiting, I really appreciate it!  Take care and have a great weekend!

Stef


Stamps:  Love You Beary Much (Simon Says Stamp)
Paper:  Neenah Solar White, Sweet Talk 6x8" paper pad (Simple Stories)
Ink:  Gina K Chocolate Truffle Amalgam, Versamark, Candy Apple (Pinkfresh Studios), Tattered Rose DOX
Other:  Slimline Scallop Frame die (SSS), White Baker's Twine, Tiny Hearts Shaped Sprinkles (Doodlebug), Glossy Accents, Wow Superfine embossing powder
Copics:  R39, 37, 35, 20 E37, 35, 33, 31, 30, W7, 5, 3