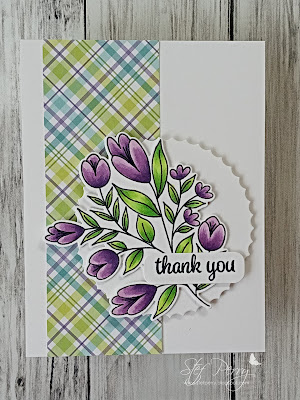
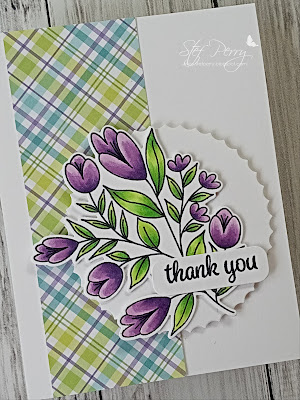
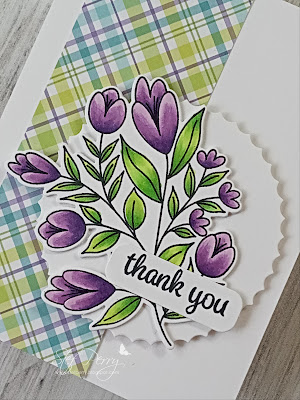
Showing posts with label thank you. Show all posts

Tuesday, November 4, 2025

Cosmos Thank You for The Flower Challenge

Hello friends!  The Flower Challenge is back for November and our theme this month is Thanks.


Such an appropriate theme for November in the US, when we celebrate Thanksgiving. However, your floral thanks card needn't be related to that holiday, as you can see by my card.


I started out by die cutting all the flower petals and leaves from Altenew's Garden Cosmos die set.  I knew I wanted to create a teal background, so I thought orange tips on the flowers would go well with it.  While the inking dried, the panel was embossed with the Textured Tiles folder then trimmed down to 4 " x 5.25".  I used a couple of dark teal inks around the edges and over certain parts of the raised background, then adhered it to the white card base.

The sentiment was created from a very old Pinkfresh Studios die set. I used the orange ink pad direct to paper to keep things "matchy-matchy" then with the sentiment.  It was adhered to the card front with thin foam square, then I added the flowers to arch around it, using the same foam squares behind the flowers and the bud.  No gems this time.


Thanks for visiting!  My teammates have some gorgeous inspiration for you on the challenge blog, so I encourage you to take a peek before heading off to your crafty space!  We'd love to have you join us with your floral thanks card this month!  The challenge will be open until Tuesday, November 25th.

Take care!

Stef

  • Altenew Garden Cosmos dies
  • Altenew Textured Tiles 3D ef
  • Pinkfresh Studios Scripted Thank You dies
  • Altenew Mardarin Burst, Red Jasper, Teal Tempest, Honeydew Glow, and Galactic Stream inks

Sunday, May 4, 2025

So Kind for The Flower Challenge

Hello friends!  It's time for May flowers at The Flower Challenge!  This month we'd like you to add spots or stripes.

I went with spots this time, using an older Tim Holtz stencil that hadn't seen the light of day for some time.


Truth be known, the stamp set hadn't been used for over a year either.  I believe those flowers are camellia japonica, at least that was the photo they resembled in my search.  Anyway, I decided to use all three floral images from the set, along with one of the sentiments.

I colored them with Olo markers then die cut them with the matching dies.  For the background I moved the stencil around the panel to get  uneven coverage, then ink blended around the outside before splattering with gold metallic paint.  When that all dried the layered arch die cut was adhered along with the flowers framing the sentiment.  No gems, I thought the splatter was sufficient.


Well, we finally have some truly warmer weather and I think it's going to stick around.  How about you?  As the weather gets better, I hope you'll still find time to join us this month!  The challenge will remain open until Sunday, May 25th. But, before you head off, please be sure to visit the blog where my oh-so-talented teammates have some gorgeous cards to inspire you.

Take care and thanks for stopping by!

Stef

  • SSS/Memory Box So Kind Stamps and Dies (Stamptember 2023)
  • Tim Holtz Bubble Stencil
  • SSS Nested Domed Arches Frame
  • SSS Seafoam ink
  • Gansi Tambi Starry Colors Gold Metallic paint
  • Olos - RV0.6, 0.4, 0.2, 0.1, G1.8, 1.7, 1.5, 1.4
  • Copics - E37, 33

Monday, November 4, 2024

Thank You for The Flower Challenge

Hello friends, I hope you're doing well! This month at The Flower Challenge the theme is Thanks, which is so appropriate for this time of year in the US, where we will be celebrating Thanksgiving on the 28th of this month.  

I'm also joining the current challenge Inkspirational, which is to layer it.

My initial intention was to create a more muted color palette for my card, befitting this time of year as fall is in full swing, but then I ended up using some of my favorite markers and the coloring got much brighter lol!


At the time that I made this card, I'd recently received this big floral stamp from Simon Says Stamp and had to use it.  It was stamped in black, colored with Copic and Olo markers, then restamped with Versamark and gold heat embossed.  I always hold my breath when I put my colored image back in my stamp positioner, worrying that I'll ruin a couple hours (or longer) of coloring, but as you can see, it turned out just fine.  The sentiment, also from the same stamp set, was gold heat embossed as well, then both were cut out with their coordinating dies.

When I reached for a card base, I saw that I had one with a white die cut panel adhered to the front, which added a lovely touch of interest without detracting from the floral image.  The flowers were adhered directly to the panel, the overhanging parts trimmed off, then the sentiment was added with foam tape.


So much to be thankful for, including you stopping by my blog today!  For plenty more inspiration, use the link above and see what my talented teammates have created with this theme.  And, of course, we'd love to have you join us this month, the challenge remains open until Thanksgiving day, November 25th.

Thanks for visiting and take care!

Stef

  • Simon Says Stamp Grateful Florals stamps and dies
  • Pinkfresh Studio Folk Edge Rectangle die
  • Altenew Antique Gold ep
  • Copic and Olo markers:  Orange - YR18, 09, 16, 21, Y17; Yellow - YR27, 24, Y19, 15; Magenta -RV69, 17, 55, 52; Small and Medium leaves - G1.8, 1.7, 1.5, 1.4; Large leaves - BG 2.7, 2.5, 2.4, 2.1, YG03 

Saturday, June 15, 2024

Thank You for The Flower Challenge

Hello friends!  We at The Flower Challenge are back with our mid-month reminder, where we have a great sketch to inspire your creativity!

I'm also sharing with the Time Out Challenge, where the theme is based on this wonderful quote by one of the great Impressionist painters, Henri Matisse. 
 "There are always flowers, for those that want to see them."

My first card for TFC92 used mostly new products so this time I decided to use some older products to create my card.


This beautiful flower is from Altenew's Build-A-Flower: Tree Peony stamp and die set.  The stamps are layering stamps, which I usually struggle with but the ones for the flower lined up really well.  I tried with the leaf a few times and gave up lol!  Since everything else, including the sweet sprigs behind the flower were in black and white, I decided the leaf could be too!

Next the Reflections Cover die was cut from white, as I initially thought I'd have a black card base.  But it just didn't come together, so I cut a strip of black per the sketch, added the die cut then popped up the floral images along with the sentiment, and a bit of bling topped things off.


Thanks for stopping by and I encourage you to do so over at the challenge blog as well, you will love seeing all the gorgeous inspiration my wonderful teammates are sharing over there!  If you haven't joined us yet or want to add another card to the gallery, the challenge remains open until Tuesday, June 25th.

Take care!

Stef
  • Altenew BAF: Tree Peony stamps and dies
  • Altenew Elegant Sayings stamp and die
  • Altenew Reflections die
  • Altenew Dew Drops, Aqualicious, Teal Cave, Honeydew Glow and Lemonade Stand Fresh Dye inks
  • Simon Says Stamp Surf Dazzling Gems

Saturday, April 13, 2024

Touched Beyond Words

Hello friends!  I hope you're having a great weekend.  Today I'm sharing a card that I made for the current challenge at Freshly Made Sketches.

I love Jen's simple sketch and it was just perfect for using a big floral.  My card ended up being a square 5" x 5".


This large flower image is from Altenew's Vintage Garden and while I've had the stamp set a while, I hadn't inked up and colored this image as of yet.  For the flower petals I used Copics in a part of the RV family I don't typically reach for because they are more on the red side and I'm more inclined to like pinks.  Good to get out of your comfort zone, right?  The leaves were colored with Altenew Artist markers.

For the background, I ink blended a panel with some light greens at an angle starting at the upper right and fading off to white towards the middle.  It was then embossed with a 3D folder but the texture was so pronounced I didn't like it for this particular card, so I ran it through my die cut machine a second time just between the plates to lessen the embossing - it's not totally flat and it worked better for adhering everything.  

The flower was added to the white scallop circle that had been die cut three times, then the sentiment and gems finished things off.


Thanks for taking time to drop by!

Take care!

Stef
  • Altenew Vintage Garden Stamp and Die
  • Spellbinders Tile Motif 3D embossing folder
  • Spellbinders Betterpress You Are Everthing Sentiment press plate
  • Hero Arts Scallop Circle die
  • HoneyBee Stamps Aurora Borealis Gems
  • Copics - RV21, 23, 25, 19
  • Artist Markers - Aloe Vera, Matcha Tea, Swamp Green

Thursday, January 25, 2024

Bountiful Banner for Just Us Girls

Hello friends!  I'm back with my final card as guest designer for Just Us Girls and this time we are having fun with stencils!

At the last minute, I'm also joining the lovelies at Inkspirational with another stenciled edition to their gallery.


I love stencils because they can make card creation so much quicker and/or add wonderful detail to card backgrounds.  Today I used them to color a floral image.


I have been eyeing the Honeybee Stamps Bountiful Banners suite since it was first released earlier this year, so when HB had their fabulous sale at year end, I decided to pick it up.  I started by stamping the image with black pigment ink, then using the stencils and a variety of inks to color it up.  I think this color palette is one of my favorite combos.  I know I am usually drawn to cooler colors, but I do love the pop of yellow-green along with the teal and pinky purple.  


After the stenciling was complete, I added some additional contrast to all the flowers and leaves with Copic markers, which is something I often like to do.  The image and sentiment were then die cut with the coordinating dies along with two additional pieces for layering to provide some dimension (although that's difficult to tell in the photos).  The final touch was to use my white gel pen to color the flower centers.


A big thank you to the entire design team at Just Us Girls, it was just a pleasure joining you this month!

Be sure to head over to the challenge blog for some wonderful inspiration and hopefully play along this week.

Take care!

Stef


Stamps, dies and stencils:  Honeybee Stamps Bountiful Banner
Ink:  Simon Says Stamp Taffy, Sweets, Bubblegum, Fairway, Sprout, Tropic, Tidepool, Orchid, Iris and Latte; Versafine Clair Nocturne
Other:  Sakura White Gelly Roll pen
Copics:  RV69, 66, BG49, 15, YG67, 17

Tuesday, April 4, 2023

So Grateful for The Flower Challenge

Hello and welcome!  It's a new month and The Flower Challenge is ready with a new challenge for you.  This month we are focusing on background stamping, using flowers for the main images, as always.


For my card, I used a background stamp from a Hero Arts My Monthly Kit from last year at this time.


The kit came with the stamp plus a matching stencil set and some dies for specific images.  I stamped the image on white with Versamark Clair Nocturne pigment ink.  After the ink dried I used the stencil with Altenew inks in the colors Chamomile, Snapdragon, Marigold, Lime, Fresh Leaf and Deep Iris.  I wanted all the images to pop a bit more, so I used a BG000 Copic marker to color the background and used Y15 and Y11 markers to color the bees since the stencils only colored the flowers and leaves.


Next I made a shaped card using the largest Simon Says Stamp Chunky A2 Scallop Rectangle die.  Two panels of #110 Neenah Solar White were die cut, then I scored one towards the top to create a hinge and adhered them together above the score line.  The floral panel was trimmed down, mounted on a slightly larger black panel, then adhered directly to the card base.  Before securing the die cut sentiment (from Altenew's Essentials Sentiment Strips dies), I painted the wings of the bees with a Tonic Nuvo aqua shimmer pen.  The last thing to do was to add just a few clear sequins.


Okay, so now it's over to YOU!  Dust off those neglected floral background stamps or maybe just use a repetitive pattern with a single stamp.  Either way, we'd love to see you in the gallery this month!  Do be sure to pop over to the challenge blog - the team has some beautiful inspiration awaiting you!

Take care!

Stef


Saturday, March 4, 2023

Thank You for The Flower Challenge

Hello and welcome!  It's time for a new challenge at The Flower Challenge and this month the theme is to use die cuts and/or stencils, so pull out your favorite dies or stencils (of flowers, of course!) and share with us this month!


For my card I did a little stenciling and quite a bit of die cutting.


I started by stamping the sweet Pinkfresh Studio Inky Bouquet in Memento Tuxedo Black, then colored the flowers and leaves with Copic markers.  Next I used one of the 6 layering stencils and colored the vase with Simon Says Stamp Surf and Seafoam inks.  I have really been on a kick with peach and aqua, but I'm lovin' it!  When the ink was dry, I put the image back in my Misti where I'd left my stamp in place, restamped with Versamark ink and gold heat embossed both the floral image and the sentiment.


After using the companion dies to cut out the floral vase and sentiment, I went to work on the background.  This time I used the Ring Panel cover die from Waffleflower, die cut from white cardstock and layered it directly on the white cardbase.  Next I used the companion dies to cut additional layers for the vase and the sentiment, adhered them together, then added them to the card front and I was done!


Thanks so much for stopping by.  Be sure to do the same with the challenge to check out the absolutely gorgeous cards by the other DT members and hopefully join us this month!

Take care!

Stef


Sunday, July 24, 2022

You Are the Best for Sunday Stamps

Hello and welcome!  It's time for a new challenge at Sunday Stamps and this time it's with a sketch that the talented Heather created.


I'm also playing along with the current Color Throwdown Challenge, using yellow, green, aqua and kraft colors on my card.


I took a bit of "artistic license" with Heather's sketch (hope you don't mind, teamie!) and instead of slanted panels I have flowers at opposing angles.


I started by die cutting all the flower petals, stems and the one center, then ink blending them with various dye inks.  The layering is relatively easy and as I ink blended each petal I held up the previous and the next one to make sure there was sufficient contrast.  When that was complete, the flowers were adhered close to their centers, then glued to the leaves.  


The size of the flowers required making a 5x7 inch card.  I trimmed down a panel of white to 4.25 x 6.25 inches, then ink blended two yellows in the middle before adhering the flowers.  The panel was layered on two additional layers of thick scrap cardstock then added to the kraft card base.  The sentiment was stamped with brown pigment ink then cut out with a circle die and added to the card front with foam tape.  I dug through my messy embellishment drawer and found some sequins that matched perfectly for that final touch.


Thanks for visting, I really appreciate it!  Be sure to use the link above to see the gorgeous cards by the other DT members and hopefully join us for this great sketch challenge!

Stef


Stamps:  You Are Enough (Gina K Designs)
Paper:  Neenah Solar White and Desert Storm
Ink:  Warm Sunshine and Maple Yellow (Altenew), Sprout, Fairway, Field, Seafoam, Surf, Ocean, Latte and Cappuccino (Simon Says Stamp)
Other:  Craft-A-Flower:  Garden Rose dies (Altenew), Nested Infinity Circle die (Hero Arts), E34 Copic Marker

Sunday, May 15, 2022

Thanks for Sunday Stamps

Hello and welcome!  It's time for a new challenge at Sunday Stamps and this time we have some pretty colors to inspire you.


That photo of berries sure looks scrumptious, doesn't it, but at first I was a little stumped as to what to make with the colors.  In the end, I used three of them - light reddish pink, red and navy - to create a plaid mini slimline thank you card.


I started by ink blending Coral Bliss to the top and middle of a panel of Bristol, then came in with the darker red Vineyard Berry at the bottom.  Once that was complete, I slipped the panel into my Misti and used Tanzanite to ink up the plaid background stamp.  My original intention was to make a birthday card for a BIL whose birthday is right before Independence Day but I didn't like how it was coming together, so I went a totally different direction.


I often like to pair organics/florals with geometrics, so I decided to do it with this plaid.  I found a pretty floral stem die in my "collection" that had gone as yet unused, so I changed that by cutting the stem from white cardstock.  The plaid panel was die cut with a mini slimline rectangle die, then matted on a slightly larger white panel that was cut with a die that created the hash mark border.  After adhering the die cut stem, I wrapped gold twine around the matted panels before adding to the white card base.  The sentiment was stamped in Vineyard Berry, die cut with a tag die, then added to the card front along with a gold bow.  I decided the card needed a little more "something", so some glossy dots were adhered at the top right and on the tag.  Super simple card to make.


Thanks for visiting, and I hope you'll take a moment to head over to Sunday Stamps and see the fabulous cards by the rest of the design team!

Take care!

Stef


Stamps:  Special Delivery Sentiments (Waffle Flower), Soft Plaid Background (Simon Says Stamp)
Paper:  Neenah Solar White, Strathmore Bristol
Ink:  Coral Bliss, Vineyard Berry and Tanzanite (all Altenew)
Other:  Caserta Bloom die ( Memory Box), Special Delivery tag die, Mini Slimline Essential Bundle dies (Pinkfresh Studio), Silver Glossy Dots (Pink & Main), gold twine from my stash

Friday, January 28, 2022

Thanks to Just Us Girls

Hello and welcome!  Today is my fifth and final guest designer post for Just Us Girls.  It's been sooo much fun and I want to thank the DT for all their kindness and their ongoing inspiration each week!  This week is wild-card week and the theme is....


...plaid!  I have a number of pretty plaid paper pads that are rarely used so this was a great opportunity to add them to my card.

I'm also joining the current Anything Goes challenge at Simon Says Stamp Wednesday Challenge and the Make Your Mark challenge at Addicted to Stamps.


I kept my card pretty simple this week.  The floral image was stamped on white and colored with Copic markers that match the colors in the plaid strip.  The sentiment was stamped then both it and the flowers were die cut.  I actually used the floral die to cut two additional out of white cardstock and layer them all together for dimension.


Next a strip of the plaid paper was trimmed down and adhered to the white base.  I was looking through my scraps and found the circle already die cut - it is from the middle of a circle frame die and was the perfect size for grounding the elements.  It was mounted to the card with foam tape, then the flowers and sentiment were adhered and that finished off this CAS card!


Thanks for stopping by and I hope you'll use the link above to appreciate all the beautiful cards by the DT members and join the fun this week!

Take care!

Stef


Stamps:  Best Friend Ever (Simon Says Stamp)
Paper:  Neenah Solar White, Plaid Patterns 6x6 paper pack (MFT)
Ink:  Memento Tuxedo Black
Other:  Best Friend Ever die, Featured Sentiments die (Altenew), Stitched Scallop Circle dies (Pinkfresh Studio)
Copics:  V17, 15, 01, YG17, 05, 03, 01

Thursday, April 15, 2021

Stenciled Floral

Hi friends and welcome back!  I hope you're doing well.  Today I have a card to share that I made for two challenges - the sketch challenge at Fab Friday and the Trend Week challenge at Just Us Girls.


I thought the sketch would be perfect as a mini-slimline card measuring 3.5" x 6.25".


To start, I used a layering stencil to create the rose and leave background.  I worked with three shades of pink for the roses, using the darker two towards the center.  Switching to the leaves stencil, two shades of green were used.  After the panel was trimmed down, I wrapped a layer of vellum around the middle, then matted it on a panel of black cardstock. 


For the sentiment I used the Apothecary Labels stamp and die sets.  I stamped the label in the darkest pink, used my heat gun to make sure the ink was dry, then white heat embossed the sentiment.  When that cooled, the label was die cut then matted on a slightly larger black label.  After the main panel was adhered to the white card base, I made a little nest of silver thread on the vellum, then added the sentiment label on top with foam tape.  Lastly a few jewels were added for a bit of sparkle.


I also made a second card in more earthier peach tones.  Which one do you like better?  Personally, I like them both, but I seem to be more drawn to cool tones rather than warm.


Thank you for taking the time to visit, I appreciate it!  Take care and have a great weekend!

Stef


Stamps:  Apothecary Labels (Altenew)
Paper:  Neenah Solar White, Black, Pearlescent Vellum (Lawn Fawn)
Ink:  Versamark; Pink Diamond, Pinkalicious, Rubellite, Pastel Sunrise, Canyon Clay, and Burnt Red (Altenew); Grassy Knoll and Olive (Pinkfresh Studio)
Other:  Bed of Roses Layering Stencil (Trinity Stamps), Apothecary Labels dies, Fine Detail White embossing powder (Simon Says Stamp), Bridal Mix Jewels (Little Things by Lucy's Cards), Gold Glitter Gems (Studio Katia), Gold and Silver thread (ret. SU)