Showing posts with label Simon Says Stamp Wednesday Challenge. Show all posts

Sunday, September 6, 2026

Birthday Wishes for PP802

Hello friends! I'm back with a card for our new challenge at the Paper Players.  This week we have a great theme from the amazing Joanne.

This is a really flexible theme.  As you can see by the prompt, candles for any occasion (or decor) will work.  I chose to make a birthday card this time because I can always use more plus I have a stamp and die set that hadn't been brought out to play yet, so this was the perfect opportunity.  And because I made a birthday card with it and this is its first outing, I'll be linking up to the Anything Goes challenge at Seize the Birthday and to Darnell's NBUS challenge.  I'm also sharing with the current Simon Says Stamp Wednesday Challenge where they're looking for stamped images (no digi).


I went with some bright colors for this birthday card.  


Aren't those fun and festive images?  The set is one stamp that adds all the images, then there are two dies - one that cuts the 3 small designs in a row and the two larger together, all with the postage collage look.  I decided to cut them all apart so I could create this look with each one at a tilt except the small one in the middle at top.

Before cutting apart, everything was colored with Copic and Olo markers.  The frames were open too, so one could use any color, but because I had a variety of bright colors, I thought black worked best.  And I think it really makes them pop.

Once cut apart, they were added with thin foam squares to a teal panel cut with a postage edge rectangle.  I found the sentiment already stamped and die cut so I place that at the bottom of the panel, then arranged all the cute images above.  The last thing was to add Glossy Accents to the balloons and use a shimmer pen to add sparkle to the ribbon on the package, the confetti, hat and cupcake.  


Thanks for taking time to visit!  The team has some wonderful cards with candles over on the challenge blog, so head on over there for more inspiration.  The challenge will remain open until 3pm Friday September 11th.  I hope you'll join us!

Stef

  • Simon Says Stamp Birthday Mail stamp and die
  • Taylored Expressions Mini Strips-Sending stamp and die
  • SSS A2 Postage Rectangle die
  • Copics - BG49, 13, 11, YR24, Y15, 13, Black 100
  • OLOs - V2.6, 2.4, 2.3, RV 1.7, 1.5, 1.3, 1.1
  • Tonic Nuvo Aqua Shimmer pen

Sunday, November 30, 2025

Christmas Magic for the Paper Players

Hello friends!  I hope all of you in the US had a wonderful Thanksgiving Holiday.  We had a big family gathering and it was a gorgeous day for the end of November.

Since it's the fifth Sunday of the month, we have a Tic-Tac-Toe challenge this week at the Paper Players.  The lovely Claire is hosting and has created a wonderful board full of great combinations.

I'm also sharing over at the Simon Says Stamp Wednesday Challenge
where this week's theme is Anything Goes.

My card fits both the left column (white, Christmas, die cuts) and the bottom row (die cuts, trees, sparkle).  Let's take a look!


I'm a big fan of Tim Holtz die sets and when this came out earlier in the fall, I snapped it up.  I didn't have a cityscape die set and thought this one was so cute and I ended up making four of them!

First came the background.  It was ink blended on Distress Watercolor paper with light, medium and dark blues, along with black around the edges.  The die set has a moon die but I wanted this to be a snowy scene, so I intentionally left a lighter spot, suggesting the moon trying to show through the clouds.  At least that was the story in my head lol! After applying the ink, the panel was splattered with an iridescent shimmer spray and white paint.

Next all the city scene components were die cut, then ink blended towards the bottom of the die cut for some shading.  I took time to randomly add little strips and squares of yellow cardstock behind some of the windows in the buildings, then adhered all the die cut pieces to the dried backgrounds.  The snowbanks were hand cut from white glitter paper. I used more white paint to splatter which dried while I created the sentiments.  Those were added with foam tape to finish things off.

I will admit I probably got carried away with the snow/splatter but I still like how it turned out!


I hope Claire's TTT board inspires you to play along with us this week!  The challenge will remain open until Friday December 5th at 3pm EDT.  Before you head off to your crafty space, I hope you'll pop over to the challenge blog, where my talented teammates have some fun cards to inspire you further!

Thanks for stopping by!

Stef


  • Tim Holtz/Sizzix Vault Christmas Magic dies
  • TH/Stamper's Anonymous Simple Sayings Stamp
  • Simon Says Stamp Labels die
  • Distress Watercolor and Black Heavystock paper
  • SSS Slate, Red Metallic and White Glitter paper
  • Broken China, Uncharted Mariner, Chipped Sapphire and Black Soot Distress inks
  • SSS Kale ink
  • SSS White Splatter medium
  • Hero Arts White Iridescent Spray

Sunday, March 3, 2024

May It Be Happy

Hello friends!  Today I'm sharing a card that I made for the current color challenge at Color Throwdown.  The colors were too pretty to pass up and I actually had time this weekend to just play.

I'm also joining in over at the Simon Says Stamp Wednesday Challenge where this week's theme is Anything Goes.

I combined some new products with an older cover die to create my card.


I recently obtained the HoneyBee Stamps Lovely Layers: Rose die set and it seemed to fit the bill perfectly for the challenge colors.  All the components were die cut from white cardstock then ink blended.  The pinks were as close as I could get to rose and the green inks are definitely in muted, sage-like colors.  I also ink blended a white panel in pink.


The background element was die cut from Stampin' Up Merry Merlot cardstock using a retired cover die from Simon Says Stamp.  After adhering it to the pink inked panel, it was added to the card front.  With such a busy background I needed a place for the rose to be grounded, so a scallop circle was die cut from white, layered on the card, then the rose was attached.  It's a different kind of die from what I'm used to in that the bloom, bud and the leaves are all separate components, but they line up perfectly of course.  After layering on the sentiment, I added a few pink gem stickers for some sparkle.


Thanks for visiting and I hope you'll have a chance to swing by tomorrow when I post my card for the March challenge at The Flower Challenge!

Take care!

Stef


  • HoneyBee Stamps Lovely Layers: Roses and Be Still stamp and die
  • SSS Marilyn Full Card Cover die
  • Hero Arts Scallop Circle Infinity die
  • Altenew Silver Sage, Jade and Eucalyptus inks; Concord & 9th Carnation and Sweet Pea inks; SSS Carbernet ink
  • HoneyBee Stamps Vintage Love Gem Stickers

Monday, September 4, 2023

Fragrant Peony for The Flower Challenge

Hello friends!  It's the fourth of the month, which brings a new challenge over at The Flower Challenge!  This month we are asking everyone to use a die.


I'm also playing along with Addicted to Stamps and More where the challenge is to make a birthday card.


Finally, I'm also joining the Anything Goes Challenge at Simon Says Stamp Wednesday Challenge.


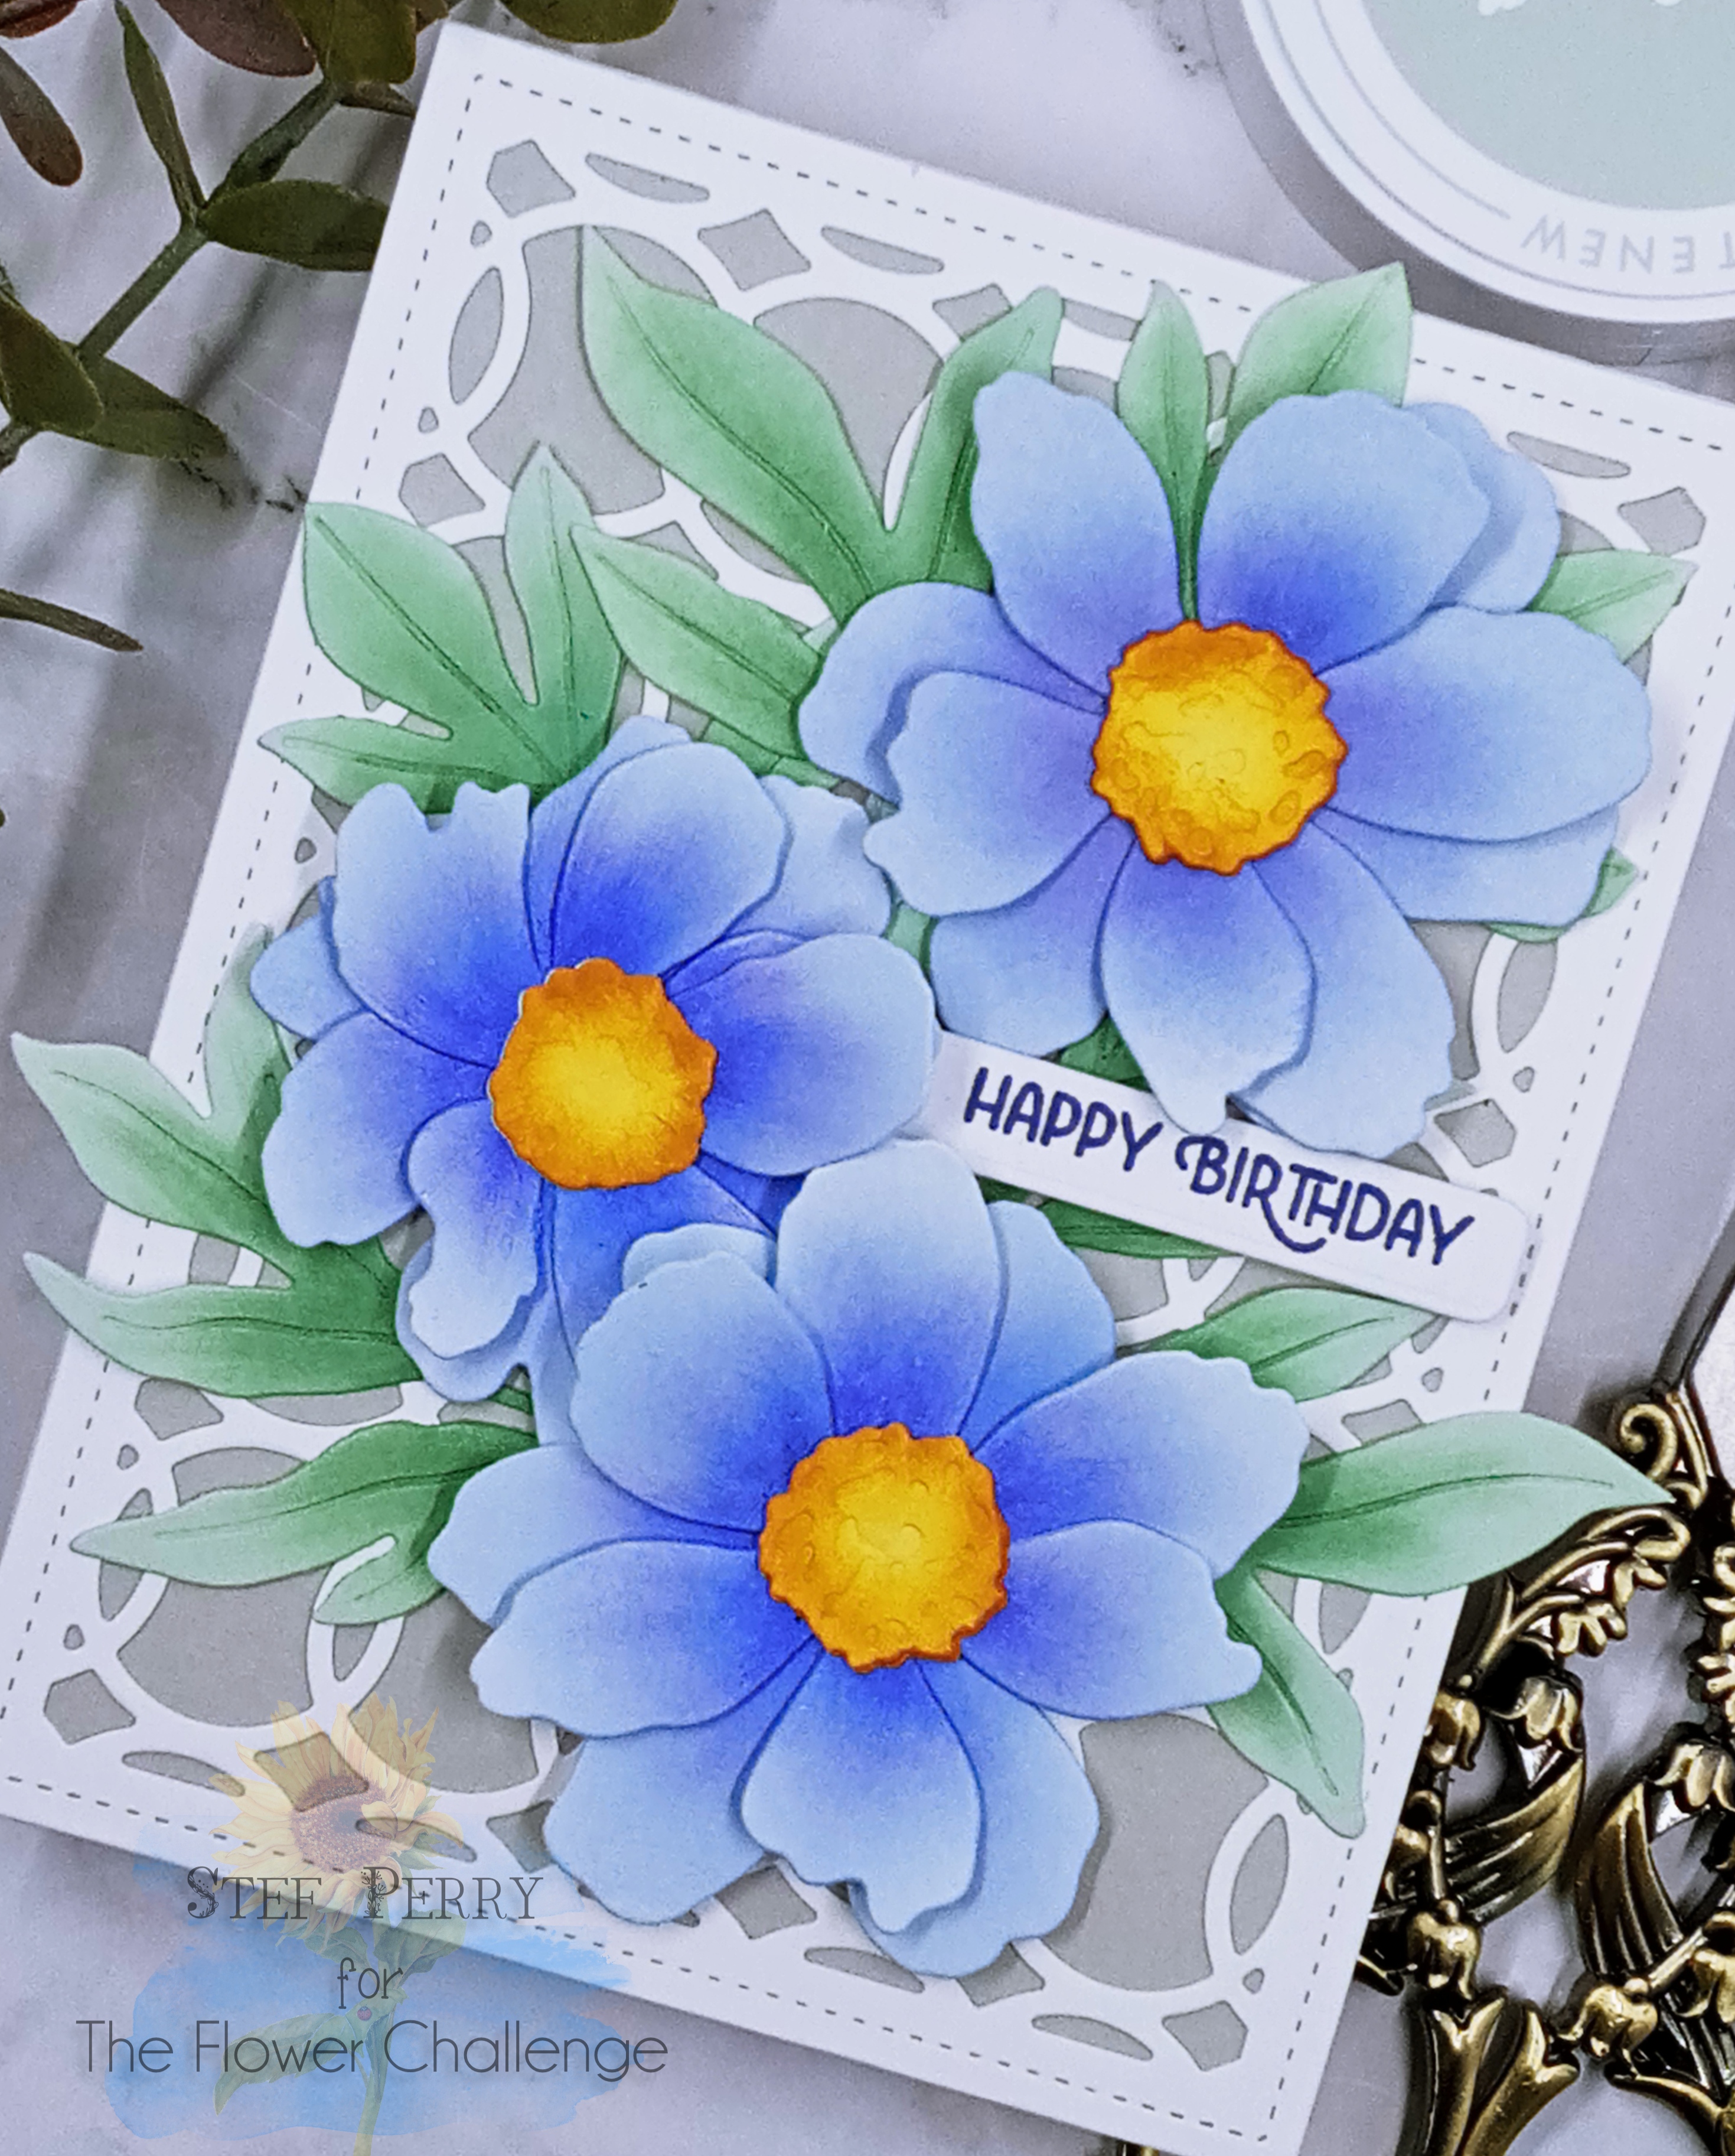
For my card, I went all in with dies, using the lovely Fragrant Peony dies from Altenew, along with a couple others.


I recently decided to buy a few of the new Altenew Fresh Dye inks and this card was the perfect way to test them out, and quite honestly, they are wonderful.  I love my Crisp Dye inks and they work fine, but I did see a bit brighter results from ink blending and a clearer image when stamping the sentiment.

I started by ink blending the lightest blue, Water Hyacinth and the lightest green, Silver Sage, on white cardstock, then die cut the petals and leaves.  I then used the next two darkest inks from both ink families to add shading to the die cuts.  The center was die cut separately from a scrap of white and blended with Sunray and Yellow Ochre.  Putting the flowers together is easy with Altenew's keyhole design for lining up the layers.


With the flowers and leaves ready to go, I die cut the Waffle Flower Ring Panel die from white and layered it on a panel of Simon Says Stamp Fog cardstock, which was then added to a white card base.  The sentiment, from MFT's Stylish Sentiments stamp set, was stamped in Indigo Skies, the darkest blue, then die cut with label die.  The flowers were arranged around the sentiment and I was done.


No doubt you have a die in your collection and we'd love to see what you create with it.  But before you head off to your crafty place, be sure to check out the stunning array of cards the design team has created over at the challenge blog!

Take care!

Stef


Stamps:  MFT Stylish Sentiments
Paper:  Neenah Solar White, SSS Fog
Ink:  Altenew Yellow Ochre Crisp Dye ink, Sunray, Water Hyacinth, Alpine Aster, Crystal Violet, Indigo Skies, Silver Sage, Jade and Eucalyptus Fresh Dye inks
Dies: Altenew Fragrant Peony and Featured Sentiment dies, Waffle Flower Ring Panel die

Sunday, September 3, 2023

Seas the Day for Sunday Stamps

Hello friends!  Wow, didn't August just blow by?  I can't believe it's time for kids to be back in school and autumn just around the corner. At Sunday Stamps our new color challenge presents a palette that can be used for a summer card if you're not ready for fall!  Either way, I hope you're inspired to join us!


I'm also joining the current Simon Says Stamp Wednesday Challenge, where this week's theme is Anything Goes.

I fussed around trying to make a mountain scene with these colors, but then decided the coast was calling and ended up with this fun little vignette on my card.


This gull trying to retrieve a sea star cracked me up and the sentiment went so perfectly.  I stamped the gull and starfish on the peer and did some easy Copic coloring.  Next I used Simon Says Stamp Morning ink to blend in the sky and Uncharted Mariner Distress Oxide ink for the ocean, then going over it with my B97 and 93 Copic markers to even out the color.  A white gel pen was the perfect tool to create small waves and ripples in the water.  


Next I used that same Morning ink, blending it all around the edges of a white panel, then cutting it down used a deckled edge die .  It was wrapped with some hemp twine and added to the white card base.  The main image was then popped up with more foam tape to finish off the card.  Pretty simple card but I think using dimension adds more interest.


So what are you inspired to make with these colors?  I hope to see your card in the gallery, but in the meantime, be sure to visit the challenge blog where my talented teammates have some fabulous cards.

Take care!

Stef


Stamps:  Colorado Craft Company Seas The Day
Paper:  Neenah Solar White
Inks:  Memento Tuxedo Black, Versafine Clair Nocturne, SSS Morning, Uncharted Mariner DOX
Dies:  Altenew Mix and Match Frames
Other:  Sakura White Gelly Roll pen, Lawn Fawn Hemp Twine
Copics:  E37, 35, 33, 31, Y28, 26, 35, 32, Black100, C6, 4, 2, 0, B97, 93

Sunday, June 4, 2023

Peony Birthday Wishes for The Flower Challenge

Hello friends!  The new month also brings a new challenge at The Flower Challenge.  This month the theme is to use your favorite flower - how easy is that?  Well, unless you have multiple favorites, then you'll have to choose one - or even better, make more than one card for the challenge!


I'm also joining the current Anything Goes challenge at Simon Says Stamp Wednesday Challenge.

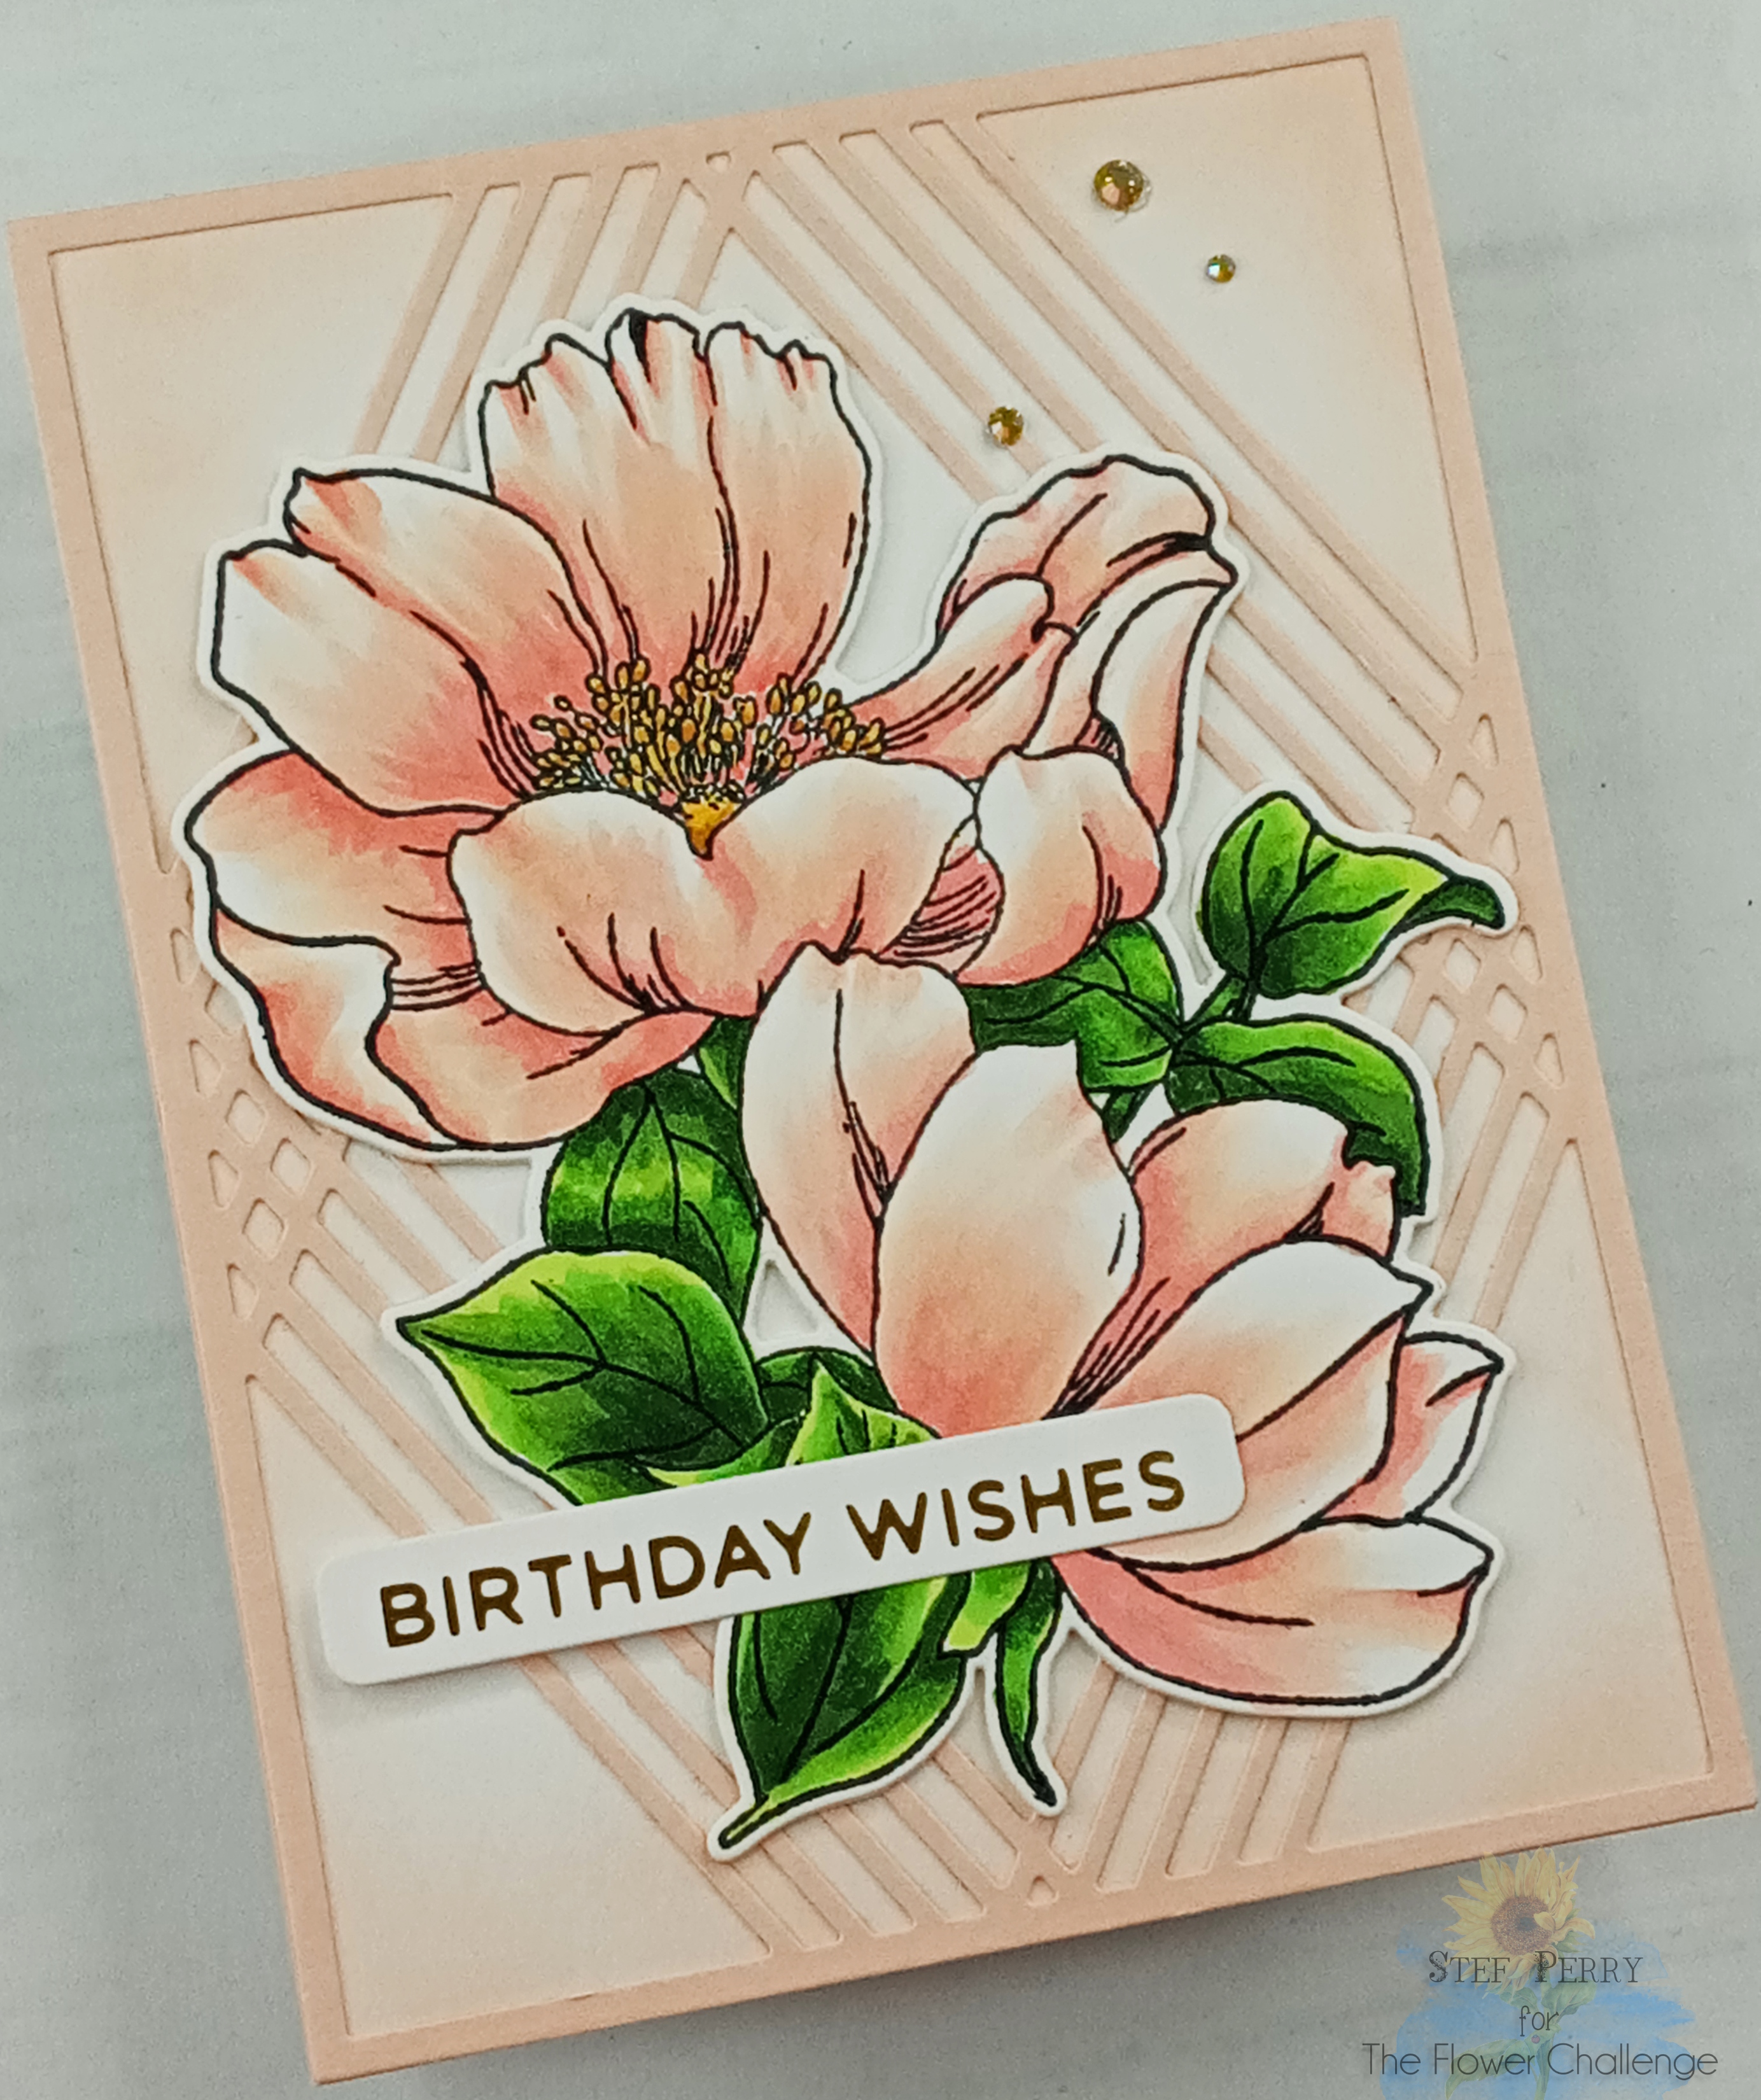
If you follow my blog, you may know that peonies are my very favorite flowers and I have a one to share today that I colored in what I guess is my current favorite color - peach!


This gorgeous image is from Altenew, and as a peony lover, one I could not resist adding to my collection of flower stamp sets.  I used Copic markers to color it, then it was die cut with the coordinating die.  The sentiment is from Spellbinders, foiled in gold and die cut with a sentiment label die.


Next the Diamond Frame cover die was cut from Concord & 9th Nectar cardstock, then adhered to a white panel that was ink blended around the outside with the same shade of ink from C&9, and added to a white card base.  The floral image was layered with two additional die cuts for dimension, adhered to the card front, then the sentiment was added with both glue and then foam squares.  To tie in the gold on the sentiment I added three sparkling gold gems and that finished it off.


I'd love to know what your favorite flower is and I hope you'll share with us this month!  The challenge is open through the 25th.  In the meantime, be sure to take a peek at the stunning array of flower cards from the other DT members!

Take care!

Stef


Stamps:  Altenew Build-A-Flower:  Pristine Peonies
Paper:  Neenah Solar White, Hammermill, C&9 Nectar
Ink:  Memento Tuxedo Black, Nectar
Dies:  All from Altenew - Pristine Peonies, Diamond Frame Cover and Featured Sentiments
Foiling:  Spellbinders Everyday Sentiments II Hot Foil Plate and Gold Glimmer Hot Foil
Gems:  Spellbinders Aura Color Essential Gems
Copics:  R32, 11, E00, YR23, Y15, YG67, 17, 25, 03

Thursday, June 1, 2023

Lighthouse Birthday for Color Hues

Hello friends!  The start of a new month brings about a new Color Hues challenge and this time the lovely Jules P. has chosen the fabulous color combo of red and aqua.


I'm also sharing my card over at Simon Says Stamp Wednesday Challenge where this week's theme is Anything Goes.

I love this color combo and had fun using it with another die set, this time from Hero Arts.


Rather than try to do an inked background or even color the individual pieces of the cover die, I opted to inlay multiple colors of cardstock - white for the frame and clouds, three aquas for the water and sky, red and gray for the lighthouse and cream and black for the sailboat and birds.  Once everything was cut out, it was pretty simple to inlay all the pieces.  


I kept the sentiment simple, stamping in Altenew Obsidian then die cutting with the coordination die.  Once that was adhered the card was finished.  With a large number of summer birthdays coming up, I was happy to have another card in my stash.


So what are you inspired to make with these colors?  I do hope you'll join us for this challenge, it will be open until 9:00 am Wednesday June 14th.  In the meantime, be sure to slip over to the challenge blog where the other DT members have a fabulous assortment of cards to spark your creativity!

Thanks for visiting!  Take care.

Stef


Stamps:  Waffle Flower Elegant Sentiments
Paper:  Neenah Solar White, Hero Arts Ivory, Concord and 9th Oceanside and Aqua Sky, Simon Says Stamp Sea Glass, Fog and Smoke,, Stampin' Up Real Red and Black
Dies:  Hero Arts Lighthouse and Sailboat Cover Die, WF Elegant Sentiments matching die

Sunday, February 19, 2023

Boho Hello for Sunday Stamps

Hello friends!  It's time for a new color challenge at Sunday Stamps with a gorgeous color board.  I really love these colors and I hope it inspires you as well!


I'm also joining the current Simon Says Stamp Wednesday Challenge where the current theme is "Emboss It".

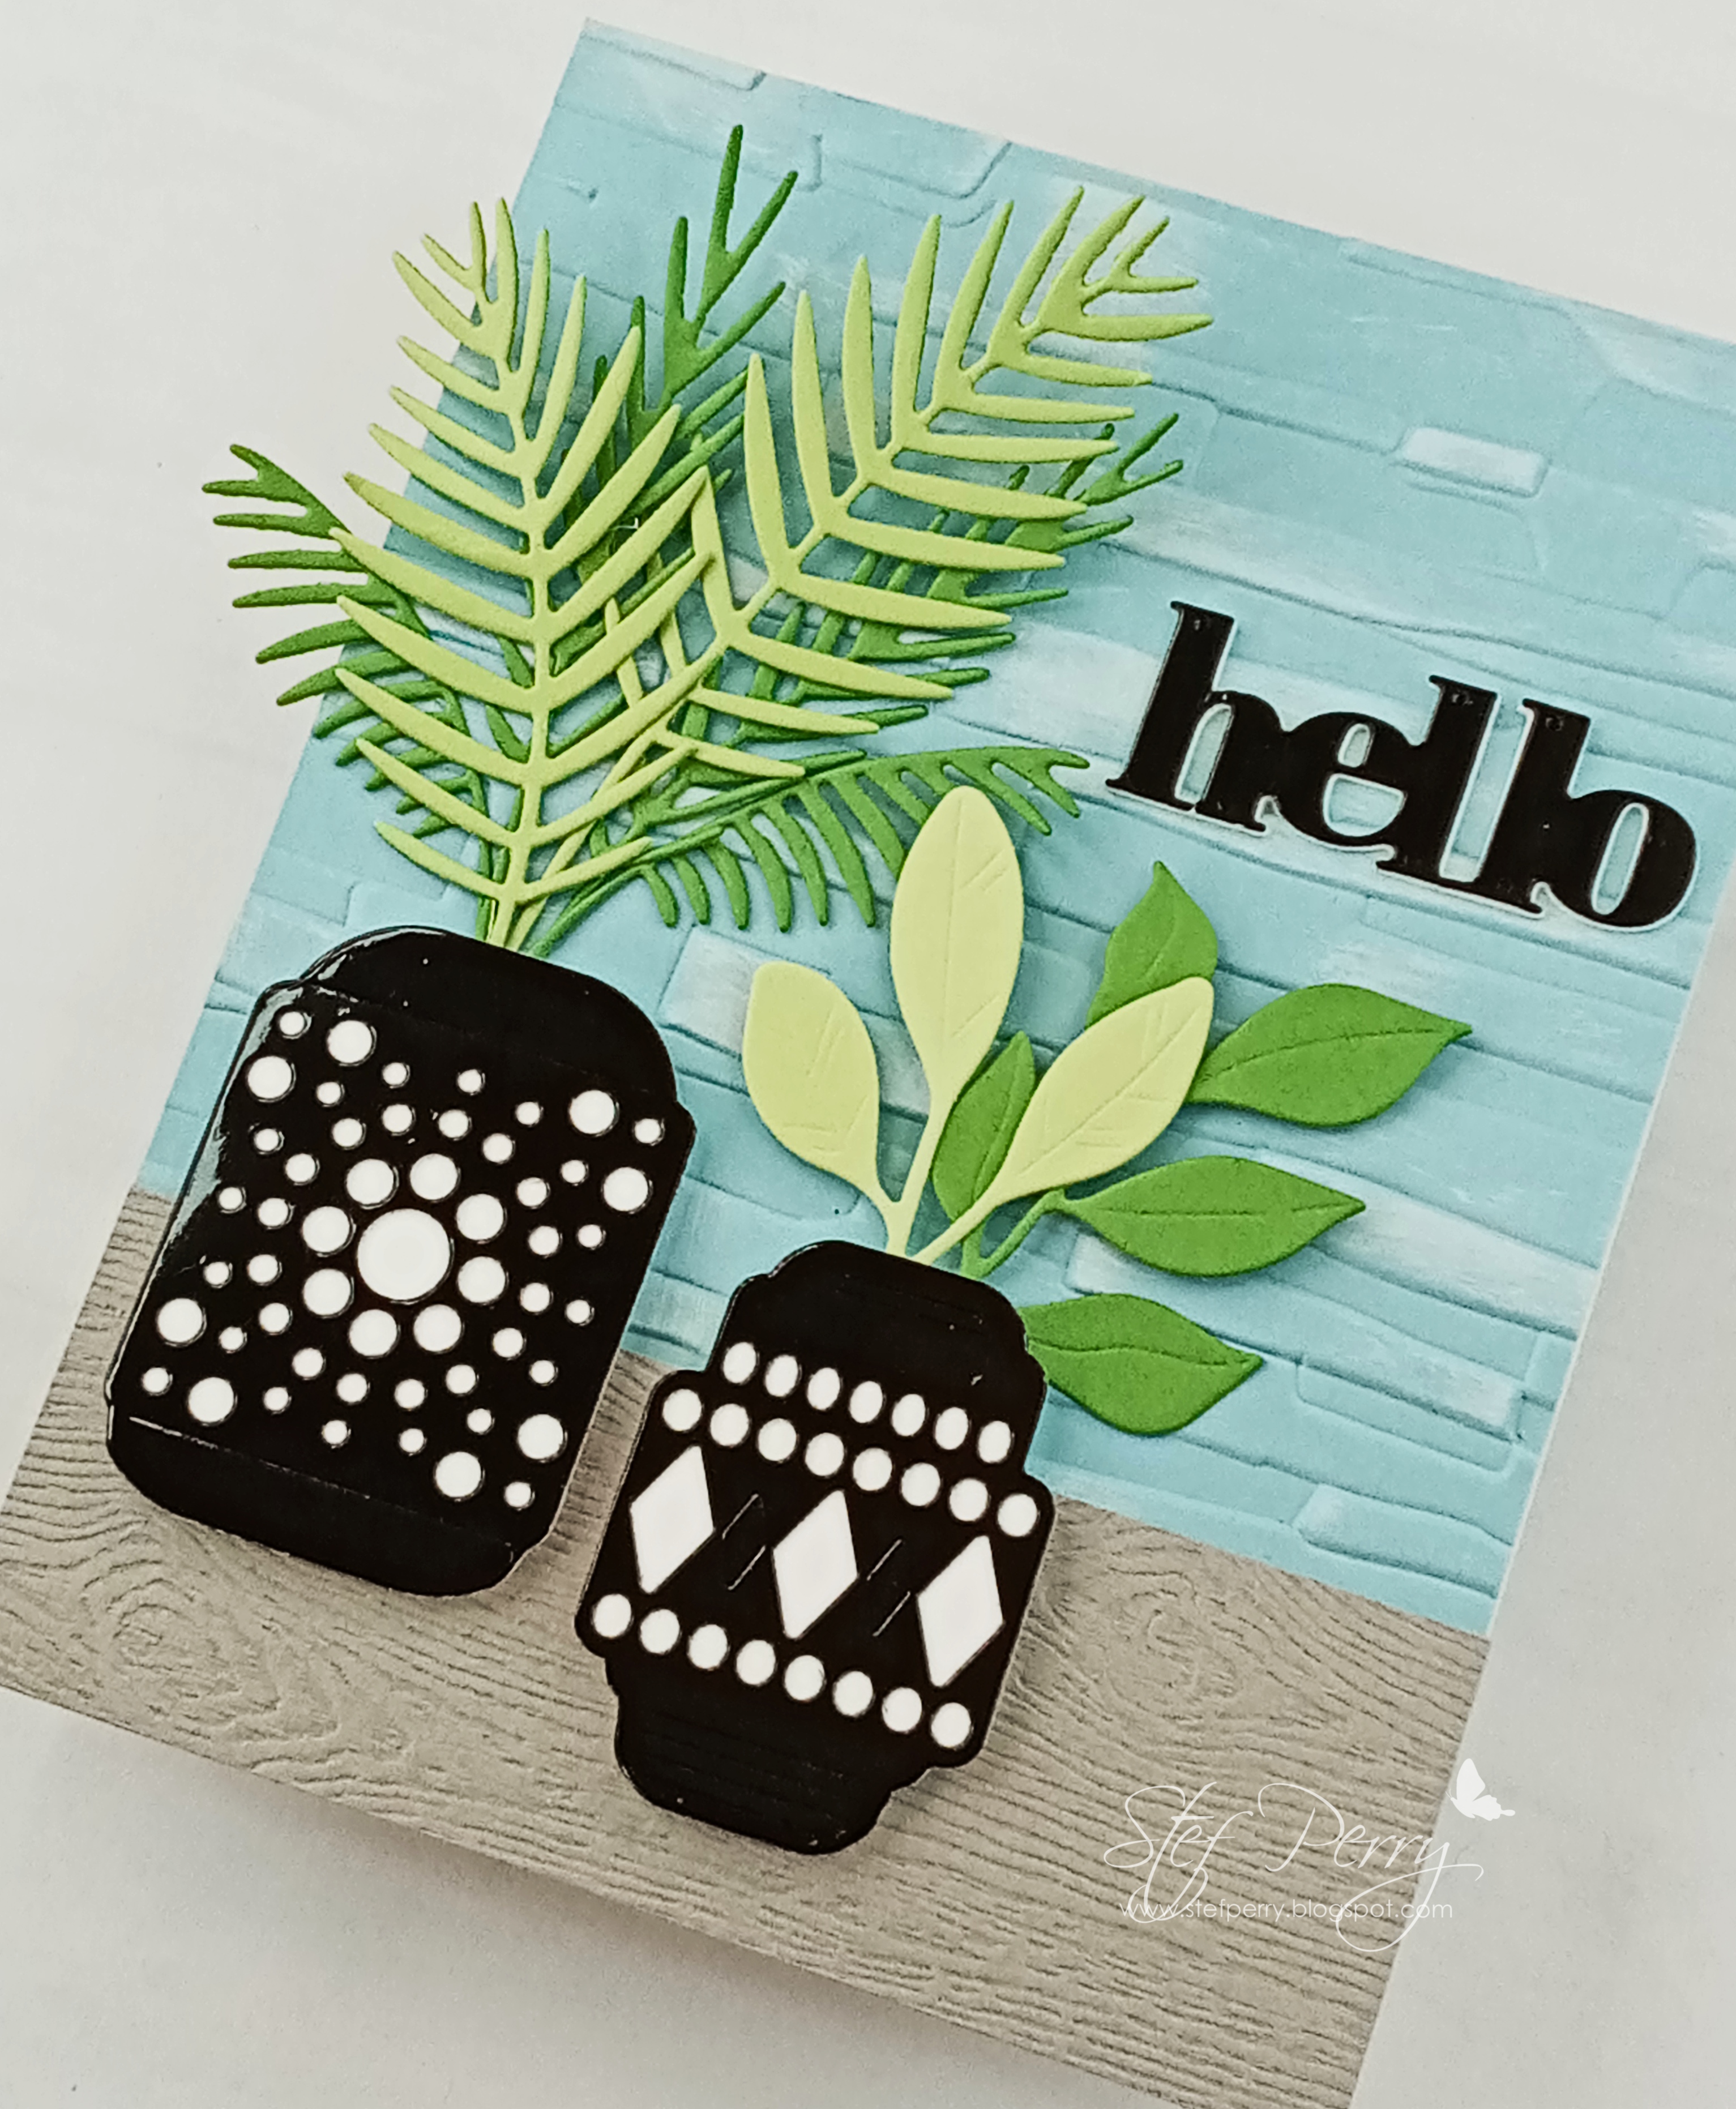
I ended up using the light blue and the greens on my card, along with neutrals gray and black.  I used some glossy black paper and had a heck of a time getting a decent photo, so I apologize for the quality - my camera definitely doesn't want to focus in on shiny or metallic things.


Oh, this card was so fun to make!  I used the branches and vases from Altenew's Boho Vases and palm branches from the Parlor Palm die sets, die cutting the them from three green cardstocks - Concord & 9th's Sprout and Parsley along with Simon Says Stamp's Green Apple.  The vases were die cut from SSS Black Glossy cardstock and I added hand cut scraps of white on the reverse side to cover the openings.  


The background was created by embossing a panel of Stampin' Up Balmy Blue cardstock with the new Altenew Masonry Wall 3D embossing folder then lightly swiping my Hero Arts Unicorn White ink across it to catch some of the layers.  I absolutely love the ef, it reminds me of the fireplace surrounds and walls in mid-century homes. When the ink dried, a strip of Lawn Fawn Gray Woodgrain cardstock was layered on the panel, then the vases were added with foam squares.  The branches were tucked into their respective vases, then I glued the base of the palms down, letting the tops pop up, and I used foam squares to adhere the smaller barnches.  The sentiment was die cut using the SSS Bold Hello die, twice from white and once from the black glossy cardstock.  Once that was adhered, then panel was added to a white card base to finish things off.


Thanks for visiting, I appreciate it!  Be sure to use the link above to check out the fabulous cards by the other DT members, and hopefully be inspired to join us!  The challenge will remain open until 4 pm MST / 6 pm EST March 3.

Take care!

Stef


Wednesday, February 8, 2023

Love Ya!

Hello friends!  Today I have a quick post sharing a Valentine card that I made for my oldest grandson. I'm joining the challenges at Double D, where the theme is hearts, along with the Simon Says Stamp Monday Challenge's Love is in the Air theme and the Simon Says Stamp Wednesday Challenge, where the theme is fun with dies.


My card has all sorts of hearts on it!


This was a quick and easy card to make.  Starting with a panel of Neenah Desert Storm, I stamped the Simon Says Stamp Lace Heart Kaleidoscope Background stamp using Versamark ink, then white heat embossed it and die cut it with the largest Hero Arts Nested Infinity rectangle die.  I then blended Ink on 3 Shark Tooth White around the edges of the panel to give it a softening effect and then used an R46 Copic marker to color in the little hearts.


Next came all the die cutting!  I used the SSS Nested Round Hearts dies, cutting from white and their gorgeous new Rich Red Matte Metallic cardstock.  I also die cut the largest heart from a vellum panel covered on the back with double sided adhesive so I could adhere it to the card front without any glue showing.  Next the two white hearts were adhered to the vellum heart, then the smaller red hearts adhered randomly.  Finally, the sentiment, also die cut from the red metallic paper and two layers of white, was added to the middle of the hearts and I was done!


Thanks for stopping by!  Take care!

Stef

Sunday, January 22, 2023

Best Wishes for Sunday Stamps

Hello friends!  It's time for a new challenge at Sunday Stamps and this week we have a great color challenge with lots of vibrant colors to create with.


I'm also joining the current challenges at Freshy Made Sketches and Simon Says Stamp Wednesday Challenge where this week's theme is Fabulous Flowers.


I decided to use the dark and medium purples along with the coral for my card.


This was a very quick and easy card to make.  I started by ink blending Villainous Potion, Seedless Preserves and Abandoned Coral Distress inks on a panel of Canson Montval watercolor paper.  I love how Seedless Preserves has just enough red and Abandoned Coral just enough pink so that they blend together beautifully rather than making mud!  A bit of water splatter followed by white gouache splatter and it was set aside to dry.


Next the I die cut the flowers from white cardstock using the Tim Holtz Wildflowers #1 dies and found the die cut sentiment in with the Pickup Lines stamp set from Honey Bee stamps.  I used the die to cut a couple more then layered them together for a bit of dimension.  After the inked panel dried it was cut with the largest of Waffle Flower's Deckled Rectangle dies then layered atop a 6"x 4.75" card base made from Ellen Hutson's White Woodgrain Embossed cardstock.  The die cut flowers were adhered to the panel then a leftover strip from the same woodgrain cardstock was trimmed down and adhered over the flowers.  Lastly I added the sentiment and was done!


So what will you create with these colors? I hope to see your card in the gallery and in the meantime, take a moment to drop by the challenge (link above) to see the beautiful cards by the other DT members.

Take care!

Stef

Sunday, December 11, 2022

The Most Wonderful Time of the Year for Sunday Stamps

Hello and welcome!  It's time for a new challenge at Sunday Stamps and this week we have a fabulous sketch from Heidi!  


I am also joining the Simon Says Stamp Monday Challenge, where the theme is Holiday Cheer, and the Simon Says Stamp Wednesday Challenge, with a theme of Add Sparkle.

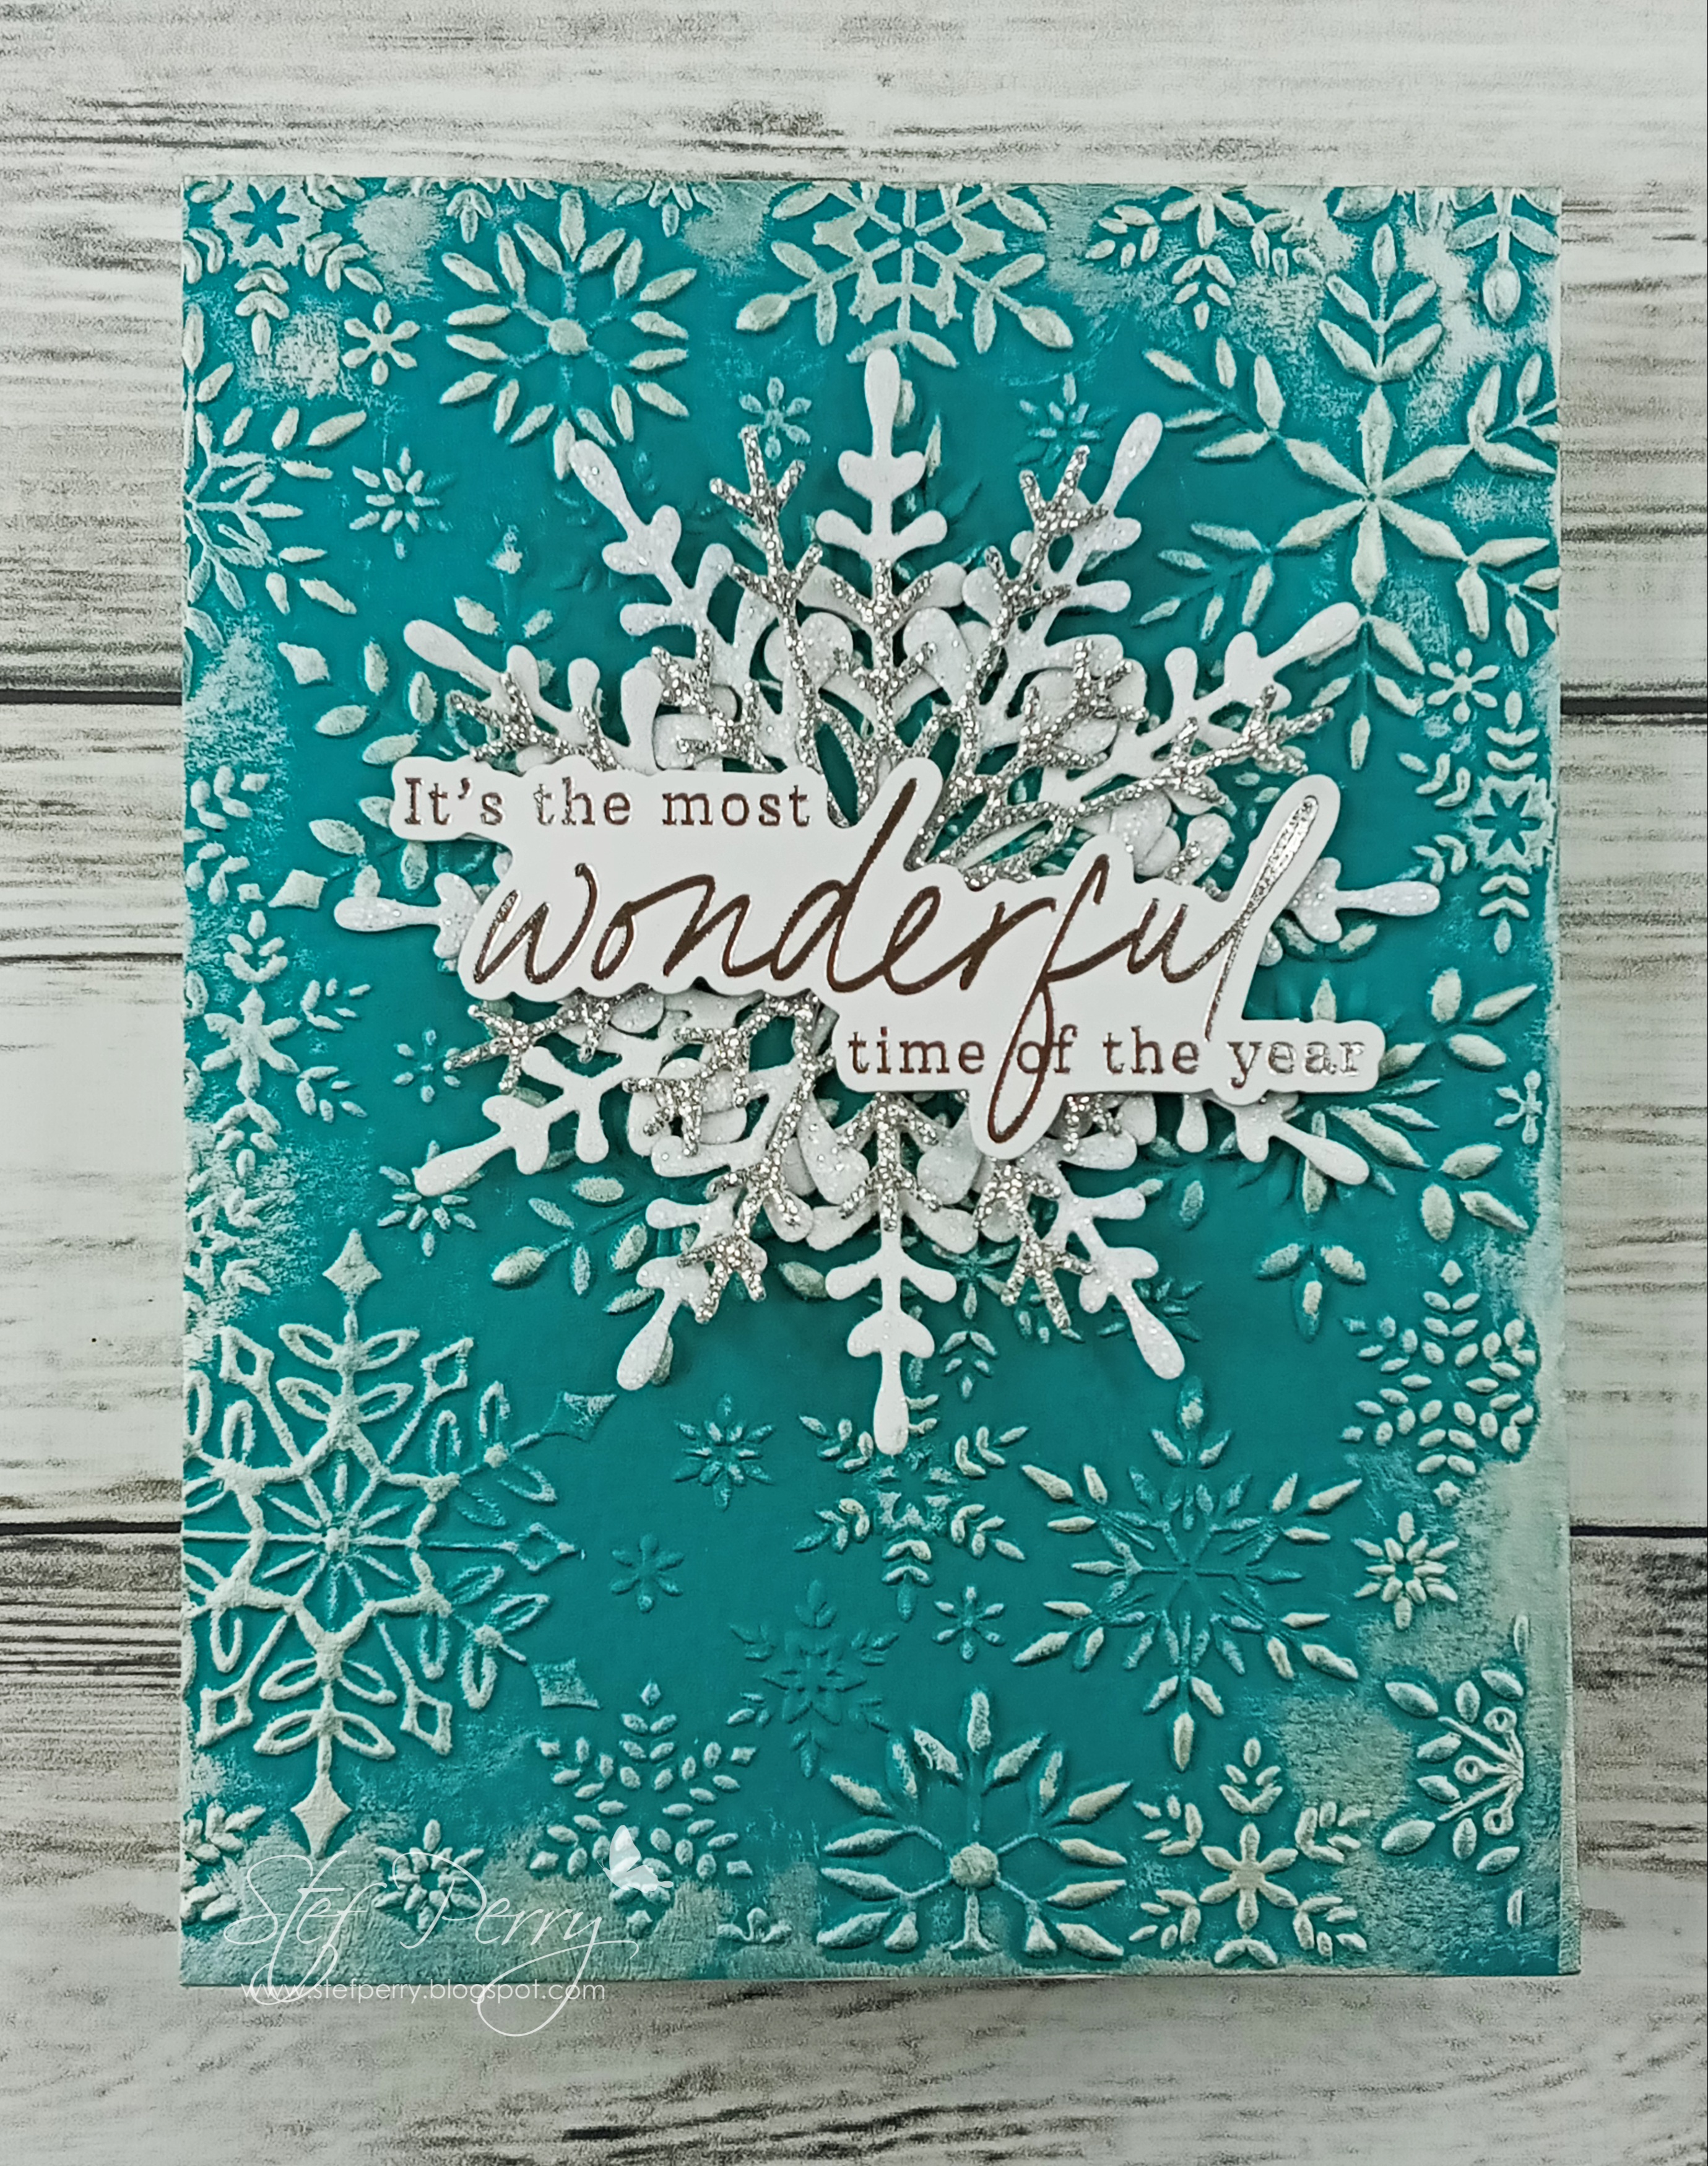
I made a series of snowflake cards using a similar design before I even saw Heidi's sketch, (you can see another example here) so I was very happy that another one worked perfectly for this challenge. Plus the color of the background is one of my favorites.


I started by embossing a panel of Concord & 9th Peacock card stock with the Simon Says Stamp Snowflake visions, then used my finger to rub Tonic Nuvo Almond Embossing Mousse lightly over the panel, then when applied a heavier amount around the edges.  


Next I used the SSS Glistening Snowflakes detail die to cut snowflakes from SSS White and Silver Glitter paper and the SSS Dainty Snowflake die to cut a smaller silver glitter snowflake.  Once the snowflake panel was dry, I adhered the snowflakes in layers, then added the sentiment with foam squares just towards the middle of the snowflakes.  The sentiment is from the Pinkfresh Studio Foiled Sentiments 4 holiday pack - super handy and a quick way to finish off my card!


Thanks for visiting!  Please be sure to use the link above to see the beautiful cards by the other DT members and hopefully join us - the challenge will be open until December 23rd.

Take care and enjoy the holidays!  

Stef


Sunday, October 30, 2022

Autumn Greetings for Sunday Stamps

Hello and welcome!  It's time for a new challenge at Sunday Stamps and this time it is a new color combo to spark your creativity! 


I'm also playing along with the Anything Goes Challenge at the Simon Says Stamp Wednesday Challenge.

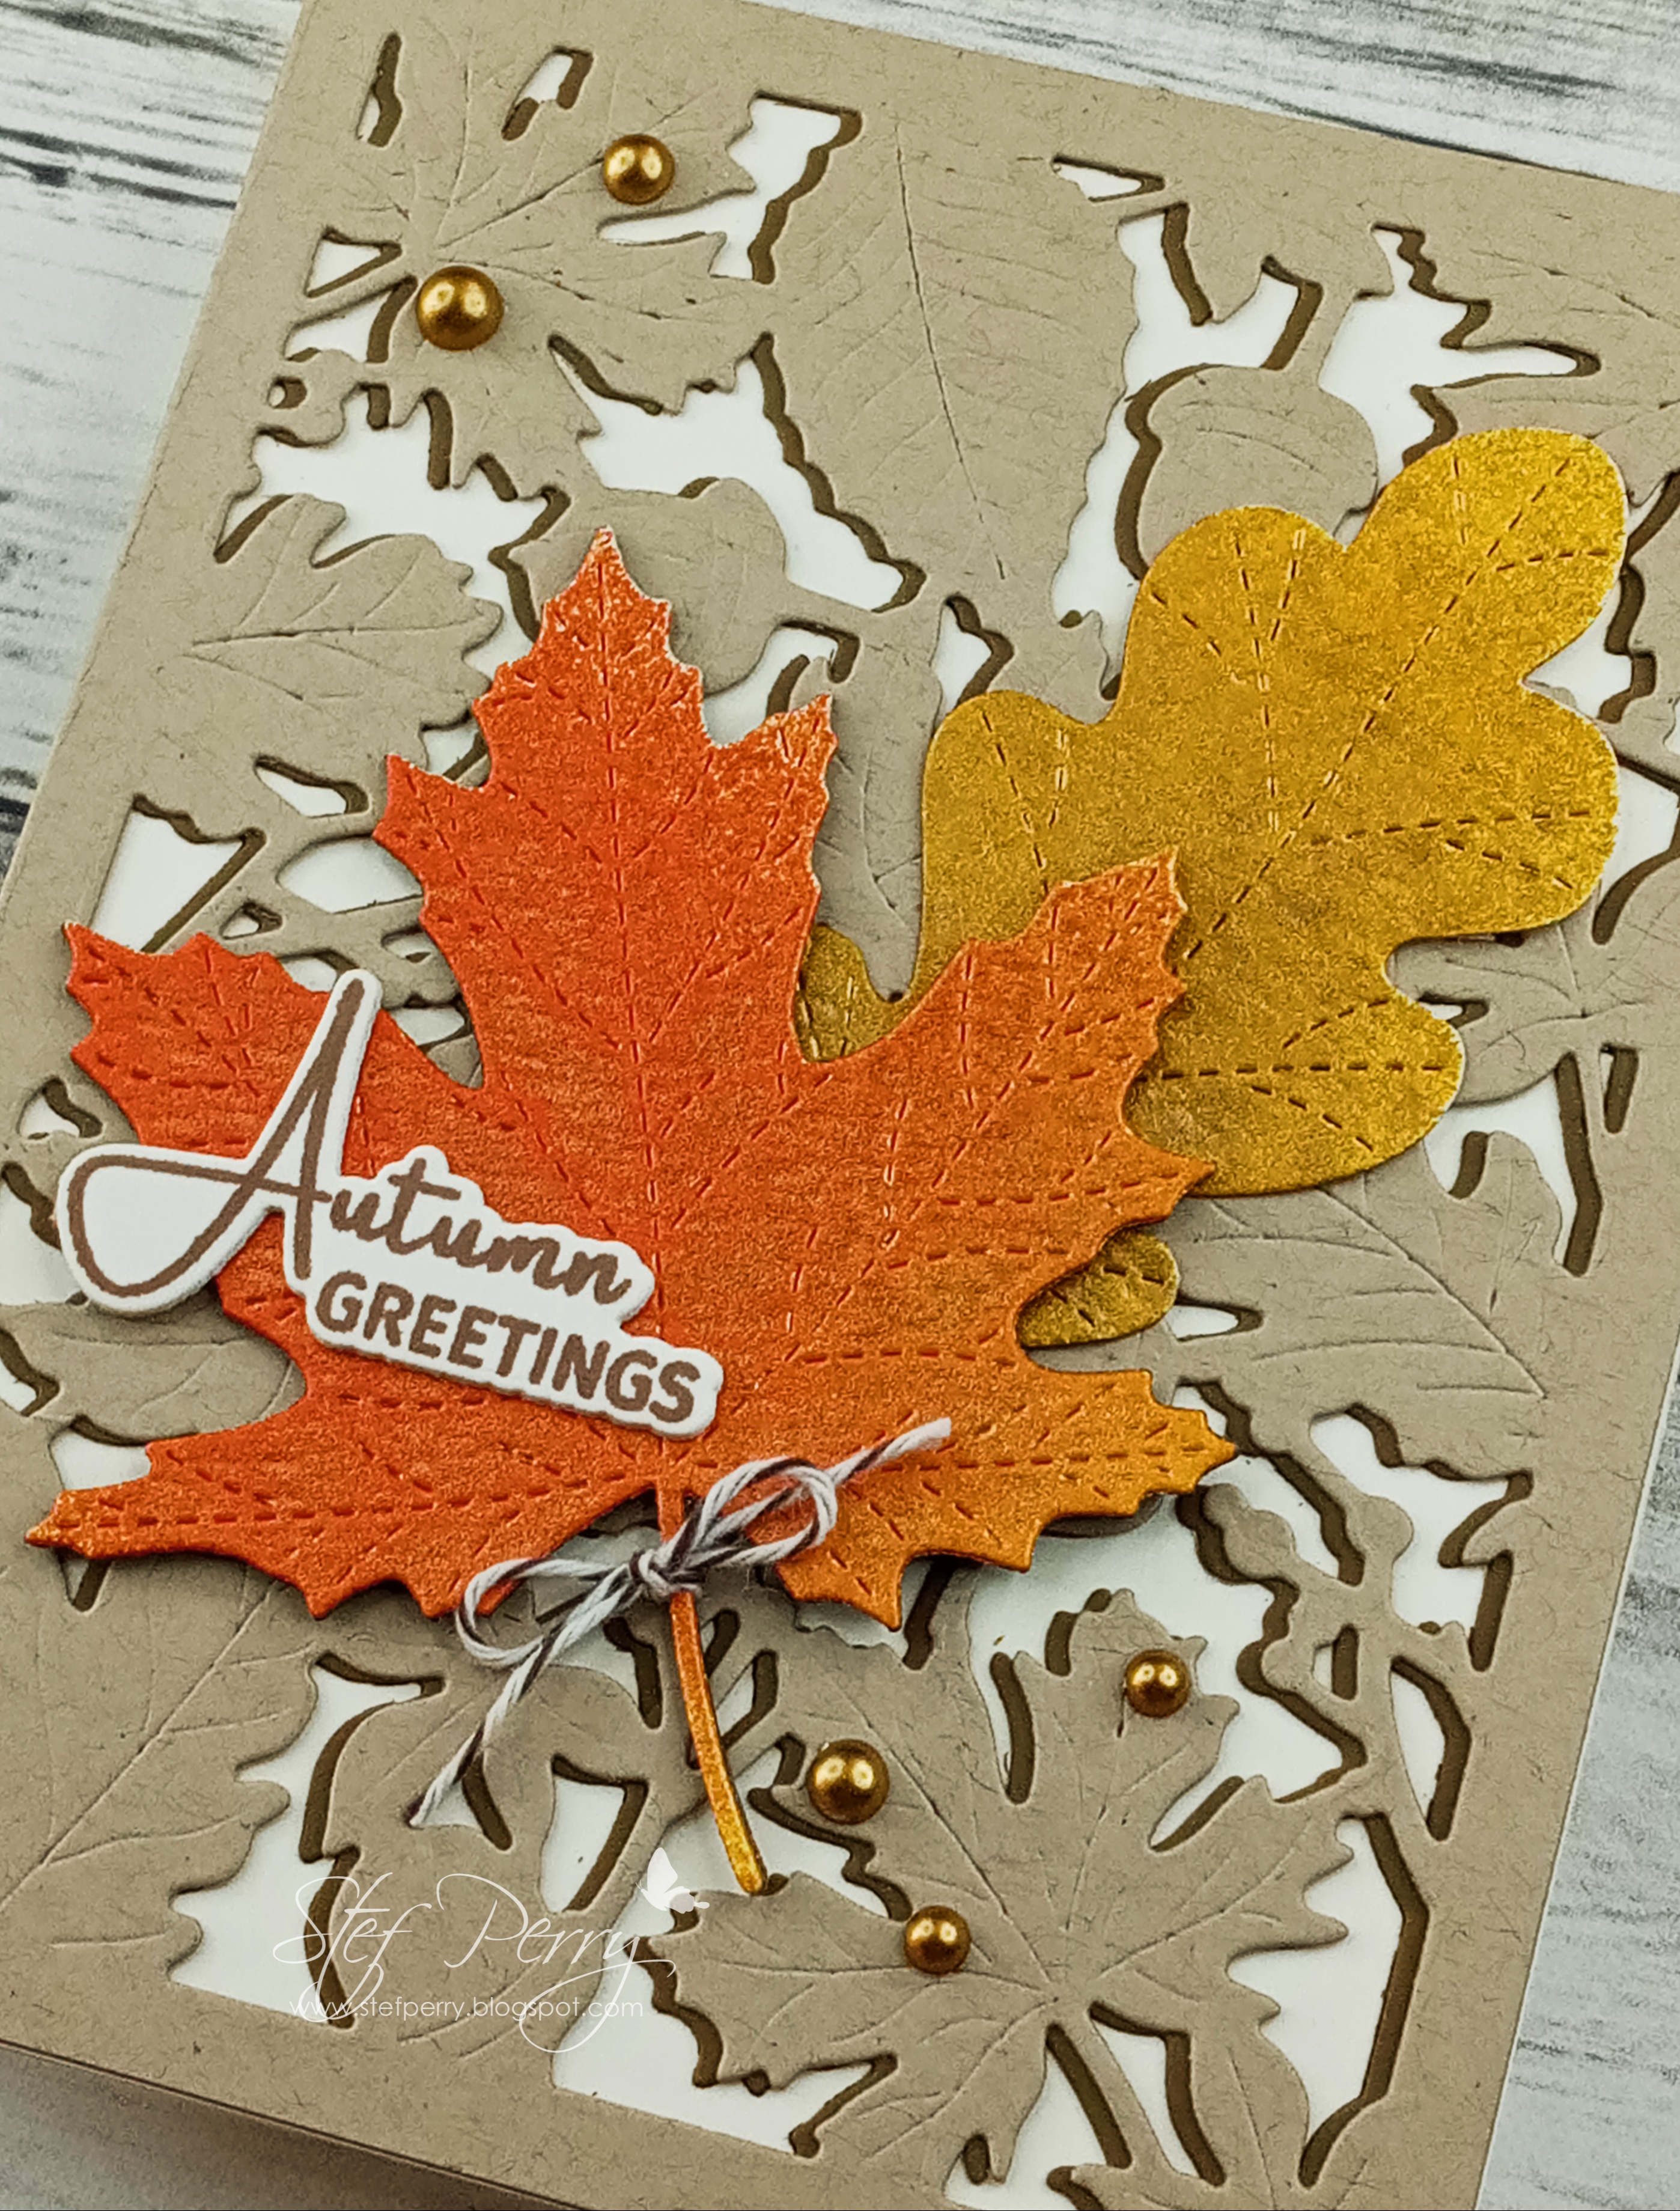
I decided to make one last autumn card and chose to use brown, yellow and orange.  


I started by die cutting the large maple and oak leaves from watercolor paper, then used Distress Mica Stain sprays in Flickering Candle, Jack-O-Lantern and Crooked Broomstick to color them.  The brown didn't really show, I think I used much more of the other two colors.  While the leaves dried, I stamped and die cut the sentiment and worked on the background.


Since the brown spray didn't show adequately, I decided to incorporate the color into the background.  I had the die cut leaf background in craft that was left over from another project but it certainly wasn't dark enough.  I die cut another out of Soft Suede but it was too dark behind the leaves, so I used it as a shadow to the craft layer.  I adhered them together, trimmed off the excess brown, then added it to an ivory card base.  The yellow oak leaf was adhered directly to the panel and the maple was die cut twice more from Soft Suede, layered together then added to the card front after tying on a bow of Early Espresso Baker's Twine.  With the sentiment adhered, I then finished thigs off with a few satin gold baubles.


Thanks for taking time to stop by!  I hope you'll use the link above to see all the beautiful cards by the other DT members and hopefully join us - you'll have until Friday, November 11th.

Take care!

Stef


Stamps:  Grateful Florals (Studio Katia/Simon Says Stamp)
Paper:  Hero Arts Antique Ivory, Stampin' Up Soft Suede, Neenah Desert Storm, Tim Holtz Distress Watercolor
Ink:  Versafine Clair Acorn
Other:  Flickering Candle, Jack-O-Lantern and Crooked Broomstick Distress Mica Stain Spray, Simon Says Stamp Large Stitched Maple and Oak Leaf dies, Honey Bee Autumn Splendor A2 cover die, SU Early Espresso Baker's Twine, Trinity Stamps Gold Satin Baubles