Showing posts with label Penny Black. Show all posts

Sunday, December 1, 2024

Sending Peace for Color Hues

Hello friends!  The year has passed quite swiftly and here we are at the beginning of December, where it's time for a new Color Hues Challenge.  The amazing Nancy is our host this time and has chosen the beautiful combination of blue and purple to close out the year.  Yes, the challenge will be open until December 29th.


We've reached a milestone at Color Hues because it happens to be our 100th challenge, Woohooo... so there will be a fabulous prize offered to one of our winners. You can read all the details over on the Color Hues blog linked above.

I really dithered on this challenge, not because I had trouble with the color combination but because I made a card, decided it wasn't "enough" so I went a different direction.  But ultimately I decided to use my first card.  I'll share my second card at the bottom of the post.  Let me know which one you would have chosen.


These colors reminded me of a beautiful late afternoon winter sky, so I tried to emulate that.  I started by stamping the row of trees on a panel of Bristol paper in black pigment ink.  When that dried, I began ink blending with the darker shades of the two colors at the top and bottom of the panel, then ended up blending the two lighter shades in the middle. I created snowflakes by splattering white acrylic paint across the panel.

While that dried, the frame and peace sentiment were die cut from purple glitter cardstock and "sending" was stamped and die cut with the matching die.  I added a second layer to the frame before adhering to the now dry panel, then added the sentiments.  I decided nothing more was needed.  I think the sentiment was very appropriate as the scene has me envisioning myself in a wooded area made quiet by the falling snow.


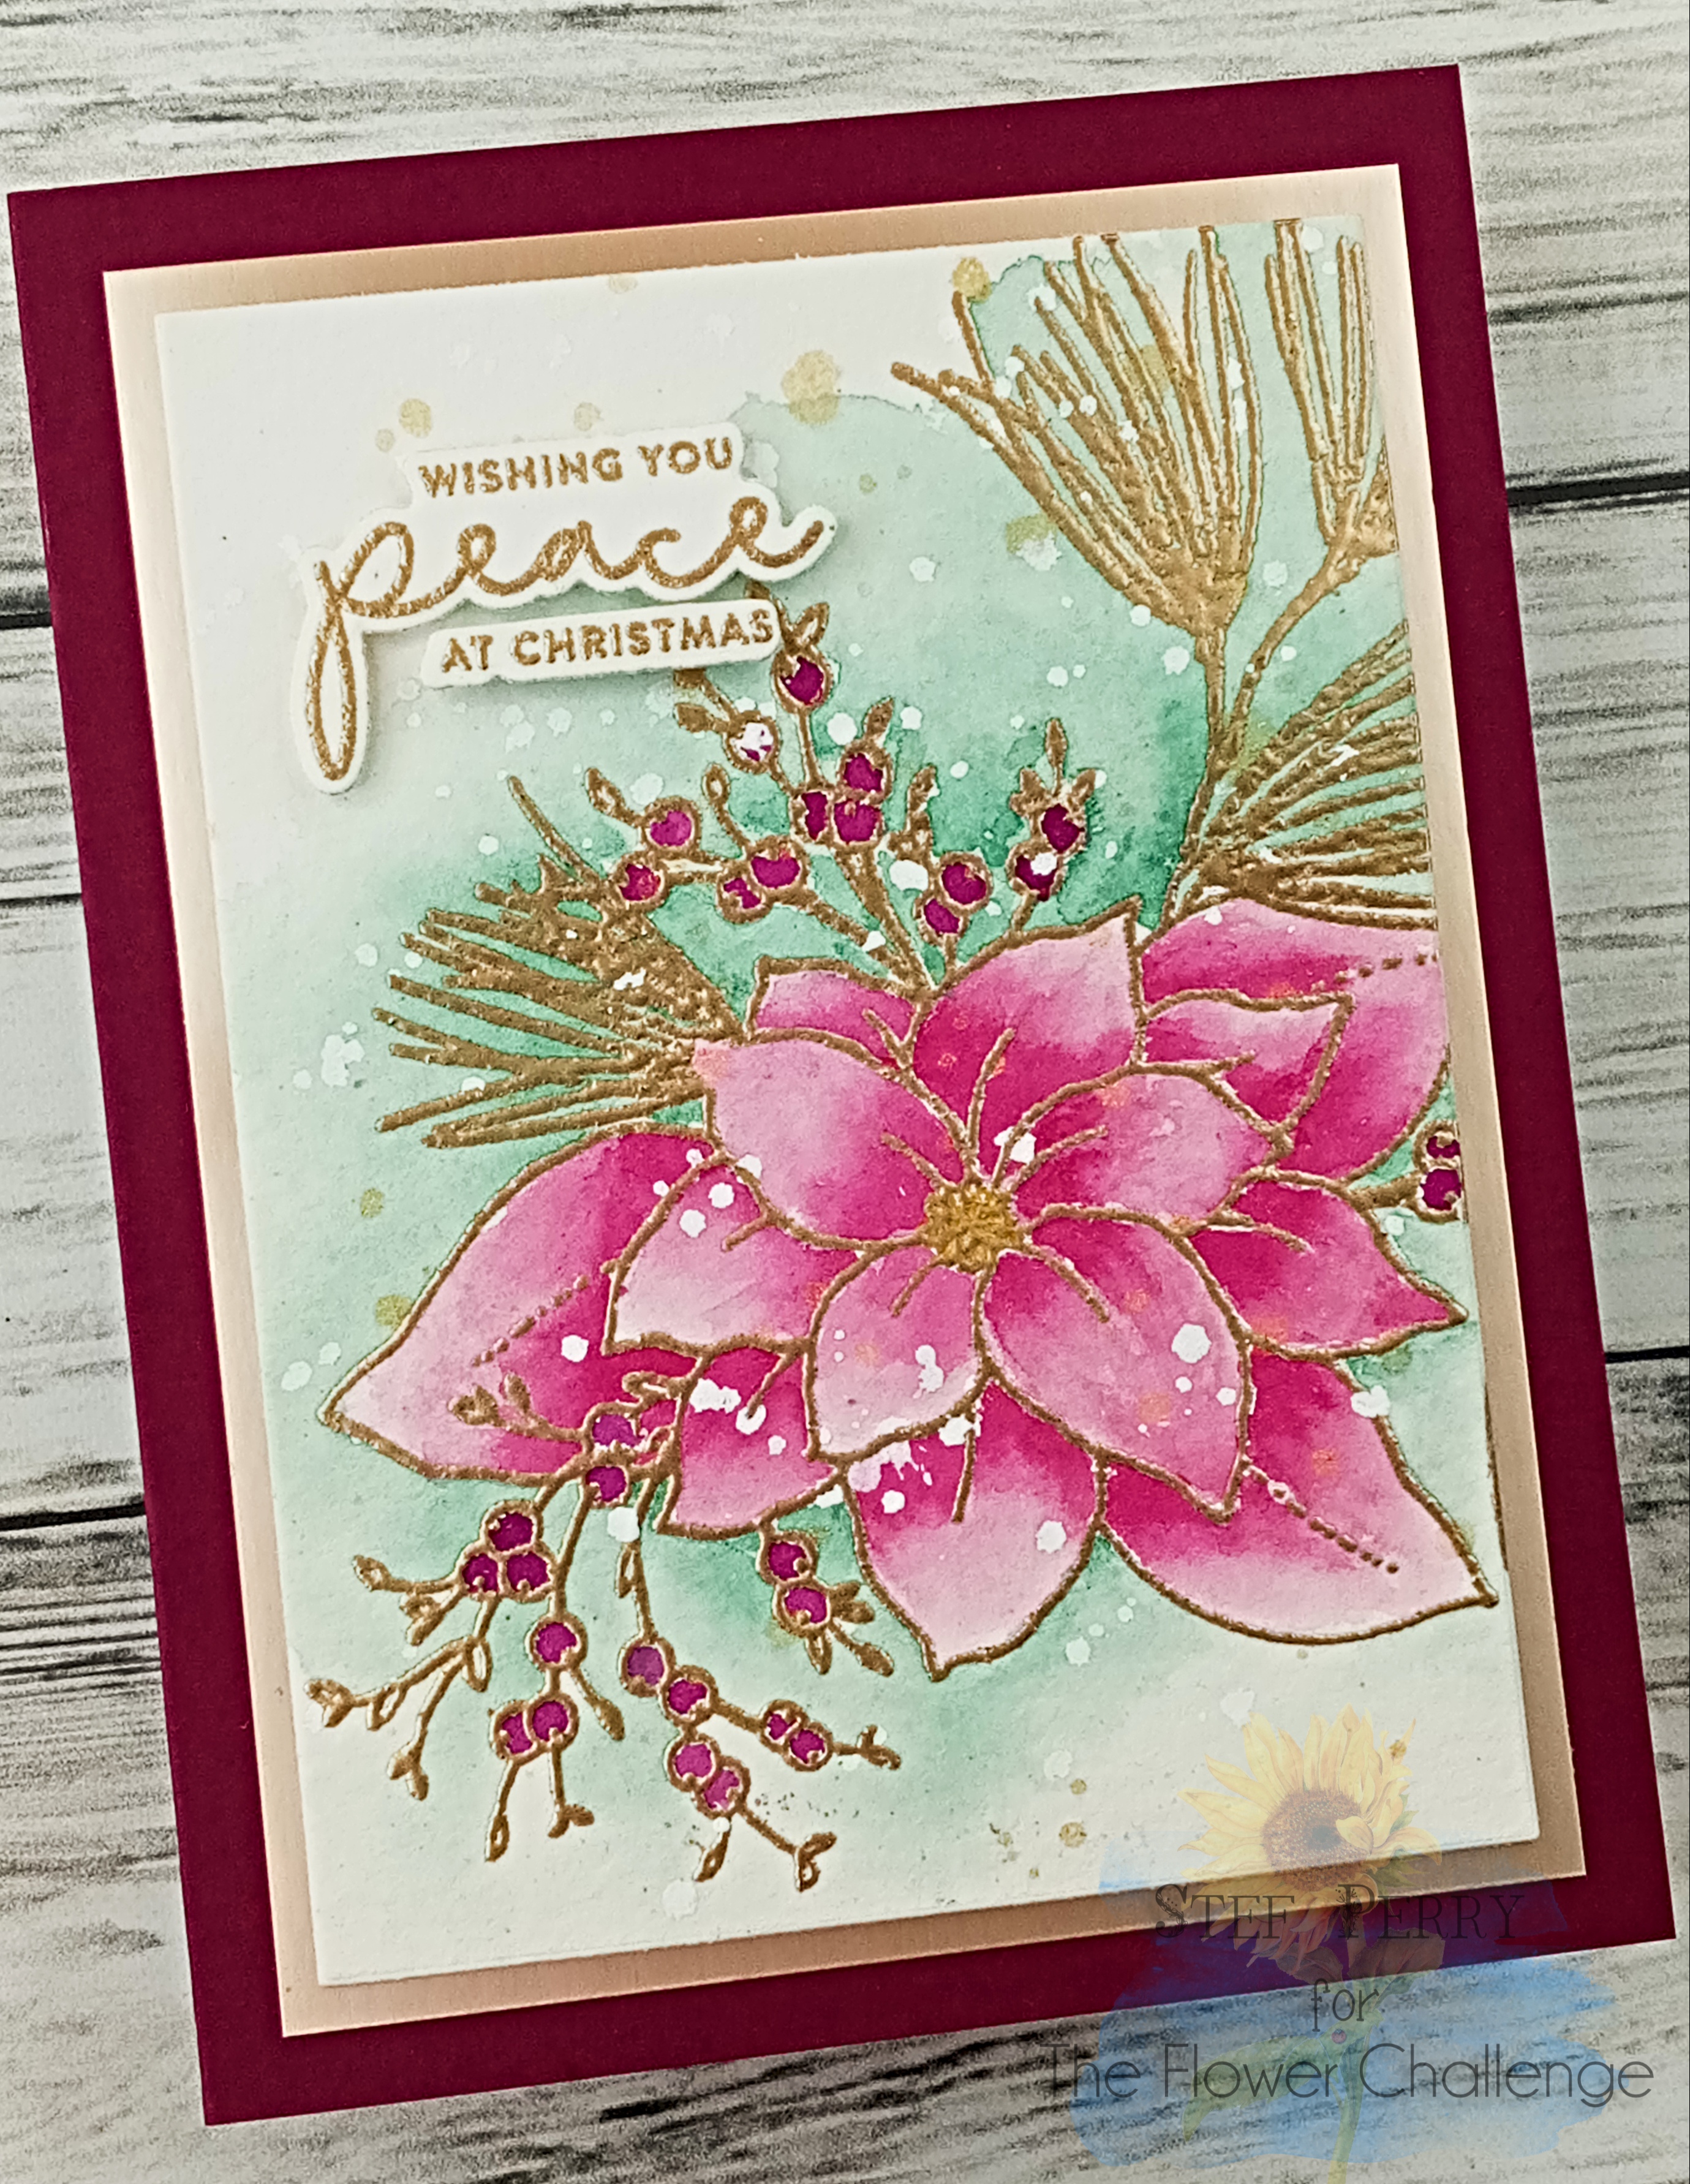
Here's the second card I created, going a completely different direction. Either way, I ended up with another card to send!  Side note - did you know there is a purple poinsettia?  It's called Plum Pudding and I believe it's a relatively new varietal and not common.


What are you inspired to create with these colors?  Although this is a busy time of year, I hope you'll find a way to carve out some crafty time and share your card with us.  Don't forget there's a prize to be won!  The challenge will close at 9 am EST on Sunday the 29th.  I hope to see your card in the gallery!

Thanks for visiting and happy holidays!

Stef

Card #1 (all products from Simon Says Stamp except where noted)
  • Peaceful Trees stamps and die
  • Simple Peace die
  • A2 Nesting Frames
  • Winter Glitter 6x6 paper pack
  • Altenew Sea Breeze, Tidal Blue, Wisteria and Hydrangea inks
  • Dina Wakely White Glossy Acrylic Spray
  • Hero Arts White Iridescent Shimmer Mist
Card #2
  • Penny Black Scarlet Stamp
  • SSS Elegantly Modern Christmas Stamp and Die
  • MFT Elegant Rectangle Stax die
  • SSS Silver embossing powder
  • Altenew Caribbean Sky ink
  • Copic and Olo markers

Sunday, December 4, 2022

Peace for The Flower Challenge

Welcome friends!  It's time for the final challenge of 2022 at The Flower Challenge.  Appropriately, the theme this time is Christmas.  


**Please note, our challenge will close on the 15th of December and the design team will be off until our next challenge on February 4, 2023.

For my card, I decided to change things up and watercolor rather than use Copic markers.  Now, I say watercolor, but it's very basic as this is definitely a medium for which I need further practice!  So all of you that watercolor proficiently, please be kind when viewing my card lol!


I used a new to me stamp set from Penny Black and heat embossed with Altenew Rose Gold this lovely poinsettia image on watercolor paper.  I primarily used the wet-on-wet technique, adding a second layer to get a bit of shading on the petals, then used a lovely shade of green around the image and some purple mixed with the pink to achieve a kind of plum color for the berries.  


Next the panel was splattered with gold shimmer spray and white acrylic paint.  When dry the panel and a piece of Altenew Brushed Rose card stock were die cut and layered directly onto the plum card base.  The sentiment was heat embossed and die cut, then popped up on foam tape for a little dimension and I was done!  A note about the "at Christmas" part of the sentiment.  It was actually part of a "missing you at Christmas" sentiment, but I just used my Misti and some Scotch tape to cover up the part I didn't want to use, inked it up then removed the tape and stamped.  After it was heat embossed, I used the matching die then just trimmed off the bit where the first part of the sentiment would go. 


The link above will take you to the challenge where you can see all the gorgeous cards by the other DT members and hopefully join us by the 15th!

Happy Holidays to everyone celebrating this month! 

Stef


Stamps:  Penny Black Scarlet, Simon Says Stamp Christmas Blessings
Paper:  Hero Arts Plum, Altenew Brushed Rose, Arches 140lb watercolor
Ink:  Versamark
Other:  Christmas Blessings dies, Altenew Rose Gold embossing powder, Altenew 24 pan watercolor set, Imaginecrafts Gold Shimmer Spray, Dr. Ph Martin's Bleed Proof White paint

Thursday, January 7, 2021

Happy Together

Hello, friends and welcome back!  I'm sharing a card made for three challenges - Just Us Girls (my 2nd entry this week), Inkspirational Challenges and the current Color Challenge at Splitcoaststampers, where Karen has chosen Gorgeous Grape, Granny Apple Green and Coastal Cabana. I also used colors similar to Night of Navy and Mossy Meadow, both considered "neutrals" by Stampin' Up and allowed by the color challenge. 


Pondering what to use as something in my home, I remembered one of my favorite stamps from Penny Black with a row of cactus and succulents.  Since we do have plants, including a large succulent, I thought this would work perfectly.


The image was stamped on a panel of white and colored with Copic markers.  I began with a light shade of the grape color, filling in the background, then using a piece of gauze soaked with Copic colorless blender to add some texture to the background.  Once that dried, I colored the rest of the images in the challenge colors along with navy, mossy green and a gray for the "table" the plants are sitting on.


With the coloring complete I used one of the A7 rectangle dies from Waffle Flower to create a long and thin panel, matted it on a slightly larger piece of Gorgeous Grape and added it to the white card base with foam tape. The base ended up being 4 x 6" which I can mail in a 5 x 7" envelope or make a custom one. 

The sentiment was die cut three times from the grape card stock as well and glued together for some layered dimension.  The sentiment doesn't come with a shadow die, but since it's a solid, I was able to trace around the outside and fussy cut to create my own shadow.  This was adhered to the main panel then a tiny green heart added for the final touch.


Thanks so much for visiting, I always appreciate it!  I hope you are continuing to stay safe and healthy and enjoy the upcoming weekend!

Stef


Stamps:  Happy Together (Penny Black)
Paper:  Neenah Solar White, Gorgeous Grape (SU)
Ink:  Gina K Obsidian Amalgam
Other:  A7 Rectangle dies (WF), Bold Hello die (Simon Says Stamp), Doodlebug Tiny Hearts Sprinkles
Copics:  BG72, 32, 11, 10, YG67, 17, 25, 23, V17, 15, 12, B39, 37, 34, G99, 94, 82, T4,2,0

Thursday, March 26, 2020

Time To Celebrate for Seize the Birthday!

Hello, friends!  It's time for a new challenge at Seize the Birthday! The "toppings" for this challenge is cards for kids, super fun!  Just remember to keep it a birthday theme.


I decided to use a fun Penny Black stamp set with various critters to make a birthday card that will eventually go to our niece's young son.  I began by stamping the images on a 4.5" x 7" piece of Bristol paper with Copic friendly ink, then masking them off so I could ink blend the background sky and green hills.


With the ink blending complete I colored the images with my Copic markers. When the coloring was complete I thought my hills looked a little bare, so I added some grass and a few fluffy bushes in the background.  Separately I stamped and colored the gift down by that cute pooch, fussy cutting and popping it up on foam tape. The polka dots on both birthday presents were colored in with a white gel pen


After trimming down the main panel, the sentiment was stamped, then the panel was layered on a piece of yellow card before adding to the blue card base with foam tape.  The final size of the card ended up being 4.25" x 7".  The last detail was to add some sparkle to the balloons.  I was also going to add crystal glaze to the balloons but I forgot to do that before I took my photos.


Thanks so much for visiting, I really appreciate it!  Be sure to use the link above and join this fun challenge at Seize the Birthday!

Stay healthy and safe!

Stef


Stamps:  Time to Celebrate (PB), Sentiment Sampler (Paper Smooches)
Paper:  Daffodil Delight and Pacific Point (SU), Strathmore Bristol
Ink:  Gina K Obsidian Amalgam, Tumbled Glass, Twisted Citron and Mowed Lawn Distress Inks
Other:  Mini Cloud stencil (MFT), Tonic Nuvo Aqua Shimmer pen, Sakura White Gelly Roll pen
Copics:  W5, 3, 1, 0, N4, 2, 0, B39, 26, 24, 21, YR07, 15, 21, Y28, 08, 02, 00, YG03, 07, 17, 67, G28

Sunday, March 15, 2020

Field of Tulips for The Paper Players!

Hello friends!  Time for a new challenge at The Paper Players!  This week the lovely Joanne is our host with a CAS challenge I am loving!


I'm also joining the current "Use Some Green" challenge at the SSS Wednesday Challenge and the photo inspiration challenge at Addicted to Stamps and More.


For my card I decided to use one of my favorite tulip stamps, taking my color cues and field design from two photos of tulips and the light blue/aqua sky photo in the inspiration piece.


The tulips were stamped across the bottom of a panel of white card with Copic friendly ink.  I started by coloring in the sky with a couple of light blue-green markers and putting in some duller light greens behind the tulips to give the effect of a field, using brighter yellow-greens for the flower stems and petals.  For the flower color, I used a medium fuchsia color, one of my favorites.  After the coloring was complete, the panel was trimmed down to 4 x 5.25" and die cut with the frame die, which was also used to cut the white frame insert.


After adhering the frames and the center piece onto the white card base, I used the sentiment from another stamp set that fit perfectly in one of the smaller scallop rectangles from an A2 scallop die set.  Since the remainder of the card was adhered directly to the card base, I thought giving the sentiment some dimension would provide some additional interest.  Of course, the final touches were painting the tulips with a shimmer pen and then adding just a few jewels, because there should always be a bit of sparkle, IMHO!!


I'm so glad you took the time to visit and I do hope you'll join us at The Paper Players this week for Joanne's wonderful challenge!

Stef


Stamps:  Tulip Queue (Penny Black), Sketch Tulip Bouquet (sentiment, SSS)
Paper:  Neenah Solar White
Ink:  Gina K Obsidian Amalgam, Versafine Clair Nocturne (sentiment)
Other:  A2 Frames die (SSS), Scallop A2 rectangle die (Honey Bee), Bridal Mix jewels (Lucy's Little Things), Tonic Nuvo Aqua Shimmer Pen
Copics:  G46, 21, 20, YG67, 17, 13, RV17, 55, 52, BG000, 0000