Showing posts with label Poppy Stamps. Show all posts

Tuesday, April 1, 2025

Thinking of You for Color Hues

Hello friends!  No fooling, the first of April has rolled around and we have a new challenge at Color Hues! (I apologize for the old groaner, I just couldn't resist.) ;-)  

This time the amazing Jules is hosting and has chosen a delicious color combination.


After enjoying using an older Emily Midgett illustration for our first challenge this year here, I decided to use another one for this challenge.


I started by shading the white flowers with cool grays then moved on to the remainder of the panel.  I can't tell you how much I love this color combination.  I could have used darker orange colors for a little more drama but I went with something a bit lighter, maybe because it's Spring?  I don't know but I like how it all turned out.  I used a lighter shade of teal to color the background, the trimmed down the panel.
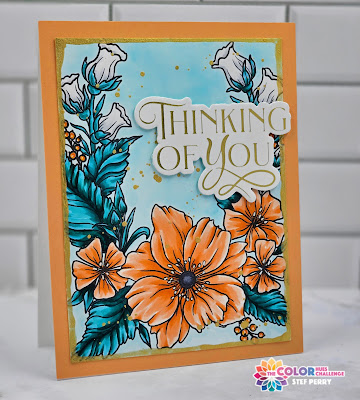
Some gold metallic paint was used around the edges of the panel, and lest you think my hands have gotten shaky, the imperfection was intentional.  I followed that up with some splatter and after it dried mounted it onto an orange panel adhered to a white card base.  I used a white gel pen for the stamen then finished things off with the foiled sentiment from my stash.


Thanks for visiting and I encourage you to head over to the challenge blog where my wonderfully talented teammates and Guest Designer Renate have some spectacular inspiration to share with you.  The challenge will remain open until 9 am EDT Monday 4/14 and we'd love to see YOUR card in the gallery!

Take care!

Stef

  • Emily Midgett Illustrated panel
  • Poppystamps Your Are Amazing Foil & Cut set
  • Gansi Tambi Starry Colors Metallic paint
  • Copics - 
  •    Flowers - YR69, 65, 01, 00 and C02, 0
  •    Berries - YR07, 16, Y17
  •    Leaves - BG78, 49, 45, 01
  •    Background - BG000

Sunday, June 16, 2024

Joyful Day for Color Hues

Hello friends!  Mid-month brings a new challenge over at Color Hues and this time the lovely Marcia has chosen pink and sage.

I'm also sharing with the Time Out Challenge, where the theme is based on this wonderful quote by one of the great Impressionist painters, Henri Matisse. 
 "There are always flowers, for those that want to see them."


And I'm sharing my card at Seize the Birthday for the Anything Goes choice.


No surprise, with the CH colors, I went with leafy branches and flowers, which also worked perfectly with the TOC challenge.


Pinkfresh Studio's new release included those pretty leafy branches, which I couldn't resist (wink, wink).  They were stamped, stenciled with three muted greens, then die cut with the coordinating die.  The sentiment and matching die are from the same set.  One additional die cut was added to the leaf branches and two were added to the die cut sentiment, nice for a bit of dimension and also stability on the die cut background.

Next I die cut several tiny flowers from a Memory Box and Poppystamps die sets and ink blended them in pink.  I used the same pink on the front of the card base, then added the die cut trellis over which I adhered to branches, leaving room for the sentiment.  At first, I just had a few flowers on the branches but kept adding more and more until I'd used almost all of them, and liked how it looked much better.  After they were adhered, I curled up the petals a bit, then added a sparkly gem to the middle of each.  After adding the sentiment, I decided to finish things off with a couple more flowers - why not lol?


What are you inspired to create with these colors?  For more inspiration, be sure to visit the challenge blog, where my wonderful teammates have some fabulous cards to share with you.  The challenge will remain open until 9 am EDT June 29th - hope to see your card in the gallery!

Take care!

Stef

  • Pinkfresh Studio Joyful Day stamps, dies and stencils
  • Memory Box Layered Impatiens
  • Poppystamps Petite Blooms Flower set
  • Altenew Garden Trellis Cover die
  • Altenew Blush Rose, Silver Sage, Jade and Eucalyptus Fresh Dye Inks
  • Honeybee Stamps Aurora Borealis Gem Stickers

Wednesday, June 28, 2023

Christmas Sparkle for Christmas Craft Creations

Hello friends!  For the month of June, the challenge at Christmas Craft Creations is to use heat embossing as the focus of your project.  My card today is for the reminder post - the challenge is open until 11:00 am MDT on Tuesday July 11th.


I'm also playing along with the lovelies at Inkspirational, where the current challenge is to emboss your background.


I don't know about you, but I have what I wouldn't call a "bad" habit (although my wallet may disagree lol!) but a tendency to get carried away after seeing all the new beautiful Christmas crafting supplies that are released every year and buying more than I use in a season.  The stamp I used today is one of them.


The snowflakes are part of the beautiful Snowed In Background stamp from Taylored Expressions and because it is red rubber, I easily got beautiful results despite the intricate detail of the snowflakes.  It was stamped with Versamark onto aqua paper then silver heat embossed.  I then inked around the perimeter of the panel with a darker aqua color and once that dried trimmed the panel down to 3.75" x 5".


Next the sentiment, which is from Poppystamps Christmas Sparkle stamp set, was stamped on the aqua paper, silver heat embossed then die cut with a circle die and mounted on a slightly larger circle die cut from matte silver cardstock.  The sentiment was added to the panel with thin foam squares.  The panel was then adhered to a 4" x 5.25" panel of the same silver paper then added to a white card base.  I loved how it looked but thought it could use a bit more sparkle, so I added Ocean Waves crystals to the center of all the snowflakes except the tiniest of them.  I wish I could show you how it sparkles IRL, it looks so pretty, but unfortunately my camera just can't capture that.


Thanks so much for visiting and I do hope I've inspired you a bit, and for even more inspiration to start or add to your Christmas card stash, be sure to head over to the challenge blog where the other design team members have some beautiful cards to share!

Take care!

Stef


Stamps:  Taylored Expressions Snowed In Background, Poppystamps Christmas Sparkle
Paper:  Neenah Solar White, Simon Says Stamp Matte Silver, Concord and 9th Aqua Sky
Ink:  Versamark, Concord & 9th Oceanside
Dies:  Hero Arts Nested Infinity Circle dies, 
Other: SSS Ultra Fine Silver embossing powder, Studio Katia Ocean Waves Crystals

Wednesday, December 28, 2022

Happy Holidays for Christmas Craft Creations

Hello and Happy Holidays, friends!  I'm very excited to announce that I have been asked to join the wonderful design team at Christmas Craft Creations!  If you're not familiar with the challenge, it is monthly beginning on the 2nd Wednesday each month, with a reminder on the 4th Wednesday. 

This month the theme is gnomes and you have until 6 pm GMT on Tuesday January 10th to join the fun and get a head start on building your Christmas card stash for 2023!


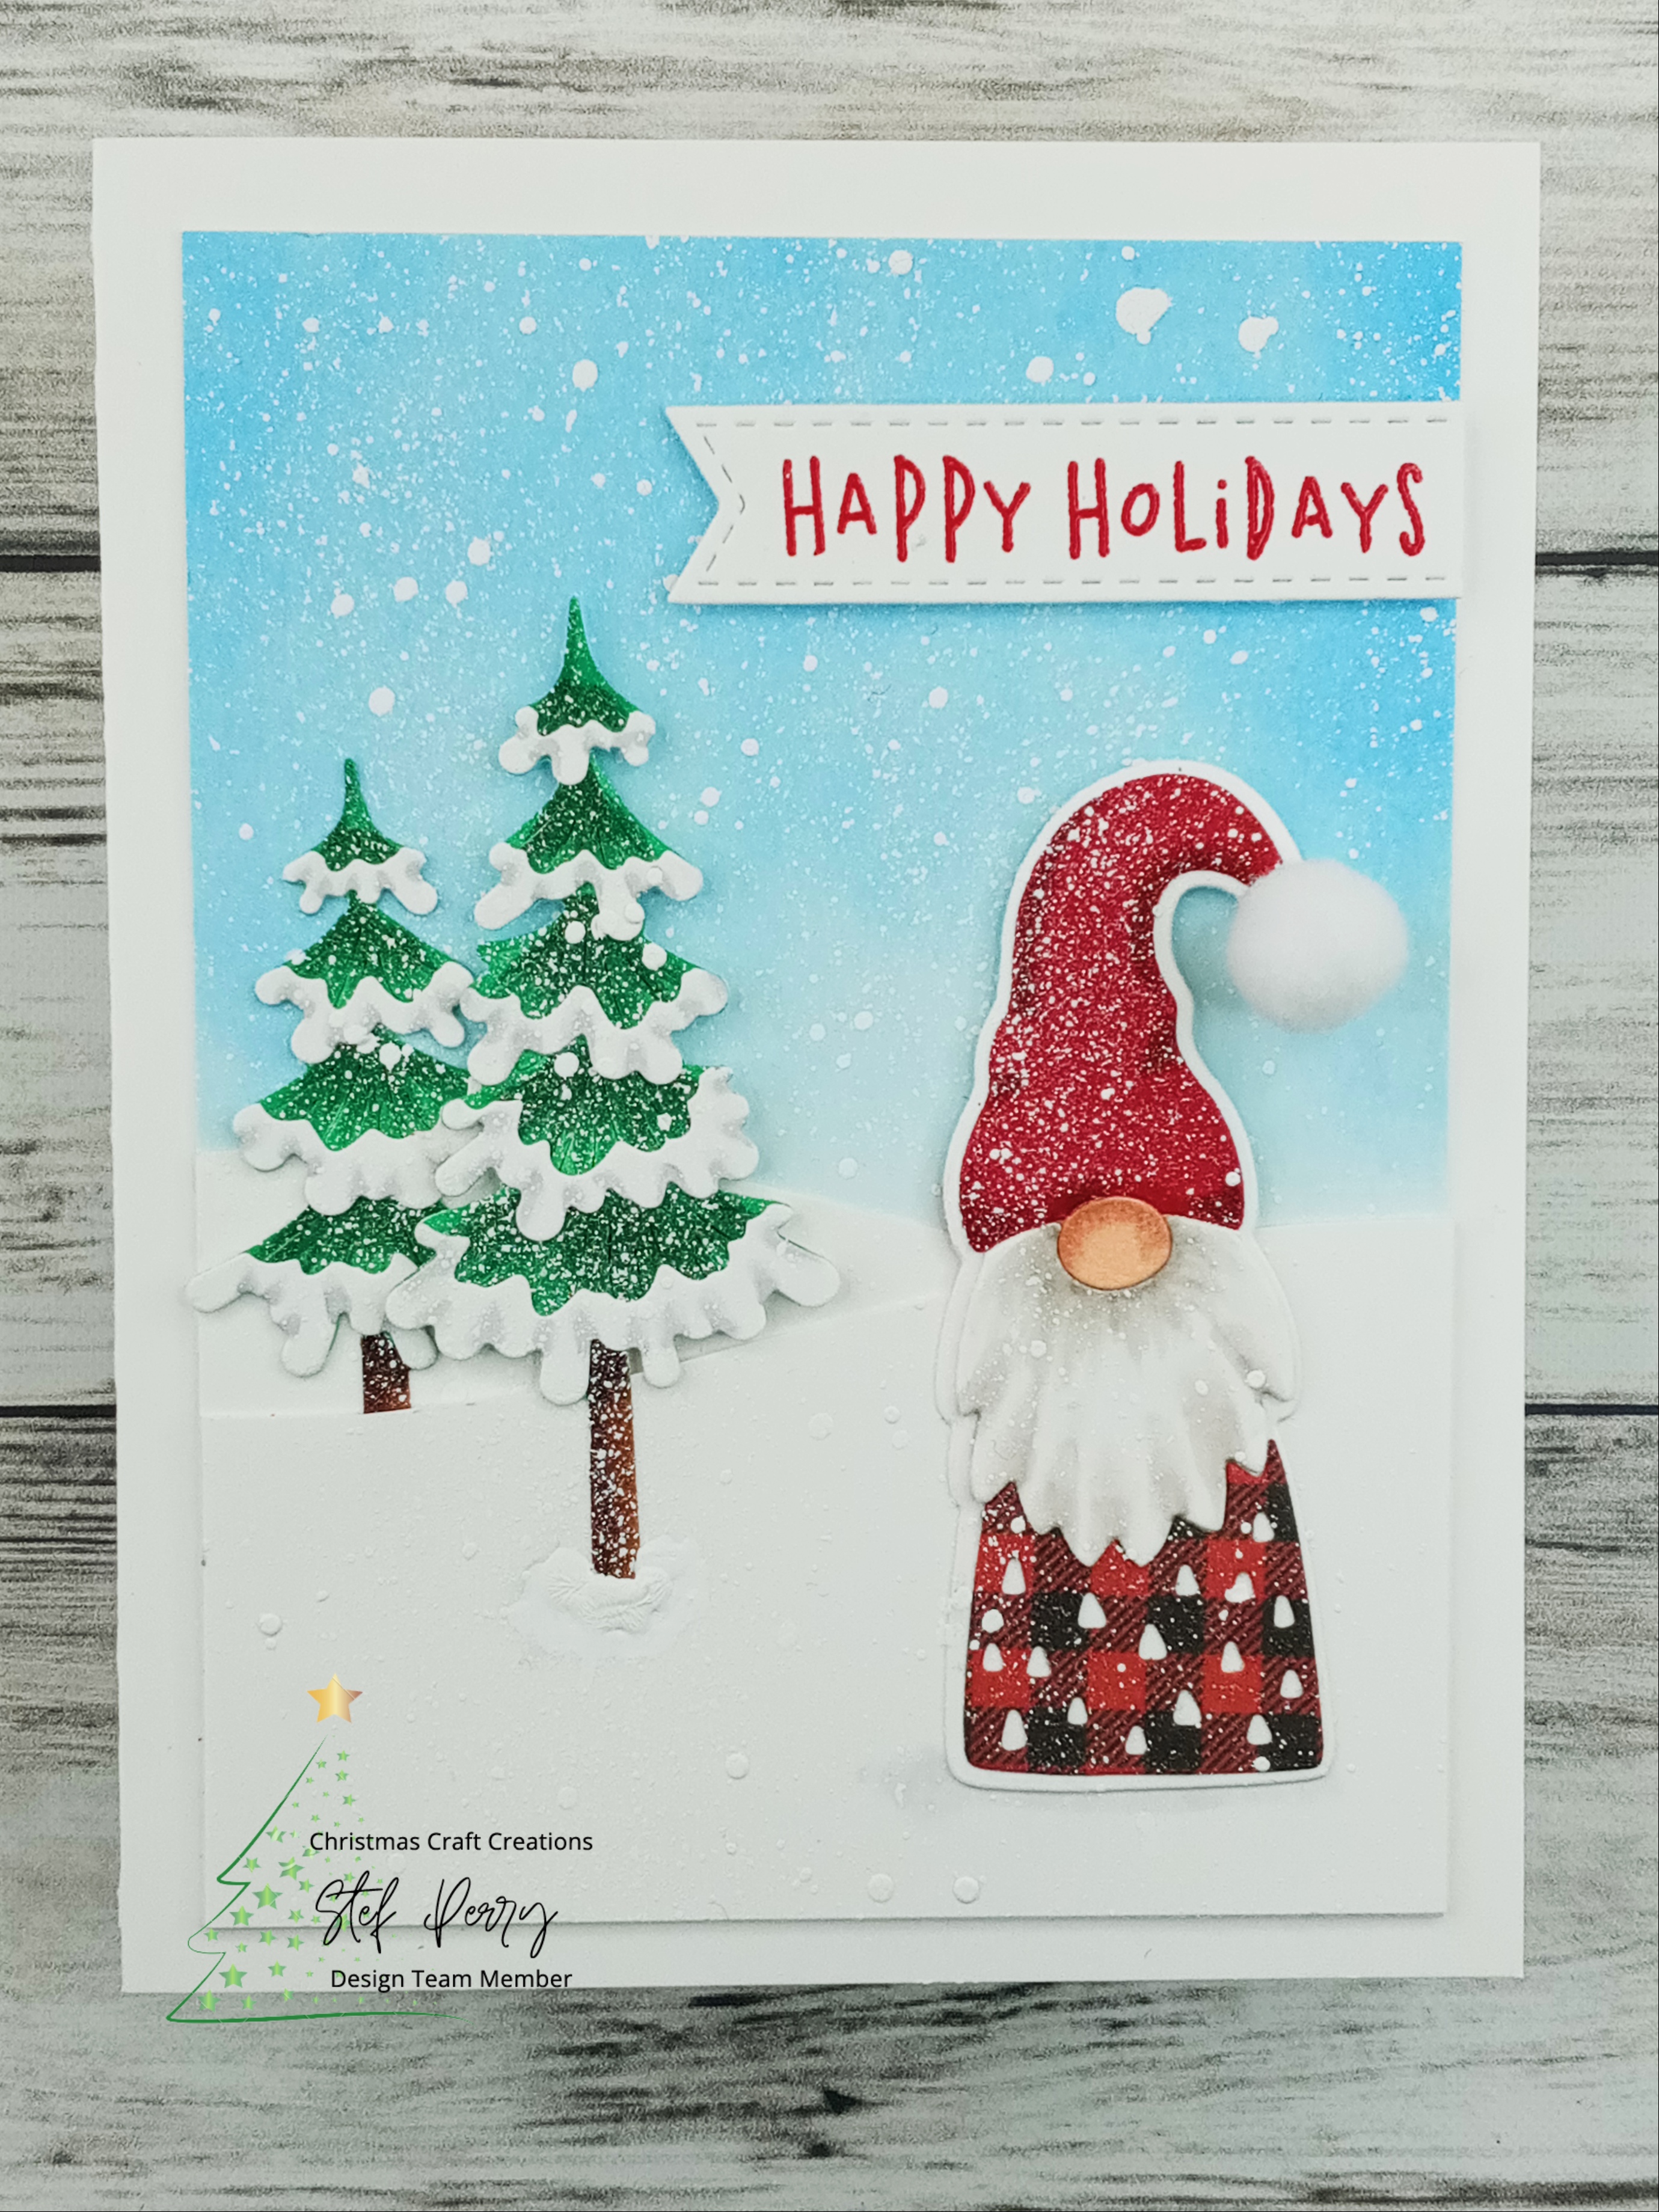
I created a little snowy scene for my Christmas gnome.


Isn't he fun?  I've had this gnome die from Simon Says Stamp for three years, when I used it for a large number of Christmas cards, but haven't used it since then. His outfit was die cut from a scrap of patterned paper and red cardstock.  His nose and beard and the base layer were all cut from white, then I used my Copic markers for coloring.  


I used Marine and Cadette SSS Pawsitively Saturated inks for the background sky, then hand cut the snowy hills to layer on the bottom of the panel.  The trees where die cut from white, colored with Copic markers and added to the panel along with the gnome.  I used white acrylic paint for the snow and while that dried, red heat embossed and die cut the sentiment.  When everything was dry, the panel added to the white card base, the sentiment adhered with thin foam squares and lastly I added a cute white pom-pom to the gnome's hat.


Thanks so much for stopping by, I appreciate it!  Please do use the link above to see all the super cute gnome cards by the other DT members and hopefully join in the fun this month!

Take care!

Stef


Stamps:  The sentiment is from an older My Monthly Hero card kit that's no longer available
Paper:  Neenah Solar White, Stampin' Up Real Red, patterned paper from my stash
Ink:  Marine & Cadette, Versamark
Other:  SSS Lil Gnome water dies, Poppystamps Iced Pine Trees dies, MFT Essential Stitched Sentiment Label die, white pom-pom, Dr. Ph Martin's Bleed Proof White paint, Gina K Red Hot embossing powder
Copics:  E13, 11, 00, R59, 46, W3, 1, 0, C2, 1, 0

Sunday, September 4, 2022

Poinsettia Christmas for The Flower Challenge

Hello friends!  Today I'm sharing my design team card for The Flower Challenge.  This month our theme is sparkle and I hope you'll join us!


This is my second blog post today - you can view my fall themed DT card for Sunday Stamps here.

I'm also joining the current Time Out Challenges where the theme is Festive, Addicted To Stamps and More for their Christmas challenge and the CAS Christmas Card Challenge with a September theme of Sparkle.


I decided to create a Christmas floral and let the sentiment provide the sparkle.


I used three of the lovely poinsettia stamps from Waffle Flower, stamped and colored with Copic markers.  I also added some silver to the flower centers and the little berry branch with a gel pen.  Before die cutting with the matching dies, I popped the stamped panel back into my Misti, where I'd left the stamp and restamped, this time with black pigment ink.


I used a large panel of Bristol paper, ink blending around the edges with Salvaged Patina Distress Ink, then using Transparent Texture paste through a snowflake stencil along the bottom third.  When that dried, it was just too transparent, so I lightly swiped a white pigment ink pad across the raised portions to help it stand out just a wee bit more.  The sentiment was die cut twice from white cardstock then once from silver glitter and layered together for dimension.  After the background was dried, trimmed down to 4.5"x 6" and adhered to a white cardbase, the flowers and sentiment were added.  The last bit was to add a few snowflake embellishments.


I'm so glad you stopped by and I do hope that you'll join us this month at TFC, you have until the 25th of September.  In the meantime, do be sure to use the link above and look at all the beautiful cards created by my fellow DT members.

Take care!

Stef


Stamps:  Poinsettia (WF)
Paper:  Neenah Solar White, Koh-I-Nor Bristol, Silver Glitter (Simon Says Stamp)
Ink:  Memento Tuxedo Black, Versafine Clair Nocturne, Salvage Patina Distress, Shark Tooth White (Ink on 3)
Other:  Poinsettia dies, Merry Christmas Poe Script dies (Poppystamps), Delicate Snowflake stencil (SSS), Texture Paste Transparent Matte (Ranger), Vanilla Sugar Snowflake Embellisments (Trinity Stamps)
Copics:  R59, 39, 35, 37, G28, 27, 03, Y17, 03, BG72, 70, 57, 53, 11

Tuesday, February 15, 2022

Tri-Fold Smpathy card for The Flower Challenge

Hello and welcome!  It's time for our reminder post at The Flower Challenge for this month's theme of Occasions.  If you haven't already, I hope you'll join us - the challenge is open until the 25th of the month.


For my card earlier this month (link is here if you care to take a peek), I made a birthday card.  This time I made a sympathy card, which I hate using, of course, but always want to have on hand.  I ended up making a tri-fold card, using some new-to-me dies from Poppy Stamps.


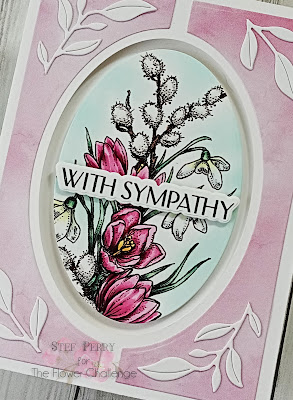
I started out by using my Copic markers to color a digi image from Power Poppy. After the coloring was complete, a light blue ink was blended around the background and in as close as I could get to the image without changing the color of the pussy willows or the snowdrops.  Do you usually have a design in mind when you set down to make a card?  If I'm not using a sketch, I typically wing it after I color my image.  That's probably poor planning on my part, and sometimes I do get stuck, but generally I can work something out.  That's what happened this time and then I thought I'd try out the Poppy Stamps dies.


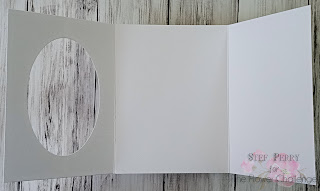
The larger die cut the oval card front plus a half inch tab down the left side.  The tab is intended to be folded and adhered to an A2 panel to create a card.  But since I wanted a tri-fold, I made another white A2 card base, then adhered them all together (photos below give you a better idea).  The die set also comes with an smaller oval to cut out your main image, which I used on the colored panel. A separate coordinating die was used to cut out the patterned paper for each side of the oval and I added some die cut leaves for a little additional detail.  The colored image was added with foam tape, then the sentiment adhered with thin foam squares. 


The photo above shows the card opening and how the colored oval is adhered to the inside.  Below shows the card opened up for a place to write one's message.


Once the die cutting was complete, this card came together fairly quickly.


So glad you stopped by to visit!  Be sure to use the link above to see all the incredibly beautiful cards by the rest of the DT and hopefully join us for this challenge!

Take care!

Stef


Stamps:  Winter Pick-Me-Up digi (Power Poppy), Elegant Sentiments (Waffle Flower)
Paper:  Neenah Solar White, Watercolor Wash 6x6 Paper Pack (MFT)
Ink:  Memento Tuxedo Black, Versafine Clair Nocturne, Dew Drop (Altenew)
Other:  Oval Fold Framd and Tall Curve Background dies (Poppy Stamps), Etched Meadow Flower and Leaves die (SSS), Elegant Sentiment matching die (WF)
Copics:  RV69, 66, 55, 52, G29, 21, 40, YG45, W3, 1, 0, C1, 00, Y26, 17, 13, 00, E59, 57