Showing posts with label Color Challenge. Show all posts

Sunday, April 13, 2025

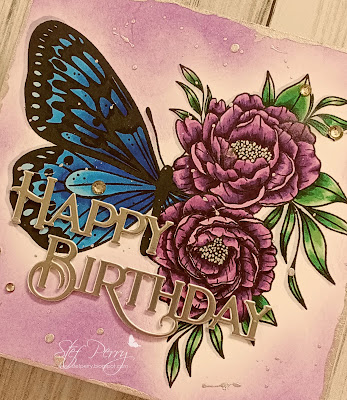
Butterfly Blossoms for the Paper Players

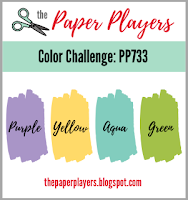
Hello friends!  It's color week over at the Paper Players and I'm hosting.  I chose some Spring-like colors.

I'm also joining in over at the Time Out Challenge.  This time we are to Pick Two, so I'm choosing floral and stencil.


As you could tell from the blog title, I chose to use flowers. I debated about making an Easter card because I think the colors would work equally well for that occasion, but the flowers won out.


The stamp set has three dainty flower stamps and four butterflies, so lots of variety.  I used the coordinating stencils to color the images and the dies to cut them out as well as the sentiment.

I lightly ink blended Salvage Patina Distress ink on a white panel the cut it down with a postage edge rectangle die.  The shorter flowers were adhered directly to the panel except for the largest flower in the group to which I added thin foam squares.  The remaining floral image along with the sentiment and large butterfly were layered on two additional die cuts before adding to the panel.  The right wing of the wee little butterfly was glued down and a small piece of foam tape added a little dimension to the left wing.  It's not visible in the photos but I used an aqua shimmer pen to add glitter to all the images, then finished things off using a white gel pen for the flower stamen.


What do these colors inspire you to create?  I hope you'll show us this week, we'd love to see what you come up with.  Do take a moment to pop over to the PP blog as my teammates have some lovely cards to provide further inspiration.  The challenge remains open until Friday, April 18th at 3pm EDT.  

Thanks for visiting and take care!

Stef

  • Simon Says Stamp Butterfly Blossoms stamps, dies and stencils
  • SSS Postage Edge die
  • Altenew Lemon Ice, Honeydew Glow and Lemonade Stand inks
  • SSS Sprout, Fairway, Field, Lilac, Orchid, Amethyst and Mocha inks
Saturday, March 16, 2024

Best Wishes for Color Hues

Hello friends!  It's time for a new challenge at Color Hues and this time the lovely Carol has chosen a beautiful color combination.

This combo made me think of cream colored flowers so I decided to use the pretty HoneyBee Stamps Lovely Layers: Magnolia for my card.


The flower petals were die cut from ivory cardstock, then I lightly inked the center of each layer and the ends of some of the petals before adhering together.  Originally I ink blended a brown center but I didn't like how it looked so I switched to matte gold.  I mean, can you ever go wrong with metallics lol?!!


Next the large vintage frame was die cut from cornflower blue cardstock and I found the foiled sentiment that had been created in a previous foiling session, which led me to creating this layout.  I had everything layered on the ivory card base but the card needed a little something more, so a panel of ivory was embossed with a beautiful and intricate folder from Paper Rose, then the frame, flowers and sentiment were adhered.  The final step was to add a few gold pearls.


So, what does this color combination bring to mind for you?  For more inspiration, my amazingly talented teammates and our guest designer Steph have some stunning card designs waiting for you over at the challenge blog!  I hope you decide to join us; the challenge will remain open until 9 am EST Friday 3/29.

Take care!

Stef
  • HoneyBee Stamps Lovely Layers: Magnolia and Layering Vintage Labels die
  • HoneyBee Stamps Foil Script: Wishes Hot Foil Plate and die
  • Hero Arts Ivory, Simon Says Stamp Cornflower and Matte Gold cardstock
  • Paper Rose Sweet Vines embossing folder
  • Spellbinders Matte Gold Glimmer Hot Foil
  • SSS Morning ink
  • HoneyBee Stamps Metallic Mix Pearl Stickers


Sunday, March 3, 2024

May It Be Happy

Hello friends!  Today I'm sharing a card that I made for the current color challenge at Color Throwdown.  The colors were too pretty to pass up and I actually had time this weekend to just play.

I'm also joining in over at the Simon Says Stamp Wednesday Challenge where this week's theme is Anything Goes.

I combined some new products with an older cover die to create my card.


I recently obtained the HoneyBee Stamps Lovely Layers: Rose die set and it seemed to fit the bill perfectly for the challenge colors.  All the components were die cut from white cardstock then ink blended.  The pinks were as close as I could get to rose and the green inks are definitely in muted, sage-like colors.  I also ink blended a white panel in pink.


The background element was die cut from Stampin' Up Merry Merlot cardstock using a retired cover die from Simon Says Stamp.  After adhering it to the pink inked panel, it was added to the card front.  With such a busy background I needed a place for the rose to be grounded, so a scallop circle was die cut from white, layered on the card, then the rose was attached.  It's a different kind of die from what I'm used to in that the bloom, bud and the leaves are all separate components, but they line up perfectly of course.  After layering on the sentiment, I added a few pink gem stickers for some sparkle.


Thanks for visiting and I hope you'll have a chance to swing by tomorrow when I post my card for the March challenge at The Flower Challenge!

Take care!

Stef


  • HoneyBee Stamps Lovely Layers: Roses and Be Still stamp and die
  • SSS Marilyn Full Card Cover die
  • Hero Arts Scallop Circle Infinity die
  • Altenew Silver Sage, Jade and Eucalyptus inks; Concord & 9th Carnation and Sweet Pea inks; SSS Carbernet ink
  • HoneyBee Stamps Vintage Love Gem Stickers

Friday, March 1, 2024

Framed Florals for Color Hues

Hello friends and hello to March 1st too!  As usual, the weeks and months are flying by, with today being the start of our new challenge at Color Hues.  This time, sweet Tracey has chosen a lovely combination of turquoise and green.


I decided to pair up my new Altenew Acrylic Markers with two floral stencils and make two cards.


When the acrylic markers first came out, I saw a Jennifer McGuire video where she paired them with stencils and I thought it looked fun and easy to do, so I used her technique with these two floral stencils.  I started stenciling on white cardstock, but realized the colors would pop even more on black.  As Jennifer showed in her video, I just traced around the edge of the leaf or petal in the stencil then filled in the middle.  It went pretty quickly so that's why I ended up making two cards.

After I created these cards, Altenew held an IG hop on 2/16 with lots of inspiration, so if you're interested you can check it out at @altenewllc.


For this first card, the stenciled image is so large that I ended up creating a 5.75" x 4.5" card, which can be mailed in an A6 envelope.  I created a thin frame from matte silver cardstock and added it to the main image that had been adhered directly to the card base.  The sentiment is one left over after a foiling session using some of my Betterpress plates and I finished things off with some iridescent clear drops.


The colored panel for the second card was trimmed down and adhered behind a thick frame cut from the same matte silver cardstock using two sizes of rectangle dies, then added to the black card base with foam tape.  The silver sentiment and vellum shadow were added along with some Aurora Borealis gem stickers from Honeybee Stamps.


What will you create with these two colors?  We'd love to have you join us but before you run off to your craft room, be sure to take a peek at what my amazingly talented teammates and guest designer Tenia have created for your inspiration!  

Thanks for stopping by.  Take care!

Stef

Card #1
  • Gina K Bold Bouquet stencil
  • You Are Everything Betterpress Sentiments & Dies
  • Spellbinders Black Glimmer Hot Foil
  • Neenah Solar White, Hammermill, Hero Arts Pitch Black and Simon Says Stamp Matte Silver cardstock
  • SSS A2 Thin Frame die
  • Hero Arts Nested Rectangle die
  • Altenew Acrylic Markers
  • Pinkfresh Studio Iridescent Clear Drops
Card #2
  • SSS XL Rose Bouquet Stencil
  • SSS Big Scripty Hugs dies
  • Altenew Acrylic Markers
  • Hero Arts Pitch Black and SSS Matte Silver cardstock, Lawn Fawn Pearlescent Vellum
  • Hero Arts Nested Rectangle dies
  • HoneyBee Stamps Aurora Borealis Gem Stickers

Friday, February 16, 2024

Cosmos Birthday for Color Hues

Hello friends!  It's time for a new challenge at Color Hues and this time I am hosting.  I chose a color combo that I don't normally use but thought it would be lovely as we are heading towards spring, or at least away from the worst part of winter (fingers crossed!).

As a reminder, use the hues of color you have on hand that are closest to the challenge colors and have fun creating!

I'm also playing along with the Anything Goes part of the current challenge at Seize the Birthday.


For my card, my "mint" green appears a bit more green in the photos but the ink I used were definitely on the "minty" side. Oh well, what can you do? (maybe breakdown and get a new camera lol!)


I decided to dust off my Betterpress and use it with a relatively new-to-me press plate and matching stencil set.  It was pressed in black ink on watercolor paper, then I used three colors of lilac and mint green inks to create some shading and variation of colors.  Then I took the lightest mint green and gently added it to the panel with a blending brush, while avoiding the flowers, to soften the bright white background.  

For the flower center I initially used a light touch of gray ink but I came back later to change things up but adding Distress Sparkle Texture Paste, which dries clear but made the centers look almost like they were covered with silver glitter.


While the sparkle paste dried, I die cut the sentiment from matte silver and also more from black cardstock for layering.  I debated about adding vellum behind the sentiment but decided not to, so it gets a bit lost in the photos, but looks very prominent in person.  

When the panel dried, it was cut with a rounded rectangle die and layered on black cardstock.  My intent was to mount it as is to a black card base but decided to add the layer of light lavender cardstock and it looked so much better.  After adhering the sentiment, I finished up by adding some pretty Aurora Borealis sticker gems for even more sparkle.


I hope these colors inspire you to head to your craft room, but before you do be sure to visit the challenge blog and see all the gorgeous cards created by my amazingly talented teammates!  The challenge will remain open until 9 am EST February 28th.

Take care!

Stef

  • Spellbinders Cosmos Backdrop Betterpress Plate and Stencil
  • Poppystamps Happy Birthday Poe Script die
  • Hero Arts Rounded Rectangle die
  • Distress Watercolor, Hero Arts Pitch Black and Simon Says Stamp Lavender cardstocks
  • Simon Says Stamp Lilac, Orchid, Amethyst, Spring, Dublin and Lucky ink pads
  • Distress Sparkle Testure Paste
  • Honeybee Stamps Aurora Borealis Gem Stickers

Thursday, February 1, 2024

Flat Shaker Valentine for Color Hues

Hello friends!  I'm here with my card for the new challenge at Color Hues!  This time the lovely Sheri has chosen red and pink, so perfect for those making Valentine cards, but would certainly work for many other occasions.

And how about our new badge? I think it's a wonderful way to reflect what the challenge is all about.  Also we have the talented Bobby Hagen joining us as guest designer!

I'm also joining my friends over at Just Us Girls, because their colors for this week's color challenge are also red and pink.


This time I tried something new - making a flat shaker!  It's not edge to edge but it still has lots of sparkly goodness when you shake, shake, shake it!


I started with the stencil, using a light pink ink on white cardstock, then applying the same ink to blend around the edges, darker on the outside and lighter in the middle.  I cut some old packaging to size, put Score Tape on the back of the stenciled panel, wrapped the acetate around three sides, waiting to seal the fourth side until after adding the clear sequins.


Next I put double sided adhesive on the back of a panel of Rich Red Matte cardstock, then die cut the sentiment.  This alleviated the problem with glue smearing on either the acetate or the metallic paper when adhering to the front of the shaker.  It was then layered on a slightly larger panel of the red metallic cardstock, adhered to the white card front, with the final touch of adding the red sparkly heart.  This was so easy to do and it's a great way to use up my sequin stash, which isn't large, but I don't use them as on my cards very often anymore.


I look forward to seeing what you make with this color combo!  Be sure to take a look at the beautiful cards created by our guest designer and the other DT members and hopefully are inspired to join us.  The challenge will remain open until 9 am 2/14.

Take care!

Stef


  • Simon Says Stamp Hugs & Kisses die, Hero Arts Nested Rectangles
  • SSS Heart Blooms stencil
  • SSS Bubblegum ink
  • SSS Rich Red Matte metallic cardstock
  • SSS Rainbow Splash Sparkly Hearts, Pretty Pink Posh Sparkling Clear sequins

Tuesday, January 16, 2024

Greenery Swag for Color Hues

Hello friends!  How has your January been treating you thus far? It's been plenty cold here with lots of snow, and I know much of the United States is feeling the chill too!  But if we are bundled up in the house, we might as well craft, right?  

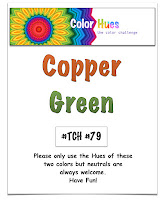
And, just in case you need some crafty inspiration, today is the start of a new Color Hues Challenge and the lovely Karen has chosen a beautiful combo of green and copper. 

I love these colors together and decided to use them for an addition to my depleted birthday card stash.


I combined some older and newer dies, all from Simon Says Stamp.  I started with the background, using the Pincushion Plate with a panel of dark green cardstock.  It adds a lovely bit of embossed detail along with cutting all the tiny holes, which you can see more clearly in the photos below.  I was tempted to back it with a copper metallic panel but it looked too dark, so instead it was adhered directly to a white card base.


The sentiment and the berries were both cut from that copper metallic paper and then I used a lighter green for the swag, topping that with some white flowers.  The sentiment was added to the vellum shadow die before adhering to the card front, then I added the swag.  Lastly I used some beautiful gem stickers that have that same coppery hue and they really sparkle in the light.  Such an easy-peasy card to pull together, I think I need to make a few more birthday cards like this to have on hand.


I hope my card has provided a bit of inspiration and for even more, you must go take a look at what the rest of the amazingly talented design team created with these colors!  We'd love to have you join us, you'll have until January 28th at 9:00 am EST to play along.

Take care and stay warm!

Stef


All products are from SSS except where noted otherwise
* Greenery Swag dies
* Pincushion Plate die
* Big Happy Birthday dies
* Concord & 9th Evergreen and Parsley cardstock, Lawn Fawn Pearlescent Vellum and Tonic Copper Statin Effect Mirror card stock
* Honeybee Stamps Marvelous Moments Gem Stickers

Thursday, November 16, 2023

Bountiful Berries for Color Hues

Hello again!  It's time for a new challenge at Color Hues and this time the lovely Jules has chosen two colors that are perfect for the holidays...or not, it's up to you!


My choice was to go with Christmas and here's what I made...


My relatively CAS card started with embossing a panel of white with the Simon Says Stamp Twining Berries 3D folder.  Sorry the photos don't due justice to just how deep and pretty the images of berries on vines are.  Next, I used a rectangle die for the gold layer, die cutting out the center before layering on the embossed panel, because no one will ever know, except you lol!


The gold leaves and red berries were created using the Bountiful Berries die.  The SSS Arching Spruce Sprig die provided the brown twigs - I just cut all the branches off the large sprig so I could use them more selectively.  The sentiment was red heat embossed, die cut and added to the card front, with the final touch adding some beautiful red gems from Picket Fence Studios.  I actually ended up making five more cards just like this, substituting a red card base rather than the fancy gold frame.


This is such a lovely combination of colors, I do hope you're inspired to join us for this challenge!  For more inspiration, take a look at the stunning cards by my talented teammates and our wonderful guest designer Claire over at the CH blog.  We'd love to see what you create!  The challenge will remain open until 9 am EST Tuesday 11/28.

Take care and have a crafty day!

Stef


Stamps and Dies:  SSS Graceful Holiday Greetings Bundle, Bountiful Berries die and Arching Spruce Sprig die; Pinkfresh Studio Folk Edge Rectangle die
Embossing Folder:  SSS Twining Berries
Paper:  Neenah Solar White, SSS Matte Gold and Rich Red Metallic, C&9 Nutmeg
Other:  Gina K Red Hot embossing powder, Picket Fence Studios Candy Lane Gem Mix

Saturday, November 4, 2023

Bouquet Birthday for The Flower Challenge

Hello friends!  I'm back with my DT card for the latest at The Flower Challenge!  This month we're using the colors black, yellow and white for our floral themed cards.

For my card, I decided to break out my Spellbinders Betterpress and use press plates for both my floral image and sentiment.


The images were pressed on a Spellbinders Porcelain Cotton card panel with the recommended black ink.  It's always such a treat to see how perfectly these images come out.  Because alcohol markers cannot be used with the Betterpress inks, I opted to watercolor the panel.


I decided the easiest route was a loose watercolor using Distress reinkers.  I wet down the panel with water then dropped in very diluted Squeezed Lemonade with my larger paintbrush, covering most of the panel. Next came diluted Fossilized Amber for the flowers, then Wild Honey for the stamen in the largest flower.  When it dried, I trimmed it down to 3.5" x 4.75", layered it on a slightly larger panel of black, then added to the white base with foam. A few black rhinestones finished things off.


We would love to see how you decide to use these colors - I hope you'll join us this month!  In the meantime, if you visit the challenge blog, you'll see that my very talented teammates have a wide variety of cards to inspire you!  The challenge will remain open through Saturday, 11/25.

Take care!

Stef


*Spellbinders Pressed Bouquet and A Little Message Sentiments Betterpress Plates

*Spellbinders Betterpress Black ink; Squeezed Lemonade, Fossiled Amber and Wild Honey Distress Reinkers

*Spellbinders Porcelain Cotton Card Panel, SU Black cardstock, Neenah Solar White cardstock

*Honey Bee Obsidian Rhinestones

Tuesday, May 16, 2023

Vintage Birthday for Color Hues

Welcome back, friends!  It's time for a new Color Hues challenge and the lovely Julie Beech has chosen the combo of orange and slate gray.


When I saw this color combo I knew exactly what I wanted to use for my card.  Let me take us back a few decades....


...back to those ancient times before computers lol!  I've had this MFT Typewriter die and sentiment set for a while and was more than ready to play with it.  All the parts/components were die cut, some  multiple times, with orange, slate gray, white, black and silver card stock. Of course that meant I had enough for two typewriters and two cards.  The dies include one for the sheet of paper to be inserted in the typewriter, so I stamped in black ink the two different sentiments on white cardstock, then die cut them out.


For the remainder of the card, I wanted kind of a graphic background.  First I stamped the Sketchy Lines Background stamp in gray ink, then die cut that panel and the orange panel with dies from Altenew's Mix and Match Frames die set.  Both layers were adhered to the white card base, the sheet of "typed" paper inserted in the typewriter and adhered on the back, then I used foam tape under the top part of the typewriter and glue for the lower part to add them to the card fronts and I was done.


Thanks for stopping by! And if you're looking for more inspiration with these colors, head on over to the challenge blog, where the endlessly talented design team will not disappoint.  I hope to see your card in the gallery - you have until 9 am May 28th to play along. 

Take care!

Stef


Products used today:

Stamps - MFT Typewriter Sentiments:  Friendship, Simon Says Stamp Sketchy Lines Background
Paper - Neenah Solar White, SSS Slate Gray, Black and Matte Silver, SU Pumpkin Pie, Concord & 9th Clementine
Ink - Altenew Obsidian pigment ink, SSS Charcoal
Dies - MFT Typewriter, Altenew Mix and Match Frames

Monday, April 25, 2022

Sketched Rose Wreath for the SCS Color Challenge

Hello friends!  It's my final week as guest designer for the Color Challenge at Splitcoaststampers.  This week we are playing with a lovely, soft combination of Blushing Bride, Soft Succulent and Sahara Sand.  The dessert option is to add gems or enamel dots.  A BIG thank you to Mary and the team for inviting me back to GD, it was such a pleasure!


To begin, I lightly stenciled a design on a panel of white using Fog ink, which is a warm gray, similar to Sahara Sand.  The panel was trimmed down and adhered to a slightly larger panel of Sahara Sand.  The wreath, flowers and single leaf were foiled in gold, die cut with the matching die then colored using Copic markers.


The wreath was die cut two more times from thick white cardstock, then layered together with the colored piece.  The panels were adhered to the white card base, then the wreath was added along with the gold foiled sentiment.  Some pearls with kind of a gold hue worked to finish things off!


I'm so glad you took time to stop by!  If you'd like to see the DT members beautiful creations or play along with the color challenge, you can use this link to Splitcoaststampers.

Take care!

Stef


Stamps:  None
Paper:  Neenah Solar White, Hammermill white, Sahara Sand (SU)
Ink:  Fog
Other:  Sketched Rose Wreath Foil Plate and Die set (Simon Says Stamp), Everyday Sentiments II foil plate (Spellbinders), Gold Glimmer Hot Foil (Spellbinders), Fanfare Stencil (SSS), Skinny Sentiment Strips die (MFT), Soft Jellybean Mix Pearls (Lucy's Cards)

Monday, April 18, 2022

Butterfly Birthday for the SCS Color Challenge

Hello and welcome!  I'm in my third week of guesting with the fabulous Color Challenge team at Splitcoaststampers!  This week, my dear former teamie Karen has chosen some vibrant colors for us to play with - Gorgeous Grape, Pacific Point and Pear Pizzazz.  I was a bit thrown by Pacific Point at first, but figured out a way to use it that I really love, and I hope you do too!

I'm also joining the current challenge at Festive Friday.  I used blue, rhinestones and die cuts from the Inspo List.


Because the image I stamped and colored was so large, and I didn't want to trim it down, the card ended up being five inches square.


Such an amazing stamp and the challenge colors worked beautifully with it.  It was colored with Copic markers, then I inked blended around it with a vibrant Distress Oxide ink called Villainous Poison, which as you can imagine was released last fall just in time for Halloween.  I tried to color the stamen gray but it was too blah, so I used my silver gel pen instead.  And that led me to use more silver for the sentiment die cuts and some metallic ink as well.


After the ink blending was complete, I used a metallic paint/ink around the edges of the colored panel, then decided to add some splatter.  I had a couple of large "bloops" that I had to try to clean up and eventually covered up one with the strategic placement of a crystal gem.  After the paint dried, the panel was adhered to the white card base, then the sentiment (which was die cut and layered 3 times) was added along with the gems.  


I'm so glad you took time to stop by!  I've added a link above to the Splitcoaststamper's front page from which you can access the Color Challenge to check out all the great inspiration and play along this week.

Take care!

Stef


Stamps:  Spread Your Wings (Gina K Designs)
Paper:  Neenah Solar White, Matte Silver (Simon Says Stamp)
Ink:  Memento Tuxedo Black, Villainous Poison Distress Oxide
Other:  Happy Birthday Poe Script dies (Poppystamps), Silver Mica Ink (Kuretake), Silver Gel Pen (Altenew), Crystal Collection-Night Sky (Lucy's Cards)
Copics:  V09, 17, 15, 12, G29, 21, 40, YG45, B28, 26, 24, 21, C2