Wednesday, January 27, 2021

Wisteria Birthday

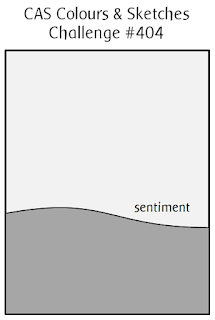
Welcome friends!  I've had a fun week playing along with lots of challenges, and this is my 2nd post for today.  For this card I used the great sketch from the current CAS Colours & Sketches Challenge.  I'm also joining Seize the Birthday with my "anything goes" entry and the current Simon Says Stamp Wednesday Challenge where this week's theme is "anything goes".


I was doing a little search through all my 6x6 paper pads yesterday for use in a different challenge and I found a wonderful pad from Basic Grey (one of a few I still have).  It came out in 2008 and I think I bought it within a year or two of that.  BG is no longer in business so I feel very fortunate to still have some of their beautiful patterned papers to create with.


I thought the Wisteria flowers hanging from a branch followed the sketch almost perfectly, if you flip it.  The colors are so soft and pretty, it really doesn't demand much else to finish a card.  I used an A2 sized deckled rectangle die to cut the patterned paper along with a piece of white card stock and I adhered them together for stability so the panel could be added to the card base with foam tape. The card base ended up being 4.5"x 5.75" so there could be a nice white border around the patterned paper panel.


The sentiment was die cut from white card stock three times and adhered together before adding to the card front.  A tiny pearl was used for the tiddle over the letter "i", then a few more added to dress things up.  And that finished my card.  Pretty quick and easy when you let the paper be the star of the card!


Thanks for visiting, I always appreciate it so much!  I hope you're continuing to stay safe and healthy!

Take care.

Stef


Stamps:  None
Paper:  Neenah Solar White, Wisteria 6x6 Paper Pad (BG)
Ink:  None
Other:  Deckled Rectangle die (Waffle Flower), Script Happy Birthday die (Simon Says Stamp), Basic Pearls (ret. SU)

Thinking of You

Hello, friends!  I've had a stretch of card making this past week and have another card to share with you.  This time it's for the current sketch challenge at The Paper Players using the current Color Hues challenge colors.  I'm also joining the current Simon Says Stamp Wednesday Challenge where the theme this week is Anything Goes.


I love the classic navy and cream combo but wasn't sure how I wanted to use them until I saw Joanne's fabulous sketch, then it all came together pretty quickly.


The colors really reminded me of a dish pattern my grandmother had when I was young, so I decided to go with a rather classic looking floral print, using the Pretty Peonies Background stamp.  It was inked up with blue pigment ink on Ivory card stock (I don't own any "cream" so I hope the Ivory is satisfactory substitute).  Next I used gold metallic paint to color the "berries" in the image. While the paint dried, the sentiment was stamped and heat embossed in gold on a strip of navy card stock.  


To put it all together, a navy panel was adhered directly to an Ivory card base.  Next the floral panel was added to a slightly larger piece of Gold Pearl Mirror paper, then added to the base with foam tape.  I fiddled around with the sentiment strip and finally decided to flip it from the bottom left to the top left of the panel so the gold berries wouldn't be covered up.  It was added with foam tape, then the gold pearl die cut heart adhered to it.  The final step was to added just a few dark sapphire jewels.


Thanks so much for visiting, I really appreciate it!  I hope you're continuing to stay safe and healthy.

Take care!

Stef


Stamps:  Pretty Peonies Background, Delicate Flowers (both Simon Says Stamp)
Paper: Ivory, Soft Navy (SSS), Gold Pearl Mirror (Tonic)
Ink:  Versafine Clair Bluebell, Versamark
Other:  Stitched Rectangle dies, Sentiment Labels die, Nested Infinity Hearts die, Hero Arts Gold embossing powder, Dark Sapphire Mix Jewels (Little Things by Lucy's Cards), Starry Colours Metallic paint (Gansai Tambi)

Sunday, January 24, 2021

Warm Wishes

Hello again!  Yes, this is my third post today LOL!  Scroll down if you're looking for my Sunday Stamps DT card or to see my post for Freshly Made Sketches.

For this card, I am joining the current Inkspirational Challenge, where our card is to be inspired by this fun photo.


For my card, I used a sweet Stampingbella stamp that has been long neglected since I bought it last year, and seems perfect for this challenge.


Isn't she sweet? I colored her with Copic markers in colors inspired by the challenge photo, along with some gray.  I love that stylish coat and fun boots.  The panel was trimmed down and set aside while I worked on the base.  


A panel of white was cut with a pretty cover die that almost looks like snowflakes and layered on the lavender base.  A panel of dark purple and the main image were then added with foam tape and the sentiment added to the front, also with foam tape.  I love how this turned out!


Thanks for visiting, I always appreciate it so much!  I hope you have a great week.  Take care!

Stef


Stamps:  Uptown Girl Quinn and her Boots (Stampingbella)
Paper:  Neenah Solar White, Lavendar and Royal Purple (Simon Says Stamp)
Ink:  Gina K Obsidian Amalgam
Other:  Papel Picado Confetti die (Hero Arts), Copic markers

Wishing

Hello friends and welcome back!  I hope you're having a great day.  I have a card to share that I made for the current challenge at Freshly Made Sketches.


I thought this was a great sketch to highlight a small image, so I pulled out one of the cute foxes from Let's Curl Up to use.


The cutie fox was colored with Copic markers.  I used a warm gray to give her the dark socks on her front feet.  Next I die cut her with the matching die, along with die cutting a stitched circle and the largest of the Love Speech Bubble dies.  The heart cuts out from the middle of the speech bubble, so after using a couple of light red Copic markers to color it, I inlaid it back into the bubble and taped it on the back so it could be popped up with foam tape.


For the card base, I cut three 3/8" strips of woodgrain patterned paper (unfortunately my camera reads blue, the color is really more of a dusky blue-green).  I adhered the bottom one, then stamped the sentiment onto the white base before adding the other two.  Lastly, the circle was added to the base with foam tape, the fox adhered to it and the speech bubble added.  A super quick and easy card!


Thanks so much for visiting, I really appreciate it!  I hope you're continuing to stay safe and healthy, and have a great week ahead!

Stef


Stamps:  Let's Curl Up (MFT)
Paper:  Neenah Solar White, Woodgrain Whimsy 6x6 paper pack (MFT)
Ink:  Gina K Chocolate Truffle Amalgam, Versafine Clair Pinecone
Other:  Let's Curl Up matching die, Stitched Circle die, Love Speech Bubbles die (MFT)
Copics:  E19, YR18, 15, 21, 20, 30, R02, 01, W1, 0

Sending Hugs for Sunday Stamps

Hello friends and welcome back!  It's time for a new challenge and Sunday Stamps.  This week we have a beautiful color board to inspire you.  I ended up using 4 of the 5 colors (red, dark red/burgandy, kraft/tan, and ivory/cream).


I'm also joining the current Simon Says Stamp Wednesday Challenge where the theme this week so "Make Your Own Background".

Initially when I looked at our color board, I wasn't thinking Valentine's Day but when I sat down to create, I was inspired by a stencil and a cover die to go that direction.


Starting with a panel of Neenah Desert Storm, I ink blended white pigment ink through a heart stencil to make the background.  Next, I took a piece of Bristol and ink blended Barn Door and Aged Mahogany to get an ombre effect of dark and medium red.  When the ink dried both panels were die cut with the Chunky Heart Panel cover die.  The craft panel was adhered directly to a white card base, then the red hearts popped up in the die cut openings with foam tape.


Then I had the brilliant idea to use a shimmer pen to paint all the hearts.  Unfortunately it reactivated the red inks way more than I anticipated, so they no longer had a smooth blend.  What I should have done was spray the inked panel with shimmer spray before die cutting.  Hindsight is always so helpful, right? 

By this time I was highly invested in making the card, so instead of it ending up in the waste bin, I made the hearts shiny by covering all of them with Glossy Accents. I am so glad I did, because I think it really made the hearts just POP!  I let the hearts dry overnight and the following day the word "Hugs" was cut 3x from Ivory card stock and once from red foil, layered and adhered to the Ivory shadow.  I added foam tape in between the hearts and adhered the die cut and the "sending" black sentiment strip.  Finally I added a bit of bling with the clear sequins.


Thanks for visiting, I appreciate it sooo much!  I hope you're continuing to stay safe and healthy.  Have a great week ahead and please be sure to join us for our new color challenge!

Stef


Stamps: None
Paper:  Neenah Solar White and Desert Storm, Red Foil (Memory Box), Koh-I-Noor Bristol, Ivory and Thinking of You Sentiment Strips (Simon Says Stamp)
Ink:  Unicorn White (Hero Arts), Barn Door and Aged Mahogany Distress
Other:  Hugs Dies and Chunky Hearts Panel cover die (SSS), Drifting Hearts stencil (Memory Box), Sparkling Clear sequins (Pretty Pink Posh), Glossy Accents (Ranger)

Thursday, January 21, 2021

Merry Days

 Hi friends!  I hope this finds you well!  Today I'm sharing a card made for the current Paper Players challenge, where the lovely Claire is hosting.  It's the monthly CAS challenge and this time the theme is "Snow".  I'm also joining the current challenge at Addicted to Stamps, where it is Christmas week.


So many potential ways to go with the snow theme but snowflakes won out!  


I went through my pile of leftovers from making Christmas cards and found this gorgeous embossed background.  The panel was initially sprayed with Distress Spray Stain and Shimmer Spray, then when dry was embossed with the Filigree Snowflake folder.  I just love the pattern and the shimmer makes it so elegant.  The panel was trimmed down and added to a white card base with foam tape.


The large snowflake was die cut from holographic paper and the shadow from heavy weight vellum backed with double sided adhesive paper.  I first removed the release paper of the vellum and added it to the embossed panel then adhered the snowflake.  The sentiment is from a sheet of sentiments and I trimmed it out with my paper trimmer then adhered it across the snowflake middle with foam tape.  The final touch was to add a few holographic star sequins.


Thanks for visiting, I really appreciate it!  I hope you're staying safe and healthy.  Take care!

Stef


Stamps:  None
Paper:  Neenah Solar White, Silver Holographic (Simon Says Stamp), Grafix Platinum Vellum, CZ Design Reverse Christmas Sentiment Strips (SSS)
Ink:  Dusty Concord Distress Spray Stain
Other:  Sparkle Sheer Shimmer Spray, Dainty Snowflake (SSS), Filigree Snowflake embossing folder (SSS), Oh My Stars Confetti Mix (Trinity Stamps)

Love You Forever for the Tic Tac Toe Challenge

Hello friends and welcome back!  It's time for a new Tic Tac Toe Challenge!  I've created this fun board that I hope spark's your creativity!


For my card I went down the right hand column, although I think we could stretch the definition of CAS and go across the middle as well.


I just love this wreath!  It wonderful for a Valentine or anniversary, but I think you could use any sentiment with it to stretch the number of occasions for its use.  I colored it with Copic markers then it was cut with the coordinating die, which cuts both the center and the outside of the wreath.  I also stamped, colored and die cut the large flower on the bottom left as well as the heart above the sentiment.  A separate panel of white was lightly ink blended with Spun Sugar in the center where then sentiment was then stamped.  Next it was cut with a heart die and adhered to the back of the wreath. 


Next three more wreaths were die cut and adhered to back for greater stability.  The white card base was layered with a strip of designer paper in black with white little hearts, then the die debossed panel, trimmed down to 3.75" x 5", was added with foam tape.  The wreath was added to the front of the panel with thin foam squares, which were also used to add the extra flower and the heart.  The final step was to use a shimmer pen on all the flowers, the heart and the berries.


Thanks so much for visiting, I really appreciate it!  I hope you're continuing to stay safe and healthy, and enjoy your upcoming weekend.

Stef


Stamps:  You Have My Heart (Simon Says Stamp)
Paper:  Neenah Solar White, Stacked with Love dsp (ret. SU)
Ink:  Gina K Obsidian Amalgam, Versafine Clair Nocturne, Spun Sugar Distress
Other:  You Have My Heart matching dies, Infinity Nested Heart die (Hero Arts), Detail Swirls Plate Cover die (SSS), Tonic Nuvo Aqua Shimmer pen
Copics:  RV69, 17, 55, 52, G29, 21, YG45

Sunday, January 17, 2021

Snowy Birthday Wishes

Hello friends, and welcome back!  I have a cute birthday card to share with you today that I made for Seize the Birthday where the toppings option is Snowy Background and Inkspirational where the theme is Mask.  


For my card I used some Stacey Yakula cute critter images from Purple Onion Design.  I used masking to create the snow scene.


Meet Snowy the Owl, Birch the Bunny and Cedar the Fox, who are gathered to help celebrate the recipient's birthday!  I absolutely adore these images!  I started with a panel of white, first stamping Cedar, then masking him. Next was Birch, stamped and masked, and finally Snowy, also stamped then masked.  With that complete, the birch tree background was stamped.  After the scene was fully stamped and the masks removed, everything was colored with Copic markers, including the background. When I was done with the coloring the panel was die cut with a stitched rectangle die.


Next I watered down some white gouache and created the snow by first gently tapping a loaded paint brush on the finger of the opposite hand, then used an old toothbrush to get the finer show.  I did mask the faces of the critters before splattering so they wouldn't get lost in all the snow.  When the paint dried, the panel was mounted on a white card base with fun foam.  The sentiment was die cut and added to the panel with foam tape to finish things off.


Thanks for visiting, I appreciate it so much!  I hope you're continuing to stay safe and healthy, and have a great week ahead!

Stef


Stamps:  Birch, Snowy, Cedar and Birch Tree Background (Stacey Yakula/Purple Onion Design), Birthday Wishing (sentiment/Colorado Craft Company)
Paper:  Neenah Solar White
Ink:  Gina K Obsidian Amalgam, Versafine Clair Nocturne
Other:  Stitched Rectangle dies (Simon Says Stamp), White Gouache
Copics:  Sky - B97, 95; Snow - V12, 01, B0000; Tree - W3; Cedar - E19, YR18, 15, 21, 20; Hat - YG17, 23, 01, 00, V09, 06, 05, 12; Birch - W5, 3, 1, 0; Hat - BG07, 45, 53, YG17, 23, 01,00; Snowy - E79, 77, 74, 71, 70; Hat - V09, 06, 05, 12 YG17, 23, 01, 00

Friday, January 15, 2021

Ice Cream Day

Hello friends, and welcome back!  I've made a fun card to share with you inspired by the current challenges at Freshly Made Sketches and Festive Friday.


From the Festive Friday elements I used ice cream, pink, brown and dry embossing.  


I started by stamping that darling mouse with her large ice cream cone and coloring with Copic markers. After working out how I wanted to die cut the image to work with the sketch, I first stamped the sentiment then used a wonky rectangle to cut it all out.  I love that sentiment, because personally I think everyday should be an ice cream kind of day, don't you?  Also, while I stamped Happy Birthday on the inside, you really could use this for a number of occasions, or just to say hello.


With the main image complete, I moved onto the card base.  A strip of Rich Razzleberry was embossed with a retired SU embossing folder (sorry, I don't recall the name) with fun polka dots.  That was adhered to the white base, then the main panel added with foam tape.  Lastly, the purple hearts were added and the scoop of ice cream painted with a shimmer pen.  I think it's such a darling image and so easy to color.


Thanks for visiting, I appreciate it so much!  I hope you're continuing to stay safe and healthy.  Have a great weekend!

Stef


Stamps:  Ice Cream Day Mini (Colorado Craft Company)
Paper: Neenah Solar White, Rich Razzleberry
Ink:  Gina K Chocolate Truffle, Versafine Clair Pinecone
Other:  Wonky Rectangle die (Simon Says Stamp), Shades of Purple Enamel dots (Altenew), retired SU embossing folder, Tonic Nuvo Aqua Shimmer pen
Copics:  E39, 34, 31, 30, 29 W5, 3, 1, 0, R43, 21, 20, V09, 06, 05

Monday, January 11, 2021

Tender Blooms

Hello and welcome!  I have a card to share with you today, one I made for the current challenges at Just Us Girls, where we are to use a stencil, and Addicted to Stamps, where the theme is Make Your Mark.  


I'm also joining the current Simon Says Stamp Wednesday Challenge where the theme is to Use Something New.  The stamp set I used for this card is new.


My card today is very Spring or Summer-like, which is always nice in the dead of winter here in Boise!


The Tender Blooms stamp from Waffle Flower was stamped on a piece of white cardstock and colored with Copic markers, then cut with the coordinating die.  On a panel of Bristol, I used green ink at the bottom and then a cloud stencil in the sky with blue ink.  This panel was then cut with a slimline stitched rectangle die and adhered to the white base with fun foam for a bit of dimension.


The stamped image is quite large, roughly 5.5 x 6 inches, so I had to trim it down to fit the slimline format.  I used a combination of scissors and my guillotine paper cutter to selectively cut it so I could leave that one pink flower at the top left. I wanted to ground the bottom of the flower image, so I ink blended and die cut a grassy edge that was adhered over top to cover it.  The sentiment is from the same stamp set and has a fabulous matching die.  Once the sentiment was adhered, I added a few clear dew drops to finish things off.


Thanks for visiting, I appreciate it so much!  I hope you're remaining safe and healthy, and have a great week!

Stef


Stamps:  Tender Blooms (Waffle Flower)
Paper:  Neenah Solar White, Koh-I-Noor Bristol
Ink:  Gina K Obsidian Amalgam, Versafine Clair Nocturne, Fresh Pear, Grassy Knoll, Key Lime and Sky Blue (Pinkfresh Studio)
Other:  Tender Blooms matching dies, Rolling Clouds stencil (MFT), Slimline Lacy Layers die (WF), Grassy Hiss Borders (Lawn Fawn), Small Clear Dew Drops (Honey Bee)
Copics:  RV69, 17, 55, 52, R43, 32, 20, B04, 02, 000, Y19, 11, E37, 39, YG45, 23, 17, 01, G29, 28, 21, 17, 03, C 4, 2, 0

Sunday, January 10, 2021

A Good Day

Hello and welcome!  I have a card to share with you using a new-to-me stamp and die set.  I'm joining the current challenges from Freshly Made Sketches, where Jen has given us a great slimline design, and Addicted to Stamps, where the current theme is Make Your Mark.  To make the scene work that I created, the 3 elements in the sketch were flipped to the upper left corner.


I'm also joining the current Simon Says Stamp Wednesday Challenge where the theme this week is to use something new.


I've been eyeing this darling stamp set from Waffle Flower for a couple of years and finally decided to step up and buy it.  I absolutely adore that cute bike-riding bear pulling a cart full of flowers!  The images were all stamped on white cardstock and colored with Copic markers.  I also used some Polychromos pencils to add shading to some of the images.  After that the images were cut with the matching dies.  To make the scene work with the sketch, I flipped the 3 elements from the bottom right to the upper left.  


For the background I blended a blue sky and green at the bottom of a panel Bristol.  It was then cut with a stitched rectangle die and the sentiment stamped in the upper left.  I determined how I wanted the scene laid out but felt like something more was needed, so another panel was blended in green then cut with a slimline grassy hills die.  It was adhered to just at the bottom to the larger panel, then the images tucked underneath with the upper part adhered with foam tape, which was also used to add the bird, bee and butterflies.


Thanks so much for visiting, I really appreciate it!  I hope you're continuing to stay safe and healthy, and have a wonderful week ahead!

Stef


Stamps:  Happy Day (Waffle Flower)
Paper:  Neenah Solar White, Koh-I-Noor Bristol
Ink:  Gina K Obsidian Amalgam, Versafine Clair Nocturne, Sky Blue, Fresh Pear, Grassy Knoll and Key Lime (Pinkfresh Studios)
Other:  Happy Day dies, Slim Lacy Layers die (WF), Slimline Grassy Hills die, Polychromos Colored pencils
Copics:  E37, 35, 33, 31, 47, 44, 42, YG67, 17 03, V05, 01, B01, 00, 000, Y19, 06, 00, RV23, 21