Showing posts with label Inkspirational Challenges. Show all posts

Tuesday, July 21, 2026

Spectacular Christmas

Hello friends!  I popped in to see what the new challenge was at Inkspirational and saw that the word prompt was Christmas in July.  I had recently received my Spectacular Christmas bundle from Spellbinders and knew I wanted to use a couple of the images for this challenge.

The bundle comes with a bear, a penguin, a deer and Santa Claus.  I decided to use the first two for my cards.  Here are both finished cards.


Aren't they so cute?  I adore them.  I started with all the die cutting after I figured out what color combinations I wanted to use.  Initially I thought I would put them both on a landscape 5" x 7" card but changed my mind, instead opting to use the Color Block Accent Arches die along with the Essential Arches dies.  


The dies were easy to assemble, although the glasses with the Ho Ho and adding the earmuffs onto the penguin was a bit fiddly.  The package she's holding is from this month's stitching die set but all the other accessories and the cupcake the bear is holding is from this bundle.

The background on both cards uses the Sparkling Snow embossing folder.  After embossed the arch panels I gently rubbed white pigment ink across the raised portions.  It was very subtle on the light-colored cardstock so after the cards were assembled Stardust Stickles was added to the centers of the stars, snowflakes and dots.


I could have added the finished arches to a larger rectangular card base, but I like the look of the shaped cards.  After white heat embossing the sentiments, they were die cut with a label die then trimmed down to fit the bottom of the embossed panel, after which the critters were added, all with foam tape.

Do you have a favorite critter or color scheme? Personally, I can't pick a favorite, I like them both.

Thanks so much for taking time to visit, I appreciate it!

Stef


  • Spellbinders Spectacular Bear and Penguin die sets
  • SB Sweater Weather Friend Stitching DOM (gift package)
  • Spectacular Holiday Sentiments
  • Essential Arches and Color Block Accent Arches dies
  • Sparkling Snow embossing folder
  • Simon Says Stamp Sentiment Labels die
  • Spellbinders cardstock - Mulberry, Orchid, Carrol, Seaside, Teal Topaz, Peridot, Blush, Truffle, Matte Silver
  • Stardust Stickles and Glossy Accents
  • Tonic Shimmer Pen

Sunday, July 12, 2026

La Dolce Vita Birthday for PP794

Hello friends!  It's time for a new challenge at the Paper Players and this week the amazing Jaydee is hosting.  This is color week and Jaydee has chosen a gorgeous combination.

My card uses products that have been languishing in my unused bin, so I'll be sharing this at Darnell's NBUS challenge.


I'm also joining the Anything Goes option at Seize the Birthday and the Summer Vibe challenge at Inkspirational.


I had so much fun creating the first card that I ended up making two.


I started by cutting the lemons, flowers and leaves from colored cardstock that coordinated with Jaydee's challenge colors and then enhanced them with some ink blending.  

The embossed background was made using Shortbread cardstock from Concord & 9th.  It appears a lot lighter in the photos - in person it is the yummiest warm color between ivory and light yellow.  It was trimmed down and added to a black matte.

The sentiments are from a coordinating Betterpress set, which I inked up in black then used the coordinating dies to cut them out.  As someone who doesn't speak Italian, I always thought ciao was goodbye, but learned it can also mean hello.  So the greeting reads hello beautiful and I like the versatility of that.  Paired with the sub greeting above, I can use it for a birthday or many other occasions.

For the second card, I kind of when overboard with the flowers lol! 


This time I die cut everything from white cardstock then ink blended them for a slightly different look.  I used the same embossed background but added the arch panel as a landing spot for all the die cuts.  The sentiment is from the same Betterpress set and I finished this off with a few opal gems.  


Do you have a favorite?  I like them both, but I like the look of the ink blending on white for card #2 a bit better.

Thanks so much for stopping by!  Be sure to take a moment to visit the challenge blog, my talented teammates have some amazing cards using these colors in a variety of ways.  The challenge will remain open until July 17th at 3pm EDT.  I hope you'll join us!

Stef


Card #1

  • Spellbinders Citrus Spritz die set
  • SB La Dolce Vita Betterpress plate and die
  • SB Lemon Fresco embossing folder
  • SB Blush, Tutu and Rainforest cardstock
  • C&9 Buttercup and Shortbread cardstock
Card #2 (same die and sentiment sets, and embossing folder)
  • SB Essential Arch die
  • Simon Says Stamp Shell, Salmon, Coral, Guava, Watermelon, Limelicious and Pearfection inks
  • SB Opal gems

Sunday, January 11, 2026

Holly Christmas for the Paper Players

Hello friends!  The Paper Players are back with another year of weekly challenges.  This first one is our color challenge, hosted by the lovely LeAnne.  I used these colors to create a Christmas card (can't build up that 2026 stash fast enough!) but the trio would work nicely for many occasions.

What a gorgeous combo of colors!  My card uses a beautiful holly background stamp from Kristina Werner/Concord & 9th.  And because this is the first outing for this stamp on my blog, I'll be sharing it over at Darnell's NBUS blog.  And because Inkspirational is looking for Shine/Shiny on one's card, I'll also share over there because both my cards have shiny embellishments.

Finally, I'll be sharing over at the SSS Wednesday Challenge where the theme this week is Something New.

I made two styles of card with these colors, but I like this first one best.


Because of the simplicity of the design, I ended up creating multiples, some on colored cardstock, with or without any ink blending.

For this card, I started by heat embossing the Easy Repeat Holly Background stamp in silver, then ink blending with shades of blue, fading to white.  I really like this look.  

The sentiment was created with Spellbinders Sending Joy Betterpress Plate and die.  I had a long and productive foiling session with this set last fall, and I have been reaping the benefits as I put together my holiday cards.  Simon Says Stamp Prism Sparkling Gems were added for berries and I was done!


So simple and so pretty!  For the card below, I ink blended blues on a panel of what I think was Misty Moonlight after heat embossing the same stamp in silver.  I trimmed down the sides, added it to a white card base and finished it off with thin strips of silver and SSS Starshine Sequins.


What style card do these colors bring to mind for you?  My wonderful teammates have a variety of designs to inspire at the challenge blog here.  The challenge lasts until Friday January 16th at 3pm EST.  I hope you'll join us!

Thanks for stopping by!

Stef

Sunday, July 27, 2025

Through the Window Birthday

Hello friends!  Just popping in with second post today (you can find my Paper Players DT card here).  I haven't been playing along with challenges outside of my DT duties very often lately, so I decided to join in with a couple.

The toppings option at Seize the Birthday is to use your favorite color but my card doesn't amplify my favorite so I'm joining in the Anything Goes option.


I made this card a while ago for my dear SIL's birthday but never posted it and I thought it was a pretty one to share.  I used Altenew's House Plants, Boho Vases and Through the Window dies along with their Masonry Wall 3D embossing folder to create this little scene.  

I started by die cutting the window in a panel of white, then embossing it.  For the window scene, I just die some simple ink blending to create the sky and ground, adhered it behind the panel then added the dark gray window frame.  I used the same dark gray cardstock to create the big vase and backed the openings with a light blue scrap.  

The leaves were all die cut from white then ink blended with a trio of greens.  The pot was also ink blended with a light gray.  The wood shelf was cut from light brown cardstock, then I added shading with ink.  With everything added to the card, I finished things off with matte gold flower centers and a foiled sentiment.  This was a fun card to make - these dies are fabulous!


Thanks for taking time to stop by!  I'll be back at the end of the week with a new DT card for Color Hues.  In the meantime, take care!

Stef

  • Altenew Houseplants, Boho Vases and Through the Window dies
  • Altenew Masonry Wall 3d ef
  • Simon Says Stamp Wood Plank die
  • Spellbinders Fancy Sentiment Betterpress plate
  • Altenew Rhodolite, Silver Stone, Sea Breeze, Moss, Fresh Leaf and Lime inks

Saturday, February 1, 2025

A Valentine for Color Hues

Hello friends!  Did the month of January fly by as quickly for you as it did for me?  Wow!  But the good news is that it's time for a new challenge at Color Hues! The amazing Tracey will be hosting for the next two weeks and has chosen the timely colors of red and pink.

We are also excited to share with you that we are partnering up this challenge with the Inkspirational Challenge!

Inkspirational is a two-week challenge that features a rotation of: Word Prompt, Designer's Choice, Mood Board, Clean and Simple, Use Stencils and Seasonal.  We are teaming up together in order to perhaps introduce challenge participants of both to another challenge that maybe they weren't familiar with.  We hope you'll play along with us by linking up to both challenges!  

I'm also playing along with the lovelies over at the Time Out Challenge, where they have a fun new challenge called Pick Two.  I've chosen heart and layers.


So, now after all that, let's get on to the card!


A little back story here too...I purchased this stamp set last year but never used it.  I was reminded of it and inspired by the lovely and talented Donna Mikasa where she shared this card for CH101.  And since it was hearts, I knew it would make the perfect Valentine card for Tracey's pink and red challenge.

I started by stamping the hearts with the three layering stamps that create nine hearts with different designs, six of which you can see above.  I just love that!  And then there is a single die that cuts them all out.  

I decided to make a square card, so I cut a white panel that was large enough to include the sentiment in the middle, layered that panel on a black mat, which was added to the pink scallop square and popped up on a white 5"x 5" card base.  Rather than add embellishments, I painted the hearts with a shimmer pen then covered them with glossy accents to make them shiny and pretty!  This card will be heading off to my granddaughter in Oregon (yes, my adult grands still like getting Valentine's from me lol!).


So what are you inspired to create with these colors?  It doesn't have to be a Vday card, just as long as it includes pink, red and neutrals of your choice.  For an abundance of incredible inspiration, please visit both challenge blogs (linked above) to see what our two very talented design teams and guest designer Trina Phan, have created.  

The CH challenge will remain open until 9 am EST February 14th. We hope to see your card in the gallery and don't forget to link up over at Inkspirational too!

Stef

  • Simon Says Stamp Printmaking Hearts stamps and dies
  • SSS Love You Greetings stamp and die
  • Pink and Main Layered Square dies
  • Hero Arts Nested Scallop Square dies
  • SSS Guava, Watermelon and Cherry inks
  • C&9th Pink Lemonade cardstock
  • Glossy Accents

Friday, November 15, 2024

Thankful for The Flower Challenge

Hello friends!  I'm here with my reminder post for The Flower Challenge.  This month the theme is thanks. 
I'm also slipping in on the final day at Inkspirational, where the theme is to Layer It.

I know sunflower season is done for the year, at least in the Northern Hemisphere, but I wanted to have one more go at using them for my floral card, so I used the lovely stamp set designed by Kelly Taylor for Honey Bee Stamps.


The stamp set has three flowers, one front facing and two side facing and I decided to incorporate all three on my card.  I used Copic markers to color them, then they were cut with the matching dies.  Next, a panel of white was ink blended with Salvage Patina Distress Ink, then adhered the card base.  It was topped with a Vintage Labels die cut from white, then I arranged the flowers and leaves, adhering them directly to the card front.  

The sentiment is from a set included with the Altenew Cozy Comfort Retreat products.  It has not yet been released but it will be sometime in the future.  It was die cut from gold metallic cardstock and twice more from white.  The card front was splattered with gold metallic paint and once dry, the sentiment was added to finish things off.


We would love to see your floral thank you card in the gallery, I hope you will join us!  The challenge remains open until Monday November 25th.  In the meantime, for some wonderful inspiration, please visit the challenge blog - my very talented team members have some beautiful cards to share!

Thanks for visiting and take care!

Stef

  • Honey Bee Stamps Bloom With Grace Stamp and Die set
  • HBS Layering Vintage Labels die
  • Altenew Stylish Greetings die set
  • Gansi Tambi Starry Colors Gold Metallic paint

Monday, November 4, 2024

Thank You for The Flower Challenge

Hello friends, I hope you're doing well! This month at The Flower Challenge the theme is Thanks, which is so appropriate for this time of year in the US, where we will be celebrating Thanksgiving on the 28th of this month.  

I'm also joining the current challenge Inkspirational, which is to layer it.

My initial intention was to create a more muted color palette for my card, befitting this time of year as fall is in full swing, but then I ended up using some of my favorite markers and the coloring got much brighter lol!


At the time that I made this card, I'd recently received this big floral stamp from Simon Says Stamp and had to use it.  It was stamped in black, colored with Copic and Olo markers, then restamped with Versamark and gold heat embossed.  I always hold my breath when I put my colored image back in my stamp positioner, worrying that I'll ruin a couple hours (or longer) of coloring, but as you can see, it turned out just fine.  The sentiment, also from the same stamp set, was gold heat embossed as well, then both were cut out with their coordinating dies.

When I reached for a card base, I saw that I had one with a white die cut panel adhered to the front, which added a lovely touch of interest without detracting from the floral image.  The flowers were adhered directly to the panel, the overhanging parts trimmed off, then the sentiment was added with foam tape.


So much to be thankful for, including you stopping by my blog today!  For plenty more inspiration, use the link above and see what my talented teammates have created with this theme.  And, of course, we'd love to have you join us this month, the challenge remains open until Thanksgiving day, November 25th.

Thanks for visiting and take care!

Stef

  • Simon Says Stamp Grateful Florals stamps and dies
  • Pinkfresh Studio Folk Edge Rectangle die
  • Altenew Antique Gold ep
  • Copic and Olo markers:  Orange - YR18, 09, 16, 21, Y17; Yellow - YR27, 24, Y19, 15; Magenta -RV69, 17, 55, 52; Small and Medium leaves - G1.8, 1.7, 1.5, 1.4; Large leaves - BG 2.7, 2.5, 2.4, 2.1, YG03 

Sunday, October 20, 2024

Peaceful Holiday for The Paper Players

Hello friends!  It's Sunday and time for a new CAS challenge over at The Paper Players where LeAnne is asking us to add a tag.

I am also sharing over at Inkspirational, where the theme is Seasonal.


I love to make cards with tags, so I was excited to see our tag challenge.  I am in desperate need of adding more cards to my holiday card stash, so that is where I went with this challenge.


I started by die cutting the tag then stamping and clear heat embossing the tree trio on the tag.  I created a mask using the circle die that comes with the set to cover the moon while I used inks to create the night sky, then removed the mask and used the moon stamps in light and medium yellow.  I grabbed a scrap of white cardstock, hand cut the top then used the tag die to cut the bottom.  After it was adhered to the tag, I added some Star Dust Stickles to the top of the "snow"

The stag and the sentiment were also stamped and clear heat embossed, then die cut with the matching dies.  A white gel pen was used to create "stars" in the sky then the die cut pieces were added to the tag. I found a leftover bit of white sparkle ribbon and added that to the top of the tag and tied it off with some silver baker's twine.  It was then added to a card base that I found in my stash with the embossed panel already adhered.  The final step was to add some of the Star Dust Stickles to the tree branches.  It sparkles so much IRL!


What are you inspired to create with this challenge?  We'd love to have you join us this week - the challenge remains open until Friday October 25th at 3pm EDT.  In the meantime, be sure to head over to the challenge blog, where my wonderful teammates have some fantastic inspiration to share with you!

Thanks for visiting and take care!

Stef

  • Simon Says Stamp/Gina K Stamptember 2024 Stay Cozy collaboration stamps and dies
  • SSS Snowy Pines embossing folder
  • Ellen Hutson Tag Trio die
  • Altenew Desert Night, Dusk, Lemonade Stand and Honeydew Glow inks
  • Lawn Fawn Silver Baker's Twine
  • Sakura White Gelly Roll pen

Sunday, October 13, 2024

Grateful for You for The Paper Players

Hello friends!  This week at The Paper Players the lovely Joanne has chosen an autumnal color combination for our inspiration.


I'm also joining the lovelies at Inkspirational with their gorgeous mood board inspiration.  I was inspired by the leafy photo and the fall colors.

 
I had many, many ideas for these colors but in the end, I played around with messy, wonderful mica sprays to create my card.  And yes I did have orange and brown fingers for a day lol!


Right off the bat, I have to say the photos do not do justice to the beautiful colors and shine of the background.  I began with a half sheet of mixed media paper from Vicky Boutin and used two brown and two orange Distress Mica Sprays on the paper, adding water so they would mix a bit then set it aside to dry.

When it was dry the colors had mixed more than I anticipated.  Don't get me wrong, it was really pretty but the browns had dominated the oranges.  I put the panel in my Misti, arranged all the leaf stamps, then used a brown pigment ink to stamp.  That didn't show up well, so ended up gold heat embossing the leaves then used gold metallic paint to add splatters.

Next, I poured a bit of the mica spray onto a palette and used a small brush to paint the lightest orange over some of the leaves and I was so happy with that small step! When everything dried a second time the panel was die cut, wrapped with some gold twine and matted onto a dark brown rectangle before adding to the 5"x 7" ivory card base.  The sentiment was also gold heat embossed, die cut with the matching die and added to the card front along with some copper-ish gems.


We would love to have you share what you create with these colors this week!  The challenge remains open until 3 pm EDT Friday 10/18.  In the meantime, please take a moment to see all the beautiful cards my talented teammates have created for your inspiration over on the challenge blog linked above.

Thanks for visiting and take care!

Stef

  • Simon Says Stamp Autumn Leaves and Graceful Florals (sentiment) stamps and die
  • Waffle Flower A7 Frames rectangle die
  • Spellbinders 5" X 7" Matting Basics A die
  • Rangers Jack-O-Lantern, Mulled Cider, Crooked Broomstick and Fallen Acorn Distress Mica Stain Sprays
  • SSS Ultra Fine Gold embossing powder
  • Altenew Gold Metallic paint
  • HoneyBee Stamps Fall Is In the Air gems


Sunday, June 23, 2024

Slider Birthday Card

Hello friends, I have a fun card to share with you that I made for my grandson.  I rarely make interactive cards but I saw the die used on a Jennifer McGuire video (link to her blog post with the video here) and thought that even I could figure out how to use it lol!

I'm sharing this over at Inkspirational, where they have a fabulous mood board and I was inspired by some of the colors.

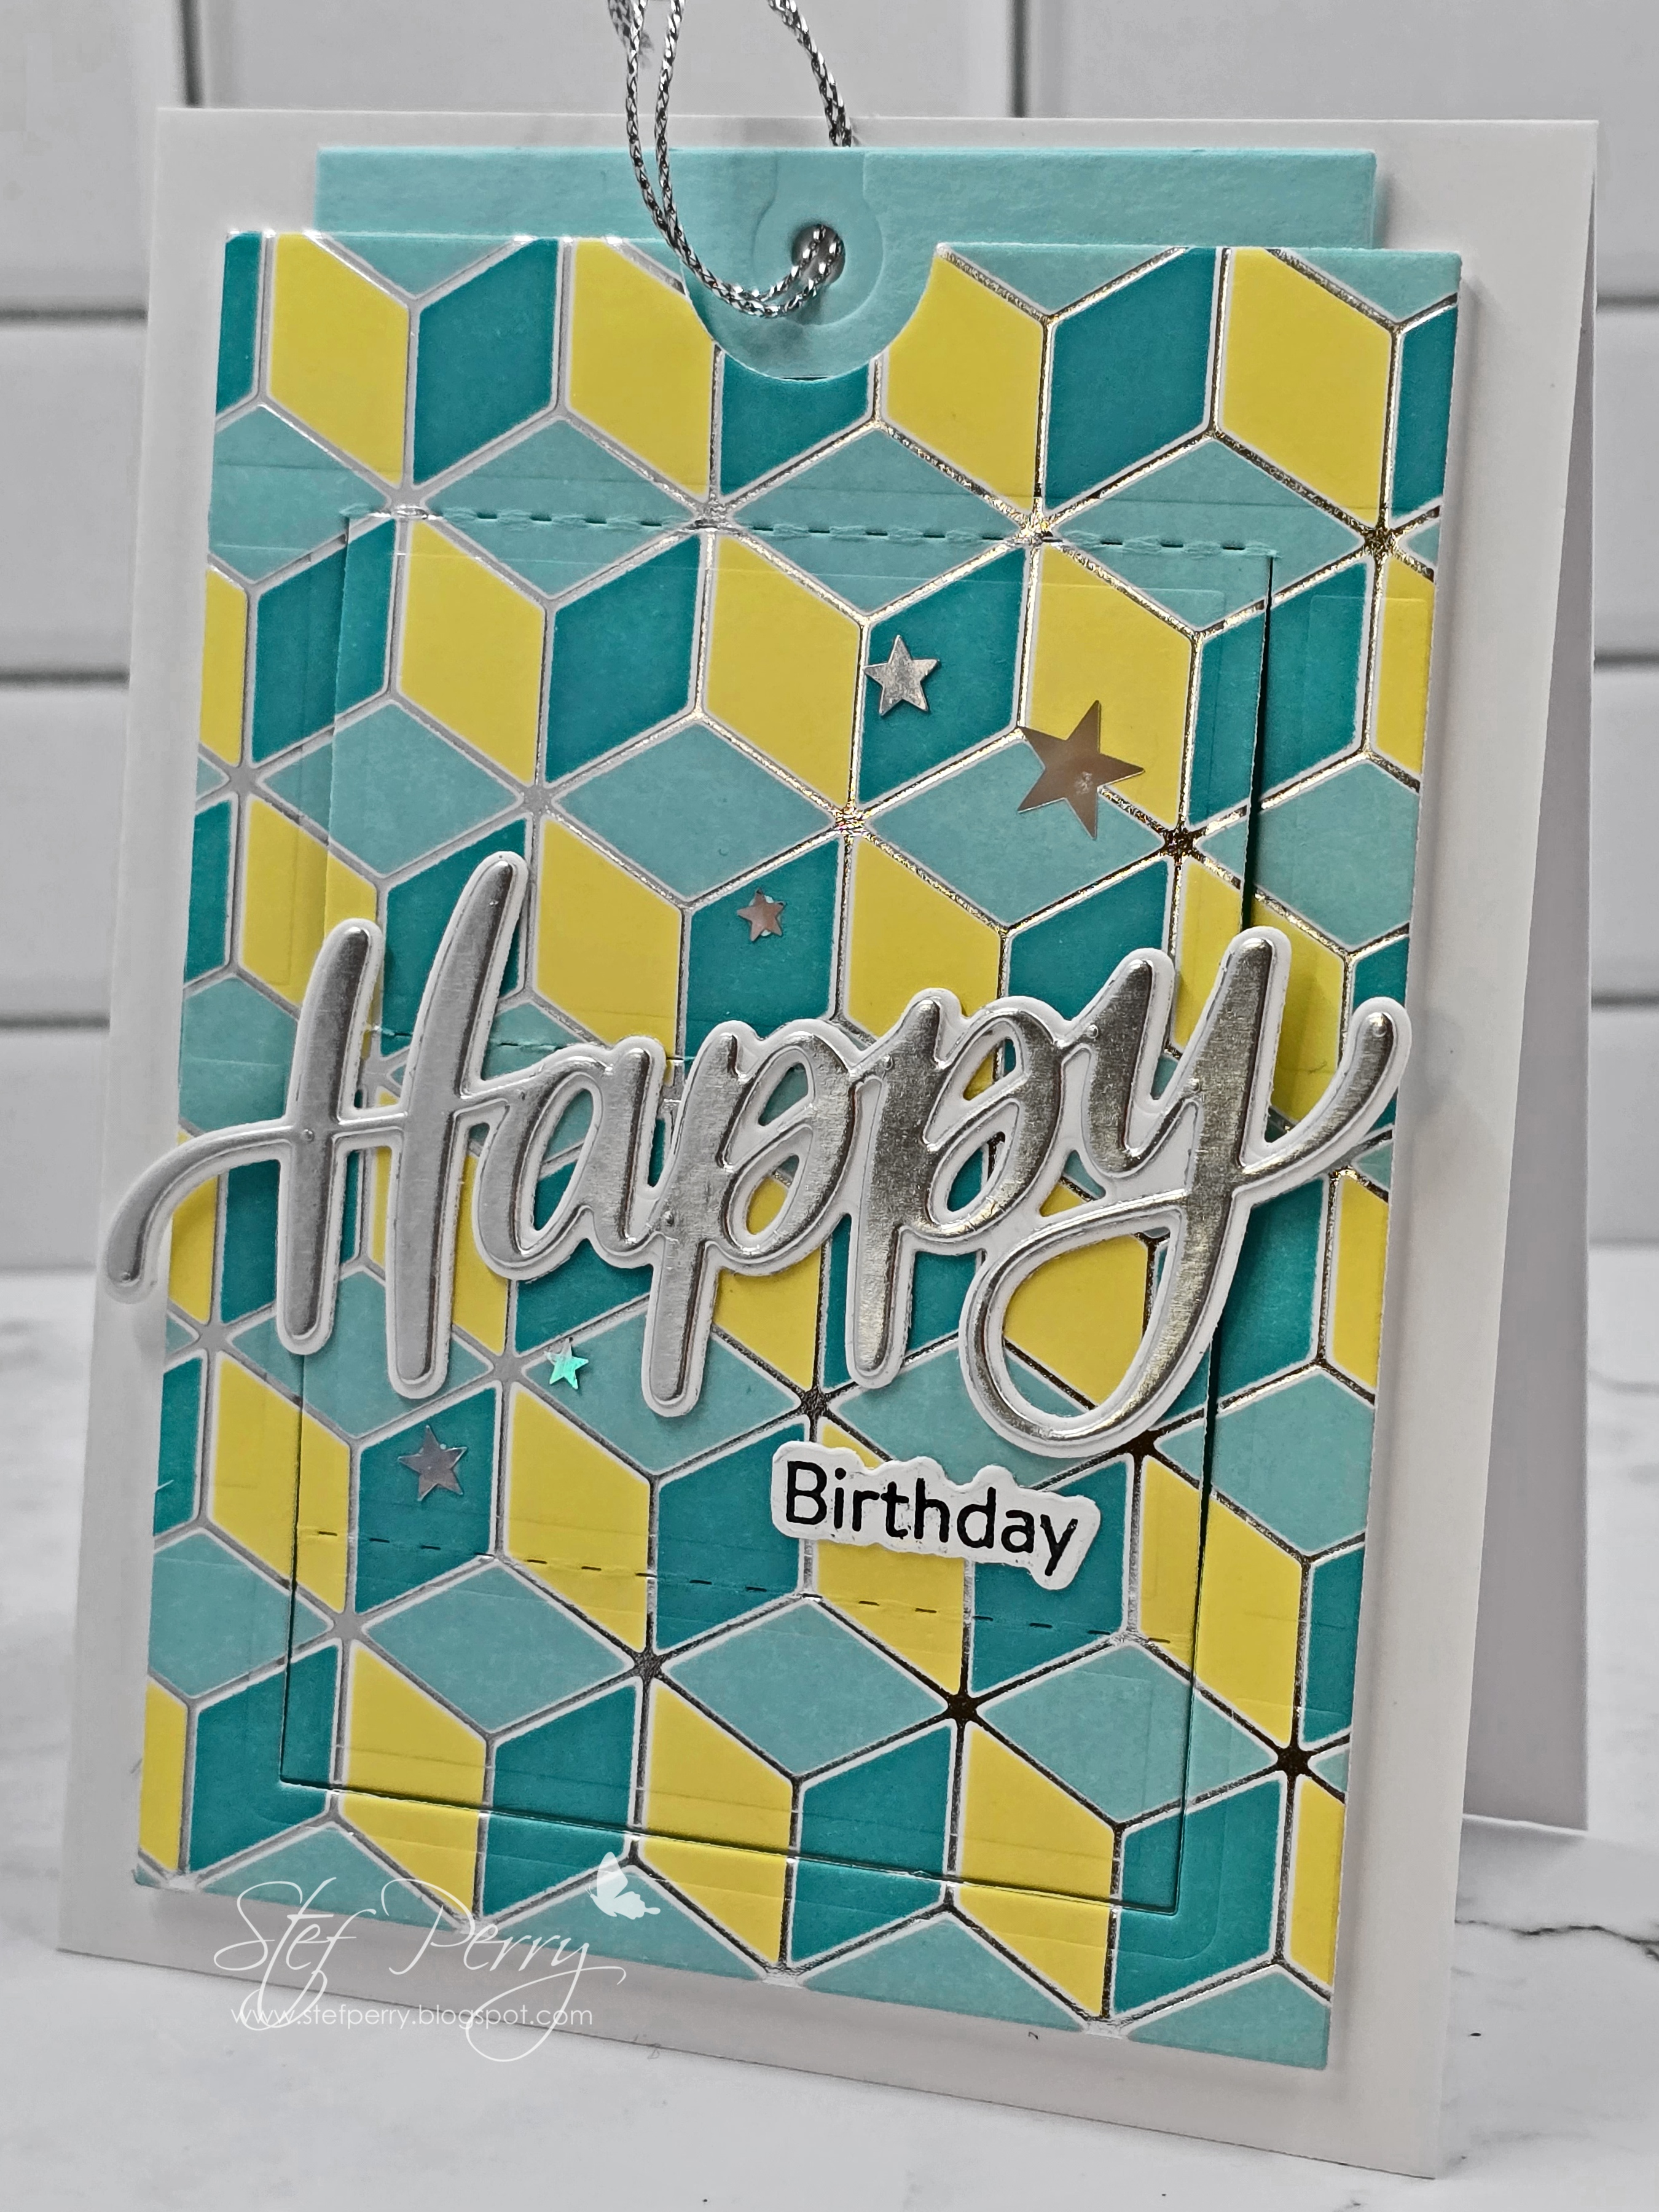
I was planning on using various foiled geometric panels that I've had in my stash for a long time for a number of upcoming masculine birthdays (doesn't have to be just for men, but it works well for those dudes that wouldn't appreciate florals lol!).  This one in particular makes these cool 3D blocks, so I used the matching stencil with Distress Oxide inks to create a panel.


The stenciled panel was die cut with the interactive feature die (Pinkfresh Studio A2 Slider die), then the tag that goes underneath was die cut from a piece of aqua paper that matched the ink colors well.  You'll see in photos below that the front of the interactive part has scoring, so the panel will open using the tag to reveal a message.

The panel was popped up on a white card base using foam tape, then the tag slipped in and adhered to the bottom of the interactive feature.  I pulled the tag up then used glue dots to add the gift card, and it slid up and down smoothly.  The pictures below will show it better than I can explain it.  Pinkfresh also has a how-to video on their product page. 


The word happy was cut from matte silver cardstock, layered on the white shadow die, then adhered to the pop-up panel that also reveals the interior sentiment.  Sooo clever!  The last thing was to add some holographic stars for some added shine. 

It was a fun card to make and I know my grandson will appreciate it.


Thanks for visiting and have a good week!

Take care!

Stef

  • Pinkfresh Studio Geo Blocks Hot Foil Plate and Stencils
  • PS A2 Slider Card dies
  • SSS Big Happy die
  • Honey Bee Stamps Birthday Wishes Stamp and die
  • Peacock Feathers, Salvaged Patin and Squeezed Lemonade Distress Oxide inks
  • Silver Metallic Thread

Thursday, May 16, 2024

Thinking of You for Color Hues

Hello friends!  Today I'm sharing my card for our new challenge at Color Hues!  The lovely Jules has chosen a pretty combo of coral and teal.

I'm also joining the Seasonal challenge at Inkspirational, with these spring flowers.


I did a little stash shopping and found a pretty Altenew floral that I haven't used in a very long time and that it would work well for the CH challenge and, as it turns out, the Inkspirational challenge too.


I love this image of a climbing floral, it flows beautifully across the A2 sized card.  I first Copic colored it in coral and teal (although my camera makes the teal look a bit more blue than it is in real life), then cut out the image with the matching die, along with a two more from white cardstock to layer for a bit of dimension. 

Next, I used a script background stamp on a panel of Neenah Desert Storm in light brown, then ink blended the edges with white pigment ink.  When the ink dried, the floral image was adhered then the panel, which was then splattered with white gouache.  When dried, it was added to the card base and the sentiment popped up with thin foam tape.  No gems or sequins - I thought there was plenty going on with the white splatter and I really love the subtle text in the background.


So many options with these colors - what will you create with them?  You'll have until 9am on Wednesday May 29th.  Before heading off to your craft space, please visit the challenge blog where my talented teammates will inspire you with their wonderful cards!

Thanks for stopping by.  Take care!

Stef

  • Altenew Craft Your Life Project Kit: Never Stop Dreaming stamp and die
  • Honeybee Stamps Be Still sentiment stamp and die
  • Simon Says Stamp Old Letter background stamp
  • Honeybee Brilliant white pigment ink and SSS Latte ink
  • Copics: R08, 14, 22, 20, BG49, 15, 11, B02
  • Windsor & Newton White Gouache