Thursday, January 25, 2024

Bountiful Banner for Just Us Girls

Hello friends!  I'm back with my final card as guest designer for Just Us Girls and this time we are having fun with stencils!

At the last minute, I'm also joining the lovelies at Inkspirational with another stenciled edition to their gallery.


I love stencils because they can make card creation so much quicker and/or add wonderful detail to card backgrounds.  Today I used them to color a floral image.


I have been eyeing the Honeybee Stamps Bountiful Banners suite since it was first released earlier this year, so when HB had their fabulous sale at year end, I decided to pick it up.  I started by stamping the image with black pigment ink, then using the stencils and a variety of inks to color it up.  I think this color palette is one of my favorite combos.  I know I am usually drawn to cooler colors, but I do love the pop of yellow-green along with the teal and pinky purple.  


After the stenciling was complete, I added some additional contrast to all the flowers and leaves with Copic markers, which is something I often like to do.  The image and sentiment were then die cut with the coordinating dies along with two additional pieces for layering to provide some dimension (although that's difficult to tell in the photos).  The final touch was to use my white gel pen to color the flower centers.


A big thank you to the entire design team at Just Us Girls, it was just a pleasure joining you this month!

Be sure to head over to the challenge blog for some wonderful inspiration and hopefully play along this week.

Take care!

Stef


Stamps, dies and stencils:  Honeybee Stamps Bountiful Banner
Ink:  Simon Says Stamp Taffy, Sweets, Bubblegum, Fairway, Sprout, Tropic, Tidepool, Orchid, Iris and Latte; Versafine Clair Nocturne
Other:  Sakura White Gelly Roll pen
Copics:  RV69, 66, BG49, 15, YG67, 17

Wednesday, January 24, 2024

Dear Santa for Christmas Craft Creations

Hello, friends!  It's time for our reminder post at Christmas Craft Creations, where the current theme is glitter and sparkle!


For me, Christmas cards often go hand in hand with glitter and/or sparkle, so I made a fun little scene card with some glittery, sparkly snow.


This scene uses the sweet Dear Santa stamp and die set from Colorado Craft Company and illustrated by Anita Jeram.  I started the card with a panel of Distress Watercolor, where I sprayed some Shiny Bauble Distress Mica Spray for the background.  While that dried, I cut a simple snowbank from white cardstock, used a Copic marker along the top and to create a path to the mail box then covered those areas with Stardust Stickles.


Next the stamped images were colored with Copic markers.  I made a mistake by coloring the bottom edge around the critters and mailbox blue, which I didn't realize until after die cutting.  It just looked odd against the snowy background, so I trimmed it away and that's why the bottom of the image is fussy cut.  I decided not to fussy cut the entire image because it was so detailed around the dog and after adding the image to the card, it really isn't that noticeable, at least I hope not to the recipients!  The final steps were to add the sentiments and use the Stardust Stickles on the top of the mailbox.  In real life, the sparkle is amazing!  You can see it better in the photo below


Thanks so much for visiting, and I hope you will take some time to join us and build up your store of holiday cards!

Take care!


Stef


Stamps and Dies:  CCC Dear Santa
Paper:  Neenah Solar White, Distress Watercolor
Ink:  Memento Tuxedo Black, Versafine Clair Nocturne
Other:  Shiny Bauble Distress Mica Spray, Stardust Stickles
Copics:  R59, 46, 27, 05, YR27, 24, 23, 21, C5, 3, 1, 00, W3, 1, 0, E27, 25, 23, 21, G09, 02, BG07, 45, 53, 01, 000

Thursday, January 18, 2024

My Favorite Human Bean for Just Us Girls

Hello friends!  Well, the month of January is flying by and today I'm sharing my 3rd card as guest designer for Just Us Girls.  This week we have a wonderful mood board that I think is one of the sweetest and coziest I've ever seen.


I know the photos are a bit hard to see but if you head over to the JUGs blog, they have a larger version where you can see all the details.  

I'm also joining the current Inkspirational Challenge, where the theme is Stencils.

I just love this JUGS Mood Board!  I was inspired by the kitty's warm cuddly sweater and hat, along with the cup of coffee.


I started with Altenew's Sweater Pattern stencil and used light brown and medium gray to create the pattern on a panel of white, which was then cut it down with a rectangle die and added to a white card base with foam tape.


Next I used the MFT Coffee Talk Bundle to create the die cut coffee cups and stamp the sentiment.  I laid the coffee cups on a sticky mat, then colored them with Copic markers.  Two additional dies were cut for each cup and they were layered up before adhering to card front around the sentiment.  The last thing was to add a heart.  I have some clay hearts from Trinity Stamps but the color was a little too tomato-y, so I just used a dark red Copic marker to change the color and after adhering it to the cup, I covered it with Glossy Accents for some shine.  I was tickled pink by how this card turned out because I've never used this bundle before although I think I bought it over a year ago.  Time to keep shopping my stash, I guess!


So, what inspires you on the mood board?  Please take a moment to visit the challenge blog and see what inspired the DT and hopefully play along!  Thanks for visiting.

Take care!

Stef


Stamps and dies:  MFT Coffee Talk Bundle, Hero Arts Nested Rectangle die
Stencil:  Altenew Sweater Pattern
Ink:  Simon Says Stamp Latte and Earl, Versafine Clair Pinecone
Other:  Trinity Stamps Candy Apple Hearts, Glossy Accents
Copics:  R39, C2, 1, 0, 00, E35, 31, 30

Tuesday, January 16, 2024

Greenery Swag for Color Hues

Hello friends!  How has your January been treating you thus far? It's been plenty cold here with lots of snow, and I know much of the United States is feeling the chill too!  But if we are bundled up in the house, we might as well craft, right?  

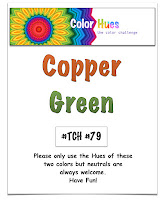
And, just in case you need some crafty inspiration, today is the start of a new Color Hues Challenge and the lovely Karen has chosen a beautiful combo of green and copper. 

I love these colors together and decided to use them for an addition to my depleted birthday card stash.


I combined some older and newer dies, all from Simon Says Stamp.  I started with the background, using the Pincushion Plate with a panel of dark green cardstock.  It adds a lovely bit of embossed detail along with cutting all the tiny holes, which you can see more clearly in the photos below.  I was tempted to back it with a copper metallic panel but it looked too dark, so instead it was adhered directly to a white card base.


The sentiment and the berries were both cut from that copper metallic paper and then I used a lighter green for the swag, topping that with some white flowers.  The sentiment was added to the vellum shadow die before adhering to the card front, then I added the swag.  Lastly I used some beautiful gem stickers that have that same coppery hue and they really sparkle in the light.  Such an easy-peasy card to pull together, I think I need to make a few more birthday cards like this to have on hand.


I hope my card has provided a bit of inspiration and for even more, you must go take a look at what the rest of the amazingly talented design team created with these colors!  We'd love to have you join us, you'll have until January 28th at 9:00 am EST to play along.

Take care and stay warm!

Stef


All products are from SSS except where noted otherwise
* Greenery Swag dies
* Pincushion Plate die
* Big Happy Birthday dies
* Concord & 9th Evergreen and Parsley cardstock, Lawn Fawn Pearlescent Vellum and Tonic Copper Statin Effect Mirror card stock
* Honeybee Stamps Marvelous Moments Gem Stickers

Thursday, January 11, 2024

Winter Wishes for Just Us Girls

Hello friends!  It's time for a new challenge at Just Us Girls, where I am the January guest designer.  This week is Word Week and we have one that is apropos for this time of year.

I'm also playing along with the current Time Out Challenge, where the theme is new.

I recently bought a new snowflake embossing folder and snowflake die cut set and was excited to put them to use for this card.


I started with a panel of mixed media cardstock and ink blended a trio of purple inks, then embossed it with the snowflake folder.  Next I used my white pigment ink pad and very gently rubbed it across the top of the raised part of the embossing to give it some dimension.


I used four dies from the HoneyBee Stamps Lovely Layers: Large Snowflakes set to cut snowflakes out of two colors of purple and one of white.  The background panel was added to the white card base, the snowflakes adhered together and then added to the card along with a foiled sentiment to finish things off.  Super easy and oh, so sparkly!


Thanks so much for visiting, I appreciate it.  Be sure to head over to the challenge blog where the DT has loads of inspiration to share with you!

Take care!  

Stef


Stamps:
Paper:  Neenah Solar White, Vicki Boutin Mixed Media, Pinkfresh Studio Foiled Sentiments 4 Holiday, Simon Says Stamp White Glitter, Winter Glitter and Be Mine Glitter
Dies:  HBS Lovely Layers: Large Snowflakes
Inks:  SSS Lilac, Orchid, and Amethyst, Hero Arts white pigment
Embossing:  HBS Snowflakes folder

Thursday, January 4, 2024

Yeti or Not for Just Us Girls

Hello friends!  I am so honored to be the January Guest Designer for Just Us Girls!  And this week we're starting off 2024 with a fabulous color combination that I absolutely love!

I'm also sharing over at Simon Says Stamp Wednesday Challenge where this week's theme is Something New, which is perfect since I used a new stamp and die set for this card.

I knew right away that I'd be using these colors for a birthday card for our great-nephew because they are perfect for creating a snowy scene.


I started with a panel of mixed media paper and ink blended the teal sky with Altenew Teal Caves.  Next I combined some Tim Holtz Distress Snowfall Grit Paste and Sparkle Paste then spread it through a snow stencil.  While that dried, the images were all stamped, colored with Copic markers and die cut.


Before adding the cute little Yetis, the background was added to the panel.  I used a Copic marker to add teal around the edges then used Stardust Stickles to add sparkle on top and also on the tree branches.  The Yetis were then added with thin foam squares, as was the sentiment, and lastly I used Glossy Accents on the balloon to make it nice and shiny.  I think my nephew will get a kick out of this card, especially the punny sentiment.


Thanks for taking time to stop by, and I hope you'll do the same at the challenge blog, where the DT have some fabulous inspiration for you!

Take care!

Stef


Stamps:  MFT Yeti or Not
Dies: MFT Yeti or Not, MFT Grounded
Paper:  Neenah Solar White, Vicki Boutin Mixed Media
Ink:  Versafine Clair Nocturne, Memento Tuxedo Black, Altenew Teal Cave
Stencil:  MFT Heavy Snowfall
Copics:  B39, 37, 34, BG07, 45, 53, YG67, 17, 03, E29, 25, 11, 21, 00, W3, 1, 0, C3, 00

Monday, January 1, 2024

Making Spirits Bright for Color Hues

Happy New Year friends, I hope your holidays were festive!  The first of the month brings around a new challenge at Color Hues and this time the lovely Marcia chose the beautiful combo of light blue and navy.  

These colors are so perfect for winter and for those like me that still want to make Christmas cards...I look at it as a great opportunity to building my 2024 stash!


I started with an A2 panel of light blue and initially ink blended Simon Says Stamp Marine (light) and Royal (darker) but the Royal just wasn't quite "navy" enough, so I reached for my Concord and 9th Midnight ink pad and added that around the edges.  In real life, the color transitions are much more subtle.  The panel was then die cut with the SSS Florence Plate.


Next, the sentiment and snowflakes were gold heat embossed and die cut with matching dies.  The blue panel was added to a white card base, then I adhered the embossed pieces after layering them on two additional die cuts for a bit of dimension.  The last touch was to add some beautiful dark blue gems.


What does this color combination bring to mind for you?  I do hope you'll join us and share how you were inspired by these colors, you have until 9 am EST 1/14/24 to join us.  In the meantime, be sure to drop by the challenge blog for more inspiration by my amazingly talented teammates!

Take care!

Stef


* SSS Making Spirits Bright Stamps and Dies
* SSS Florence Plate die
* HoneyBee Stamps Winter Wonder Gem Stickers