Wednesday, December 27, 2023

Peace on Earth for Christmas Craft Creations

Hello friends!  I hope you're having an enjoyable holiday season!  Today I'm sharing my reminder card for the current challenge at Christmas Craft Creations, where our theme this month is decoration. 

I decided to use a beautiful embossing folder with ornaments for my card.


I started with an A2 panel of white cardstock and ink blended three shades of green over it, then embossed it with the Simon Says Stamp Verdant Ornaments folder. Next I used a silver gel pen on all the highest raised areas.  This really isn't a hard process and I think the results are beautiful!


The sentiment was silver heat embossed on dark green cardstock then die cut with a sentiment label die and layered across the entire panel before adding to the silver mat and green card base.  No need for bling with the silver highlighting the beautiful, embossed images!


Thanks for taking time to visit!  Now I realize most are done making Christmas cards for this year, but it you're wanting to build your stash for next year, come join us this month and every month next year (we have a lot of fun challenges coming up in 2024!).  This challenge will remain open until Tuesday January 9th 6pm GMT.

Take care!

Stef


Stamps: SSS Making Spirits Bright
Paper:  Neenah Solar White, SSS Midnight Green and Matte Silver
Embossing:  SSS Verdant Ornaments folder
Ink:  Altenew Jade, Eucalyptus, and Forest Fern; Versamark
Other:  SSS Ultra Fine Silver embossing powder, Altenew Silver Gel Pen

Friday, December 15, 2023

Festive Bouquets v2 for The Flower Challenge

Hello my friends and happy holidays!  I hope things are going smoothly for you and that you're able to have time to enjoy the season.  I actually finished my Christmas cards earlier this year than the prior 2-3 and got the house decorated on December 1st, so I've been feeling a little ahead of the game.

But that's probably not why you've dropped by my blog, so let's get to it!  This is my reminder post for The Flower Challenge, where we're asking everyone to use gold on their cards.

I loved the lilies and the colors I used on my first TFC card here, so I decided to stick with them and go a bit bolder.


As with my prior card, the image was stamped, colored with alcohol markers, restamped with Versamark ink and gold heat embossed. The gold embossed sentiment is from the same stamp set and it, along with the flowers were die cut with matching dies.


For the background a panel of magenta cardstock was embossed with the Spellbinders Beveled Diamonds 3D folder, then lightly brayered with gold pigment ink across just the very top of the panel to make some of the embossing stand out.  When dry, the floral image was adhered and the overhanging parts trimmed off, then I added the sentiment with some thin foam squares.  


I hope you'll find a few minutes for a crafty break from the holiday busyness and join us - the challenge remains open until the 25th and we'd love to see your card in the gallery.  The team will be taking a much-deserved break in January, returning with a slate of new challenges for the new year beginning 2/4/24.

Merry Christmas and Happy New Year!

Stef


Stamps and dies:  Simon Says Stamp Festive Bouquets
Paper:  Neenah Solar White, C&9 Dragonfruit 
Ink:  Versamark, Altenew Antique Gold
Other:  Spellbinders Beveled Diamonds 3D embossing folder, Altenew Antique Gold embossing powder, Tim Holtz Brayer
Sketchmarker:  V111
Copics:  RV06, 04, 02, R39, 37, 35, YG67, 17, 03, BG32,11, G00

Monday, December 4, 2023

Festive Bouquet for The Flower Challenge

Hello friends! Here we are, time for the final challenge for the year at The Flower Challenge.  This one is perfect for those last minute holiday cards or, if you're like me, you love using metallics on your cards anytime.

I'm also joining the current challenges at The Paper Players and Time Out Challenges.


Using a large floral stamp created an opportunity to create a slimline card, which I haven't done in a while.


I started with the stunning Festive Bouquets stamp set from Simon Says Stamp (and designed by the endlessly talented Emily Midgett), stamping the larger of two florals bouquets in the set.  It was stamped in alcohol marker friendly ink, colored using bright pinks for the flowers, then restamped with Versamark and gold heat embossed (yay for stamp positioners!).


Next came the background panel, which was die cut using the SSS Detail Bohemian Slim Plate, sprayed with shimmer then adhered to a white card base after it dried.  I used my trimmer to cut the floral image so I could use the two parts on each end of the card.  The sentiment is from one of my favorite holiday stamp sets by Poppystamps, also gold heat embossed then die cut with a rectangle die.  The flowers were adhered directly to the card, the sentiment popped up with thin foam tape and finally a few gold glitter gems were scattered about.  


I do hope you find time during the busy holiday season to join us! the challenge will remain open until 5 pm on 12/25/23, plus we'll be back with more inspiration on the 15th with our reminder post.  But, before you head off to your craft room, be sure to take a peek at the stunning array of cards my teammates have created - lots of inspiration there!

If you don't have a chance to drop by for my reminder post on the 15th, I wish a happy holidays to you and yours!  

Stef


Stamps:  SSS Festive Bouquets, Poppystamps Christmas Sparkle
Paper:  Neenah Solar White
Ink:  Memento Tuxedo Black, Versamark
Dies:  SSS Detail Bohemian Slim Plate and Festive Bouquets, Hero Arts Nested Rectangle die
Other:  Hero Arts White Iridescent Shimmer Spray, Altenew Antique Gold embossing powder, Studio Katia Gold Glitter gems
Copics:  RV06, 04, 02, YG67, 17, 03, BG32, 11, G00, R39, 37, 35
Sketchmarker: V111

Friday, December 1, 2023

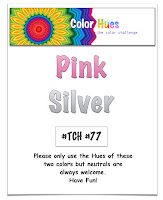
Pink Shimmering Season for Color Hues

Hello friends!  I'm back with a card for the final challenge of 2023 at Color Hues.  The lovely Nancy has chosen a gorgeous non-traditional color combination sure to work for any of your last-minute holiday cards!

For my card I used the beautiful Gina K/Simon Says Stamp Stamptember 2023 stamp set Shimmering Seasons.


I started by silver heat embossing all the images on a panel of pink cardstock, then used a darker pink ink to blend around the edges.  I really fussed and debated about the sentiment.  I had one idea in mind, but it didn't look right and then I realized some the of embossing didn't come out well. Rather than toss the panel, I came up with a new plan.


I opted to use a large sentiment die cut from matte silver cardstock but the background was too busy without something behind it plus I wanted to hide the areas where the embossing didn't take properly.  A band of vellum took care of that and was the perfect home for that beautiful sentiment and I really like how the card turned out.  I hope to create some other cards using this stamp set before I'm done making Christmas cards, the images are so pretty.


What are you inspired to create with these colors?  Please take a moment to check out the cards by my wonderfully talented teammates and hopefully you'll be inspired to join us!  The challenge will last all month, so you have plenty of time to play along.  The challenge will close at 9 am EST Thursday December 28th.

I wish you all the best during the holidays!  I'll have a new post on the 4th, so I hope you'll swing by and take a look.

Take care!

Stef


Stamps:  Gina K/SSS Stampember 2023 Shimmering Season
Paper:  Neenah Solar White, Concord & 9th Carnation, Lawn Fawn Pearlescent Vellum, SSS Matte Silver
Ink:  Versamark, C&9 Sweet Pea
Dies:  Poppy Stamps Poe Script Merry Christmas
Other: SSS Fine Detail Silver embossing powder

Tuesday, November 28, 2023

Hello for Color Throwdown

Hello friends!  Recently I was chosen as the Featured Stamper for Color Throwdown #769 with my fun little Caroling Owls card here, and now I am so pleased to be joining the CDT team as Guest Star Stamper for their latest challenge.

I love these muted colors and tried to match them as best as possible using my Copics and a blended background.


For the flowers I used one of the two floral images from Altenew's In the Woodland.  After coloring with my Copic markers, I used a white gel pen to accentuate the anthers at the end of the stamen, then die cut the image with the matching die.


Next came the ink blended panel, using Simon Says Stamp Morining ink on the smooth side of a panel of Distress Watercolor paper, which was then die cut with one of the Mix and Match Frames, also from Altenew.  Before adhering to the white card base, the flowers and panel were separately splattered with White Gouache and gold metallic paint.  I used foam tape under both the panel, the floral image and the foiled sentiment and I was done!  


Thanks for dropping by to take a peek!

Take care!

Stef


Stamps:  Altenew Into the Woodland
Paper:  Neenah Solar White, Distress Watercolor
Ink:  Memento Tuxedo Black, Versafine Clair Nocturne, SSS Morning
Foiling:  SSS Elegantly Modern Greetings Hot Foil Plate, Spellbinders Gold Glimmer Hot Foil
Dies:  Altenew Mix and Match Frames and Into the Woodland, SSS Elegantly Modern Greetings
Copic markers:  E97, YR18, 02, 01, 00, 000, YG99, 97, 95, 93, C9, 7, 6

Wednesday, November 22, 2023

Christmas Hats for Christmas Craft Creations

Hello friends, it's time for our reminder post at Christmas Craft Creations!  For our November challenge, we're asking you to add a hat to your design.


I decided to have some fun with this challenge and created an A7 card with lots of cute critters wearing hats.


I couldn't have had a more perfect stamp and die set in my stash that the Christmas Hats one from Colorado Craft Company and illustrated by Anita Jeram.  After coloring all the critters with Copic markers, they were die cut along with the trees in the background.


The next step was to create the background.  On an A7 panel, I ink blended Simon Says Stamp Galaxy for the sky, then added a panel of snowy hills that I hand cut from a panel of white.  Before adhering to the panel, I used a light blue ink both on the base of the piece and at the top of the hills, then glued it down.  The trees were die cut from dark green cardstock, then I used a dark brown Copic marker to color the trunks before adding to the background.  Next, the sentiment was white heat embossed, then the critters were adhered either with glue or foam tape.  Before adding to the card base, I sprayed the panel with shimmer spray then added "snow" with white paint.


Thanks for stopping by and I do hope you'll join us this month for this fun challenge!  In the meantime, please take a moment to visit the challenge blog, where my talented teammates have lots of inspiration for you.

Take care!

Stef


Stamps and dies:  CCC/AJ Christmas Hats, Honey Bee Stamps Pine Trees
Paper:  Neenah Solar White
Ink:  SSS Galaxy and Marine; Memento Tuxedo Black; Versamark
Other:  SSS Fine Detail embossing powder, Hero Arts White Iridescent Shimmer Spray, Dr. Ph Martins Bleed Proof White
Copics:  R89, 59, 29, 27, G99, 94, 82, 28, 09, 03, B28, 26, 24, 21, 0000, E47, 44, 43, 42, T4, 2, 0, YR27, 24, 23, Y21, C3, 1, 0, W5, 3, 1, 0

Sunday, November 19, 2023

Caroling Owls

Hello friends!  Just popping in with a fun card that I made for this week's challenges at Color Throwdown and Just Us Girls.  I was inspired by the pinks and greens in both challenges.


I decided to use a darling stamp set from Stamping Bella to create a few Christmas cards. 


These happy owls just make me smile, like so many SB stamps.  I stamped them in an alcohol friendly ink, colored them with Copic markers using pinks, greens and a couple of grays (warm for the owls, cool for the shadows), then restamped them with black pigment ink.  The sentiment is from a Purple Onion holiday sentiment set.


I used two Spellbinders Essential Stylish Ovals to die cut the image and a green mat and added the die cut sentiment with thin foam squares. The embossed background was sprayed with Hero Arts White Iridescent Shimmer Spray.  When that dried, it was adhered to the A2 card base, then the owls added with thin foam tape for a small bit of dimension. In my stash I had some small snowflakes die cut from silver glitter cardstock, so I added a few of those then finished things off with a white gel pen on the scarves and Star Dust Stickles on the brim and poms of the hats.  I love how this turned out!


I hope you've had a great weekend and if you're in the US, that you have a wonderful Thanksgiving!  

Take care and thanks for visiting!

Stef


Stamps:  Stamping Bella Three Owls Caroling, Purple Onion Winter Wishes Sentiment Set
Paper:  Neenah Solar White, C&9 Evergreen, SSS Silver Glitter
Ink:  Memento Tuxedo Black, Versafine Clair Nocturne
Dies:  Spellbinders Essential Stylish Ovals, Altenew Featured Sentiment die, Hero Arts Snowflake Confetti Fancy die
Embossing Folder, SSS Icy Snowflakes
Other:  Hero Arts White Iridescent Shimmer Spray, White Sakura Gelly Roll pen, Star Dust Stickles
Copics:  W3, 1, 0, C3, 1, 0, R43, 32, 20, E08, G28, 09, 02

Thursday, November 16, 2023

Bountiful Berries for Color Hues

Hello again!  It's time for a new challenge at Color Hues and this time the lovely Jules has chosen two colors that are perfect for the holidays...or not, it's up to you!


My choice was to go with Christmas and here's what I made...


My relatively CAS card started with embossing a panel of white with the Simon Says Stamp Twining Berries 3D folder.  Sorry the photos don't due justice to just how deep and pretty the images of berries on vines are.  Next, I used a rectangle die for the gold layer, die cutting out the center before layering on the embossed panel, because no one will ever know, except you lol!


The gold leaves and red berries were created using the Bountiful Berries die.  The SSS Arching Spruce Sprig die provided the brown twigs - I just cut all the branches off the large sprig so I could use them more selectively.  The sentiment was red heat embossed, die cut and added to the card front, with the final touch adding some beautiful red gems from Picket Fence Studios.  I actually ended up making five more cards just like this, substituting a red card base rather than the fancy gold frame.


This is such a lovely combination of colors, I do hope you're inspired to join us for this challenge!  For more inspiration, take a look at the stunning cards by my talented teammates and our wonderful guest designer Claire over at the CH blog.  We'd love to see what you create!  The challenge will remain open until 9 am EST Tuesday 11/28.

Take care and have a crafty day!

Stef


Stamps and Dies:  SSS Graceful Holiday Greetings Bundle, Bountiful Berries die and Arching Spruce Sprig die; Pinkfresh Studio Folk Edge Rectangle die
Embossing Folder:  SSS Twining Berries
Paper:  Neenah Solar White, SSS Matte Gold and Rich Red Metallic, C&9 Nutmeg
Other:  Gina K Red Hot embossing powder, Picket Fence Studios Candy Lane Gem Mix

Wednesday, November 15, 2023

Cosmos for The Flower Challenge

Hello friends!  I'm back with my mid-month reminder card for The Flower Challenge.  This month, we're using the colors black, yellow and white.

I ended up using a long-neglected background stamp for my card this time.


For my second card in this color combination (you can find my first one here) I color the background and flower centers yellow and left the flowers white using gray Copic markers to add gentle shading to the flower interior and edges.  Since the stamp is a 6" x 6" background stamp, I die cut the desired section first, then colored it.


The black layering panel was die cut with the next larger die in the set, then after adhering to the colored panel, I decided to wrap it with some black Baker's Twine and add my sentiment using a small tag.  Once that was done, the final step was to pop it up on the white card base with some foam tape.  Super easy and simple.


Thanks for stopping by and I hope you'll take a moment to visit the challenge blog - as always, my wonderful teammates have created some gorgeous cards for our reminder post!  And I do hope you're inspired to join us this month!

Take care!

Stef


Stamps:  Simon Says Stamp Cosmos Background, Waffle Flower Special Delivery Sentiments
Paper:  Neenah Solar White, SU Black
Ink:  Memento Tuxedo Black, Versafine Clair Nocturne
Dies:  Altenew Ornate Nesting, Waffle Flower Special Delivery
Other:  Retired SU Black Baker's Twine
Copics:  W3, 1, YR27, 24, Y19, 15, 13

Tuesday, November 7, 2023

Grateful for You

Hello friends!  Today I'm sharing a card created for the challenge over at The Paper Players.  This week Anne Marie is hosting the theme challenge and chose a perfect one for this time of year, which is to give thanks.

I went with a very fall-ish color palette because the colors this time of year (and the cooler weather) make my heart happy!  


I decided to color on kraft cardstock, which produces a more muted result.  The leaves were stamped in a random fashion on the panel, leaving room for the sentiment, then colored with Copic markers.  All the stamping was done with Gina K Chocolate Truffle Amalgam ink, which is Copic friendly.

 
With the coloring complete, next came the ink blending, which was done around the edges of the panel, leaving a center "glow".  I didn't want to trim down the panel, so I adhered it to a card base measuring 5.75" x 4.5" and called it good.  When I go to mail it, an A6 size envelope will work perfectly.


With so much going on in the world right now, for me (as I'm sure for many) it helps to remember all that I have to be grateful for, including you, my crafty friends!  Thank you for taking time to stop by and please take care!

Hugs,

Stef


Stamps:  Sunny Studios Elegant Leaves
Paper:  Neenah Desert Storm and Natural White
Ink:  Gina K Chocolate Truffe, Simon Says Stamp Cappuccino 
Copics:  R59, 46, 08, YR07, 68, 65, Y28, 26, 15, YG 17, 03, 01, BG75, 49, 15

Saturday, November 4, 2023

Bouquet Birthday for The Flower Challenge

Hello friends!  I'm back with my DT card for the latest at The Flower Challenge!  This month we're using the colors black, yellow and white for our floral themed cards.

For my card, I decided to break out my Spellbinders Betterpress and use press plates for both my floral image and sentiment.


The images were pressed on a Spellbinders Porcelain Cotton card panel with the recommended black ink.  It's always such a treat to see how perfectly these images come out.  Because alcohol markers cannot be used with the Betterpress inks, I opted to watercolor the panel.


I decided the easiest route was a loose watercolor using Distress reinkers.  I wet down the panel with water then dropped in very diluted Squeezed Lemonade with my larger paintbrush, covering most of the panel. Next came diluted Fossilized Amber for the flowers, then Wild Honey for the stamen in the largest flower.  When it dried, I trimmed it down to 3.5" x 4.75", layered it on a slightly larger panel of black, then added to the white base with foam. A few black rhinestones finished things off.


We would love to see how you decide to use these colors - I hope you'll join us this month!  In the meantime, if you visit the challenge blog, you'll see that my very talented teammates have a wide variety of cards to inspire you!  The challenge will remain open through Saturday, 11/25.

Take care!

Stef


*Spellbinders Pressed Bouquet and A Little Message Sentiments Betterpress Plates

*Spellbinders Betterpress Black ink; Squeezed Lemonade, Fossiled Amber and Wild Honey Distress Reinkers

*Spellbinders Porcelain Cotton Card Panel, SU Black cardstock, Neenah Solar White cardstock

*Honey Bee Obsidian Rhinestones

Wednesday, November 1, 2023

Christmas Sparkles for Color Hues

Hello friends!  It's time for a new challenge at Color Hues and this time Julie has chosen the beautiful combination of light blue and purple.  

I have to admit I went heavy on the purple, but that was more about matching inks with glitter paper than anything else.


The first step was to ink blend a panel of Tim Holtz White Heavystock with the two challenge colors.  I started with Distress Inks but it turned out too dark for what I was envisioning, so on a second panel I used Altenew inks for the blend and love how it turned out.  

Next came the die cutting.  The Simon Says Stamp Willow Snowflake die was cut from white glitter paper and the shadow from pearlescent vellum, then adhered to the panel.  The sentiment was cut from purple glitter paper then two of white for layering.  I have to say that this is an extremely dainty die cut and layering is not for the faint of heart lol! Or the impatient.  In retrospect, I now know why I don't use this die very often.  But I do love the script!


The remainder of the card was easy, matting the panel on a layer of the same purple glitter paper, then the card base.  In fact, this turned out rather simple in that there are not many components because it seemed all the sparkle was more than enough.  Let me know what you think - would you add bling?


What does this color combo say to you? I went with a holiday theme, but head on over to the challenge blog, where my amazingly talented teammates and our wonderful guest Linda have a variety of designs to inspire you.  The challenge is open until 9 am EST on Tuesday November 14th - hope to see your card in the gallery!

Take care!

Stef


Dies:  SSS Willow Snowflake and Flourished Merry Christmas
Ink:  Altenew Wisteria, Hydrangea and Sea Breeze
Paper:  TH Heavystock, Memory Box Purple Glitter, Neenah Solar White, Lawn Fawn Pearlescent, SSS White Glitter