Sunday, April 14, 2024

Birthday Wishes

Hello friends!  Another day, another card!  This time I'm playing along at Seize the Birthday.  Nancy has a fun challenge for us to use green and one other color, and of course make it a birthday card.

I hadn't made a mini or regular slimline card for a while, so I decided a mini slim would work well with the floral image I wanted to use.


Everything on the card but the frame is from the April 2024 Simon Says Stamp card kit.  I started by coloring up that pretty wild flower in a vibrant pink and of course greens for the leaves.  Next I flipped through the patterned paper selection from the kit and found this pretty green with a subtle floral pattern.  

After it was trimmed down and added to the card base, I decided to frame up the floral using a Pinkfresh Studio mini slimline frame, layering it up twice before adding to the card front.  The flower was partially adhered to the paper with some of the petals and the small but popped up with thin foam squares.  After adding the sentiments, some jewels seemed in order, so I found some pretty pink ones that matched the flower so well.


Thanks for visiting, I appreciate it! Be sure to come back tomorrow for my reminder card for the current Flower Challenge (layers) and on Tuesday when we have a wonderful new challenge with perfect spring colors over at Color Hues.

Take care!

Stef

  • Simon Says Stamp Wild and Free Flowers stamps and dies
  • Pinkfresh Studio Essentials: Mini Slimline Frame die
  • American Crafts Dreamer 6x8" paper pack
  • SSS Taffy Dazzling Gems
  • Copics - RV19, 06, 04, 02, YG67, 17, 03

Saturday, April 13, 2024

Touched Beyond Words

Hello friends!  I hope you're having a great weekend.  Today I'm sharing a card that I made for the current challenge at Freshly Made Sketches.

I love Jen's simple sketch and it was just perfect for using a big floral.  My card ended up being a square 5" x 5".


This large flower image is from Altenew's Vintage Garden and while I've had the stamp set a while, I hadn't inked up and colored this image as of yet.  For the flower petals I used Copics in a part of the RV family I don't typically reach for because they are more on the red side and I'm more inclined to like pinks.  Good to get out of your comfort zone, right?  The leaves were colored with Altenew Artist markers.

For the background, I ink blended a panel with some light greens at an angle starting at the upper right and fading off to white towards the middle.  It was then embossed with a 3D folder but the texture was so pronounced I didn't like it for this particular card, so I ran it through my die cut machine a second time just between the plates to lessen the embossing - it's not totally flat and it worked better for adhering everything.  

The flower was added to the white scallop circle that had been die cut three times, then the sentiment and gems finished things off.


Thanks for taking time to drop by!

Take care!

Stef
  • Altenew Vintage Garden Stamp and Die
  • Spellbinders Tile Motif 3D embossing folder
  • Spellbinders Betterpress You Are Everthing Sentiment press plate
  • Hero Arts Scallop Circle die
  • HoneyBee Stamps Aurora Borealis Gems
  • Copics - RV21, 23, 25, 19
  • Artist Markers - Aloe Vera, Matcha Tea, Swamp Green

Tuesday, April 9, 2024

A Botanical Thanks

Hello friends!  I'm dropping in with a fun post, sharing a card I made last week after watching a YT live with Gina K and Jennifer McGuire here. For this live, they showed different techniques for using background stamps and I've incorporated one in my card today that Jennifer shared.


This particular technique involves stamping your panel with a background stamp inked with either white pigment ink or a watercolor ink such as Versamark. When completely dry, you ink blend over it to get a subtle design.  The Versamark resists the ink, while the white pigment ink takes on a darker hue.  I made several backgrounds but this was my favorite.  

For this card, I used the Simon Says Stamp Botanical Split Background stamp for mine, inking it up in HoneyBee Stamps white pigment ink and letting it dry over night.  The next day, I ink blended it with SSS Limelicious and Surf inks, then die cut it with a Spellbinders Postage Edge Rectangle die.


Next I stamped the sentiment and sub sentiment with SSS Ocean ink, then die cut them both.  I used the SSS Whirl Dragonfly die to cut from white, glued it together then added it along with the sentiments to the card front.  The last detail was to add some SSS Surf Dazzling Gems.  CAS but with lots to look at because of the background detail.


Thanks for taking time to stop by!  I hope you're having a great week and I'll be back on the 15th with my Flower Challenge DT reminder post.

Take care!

Stef


Thursday, April 4, 2024

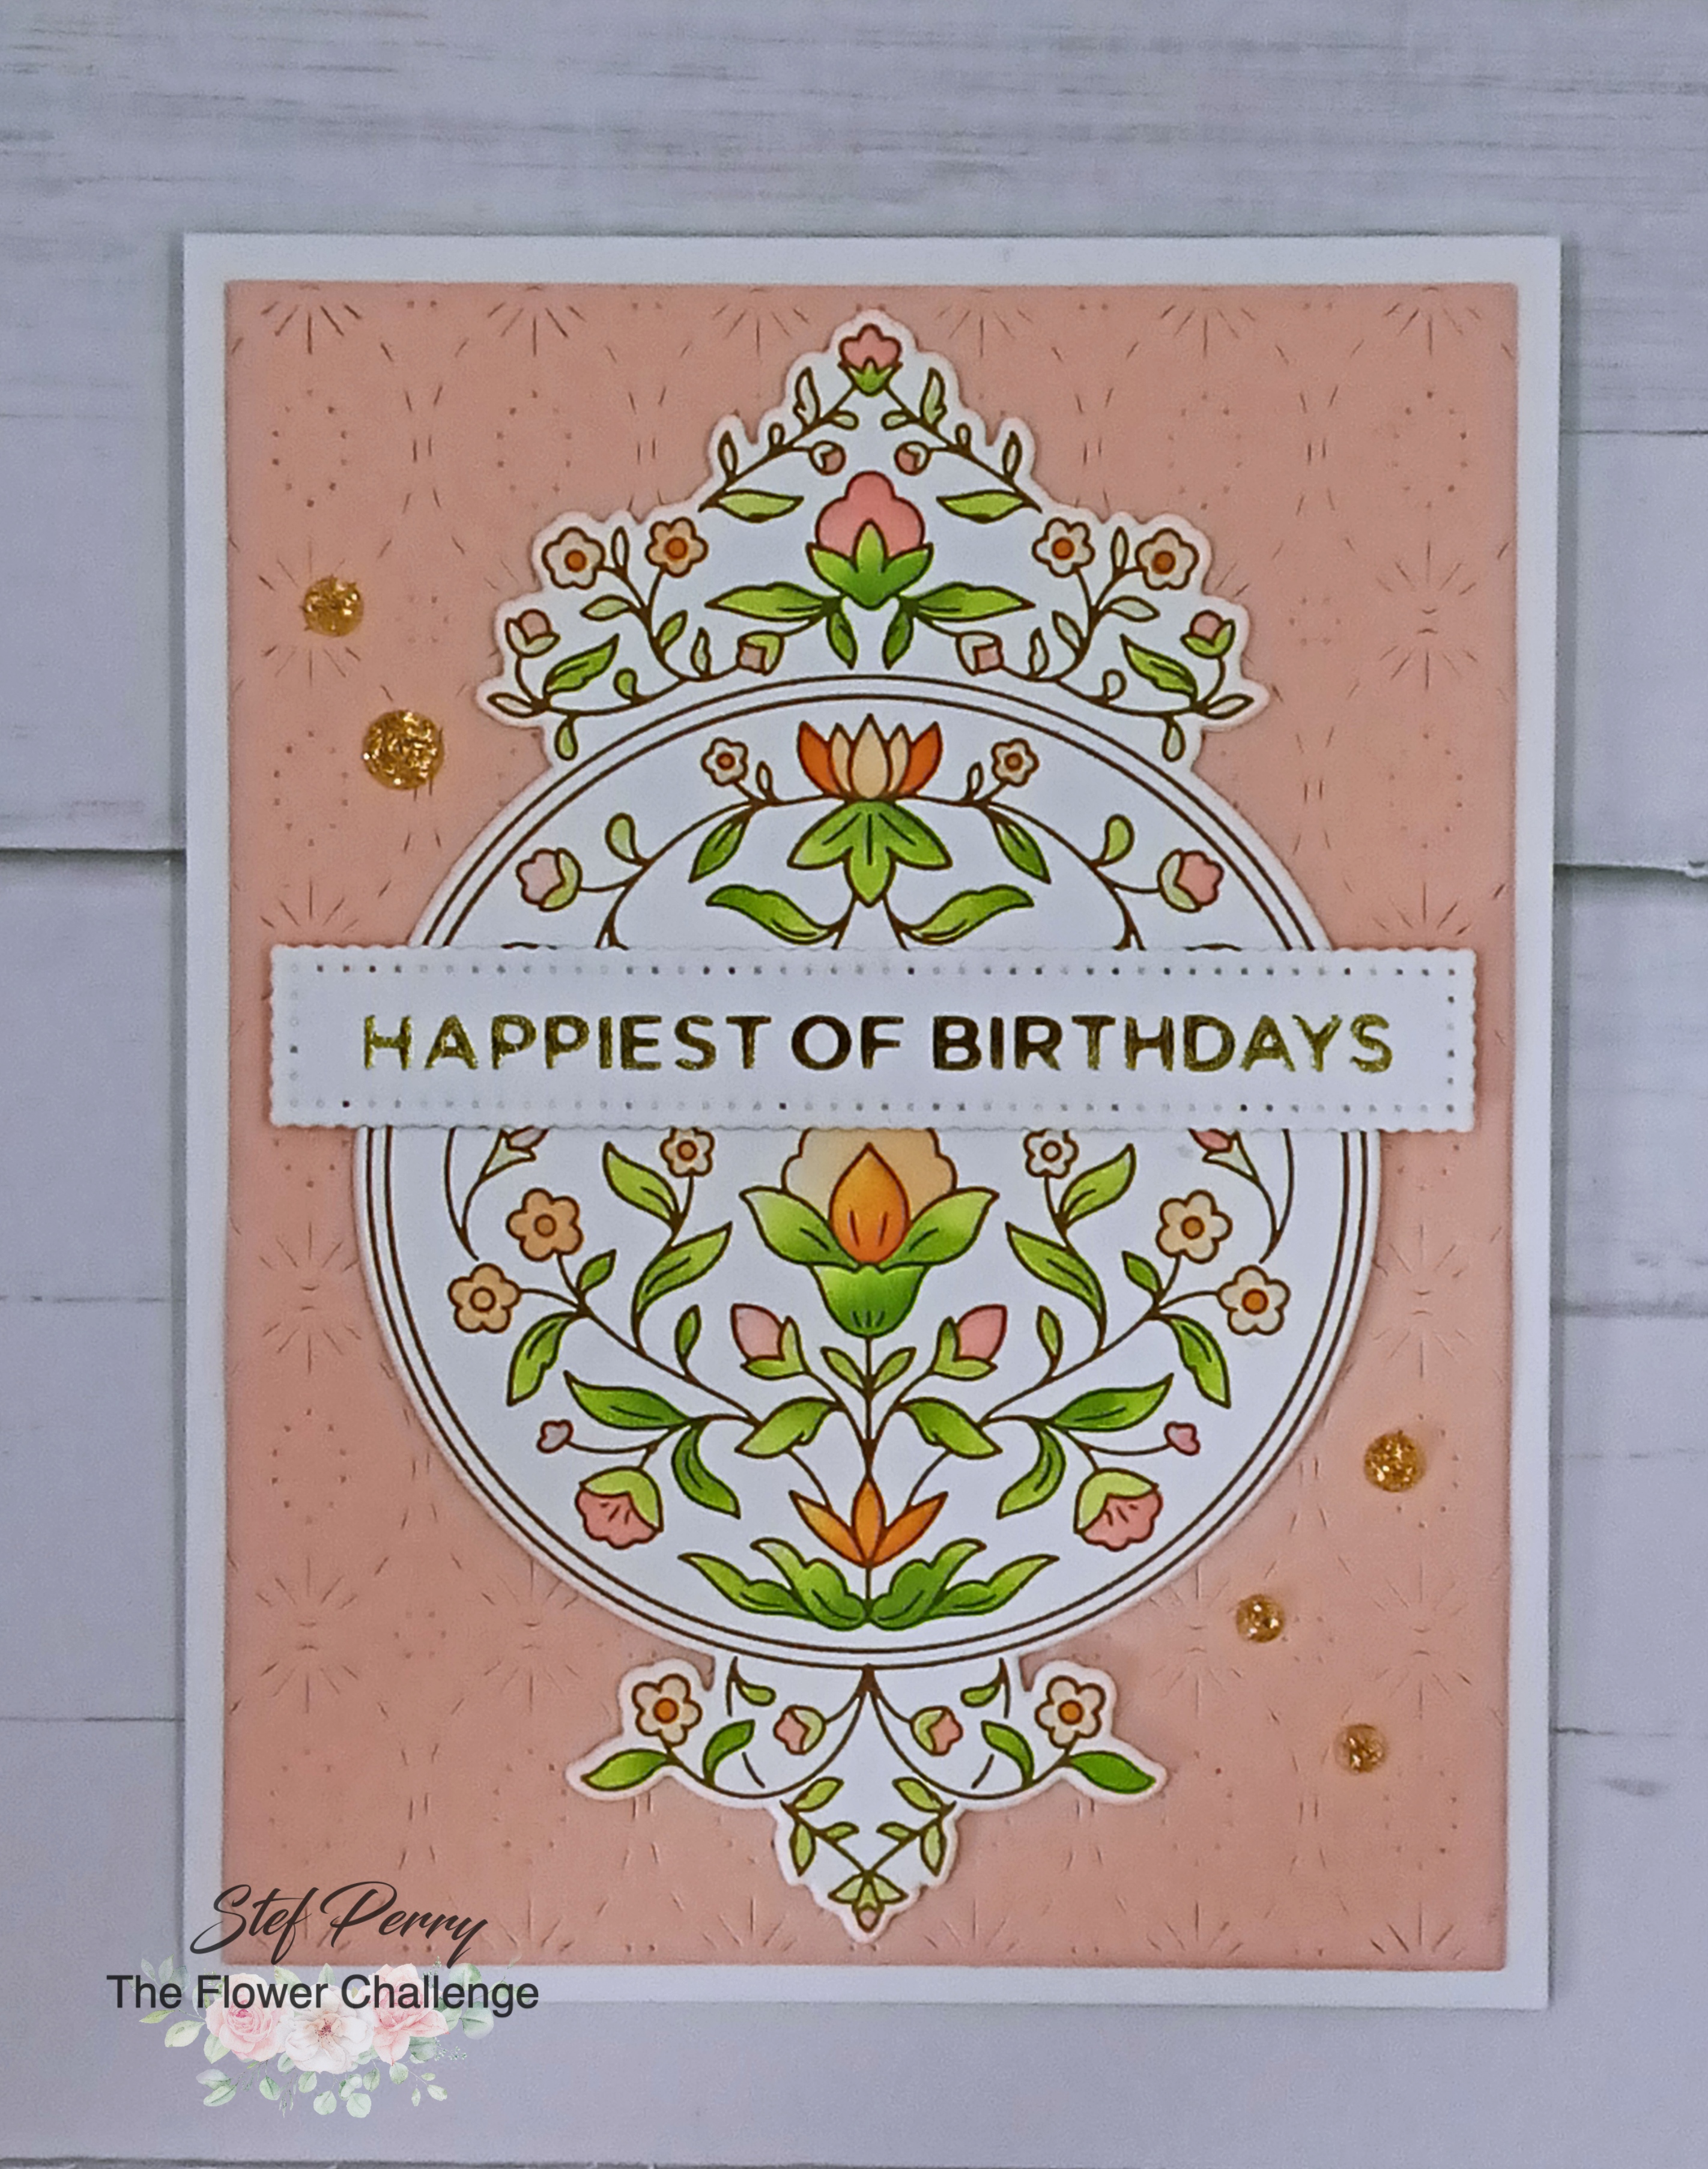
Garden Tapestry for The Flower Challenge

Hello friends!  Here we are in beginning of April and at The Flower Challenge this month we are adding layers along with our flowers!

There are many ways to add layers and for this card, I added a panel cut with a cover plate die and also added layers under my main image for dimension.


The first step was to use the beautiful and intricate Pinkfresh Studio Garden Tapestry press plate with my BetterPress.  It was inked with Spellbinders Bark BetterPress ink, then I used the coordinating stencil to color the flowers and leaves.  I just love this delicate design.


Next came the die cutting.  The PFS Intricate Stitched Ovals Cover plate die left a subtle and beautiful design on the light peach panel, then added to the card base.  The stenciled image was die cut along with three additional layers, adhered together, the layered on the peach panel.  The sentiment was from a previous foiling session using SB More Sentiments foil plates and cut with the coordinating die, and I liked how the border seemed to coordinate with the background stitched design.  Lastly we couldn't go without a little bling, so I added some Studio Katia Gold Glitter drops, which also tied in the gold from the sentiment.


How would you add layers to your floral card?  Die cut flowers?  Layers of patterned paper? Frame?  All of the above? There are so many ways to go with this and for some wonderful inspiration, be sure to take a look at all the beautiful creations by my fellow DT members over at the challenge blog, then come play along with us!  The challenge will remain open until 5pm GMT (1 pm EDT) April 25th.  Be sure to swing back by on the 15th when I'll have my reminder post with a different way to add layers!

Take care!

Stef

  • PFS Garden Tapestry Press Plate, Die and Stencil
  • PFS Intricate Stitched Ovals Cover Plate die
  • Concord and 9th Nectar cardstock
  • PFS Peach Fuzz, Coral Berry and Clementine inks; SSS Limelicious and Pearfection inks; SB Bark BetterPress ink
  • Studio Katia Gold Glitter Drops

Monday, April 1, 2024

Vintage Roses for Color Hues

Hello friends!  It's time once again for a new challenge at Color Hues, where the lovely Cindy has chosen a beautiful combination of peach and green.

To me, the obvious choice was to use florals and because I had a new die set with roses, it was the perfect match.  I did step out of my comfort zone with a more vintage style card, but I think that's a good thing to do once in a while and I love these roses - you'll be seeing more of those in the future!


This relatively new Lovely Layers: Sweetheart Roses die set was everything I'd hoped it would be, with such beautifully crafted layers.  I die cut the flowers and stems from ivory cardstock, then used Copic markers to color each layer.  After the first round of coloring on the roses, I decided there wasn't enough shading and dimension, so I went back and added more to emphasize the different layers.  I do think I got a little carried away with the leaves, however. ;-)


With the floral image adhered together, I moved on to the background.  I stamped the Vintage Flora Background Stamp on a light peach cardstock panel, then ink blended light peach around the edges.  The Vintage Labels  frame was die cut from ivory cardstock, then adhered to the peach panel, tucking the roses underneath a portion.  After adding the sentiment, the upper left of the card looked a bit empty, so I added some pretty metallic pearls that matched beautifully with the peach colors.


What do these colors bring to mind for you?  I do hope you'll share what you're inspired to create and play along with us this time!  As always, my wonderful teammates have created some beautiful and varied inspiration for you, so be sure to pop over the challenge blog and take a look.  The challenge will remain open until 9 am Sunday April 14th.

Take care!

Stef

  • HoneyBee Stamps Lovely Layers:  Sweetheart Roses
  • HB Layering Vintage Labels die
  • HB Vintage Flora Background stamp
  • Simon Says Stamp/Altenew Rose Reverie stamp set (sentiment)
  • Concord and 9th Nectar and Grapefruit inks and Nectar cardstock
  • Hero Arts Ivory cardstock
  • Copics:  Flowers - E97, YR02, 01, 00, 000; Leaves and stems - YG67, 17, 03

Wednesday, March 27, 2024

Vintage Santa Shaker for Christmas Craft Creations

Hello friends!  It's time for my monthly Christmas card for the reminder post at Christmas Craft Creations.  This month we're asking everyone to use designer paper.  


I really had very little holiday dsp until I bought a card kit from Simon Says Stamp at Christmas and it included some really nice vintage style patterned paper and frames, which I used for this card.


I started with a collage design sheet of paper, trimmed it down and adhered it to a 5 x 7" ivory card base.  Another piece of the paper had Santa's cute face on it, so it was trimmed down to go on the inside of the shaker window.  A piece of acetate was glued to the back of the frame, then foam tape was adhered around the perimeter before adding some of a sequin mix and adhering the piece with Santa on the back.


To make this look old and "vintage" I used a tool to distress the edges of all the pieces of designer paper and ink blended some Vintage Photo Distress Oxide around the outside. As the panels were layered on the card, I made sure to have some tears and have the corners curled up.  After adhering the shaker, I added two sentiment stickers to the bottom front of it and three snowflakes cut from white glitter paper to finish it up.  I do love that Santa face peeking out of the shaker window!


Now is a great time to build your supply of holiday cards, and we'd love to have you play along with us this month.  The challenge is open until 6 pm GMT (2 pm EDT) April 9th.

Thanks for visiting.  Take care!

Stef


  • Simple Stories Decorative Christmas Designer Paper
  • Tim Holtz Ideology Christmas 2023 Sticker Book and Christmas Layer Frames
  • SSS Sensational Snowflake die and Snowflake Hexagon die
  • Hero Arts Ivory cardstock, SSS Light-Weight Clear Acetate Sheet, SSS White Glitter paper
  • Vintage Photo DOX
  • Lucy's Cards Snow on Snow Sequin Mix

Saturday, March 16, 2024

Best Wishes for Color Hues

Hello friends!  It's time for a new challenge at Color Hues and this time the lovely Carol has chosen a beautiful color combination.

This combo made me think of cream colored flowers so I decided to use the pretty HoneyBee Stamps Lovely Layers: Magnolia for my card.


The flower petals were die cut from ivory cardstock, then I lightly inked the center of each layer and the ends of some of the petals before adhering together.  Originally I ink blended a brown center but I didn't like how it looked so I switched to matte gold.  I mean, can you ever go wrong with metallics lol?!!


Next the large vintage frame was die cut from cornflower blue cardstock and I found the foiled sentiment that had been created in a previous foiling session, which led me to creating this layout.  I had everything layered on the ivory card base but the card needed a little something more, so a panel of ivory was embossed with a beautiful and intricate folder from Paper Rose, then the frame, flowers and sentiment were adhered.  The final step was to add a few gold pearls.


So, what does this color combination bring to mind for you?  For more inspiration, my amazingly talented teammates and our guest designer Steph have some stunning card designs waiting for you over at the challenge blog!  I hope you decide to join us; the challenge will remain open until 9 am EST Friday 3/29.

Take care!

Stef
  • HoneyBee Stamps Lovely Layers: Magnolia and Layering Vintage Labels die
  • HoneyBee Stamps Foil Script: Wishes Hot Foil Plate and die
  • Hero Arts Ivory, Simon Says Stamp Cornflower and Matte Gold cardstock
  • Paper Rose Sweet Vines embossing folder
  • Spellbinders Matte Gold Glimmer Hot Foil
  • SSS Morning ink
  • HoneyBee Stamps Metallic Mix Pearl Stickers


Friday, March 15, 2024

Blooming Delight for The Flower Challenge

Hello friends!  It's mid-month and that brings about our reminder post at The Flower Challenge.  


This time I decided to go big with a 5.5"x 5.5" square in order to accommodate the big blooms I used.


I'm always drawn to Altenew's Build-A-Garden stamps and the Blooming Delight was no exception, so it found its way into my craft room!  I stenciled the image with inks from the Fresh Dye selection - I really love how the purple-blue and dusty rose colors look together.  The image was then die cut with the coordinating die.


As I looked through my cover dies, I found this trellis and despite it being A2 sized I thought it would be a great anchor for these blooms.  It was die cut from kraft cardstock then sprayed with Crooked Broom Distress Mica spray.  While that dried, I embossed a panel of ivory cardstock with Altenew's Masonry Wall 3D folder, then used my brayer to apply a brown ink just to the raised portion.  I'm afraid the photos don't catch for embossed detail well.  The die cut trellis was attached to the embossed panel, then the florals were added with foam tape.  The sentiment is from a Spellbinders Betterpress set.  Lastly, I added a few gems that seemed to go perfectly with the brown colors.


You still have until the 25th at 5pm GMT to play along and in the meantime, be sure to visit the challenge blog as my amazingly talented teammates have oodles of inspiration to share with you!

Take care!

Stef

  • Altenew Blooming Delight BAG stamp, die and stencil set
  • Altenew Garden Trellis Cover Die and Masonry Wall 3D ef
  • Spellbinders Fancy Sentiment Strips Betterpress plate and die
  • Neenah Desert Storm and Hero Art Ivory cardstocks
  • Altenew inks - Sunray, Chamomile, Pumpkin Pie, Yellow Ochre, Jade, Eucalyptus, Frayed Leaf, Forest Glades, Pink Sand, Dusty Rose, Toasted Mauve, Water Hyacinth, Alpine Aster, Crystal Violet, Rocky Shores and Obsidian Pigment ink
  • Crooked Broomstick Distress Mica Spray
  • HoneyBee Vintage Love Gem Stickers


Thursday, March 7, 2024

Showers of Love

Hello friends!  Just popping in with a quick post with a card I made for Claire's Rainy Days theme over at The Paper Players.  I also decided to use the Color Hues colors of turquoise and green for our current challenge.


I'm also joining the current Simon Says Stamp Wednesday Challenge where the theme is to add a sentiment.

When I saw Claire's theme, I knew I had to pull out one of my older but well-loved Birdie Brown stamp and die sets from MFT.


I started by stamping the sweet little girl and the splash drops.  They were colored with Copic markers then die cut.  I also die cut the clouds and the puddle, then used my Copics to color them as well.  

For the background, I cut a panel of white cardstock with MFT's Stitched Modern Rectangle Stax die, then white heat embossed the sentiment before inking up the background with Altenew's Aqualicious ink.  I splattered the background with water droplets, but they didn't show up as well as I wanted, so I splattered some white paint on there as well.  Once the panel was dry, the clouds, puddle and drops were adhered directly to the panel, then foam tape was used to give our cute little girl some dimension.  


Thanks for stopping by, I appreciate it.  I hope all is well in your neck of the woods!  Take care!

Stef


  • MFT BB Rain or Shine Stamps and Dies
  • MFT Stitched Modern Rectangle Stax die
  • Versamark and Altenew Aqualicious Fresh Dye inks
  • Dr. Ph Martin's Bleed Proof White
  • Copics - E29, 37, 33, 11, 21, 00, BG09, 45, 01, 11, 10, YG09, 07, 05, 01 R20, C5, 3, 1, 0, 00

Monday, March 4, 2024

Wildflowers for The Flower Challenge

Hello friends!  We have a new challenge for you over at The Flower Challenge and this month we're asking everyone to make a square card for your lovely florals!

I rarely make square cards but I found I really enjoyed creating this one because of all the real estate this size offers, providing lots of room for both my flowers and large sentiment.  In the US and Canada (I believe) extra postage is required if you mail in a square envelope, but an option is to make a 5" x 5" card like I have, which can be sent it in an A7 envelope for no additional postage.


I was looking through all my floral die cuts and spied a set that hadn't seen the light of day in a long time, so I figured it was time to put it to use!  These dies are large, beautiful wildflowers and it seemed a more vintage style design would work well.  With that in mind, I looked through my stash of patterned paper and found this beauty with gold wildflowers printed on a faint text.


The flowers were die cut from ivory cardstock, then lightly ink blended with Altenew Blush and Rouge inks. I also lightly ink blended both colors around the edge of the patterned paper square before adhering to the ivory card base.  I fiddled around with the floral arrangement and different sentiments, then settled on this design so I could use that lovely, flourished die cut sentiment in matte gold.  After the wildflowers were tied together with the gold twine, they were adhered on the lower stems with glue, then I used pieces of foam tape to elevate the flowers for a little dimension.  No gems needed for this card with all the beautiful metallic gold!


Thank you so much for stopping by and I encourage you to pop over to the challenge blog because, as always, my wonderful teammates have some incredibly beautiful inspiration for you!  I hope you'll find time to join us - the challenge will remain open until 5 pm GMT on March 25th.

Take care!

Stef


  • Tim Holtz Wildflowers dies
  • Altenew Fancy For You die
  • Pink and Main Layered Square dies
  • Altenew Blush and Rouge Fresh Die Inks
  • Hero Arts Ivory and SSS Matte Gold cardstocks, American Crafts Jen Hadfield Heart of Home paper pad
  • Retired SU gold twine

Sunday, March 3, 2024

May It Be Happy

Hello friends!  Today I'm sharing a card that I made for the current color challenge at Color Throwdown.  The colors were too pretty to pass up and I actually had time this weekend to just play.

I'm also joining in over at the Simon Says Stamp Wednesday Challenge where this week's theme is Anything Goes.

I combined some new products with an older cover die to create my card.


I recently obtained the HoneyBee Stamps Lovely Layers: Rose die set and it seemed to fit the bill perfectly for the challenge colors.  All the components were die cut from white cardstock then ink blended.  The pinks were as close as I could get to rose and the green inks are definitely in muted, sage-like colors.  I also ink blended a white panel in pink.


The background element was die cut from Stampin' Up Merry Merlot cardstock using a retired cover die from Simon Says Stamp.  After adhering it to the pink inked panel, it was added to the card front.  With such a busy background I needed a place for the rose to be grounded, so a scallop circle was die cut from white, layered on the card, then the rose was attached.  It's a different kind of die from what I'm used to in that the bloom, bud and the leaves are all separate components, but they line up perfectly of course.  After layering on the sentiment, I added a few pink gem stickers for some sparkle.


Thanks for visiting and I hope you'll have a chance to swing by tomorrow when I post my card for the March challenge at The Flower Challenge!

Take care!

Stef


  • HoneyBee Stamps Lovely Layers: Roses and Be Still stamp and die
  • SSS Marilyn Full Card Cover die
  • Hero Arts Scallop Circle Infinity die
  • Altenew Silver Sage, Jade and Eucalyptus inks; Concord & 9th Carnation and Sweet Pea inks; SSS Carbernet ink
  • HoneyBee Stamps Vintage Love Gem Stickers

Friday, March 1, 2024

Framed Florals for Color Hues

Hello friends and hello to March 1st too!  As usual, the weeks and months are flying by, with today being the start of our new challenge at Color Hues.  This time, sweet Tracey has chosen a lovely combination of turquoise and green.


I decided to pair up my new Altenew Acrylic Markers with two floral stencils and make two cards.


When the acrylic markers first came out, I saw a Jennifer McGuire video where she paired them with stencils and I thought it looked fun and easy to do, so I used her technique with these two floral stencils.  I started stenciling on white cardstock, but realized the colors would pop even more on black.  As Jennifer showed in her video, I just traced around the edge of the leaf or petal in the stencil then filled in the middle.  It went pretty quickly so that's why I ended up making two cards.

After I created these cards, Altenew held an IG hop on 2/16 with lots of inspiration, so if you're interested you can check it out at @altenewllc.


For this first card, the stenciled image is so large that I ended up creating a 5.75" x 4.5" card, which can be mailed in an A6 envelope.  I created a thin frame from matte silver cardstock and added it to the main image that had been adhered directly to the card base.  The sentiment is one left over after a foiling session using some of my Betterpress plates and I finished things off with some iridescent clear drops.


The colored panel for the second card was trimmed down and adhered behind a thick frame cut from the same matte silver cardstock using two sizes of rectangle dies, then added to the black card base with foam tape.  The silver sentiment and vellum shadow were added along with some Aurora Borealis gem stickers from Honeybee Stamps.


What will you create with these two colors?  We'd love to have you join us but before you run off to your craft room, be sure to take a peek at what my amazingly talented teammates and guest designer Tenia have created for your inspiration!  

Thanks for stopping by.  Take care!

Stef

Card #1
  • Gina K Bold Bouquet stencil
  • You Are Everything Betterpress Sentiments & Dies
  • Spellbinders Black Glimmer Hot Foil
  • Neenah Solar White, Hammermill, Hero Arts Pitch Black and Simon Says Stamp Matte Silver cardstock
  • SSS A2 Thin Frame die
  • Hero Arts Nested Rectangle die
  • Altenew Acrylic Markers
  • Pinkfresh Studio Iridescent Clear Drops
Card #2
  • SSS XL Rose Bouquet Stencil
  • SSS Big Scripty Hugs dies
  • Altenew Acrylic Markers
  • Hero Arts Pitch Black and SSS Matte Silver cardstock, Lawn Fawn Pearlescent Vellum
  • Hero Arts Nested Rectangle dies
  • HoneyBee Stamps Aurora Borealis Gem Stickers

Wednesday, February 28, 2024

Wishing You Joy for Christmas Craft Creations

Hello friends!  Today's card is for the reminder post at Christmas Craft Creations, where this month we're asking participants to use an embossing folder or stencil.  Easy-peasy, right?


I tried a new technique that I saw Jennifer McGuire do, and while the technique results weren't very satisfactory, I did mange to salvage the card and I like how it turned out.


I started with a panel of Tim Holtz White Heavystock, which can take a lot of water and covered the front of my panel with Villainous Potion Distress Oxide ink.  The technique entails adhering a stencil over the card stock, misting with water, then absorbing the activated ink through the stencil.  This can be done as many times as you'd like until you're happy with the amount of ink removed.  You then dry the panel thoroughly, put the stencil back in place and use a lighter color of ink through the stencil were the ink was removed.  

Well, as I applied Picked Raspberry DOX through the stencil, it just didn't seem vibrant enough, so then I tried the same color in regular Distress ink and it was too dark!  Awwkkk! So my only alternative at that point was to apply some white glitter glitz gel through it and it did turn out beautifully.


After the glitz gel dried, I trimmed the panel down and added directly to a white card base.  The Joy sentiment and sub-sentiments were silver heat embossed then adhered to the card front with thin foam tape.  For additional the final touch, a few holographic stars were added, including one in the middle of the O in Joy.  I was very happy that I managed to save my card and add it to my holiday card stash!


We would love to have you join us, the challenge stays open until Tuesday, March 12th at 6pm GMT.  

Thanks for stopping by and take care!

Stef

  • Gina K Stellar Snowflake Stencil and White Glitter Glitz Gel
  • Simon Says Stamp Stained Glass Greetings stamps and die and Sentiment Labels die
  • Trinity Stamps Oh My Stars Holographic Confetti Mix
  • Villainous Potion DOX, Picked Raspberry DOX and Distress ink, Versamark