Sunday, June 11, 2023

Just a Bunch of Hocus Pocus

Hello there!  I'm back with my second post of the day (you can find my Sunday Stamps DT post here.) For this post I'm playing along with the super fun challenge at Inkspirational, where they want us to share seasonal cards.  


Every year since my grandchildren were young, I have sent each of them a Halloween card.  Now that they are adults, I still do it because it's fun, they love getting them and I love to make them.  So, the card I'm sharing today was one I made for my granddaughter last fall but have never shared it in a blog post, so I thought now's the perfect time!


My favorite Halloween movie (and probably so for many people) was and is Hocus Pocus.  I'm a huge Bette Midler fan and she and the other two women were absolutely hilarious.  So, when I saw that Stamping Bella had this stamp, it was a must have for me.  

After stamping the image, I used Copic markers to color the witches and the background, using a lot of inspiration for that from the super talented Elaine Hughes and the other DT at SB.  The panel was then cut down with a wonky rectangle die, then adhered to a black A2 card base.


The sentiments are from a separate stamp set (both listed below) and after they were white heat embossed on black, I fussy cut them down to size and added them with a bit of foam tape.  The last step was to add some Honey Bee Stamps Obsidian Rhinestones, including a small one for the necklace on the middle witch.


Thanks so much for taking time to stop by.  I hope you have a great week ahead!

Take care!

Stef


Stamps: Stamping Bella Curvy Girls Witches 3 and Frightful and Delightful
Paper:  Neenah Solar White, Hero Arts Pitch Black
Ink:  Memento Tuxedo Black, Versamark
Other:  Simon Says Stamp Wonky Rectangle die, Honey Bee Stamps Obsidian Rhinestones
Copics:  Hair: (YR35, 33, 31) (E29, 09, YR18, 14) (C9, 7, 6, 3); Dresses: (BV29, 09, 06, BG99, G28, YG67, 17, 25 W9, 7, 5) (RV99, 19, 66, 55, BV17, V17, 15, 12) (E57, YR18, 16, Y17, BV17, V17, 15, 12); Background: V25, 22, T6, 4

Fisherman for Sunday Stamps

Hello and welcome!  It's time for a new challenge at Sunday Stamps and this time we have some muted colors that I found to work well for my husband's birthday card.  I used red, gray and steel blue.


I'm also playing along with Seize the Birthday's Anything Goes Challenge.


My husband is a fly fisherman and I have found when crafting companies create stamp sets with fishing images, they are mostly for bait fishing.  So I was pleased when I found this stamp from Whimsy Stamps.


I started by stamping the image on white cardstock, then ink blended Simon Says Stamp Morning ink in the background for the sky.  I used Copic markers to color the water, his waders, jeans, vest, shirt and hat and was going to call it good but the background looked to vacant.  I used very light gray copic markers to faintly draw in the trees on the other side of the water.  I am not much of a sketch artist but these are easy trees - draw a line for the trunk and add random squiggly lines for the limbs and it gives the impression of tall fir trees without having to get too detailed.


The main panel was die cut with a deckled rectangle and added with foam tape to a gray panel that was die cut with a larger deckled rectangle, then embossed with a retired Stampin' Up embossing folder.  The sentiment was stamped and die cut with an extra layer to give it a bit of dimension. The final step was to add the fishing line coming off the end of his rod; the stamp didn't have that so I just drew one with a ruler and a black Copic Fineliner pen.


Be sure to pop over to the challenge blog to check out the wonderful cards by the other DT members and hopefully be inspired to join us!

Take care!

Stef


Stamps:  Whimsy Stamps Fisherman, Honey Bee Stamps Pickup Lines
Paper:  Neenah Solar White, Simon Says Stamp Slate
Ink:  Memento Tuxedo Black, Altenew Obsidian, SSS Morning
Dies:  Pickup Lines coordinating sentiment die, Altenew Mix and Match Frames, Waffle Flower Deckled Frames
Embossing folder:  ret. SU Bark
Copics:  E35, 34, 30, 21, 11, 00, 000, T0, 2, C6, 4, 2, B99, 97, 93, 91, R59, 39, 37

Thursday, June 8, 2023

The Joy is in the Journey

Hello friends!  Today I'm sharing a birthday card that I made for my nephew and am playing along with Ann's challenge to create a masculine card at The Paper Players.


The Paper Players always has great challenges, I have found myself not having time (making time?) to play along, so this week I made sure to do so.


I used Altenew's Spectacular Adventures stamp and die set.  I think the idea of the reflection in glasses is so clever and there are three different scenes to choose from - obviously I chose the mountain scene.  The glasses were stamped in black, then I used Gina K's Warm Glow Amalgam ink to stamp the scene.  It's a light ink to use for that "no-line" stamping look.  Copic markers were used to color the scene, then the piece was die cut.


I used one of my favorite plaid prints from the retired Stampin' Up Plaid Tidings DSP - I hoard this paper pack lol!  The panel was trimmed down and layered on a white card base.  The sentiments were stamped on a white strip, layered on a slightly larger one of Garden Green cardstock, the adhered to the card.  Lastly the glasses were added with foam tape for a bit of dimension.


Thanks for talking time to stop by.  I hope you're having a great week!

Take care!

Stef


Stamps:  Altenew Spectacular Adventures, PTI Stylish Sentiments: Birthday
Paper:  Neenah Solar White, Garden Green, Plaid Tidings dsp
Ink:  Memento Tuxedo Black, Versafine Clair Nocturne, Gina K Warm Glow Amalgam
Die:  Spectacular Adventures
Copics:  G46, 43, W1, 0, BG000, 0000

Sunday, June 4, 2023

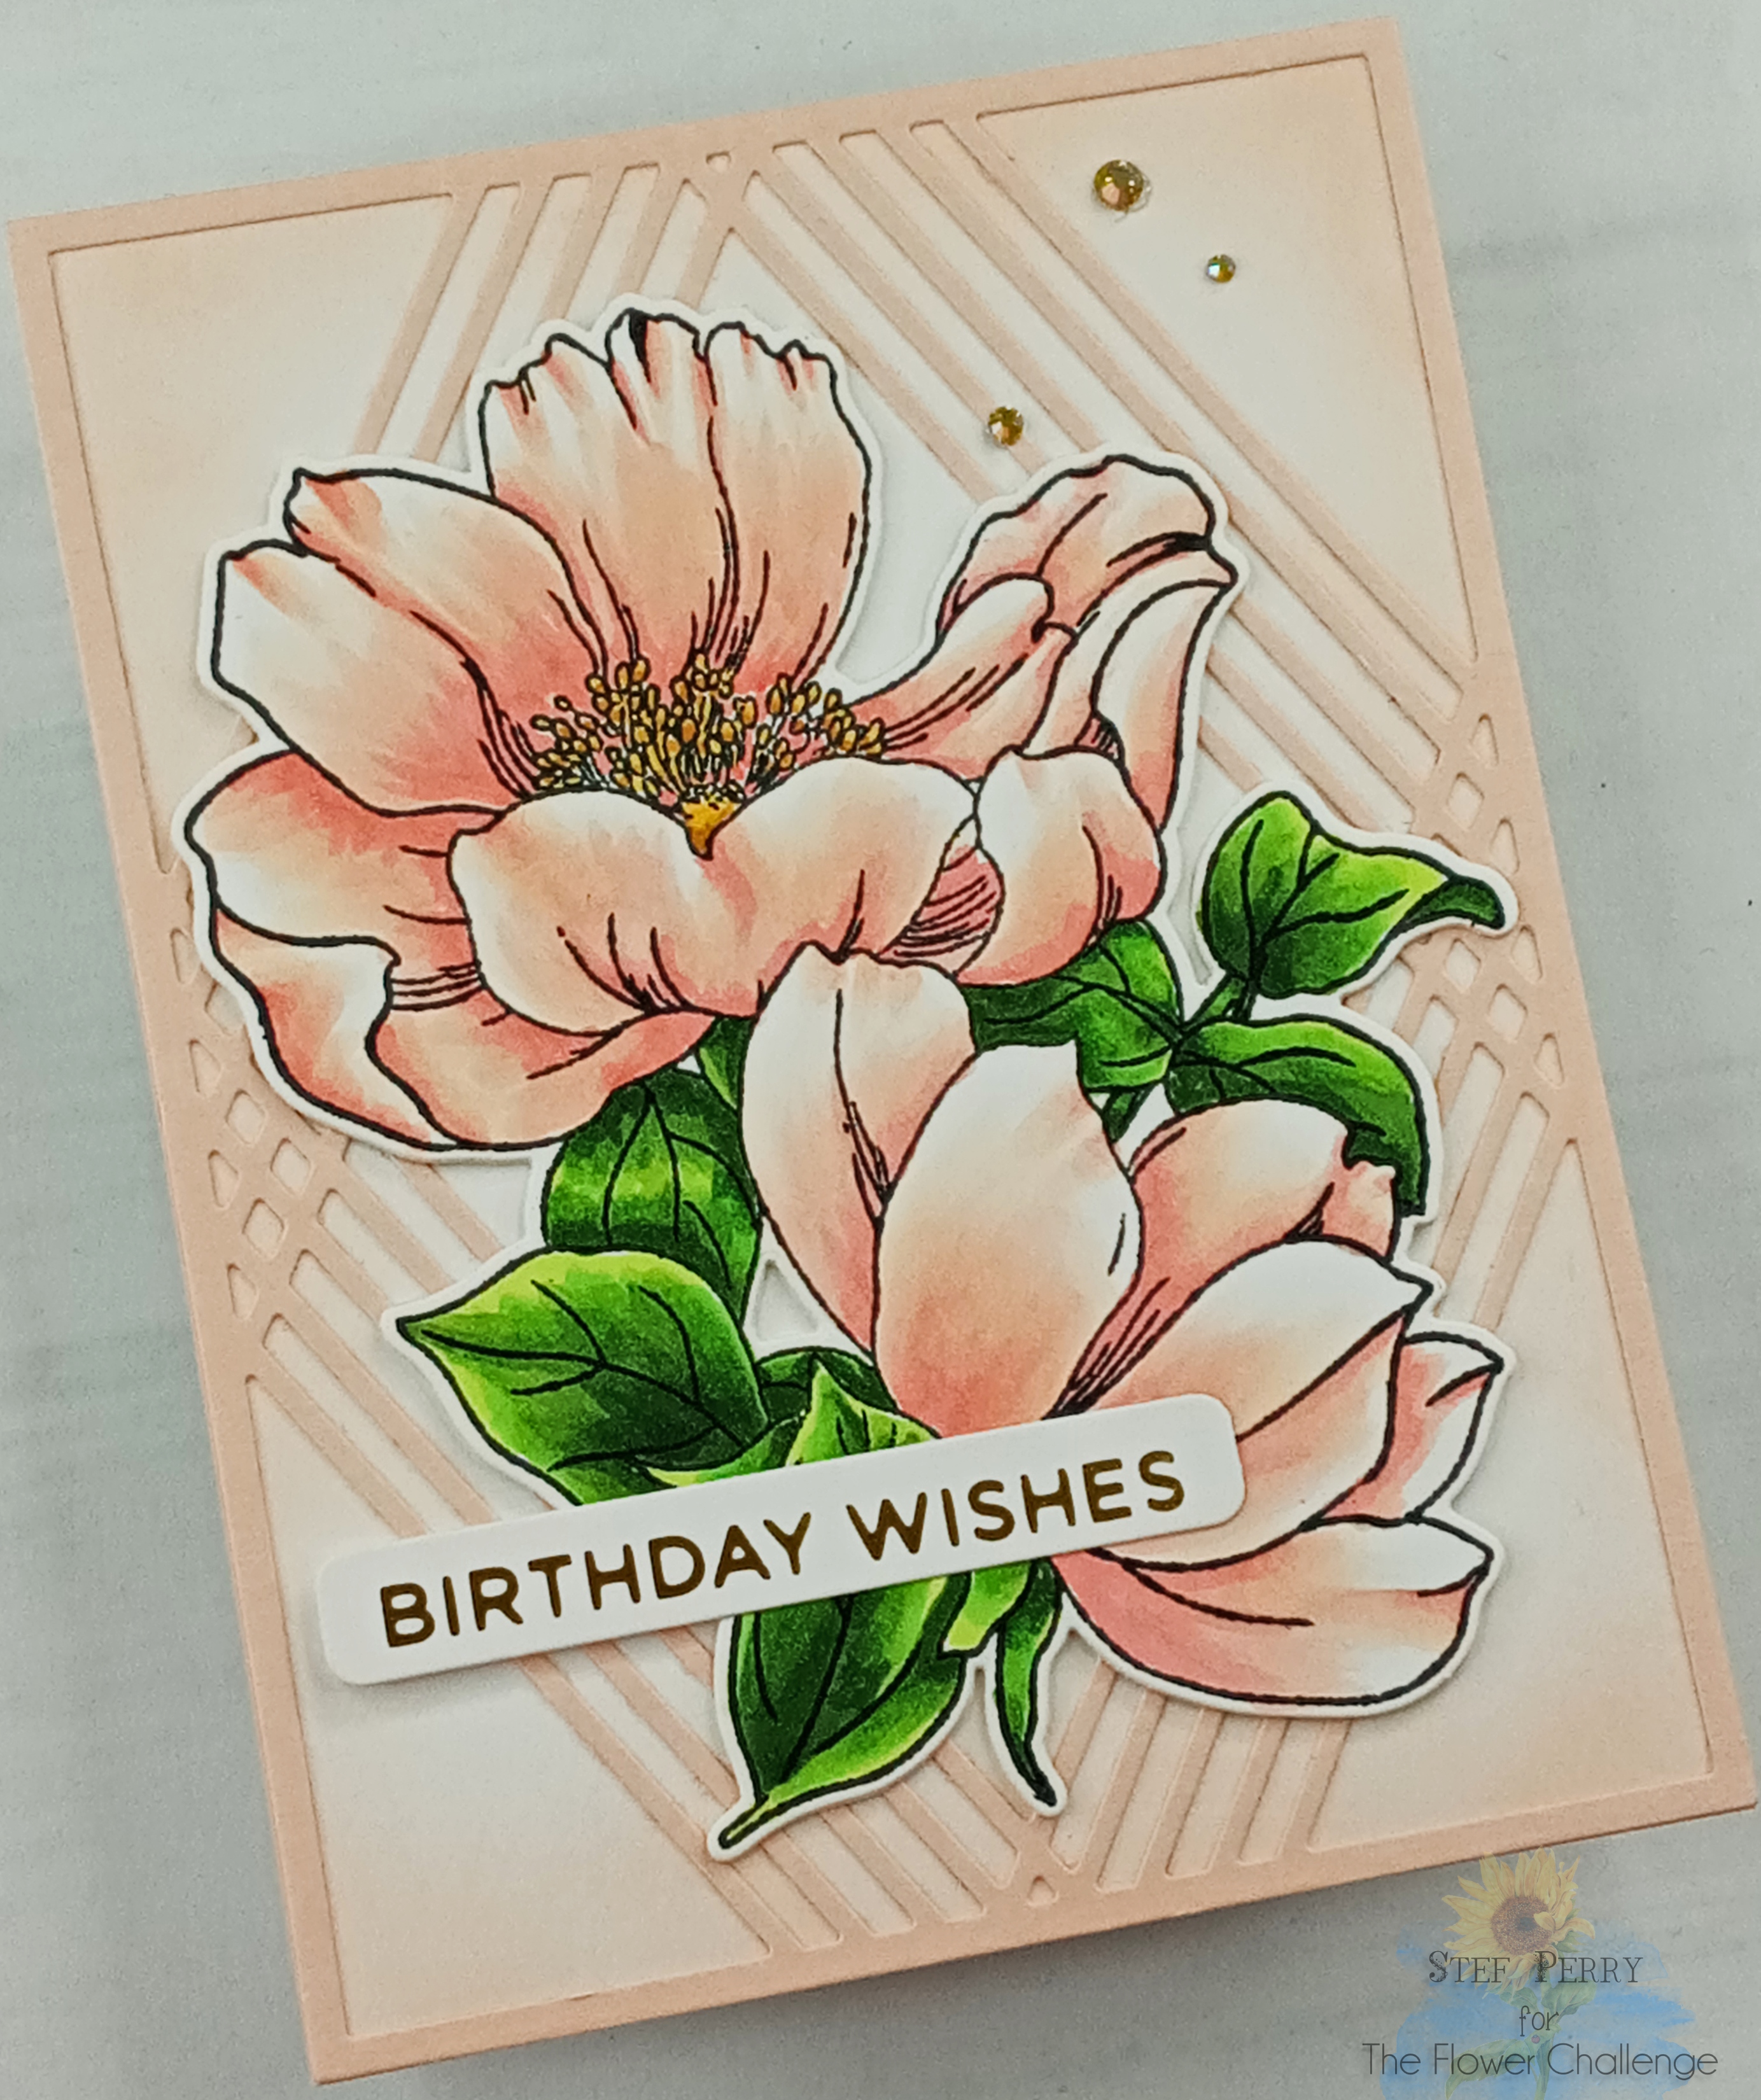
Peony Birthday Wishes for The Flower Challenge

Hello friends!  The new month also brings a new challenge at The Flower Challenge.  This month the theme is to use your favorite flower - how easy is that?  Well, unless you have multiple favorites, then you'll have to choose one - or even better, make more than one card for the challenge!


I'm also joining the current Anything Goes challenge at Simon Says Stamp Wednesday Challenge.

If you follow my blog, you may know that peonies are my very favorite flowers and I have a one to share today that I colored in what I guess is my current favorite color - peach!


This gorgeous image is from Altenew, and as a peony lover, one I could not resist adding to my collection of flower stamp sets.  I used Copic markers to color it, then it was die cut with the coordinating die.  The sentiment is from Spellbinders, foiled in gold and die cut with a sentiment label die.


Next the Diamond Frame cover die was cut from Concord & 9th Nectar cardstock, then adhered to a white panel that was ink blended around the outside with the same shade of ink from C&9, and added to a white card base.  The floral image was layered with two additional die cuts for dimension, adhered to the card front, then the sentiment was added with both glue and then foam squares.  To tie in the gold on the sentiment I added three sparkling gold gems and that finished it off.


I'd love to know what your favorite flower is and I hope you'll share with us this month!  The challenge is open through the 25th.  In the meantime, be sure to take a peek at the stunning array of flower cards from the other DT members!

Take care!

Stef


Stamps:  Altenew Build-A-Flower:  Pristine Peonies
Paper:  Neenah Solar White, Hammermill, C&9 Nectar
Ink:  Memento Tuxedo Black, Nectar
Dies:  All from Altenew - Pristine Peonies, Diamond Frame Cover and Featured Sentiments
Foiling:  Spellbinders Everyday Sentiments II Hot Foil Plate and Gold Glimmer Hot Foil
Gems:  Spellbinders Aura Color Essential Gems
Copics:  R32, 11, E00, YR23, Y15, YG67, 17, 25, 03

Thursday, June 1, 2023

Lighthouse Birthday for Color Hues

Hello friends!  The start of a new month brings about a new Color Hues challenge and this time the lovely Jules P. has chosen the fabulous color combo of red and aqua.


I'm also sharing my card over at Simon Says Stamp Wednesday Challenge where this week's theme is Anything Goes.

I love this color combo and had fun using it with another die set, this time from Hero Arts.


Rather than try to do an inked background or even color the individual pieces of the cover die, I opted to inlay multiple colors of cardstock - white for the frame and clouds, three aquas for the water and sky, red and gray for the lighthouse and cream and black for the sailboat and birds.  Once everything was cut out, it was pretty simple to inlay all the pieces.  


I kept the sentiment simple, stamping in Altenew Obsidian then die cutting with the coordination die.  Once that was adhered the card was finished.  With a large number of summer birthdays coming up, I was happy to have another card in my stash.


So what are you inspired to make with these colors?  I do hope you'll join us for this challenge, it will be open until 9:00 am Wednesday June 14th.  In the meantime, be sure to slip over to the challenge blog where the other DT members have a fabulous assortment of cards to spark your creativity!

Thanks for visiting!  Take care.

Stef


Stamps:  Waffle Flower Elegant Sentiments
Paper:  Neenah Solar White, Hero Arts Ivory, Concord and 9th Oceanside and Aqua Sky, Simon Says Stamp Sea Glass, Fog and Smoke,, Stampin' Up Real Red and Black
Dies:  Hero Arts Lighthouse and Sailboat Cover Die, WF Elegant Sentiments matching die

Sunday, May 28, 2023

Happy Birthday for Sunday Stamps

Hello, friends!  It's time for a new challenge at Sunday Stamps and this time we have a terrific sketch created by Heather.


As you'll see if you pop over to the challenge blog, there are a variety of interpretations of this sketch.  I opted to go with a rectangle rather than a square card, as it worked best for my design.


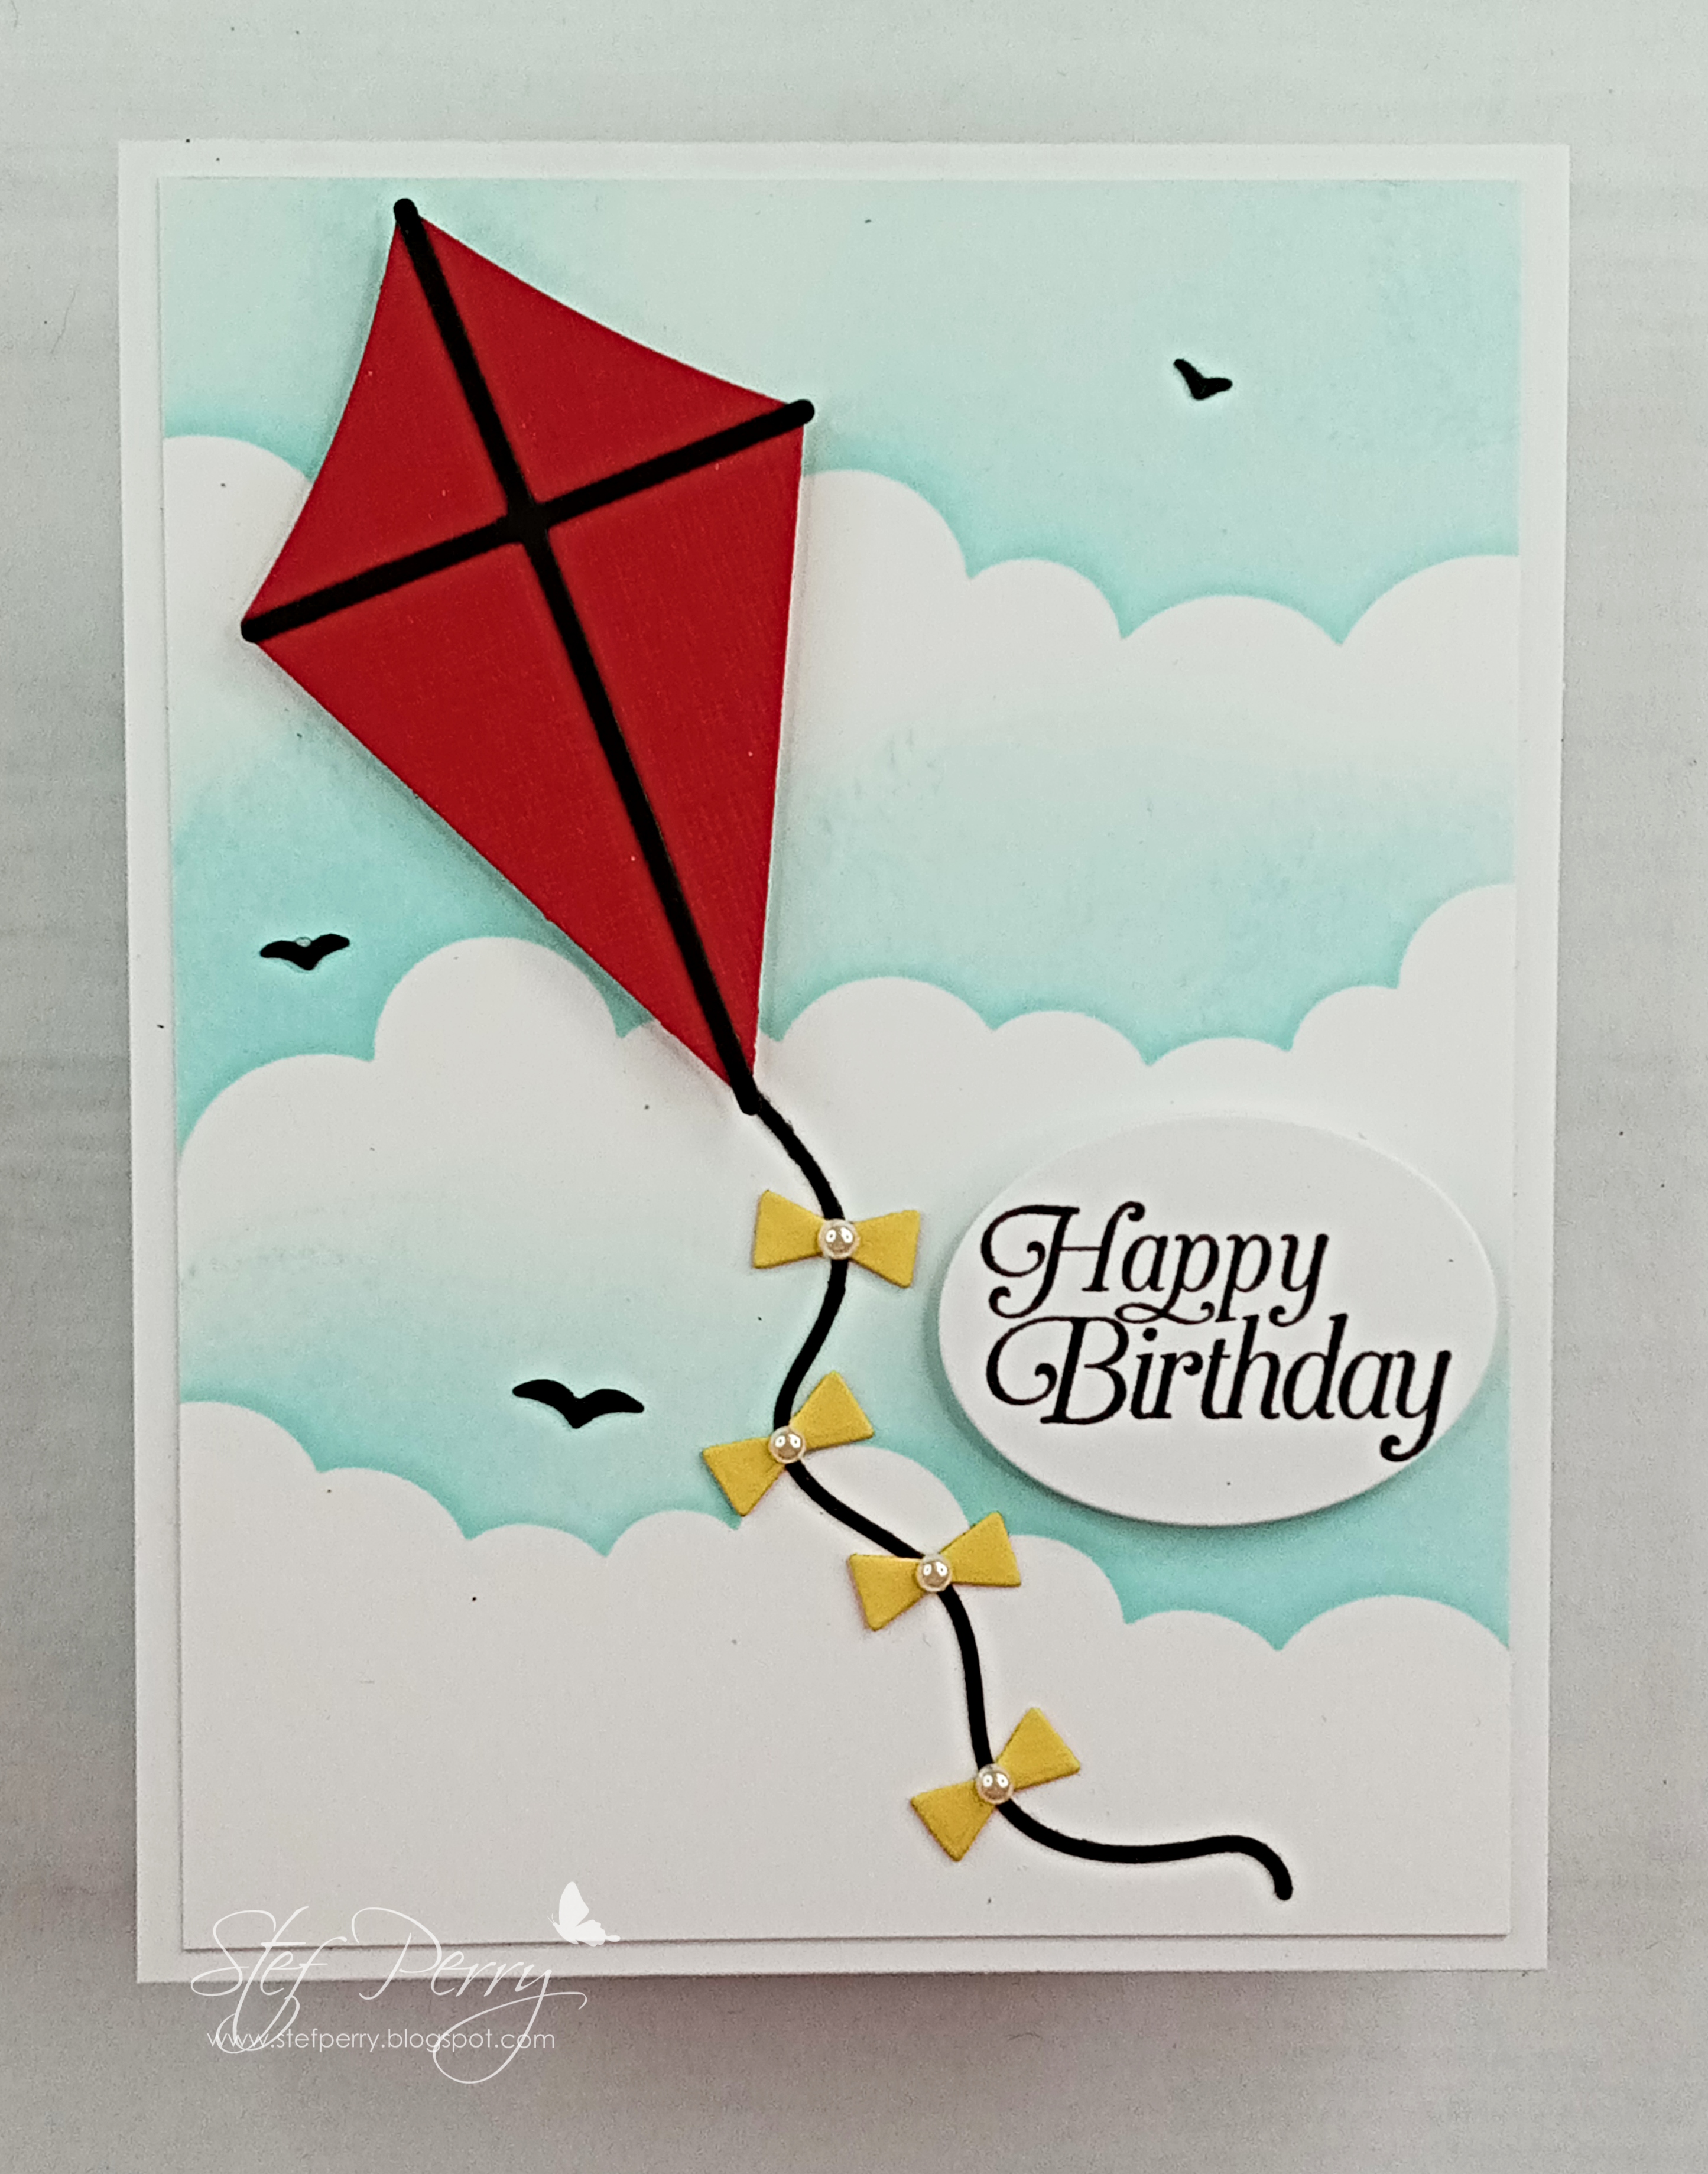
I was totally smitten by the Hero Arts release a while back and just had to have this cute Fancy Die kite set!  For the three background elements on the sketch, I used a cloud stencil with Concord & 9th's Aqua Sky ink to create three sets of clouds. The panel was trimmed down and added directly to the card base.


The kite elements were die cut from Stampin' Up Real Red, Black and Daffodil Delight cardstock.  After adding the frame to the kite, it was popped up on the panel with foam tape.  The tail was aligned below then I added the four bows and topped them with mini pearls from my stash.  The sentiment is from a long retired SU Sale-A-Bration stamp set.  I was planning on stamping it directly on card front, but it's a cling stamp and I was afraid I wouldn't get it straight, so I opted for stamping on a separate piece of cardstock, die cut it with an oval then added it with foam tape.  I thought I was finished but the sky seemed a bit empty, so the birds were added after die cutting using a different HA Fancy die set and that was it!


Thanks for visiting! I hope you'll take a moment to visit the challenge blog and see the wonderful inspireation the other DT members have to share, and hopefully be inpsired to play along with us.

Take care!

Stef


Stamps:  Ret. SU Sky is the Limit
Paper:  Neenah Solar White, SU Real Red, Black, Daffodil Delight
Ink:  Concord & 9th Aqua Sky, Versafine Clair Nocturne
Dies:  Hero Arts Fancy Kite and Fancy Cloudy Sky Scene dies, Ellen Hutson Essential Ovals
Stencil:  MFT Mini Cloud Edges

Wednesday, May 24, 2023

Festive Noel for Christmas Craft Creations

Hello and welcome!  It's time for my reminder card for Christmas Craft Creations, where this month the challenge is no stamping - none, nada, zip!  So many things you can do instead of stamping - stenciling, ephemera, or as I've done here, use all dies for my card.


I bought this Spellbinders die set on sale over a year ago and now it appears to be discontinued, but there are others that spell out different holiday words.  I have another one that spells out Joy and it is still available on their website.


I just love how this turned out! All the sparkle from the glitter paper die cuts is sooo pretty!  I started out by using the Simon Says Stamp Snowflake Visions embossing folder with a panel of SSS Sea Glass paper, which was adhered directly to the white cardbase.  The noel base was die cut from SSS Silver Matte, then everything else was die cut from Simon's White Glitter and Assortment Glitter paper packs.  


After adhering the silver base to the card front, the letters were mounted on foam strips so the small pieces could be tucked underneath if needed.  The die cutting was the most consuming part timewise; once that was done, adding all the tiny bits went quickly and I had such a great time putting it together, I plan on making a few more. 


So now it's your turn to add to your 2023 holiday card stash!  I hope you'll join us, the challenge is open until 9 am EDT on June 13th.  In the meantime, be sure to pop over to the CCC blog, the inspiration by our talented DT and guest designer, Heather, is fantastic!

Take care!

Stef


Paper:  Neenah Solar White, SSS Sea Glass, Matte Silver, White and Assorted Color paper packs
Dies:  Spellbinders Festive Noel Shapeabilities dies
Embossing folder:  SSS Snowflake Visions

Tuesday, May 16, 2023

Vintage Birthday for Color Hues

Welcome back, friends!  It's time for a new Color Hues challenge and the lovely Julie Beech has chosen the combo of orange and slate gray.


When I saw this color combo I knew exactly what I wanted to use for my card.  Let me take us back a few decades....


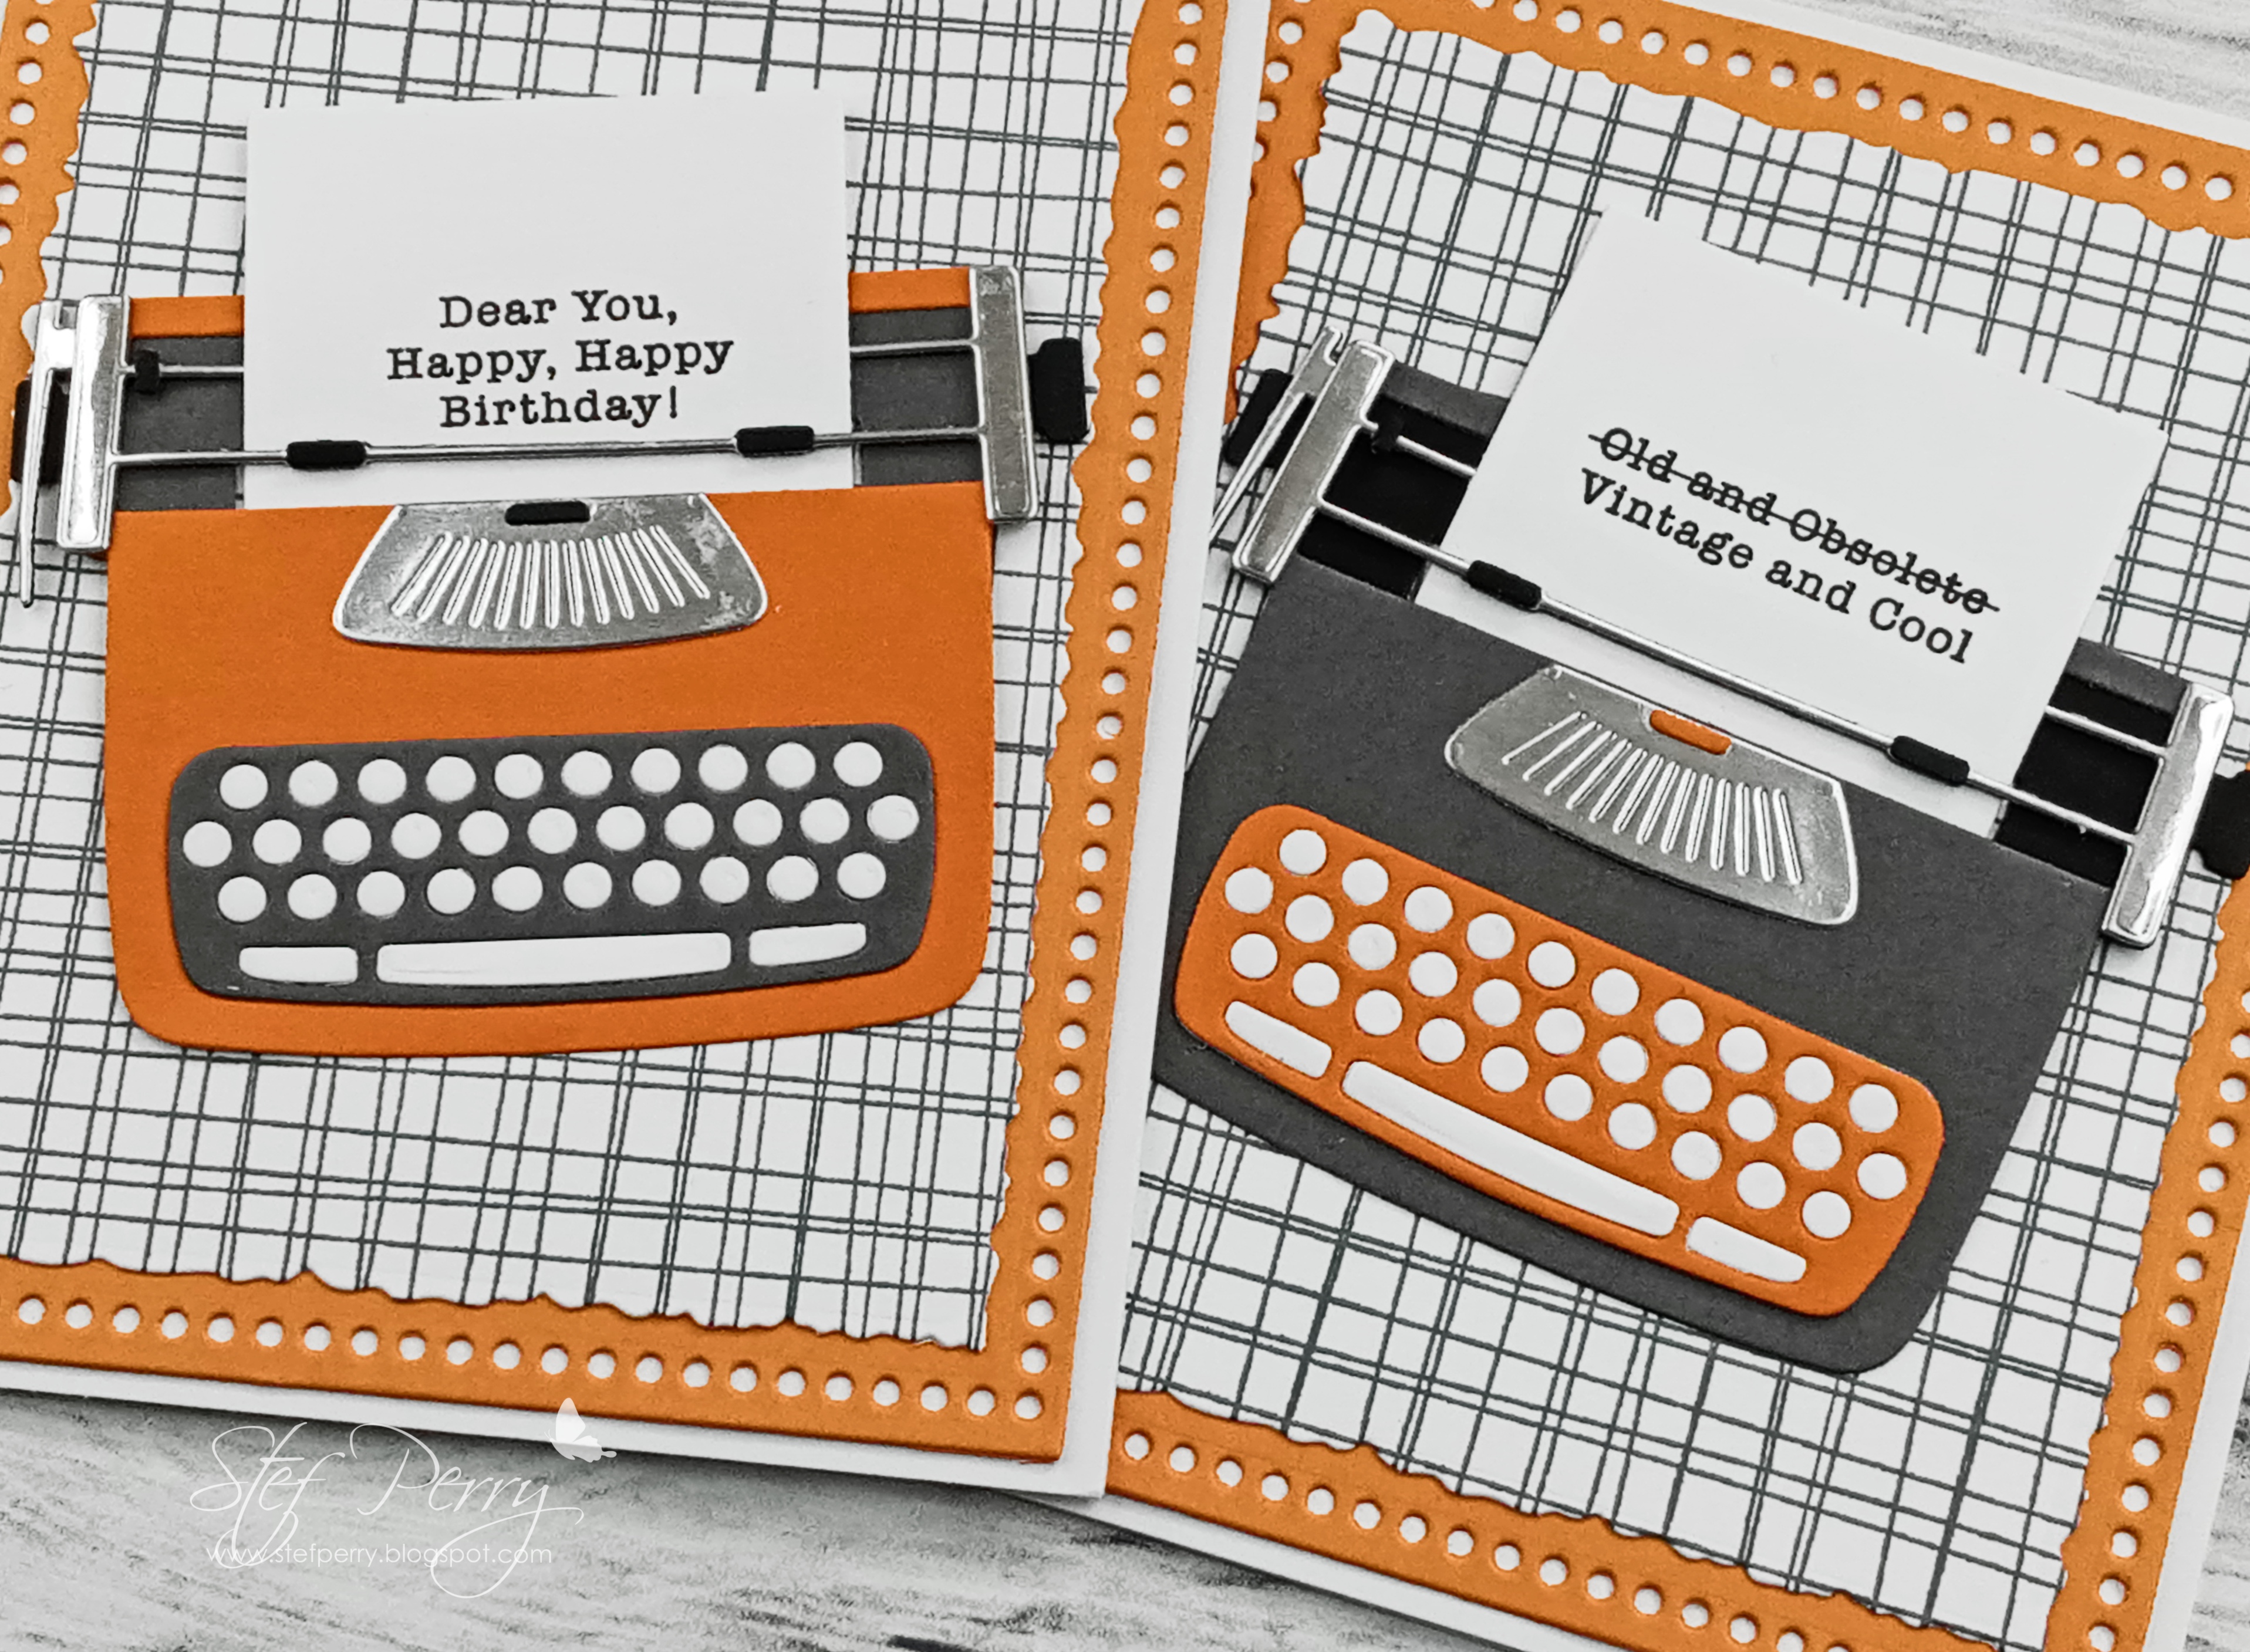
...back to those ancient times before computers lol!  I've had this MFT Typewriter die and sentiment set for a while and was more than ready to play with it.  All the parts/components were die cut, some  multiple times, with orange, slate gray, white, black and silver card stock. Of course that meant I had enough for two typewriters and two cards.  The dies include one for the sheet of paper to be inserted in the typewriter, so I stamped in black ink the two different sentiments on white cardstock, then die cut them out.


For the remainder of the card, I wanted kind of a graphic background.  First I stamped the Sketchy Lines Background stamp in gray ink, then die cut that panel and the orange panel with dies from Altenew's Mix and Match Frames die set.  Both layers were adhered to the white card base, the sheet of "typed" paper inserted in the typewriter and adhered on the back, then I used foam tape under the top part of the typewriter and glue for the lower part to add them to the card fronts and I was done.


Thanks for stopping by! And if you're looking for more inspiration with these colors, head on over to the challenge blog, where the endlessly talented design team will not disappoint.  I hope to see your card in the gallery - you have until 9 am May 28th to play along. 

Take care!

Stef


Products used today:

Stamps - MFT Typewriter Sentiments:  Friendship, Simon Says Stamp Sketchy Lines Background
Paper - Neenah Solar White, SSS Slate Gray, Black and Matte Silver, SU Pumpkin Pie, Concord & 9th Clementine
Ink - Altenew Obsidian pigment ink, SSS Charcoal
Dies - MFT Typewriter, Altenew Mix and Match Frames

Monday, May 15, 2023

Pastel Peonies for The Flower Challenge

Hello friends!  It's mid-May and time for my reminder post for The Flower Challenge, where this month we are enjoying Pretty Pastels!


At the beginning of the month I shared my dogwood card here in pastel pinks and blues and for this card I decided to use peach and mint.  I have really enjoyed using peach this year as nice change up from pink.


Last month, Altenew celebrated it's 9th birthday and their special stamp set for that occasion was Billowing Peonies, and I totally fell in love with the beautiful images.  They are huge - the peonies used on my 5"x 7" card today are from the smaller stamp! (I hope to use the larger peonies on a card sometime in the near future).  I loved coloring these beautiful flowers in pastels using my Copic markers, and then the image was die cut with the coordinating die.  Two additional layers were die cut from white then adhered to the back for some dimension.


Moving on to the card base, I layered the Top and Base Plaid A7 Cover plate dies from Honey Bee Stamps on a 5"x 7" panel of Simon Says Stamp Mint cardstock, then adhered that to a white card base.  The sentiment from Altenew's Everyday Sentiments Hot Foil Plate set was foiled using Spellbinders Matte Gold Hot Foil and die cut with a circle die.  The flowers and sentiment were then adhered and I added a few Altenew Antique Gold sequins for the final touch.


I'm so please you took time to stop by!  Now I hope you'll take a couple more minutes to pop over to the challenge blog where the design team has some incredibly beautiful inspiration for you - and hopefully you'll have time to join us, the challenge remains open until May 25th.

Take care!

Stef


Copics:  R32, 11, E00, G16, 02, 00, Y15, 13, 11


Sunday, May 14, 2023

Sending Hugs for Sunday Stamps

Hello, my friends!  We have a new challenge over at Sunday Stamps and this time it is a color challenge with some bold, vibrant colors!


Originally I was going to use the purple, blue and yellow but ended up using the gray and didn't find a way that I liked to use the blue.  


I used the Altenew Casual Bouquets stamp and die set for my florals.  I like this set because it has mirror images of each floral so if you wanted to they could offset in a wreath or on opposite sides of the card.  But I couldn't decide which one I want to use, to I colored them with my Copics and ended up with one of each style on this card.  I ended up making a second card with the other two images, which is the last photo of the post.


Next I die cut the flowers plus two additional layers out of white and adhered them for some dimension.  I used an Altenew cover die for the background then added the flowers after determining where to put the sentiment, which is a handy dandy SSS Reverse Sentiment strip.  It was also added to a couple layers of scrap cardstock before adding to the front.  Lastly I added a few silver pearls for a little bling.


Below is the second card I made, but I layered the flowers and sentiment on top of an embossed panel that was splattered with just a little bit of Jet Black ink spray.


Thanks for taking time to stop by.  Now I hope you'll head on over to the challenge blog where the other DT members have some fabulous cards that will hopefully inspire you to join us for this color challenge!

Take care!

Stef


Stamps, Dies and embossing folder  Altenew Craft Your Life Project Kit:  Casual Bouquets
Paper:  Neenah Solar White, Lawn Fawn Pearescent Vellum, SU Rich Razzleberry, SSS Thinking of You Reverse Sentiment Strip
Ink:  Memento Tuxedo Black
Other Dies:  Altenew Scallops Cover Die and Versatile Greetings die set
Other:  Altenew Jet Black Ink Spray, Lucy's Cards Silver Mix Pearls
Copics:  RV69, 63, 55, 52, C3,1,0, Y26, 15

Thursday, May 4, 2023

Hello Friend for The Flower Challenge

Hello friends!  I hope the first part of May brings flowers your way and it's also bringing us a new challenge at The Flower Challenge!  This month we are using our pretty pastels.


There are several flowers that bloom in pastel colors this time of year and one of my favorites is from the dogwood tree.  When I saw that Honey Bee Stamps came out with their beautiful Lovely Layers: Dogwood dies and coordinating products, well let's just say I was totally smitten!


I started by die cutting all the dogwood branch components from white cardstock, then used my Copic markers to color them.  Next I followed the layering guide and put together all the pieces/parts.  It really didn't take an enormous amount of time and the branches are so, so pretty!  I put those aside and then worked on the card base.


Next, Seafoam and Surf inks were blended on a portion of a panel of white cardstock, then embossed with the coordinating Dogwood Blooms 3D embossing folder.  I trimmed it down and added to the card base.  Next I die cut the Spring Vine Layering Frame dies twice, took apart the various pieces and just used the frame and the interior.  Those were all added to the card before adding the dogwood branches.  The sentiment was stamped in Versafine Clair Morning Mist, a nice soft gray, die cut and added to the center.  The last step was to scatter about a few Ocean Wave Crystals from Studio Katia and the card was complete.


So what florals in your stash are calling out to be used for this challenge?  I know you have some lol!  In the meantime, for some amazing inspiration, be sure to drop by the challenge blog and see what my fabulously talented teammates have created.

Take care!

Stef


Copics:  RV23, 21, 10, E47, 44, YG17, G43, 40

Monday, May 1, 2023

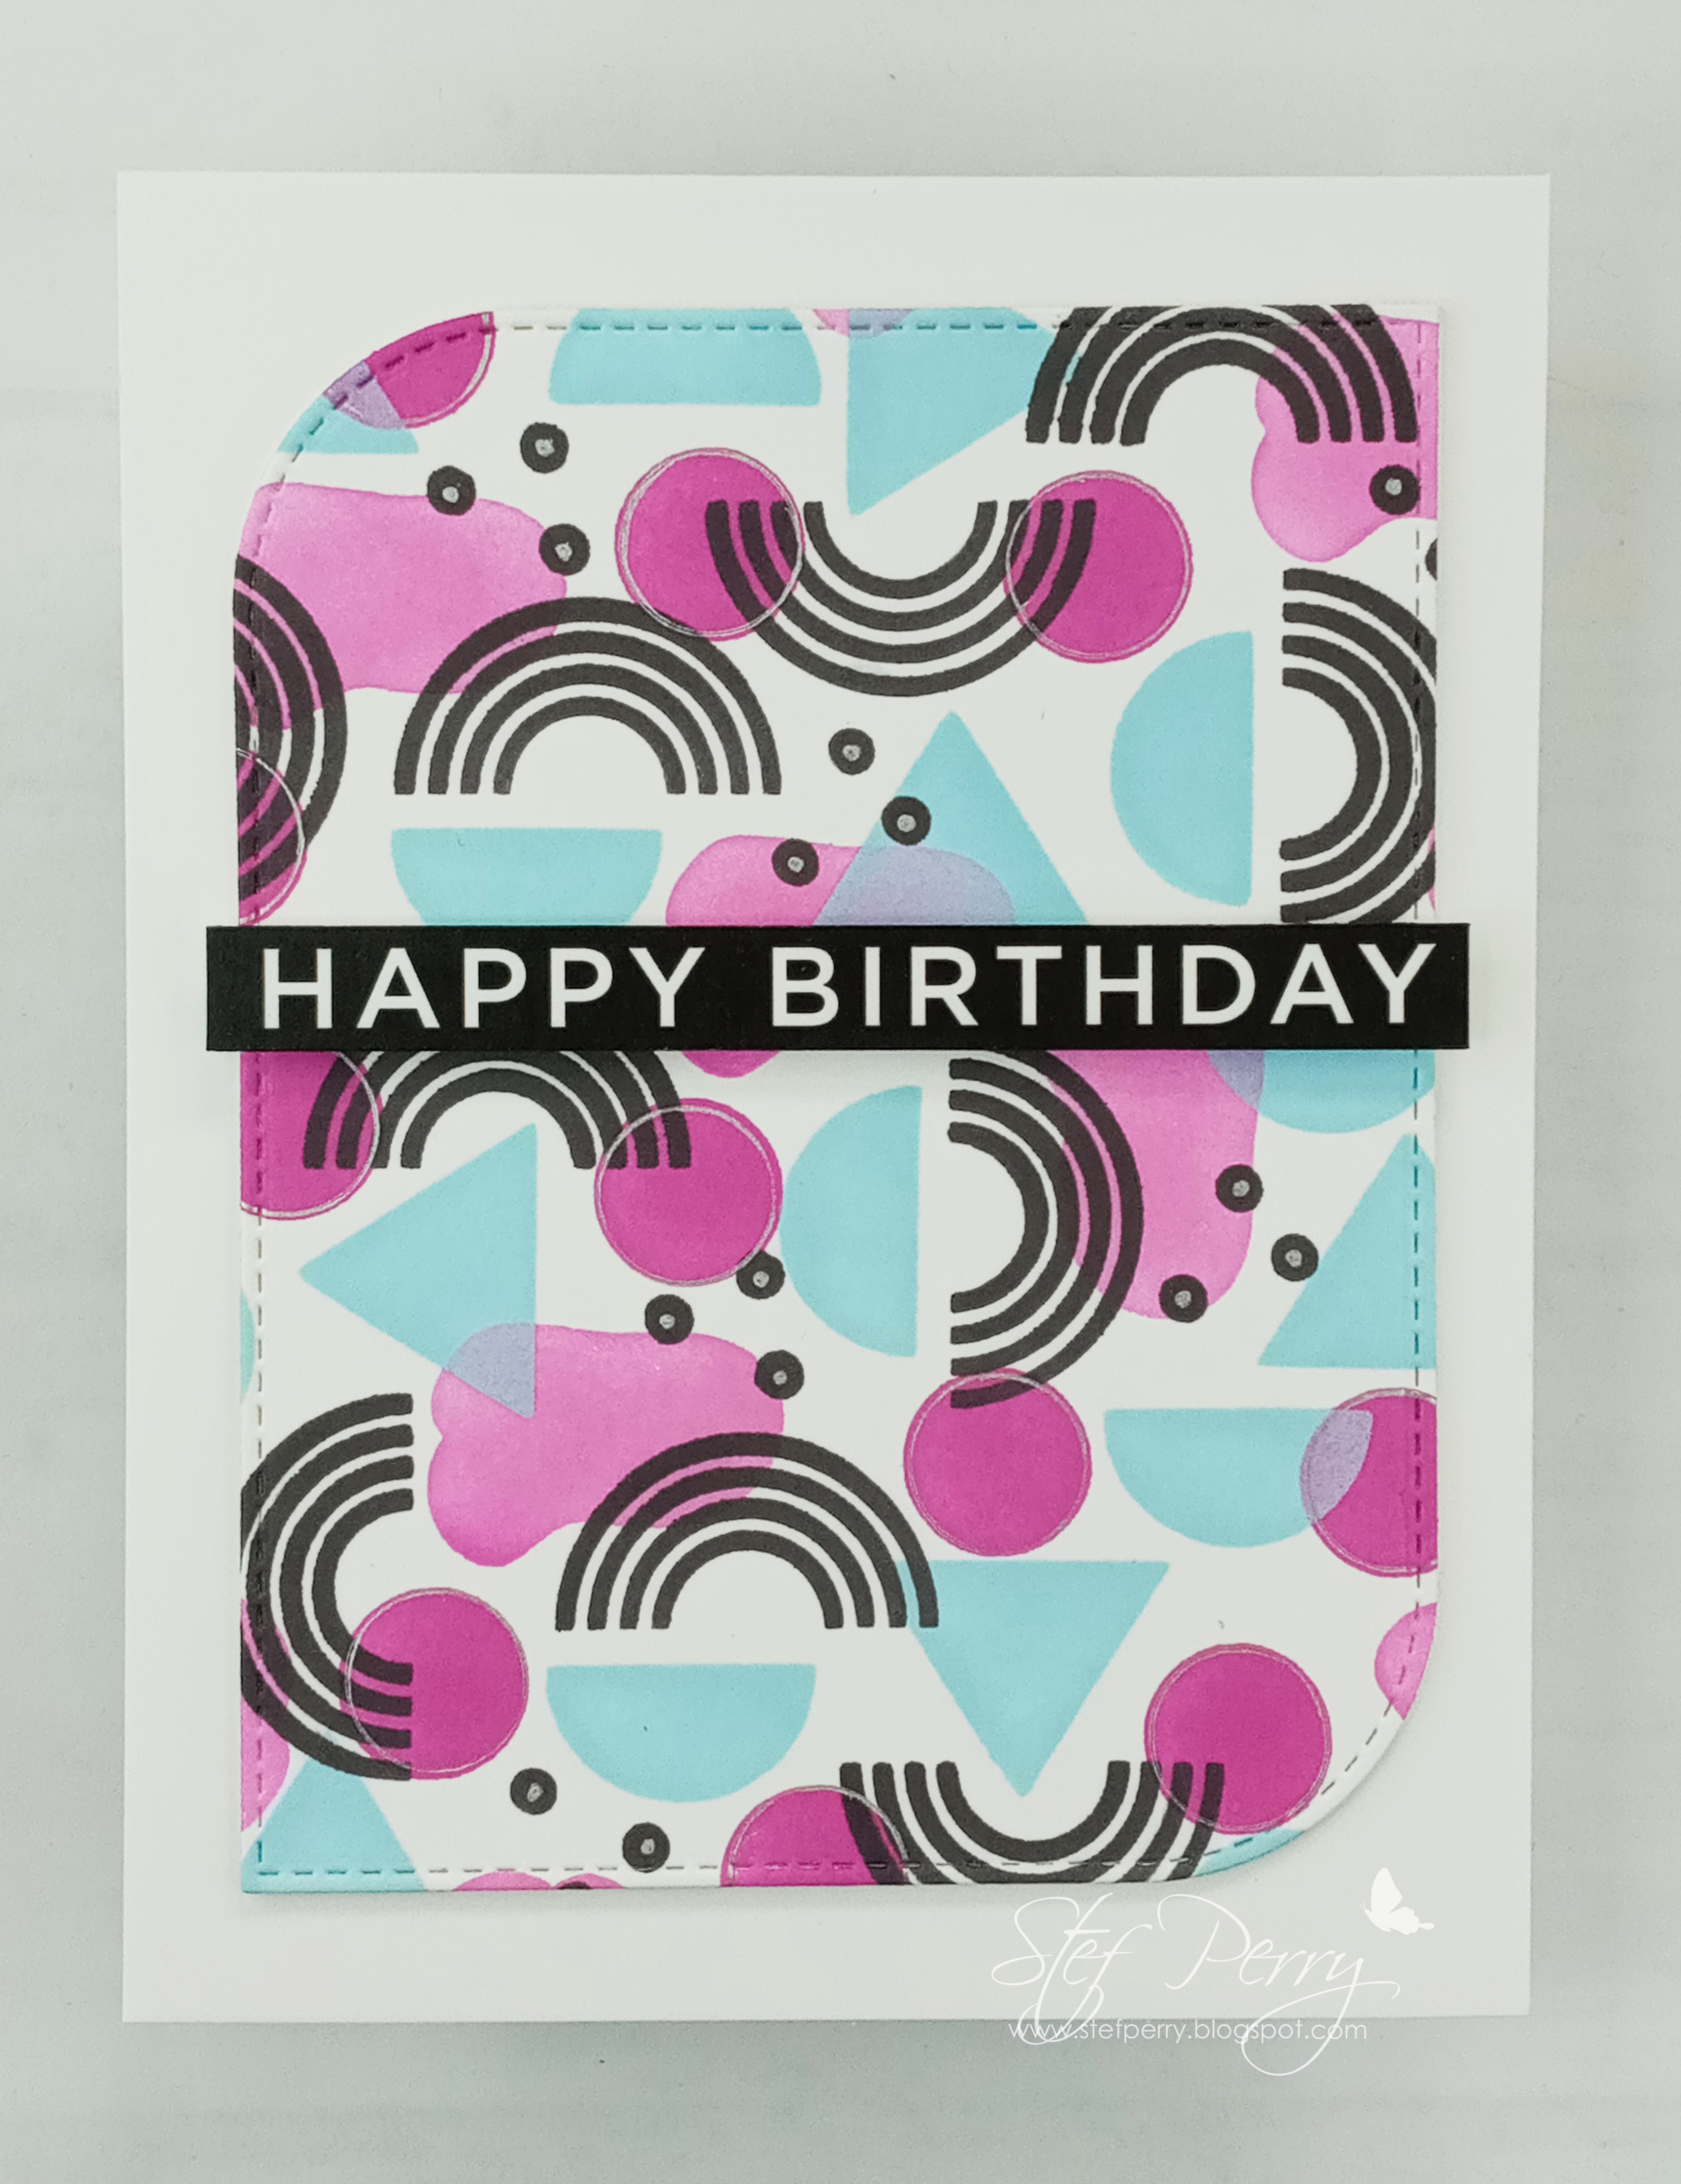
Abstract Birthday for Color Hues

Hello and welcome!  Another month rolls around (it's May already?) and it's time for a new challenge at Color Hues.  This time, the fabulous Hannelie has chosen the yummy combo of hot pink and cyan.


I'm also joining Anne Marie's Tic-Tac-Toe Challenge at The Paper Players. My three in a row go from top left to bottom right - bright colors (two hot pinks), die cut (Modern rectangle die), and birthday.


Well, I had some fun making this card using a geometric layering stencil.


The stencil I used is the Abstract Patterns stencil from Altenew.  For the first layer I used two hot pinks from Altenew, Fuchsia and Magenta, the latter of which is the darker of the two.  However, after the inks dried, the color difference wasn't markedly different, but that was okay.  Next came Sea Breeze and then for the last layer, I used Jet Black.  I am so smitten with this stencil design, I'm already planning a few birthday cards in different colors for some of the male family members.  This card will probably go to a niece that will like something other than flowers lol!


A fun design deserves a fun rectangle cut, right?  I used MFT's Stitched Modern Rectangle Stax die to cut down the panel, then adhered it to a white base with thin foam tape for just a little bit of dimension.  I decided that bling would get lost in this design, so I used a silver gel pen to add silver dots in the middle of the small black dots.  I also laid the first stencil back over the panel and used the gel pen to trace around the interior of the large magenta circles.  With that complete, the last step was to add a sentiment strip from the Simon Says Stamp/CZ Design Reverse Birthday Sentiment Strips.  Oh, so quick and easy!


These are some fun colors to play with and my fellow design team members have cretaed a stunning variety of cards for your inspiration (link above)!  I hope to see your card in the gallery!  The challenge will remain open until 9 am EST on May 14th.

Take care!

Stef