Showing posts with label As You See It. Show all posts

Friday, January 20, 2023

Butterfly Birthday

Hi there, I hope you're having a wonderful day!  I have a card to share with you that I made for the challenges at Seize the Birthday and As You See It.


As You See It #290

As it turned out, almost all of my card components were left unused from other projects.  Always a bonus and makes creating a bit quicker.


I love Jane's sketch for As You See It, but it worked best for my card to flip it to the side.  I started by die cutting the Memory Box Drifting Side Butterfly from Simon Says Stamp Matte Silver and white cardstock, then adhering the pieces together just along the bottom so the silver outline could be lifted slightly on the left edge.  I thought it would look pretty on floral embossing and found the Concord and 9th Honeysuckle embossed panel from my stash already embossed with Altenew's Beautiful Bergenia 3D folder.  I took my white pigment inkpad and lightly brushed it across the panel to highlight the raised edges and after the ink dried, trimmed it down about a half inch on one side.


The panel was adhered to a white card base, then I added a skinny strip of Matte Silver and a strip of embossed white to cover the remainder of the card front.  I pulled the SSS Happy Birthday from my die storage and found the one used on the card already completed and tucked in with the dies.  Sweet!  I adhered it onto the card front then added the butterfy and my card was complete!  


Thanks for stopping by and taking a look.  Take care and I hope you have a wonderful weekend!

Stef


Wednesday, May 25, 2022

Hello

Hello and welcome!  Today's card is one that I made for the current challenge at The Paper Players, where LeAnne has created a wonderful sketch.


I'm also joining the Simon Says Stamp Wednesday Challenge with an Anything Goes theme, the As You See It Challenge with their Recipe for Subtle Beauty and the current Addicted to Stamps Challenge to use die cuts and/or stencils.


I started with a panel of flowers and leaves that I'd previously foiled in gold and had in my stash.


The matching stencil made coloring the images easy and quick, then I used the matching die to cut them out.  A white panel was stenciled in blue on the bottom third, trimmed down and a corner cut with my trusty old SU corner rounder punch.  A shiny gold foiled strip was adhered across the top of the stenciling, then the flowers and sentiment arranged and adhered. 


 As I was preparing to add the main panel to a Flirty Flamingo card base, I realized I'd forgotten to emboss the top of the panel is the white space. So instead, an A2 size panel of Flirty Flamingo was embossed, adhered to the base, then the main image added with thin foam tape.  A few gems were added, and I was done!


Thanks so much for taking time to visit!  Take care!

Stef


Stamps:  None
Paper:  Neenah Solar White, Hammermill, Flirty Flamingo (SU)
Ink:  Coral Reef, Passion Fruit, Fresh Pear and Key Lime (Pinkfresh Studio); Honey Drizzle and Sea Breeze (Altenew)
Other:  Brighter Days Hot Foil Plate, Stencils and Dies (PS), Fancy Script Words Hot Foil Plate and Die (Spellbinders), Arches Stencil (Simon Says Stamp), Sentiment Labels die (SSS), Tasteful Texture 3D embossing folder (SU), Corner Rounder punch (ret. SU), Crystal Collection - Bouquet (Lucy's Cards)

Sunday, May 15, 2022

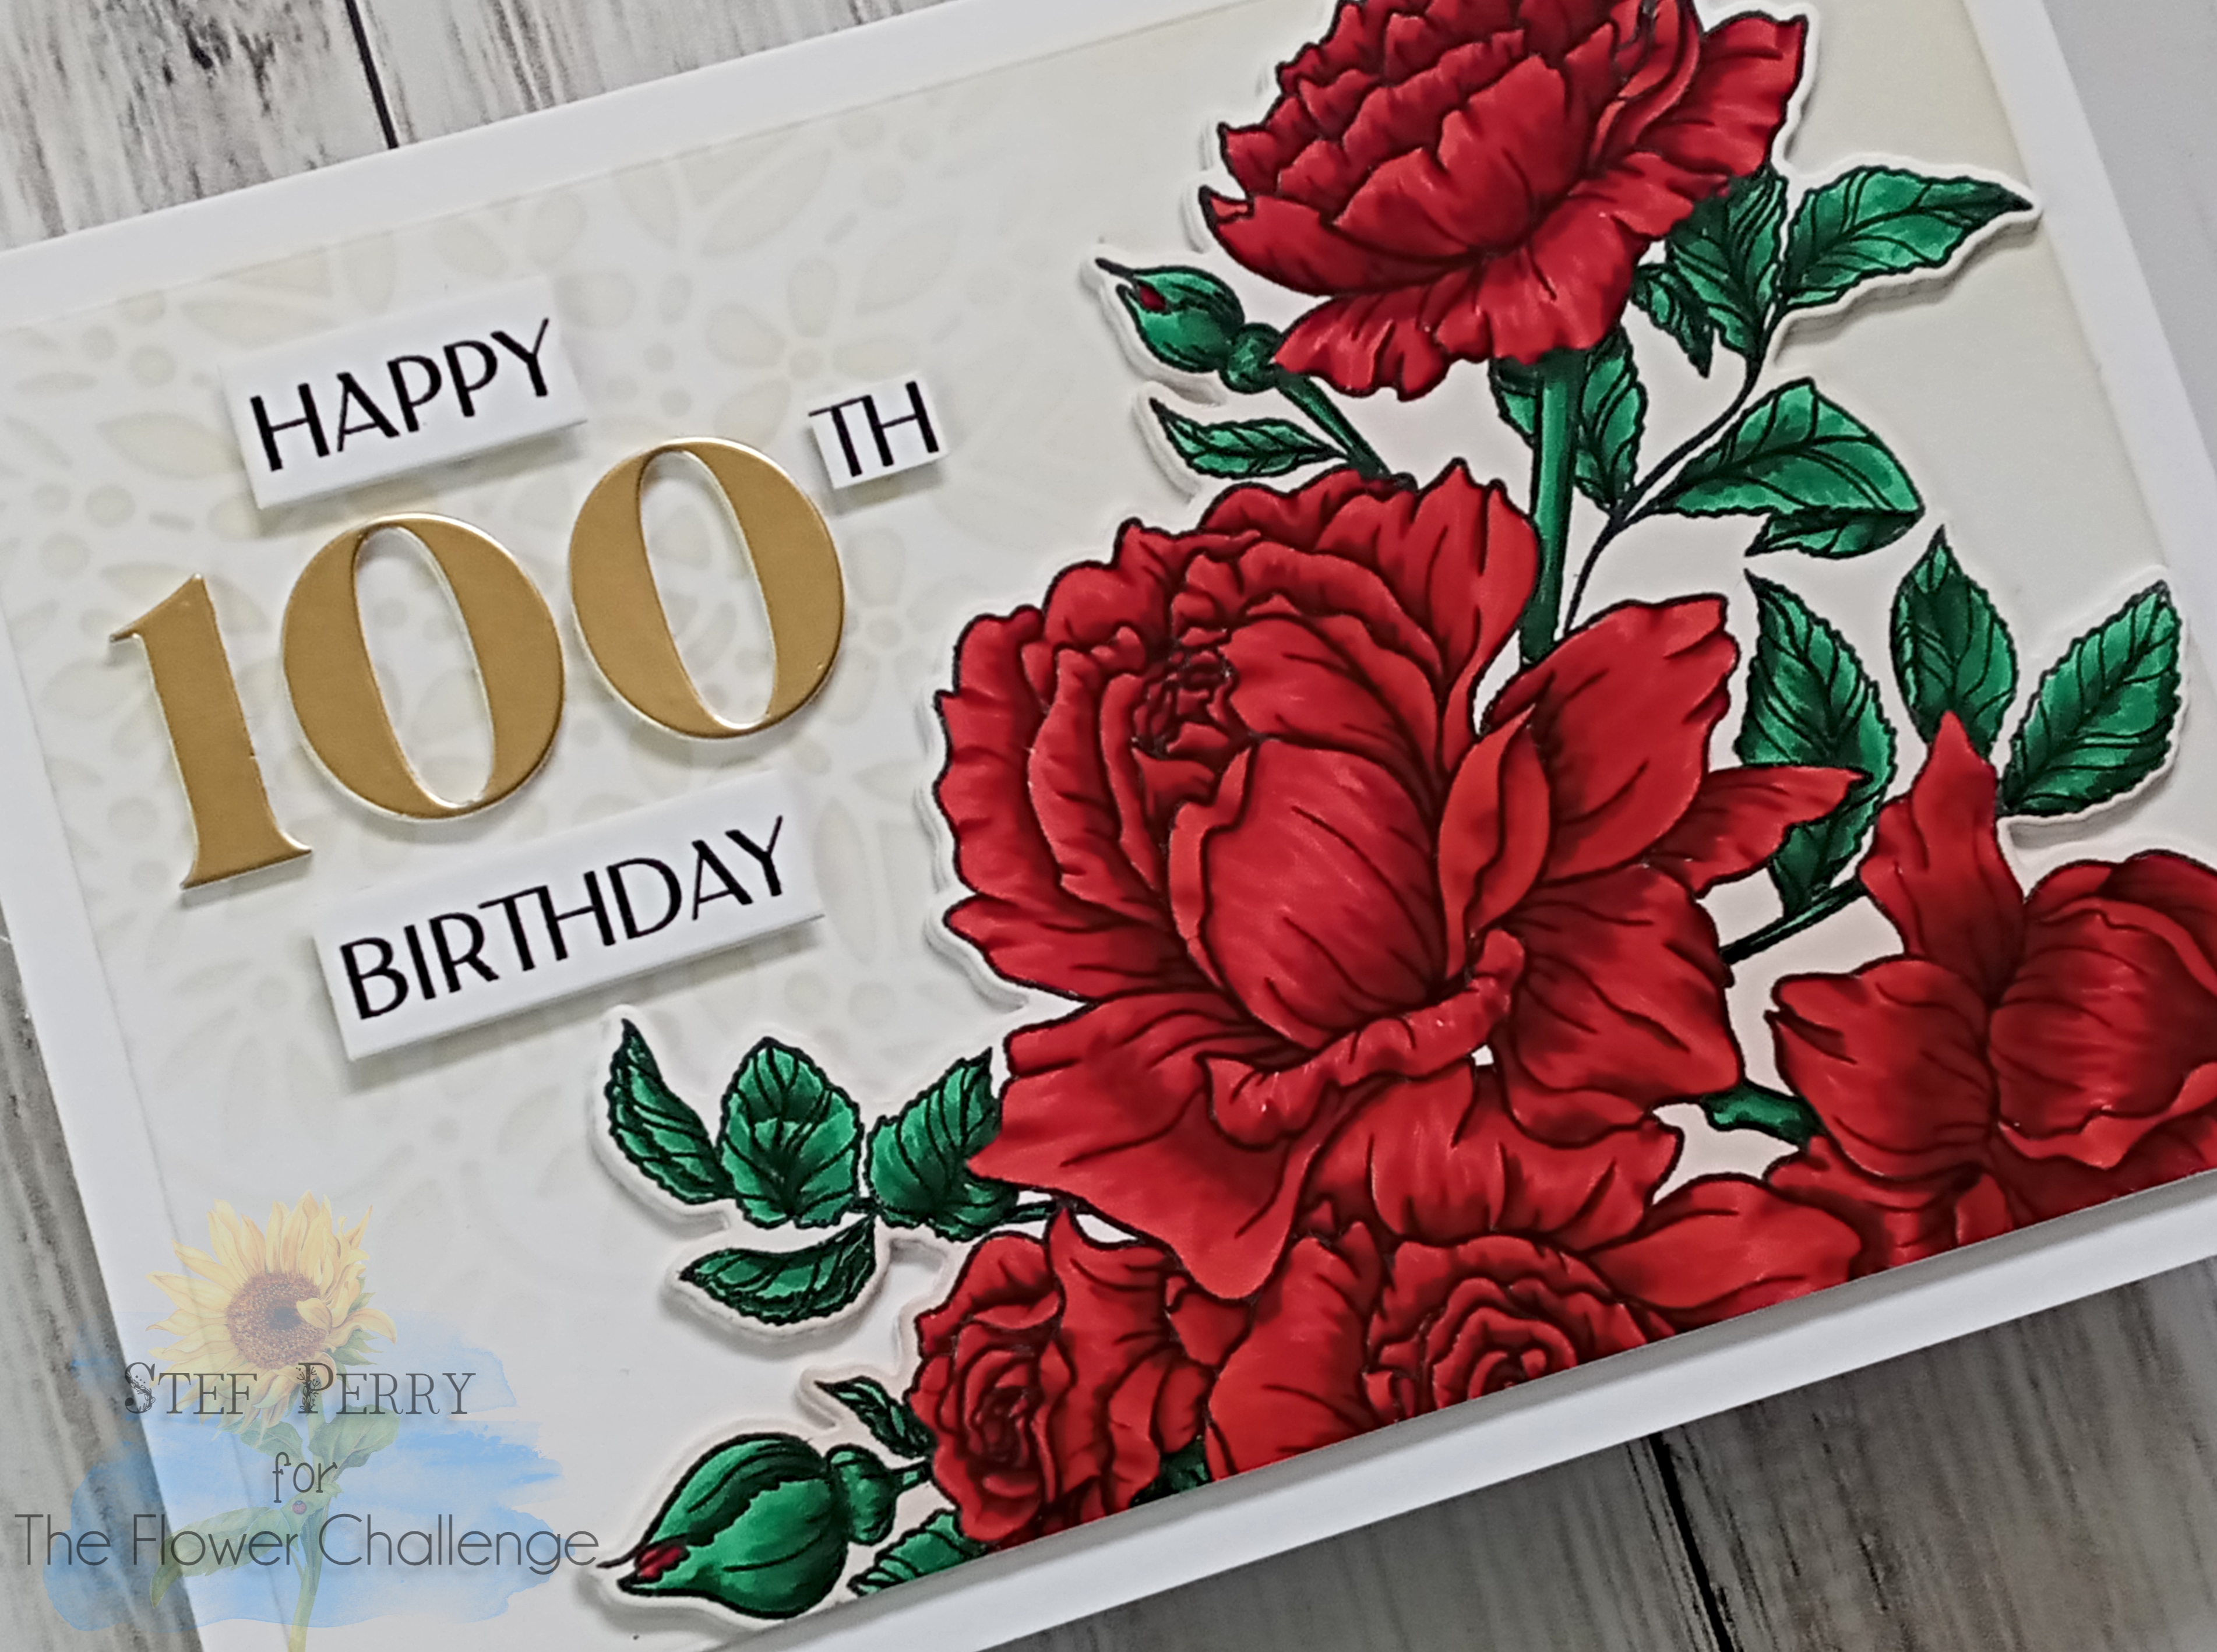
Corner Rose Birthday for The Flower Challenge

Hello friends, so glad you've come by to visit! Can you believe we're halfway through May already?  As such, it's time for our reminder post at The Flower Challenge.  The challenge ends on the 25th so I hope you'll find time to join us - this month, all you have to do is use a number along with your flowers.

I'm also joining the fabulous crew at the As You See It Challenge.  This time we are to fill in the blank for "The Best Thing About Mothers is: ________."  When I think about the mothers I have known as friends, my daughter and of course my own Mother, is the unconditional love they give.  


And I'm also sharing my card at the Addicted to Stamps Challenge, where the theme is any Occasion.


My Mom passed away many years ago and I decided that my DT card would honor what would have been her 100th birthday this June.


My Mom's favorite flower was the deep red Mr. Lincoln rose, so that is what I chose to create for this card.  The image is from a newer stamp illustrated by the amazing Emily Midgett and was a dream to color with my Copics.  It is very large, so the card size ended up being 5"x 7".  After completing the coloring it was die cut with the coordinating die, layered upon two additional die cuts from white paper, then cut down to fit the background panel.


For the background panel, Antique Linen was applied using the Spring Boho Circle stencil, then I lightly ink blended the rest of the background to achieve an aged look.  When the floral image was adhered to the panel, I lightly ink blended a bit more to soften the white edges of the die cut.  The sentiment was stamped and trimmed down then adhered with the gold numbers.  I find it a bit tricky to get it all lined up but I think it is centered pretty well and I was happy with how the gold kind of dressed things up.


For more inspiration, head over to The Flower Challenge and take a peek at all the amazing cards by the other DT members!

Take care!

Stef


Stamps:  Celebrate Rose Corner (Simon Says Stamp), Elegant Sentiments (Waffle Flower)
Paper:  Neenah Solar White, Matte Gold (SSS)
Ink:  Memento Tuxedo Black, Versafine Clair Nocturne, Distress Antique Linen
Other:  Celebrate Rose Corner die, Sentiment Labels die (SSS), Festive Alpha & Numbers dies (Scrapbook.com), Spring Boho Circle Stencil (SSS), A7 Layers Rectangle die (WF)
Copics:  R89, 59, 29, 17, G28, 17, 03

Sunday, April 17, 2022

Pastel Floral Birthday for Sunday Stamps

Hello and welcome!  It's time for a new challenge at Sunday Stamps and this time we have a delightful pastel color board to inspire you.


I'm also joining the current As You See It Challenge, where they have this fabulous sketch.


When I saw the sketch I immediately thought of my well loved Watercolor Stripes stencil and thought it would work well for the sketch plus create a great background for my pastel floral wreath.  I started by stenciling Mint Choc ink over it onto a panel of white, and then I went to work stenciling the pretty wreath.


I decided to get a no line look with my stenciling, so the wreath was stamped in a very light ink, just dark enough so I could line up the stencils.  With the layering stencils I was able to achieve shading for everything except the grapes, so I used a V22 Copic marker to add a bit of shading/outline so they didn't look like just one big blob lol!  When the stenciling was complete, I used a gold gel pen to draw in the stamen on the yellow flowers, then the wreath and three additional branches were die cut.  The wreath was die cut two more times from white cardstock for layering underneath to achieve dimension. 

The striped background was added to the white card base, then the wreath.  The gold foiled sentiment was added across the middle of the wreath, then a few gold baubles scattered around the wreath to finish things off.


Thanks so much for taking time to stop by, I appreciate it!  Be sure to use the link above to check out the beautiful cards by the other DT members, and hopefully play along with our color challenge!

Take care!

Stef


Stamps:  Rainbow Floral
Paper:  Neenah Solar White, Hammermill White
Ink:  Gina K Barely There Amalgam; Rose Quartz, Puffy Heart, Lemon Ice, Warm Sunshine, Lime, Fresh Leaf, Wyteria and Mint Choc (Altenew)
Other:  Fancy Script Words Hot Foil Plate and dies (Pinkfresh Studio), Rainbow Floral dies (PS)
Watercolor Stripes stencil (Altenew), Gold Gel pen (Altenew), Gorgeous Golden Baubles (Trinity Stamps), Copics - V22, YG05

Sunday, March 20, 2022

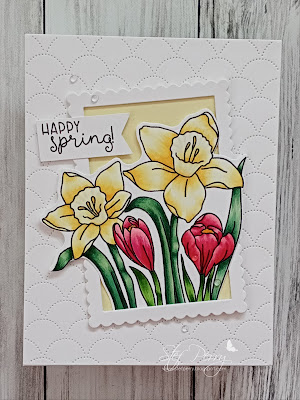
Happy Spring for Sunday Stamps

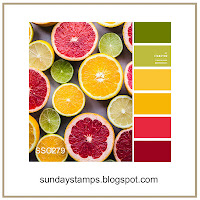
Hello friends!  I hope you're doing well!  I know I am so happy today is the first day of Spring and I've brought you a card to celebrate that.  It's time for a new color challenge at Sunday Stamps, with a bright and pretty palette to inspire you.


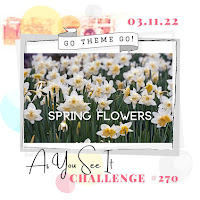
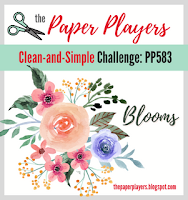
I'm also joining the current As You See It Challenge, where the theme is spring flowers and The Paper Players where the lovely Laurie has given us a great CAS challenge with "Blooms".


I used a stamp with two early Spring flowers.


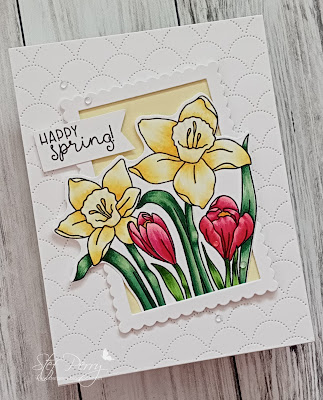
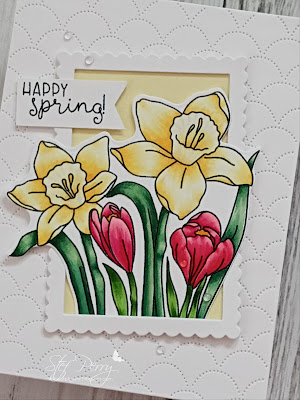
I love all flowers, but I have to say crocus are my favorite early spring flowers, with daffodils and tulips a close second.  The image was stamped, Copic colored and die cut with the coordinating die. To properly highlight the flowers, I decided to use a frame, which was die cut three times from white cardstock. They were adhered together then I popped the flowers through at the bottom, trimmed off the excess then adhered the bottom of the flower image to the bottom of the frame.


Next a panel of white was debossed with an A2 size cover die and adhered to the white card base.  As I was determining if the main image should be tilted or straight, I realized that the debossed background looked a little busy behind the flowers.  So I trimmed down a panel of light yellow cardstock and adhered that to the back of the frame, using foam squares behind the two daffodils to keep them level with the frame.  I decided that a bit of a jaunty tilt would be fun, adhered the main image to the card, then added the sentiment.  The final touch was to add a few clear dew drops. (I realized as I was writing this blog post, the lower right corner of the frame hadn't adhered properly to the card front, which I have now fixed lol!).


I am so glad you visited!  Don't forget to use the link above to check out all the amazing cards by the other DT members and hopefully join us for this springtime color challenge!

Take care!

Stef


Stamps:  Spring Stems (Simon Says Stamp), Happy Easter (Anita Jeram/Colorado Craft Company)
Paper:  Neenah Solar White, Yellow Chiffon (SSS)
Ink:  Memento Tuxedo Black
Other:  Spring Stems die, Scalloped Stitched Frames die (Poppystamps), Dotted Scales Debossing Cover die (Altenew), Small Clear Dew Drops (Honey Bee)
Copics:  V01, Y15, 11, 000, RV29, 25, 23, 21, YG67, 17, 15, 03, 45 G29, 21, 40

Sunday, February 20, 2022

Joyful Peonies

Hello and welcome!  I'm sharing a card that I made for two challenges - As You See It, where we are to use our favorite technique, and Anything Goes at the Watercooler Wednesday Challenge, which sadly is the finale for this challenge blog. 


If you know me or have followed my blog, you know my favorite technique is coloring, specifically with Copics.  However, for my card I've combined Copic coloring with a relatively new-to-me and growing favorite technique, which is hot foiling.


I've been watching foiling take hold in the crafting industry and at first didn't think it was something I need bother with. But I've always loved metallics, and when I found out I could use my Copics with all those beautiful foiled images, plus found an excellent sale online, I went in head first!  

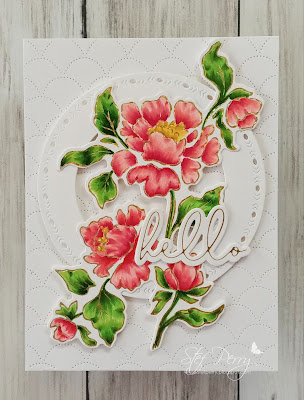
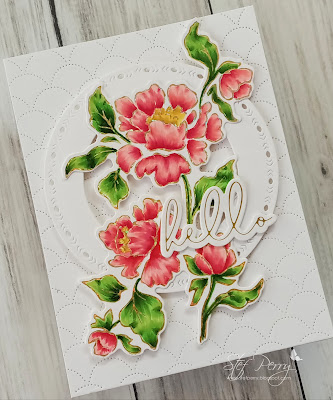
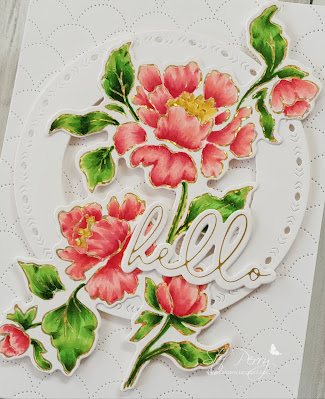
My card is pretty straightforward.  The Joyful Peonies image was foiled with a very sparkly foil (see photos below for a better example), then colored with Copics to achieve a pretty pinkish coral tone.  It was die cut with a matching die, then I went to work on the remainder of the card.


My go to is often white on white, so I reached for an A2 cover die, used it on a panel of white, then adhered it to the white card base.  Next, the circle was cut out with a die that left the pretty design around the outside and I used a smaller circle die to cut out the inside.  It was added to the card base using foam tape, then the floral image adhered directly to the circle plus foam tape on the bits that extended beyond the circle.  Lastly, the foiled and die cut sentiment was adhered on top.


Well friends, I appreciate you stopping by. And to the DT at Watercooler Wednesday, thanks for all the great challenges and all the best to you going forward. 

Take care and have a great week ahead!

Stef

Stamps:  None
Paper:  Neenah Solar White, Hammermill
Ink:   None
Other:  Joyful Peonies Hot Foil and Die set (Pinkfresh Studio), Folk Edge Circle dies (PS), Dotted Scales Debossing Cover die (Altenew), Fancy Script Words Hot Foil and Die set (PS), Speckled Aura Glimmer Foil (Spellbinders)
Copics:  RV29, 25, 23, R22, 20, Y26, 15, 11, YG67, 17, 05, 03

Wednesday, January 19, 2022

Winter Mouse

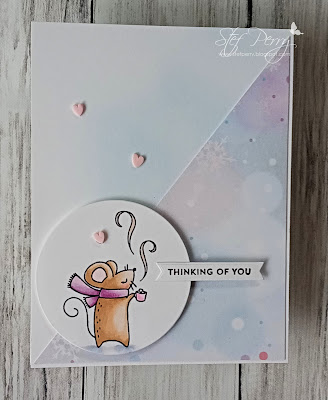
Hello and welcome!  Today I have a cute card to share that I created using the sketch from As You See It Challenge and Claire's fun CAS theme of Winter Animals at The Paper Players.


I'm also joining the current Simon Says Stamp Wednesday Challenge where the theme is Four Legged Friends.

I used a mini stamp that I received as a gift with purchase quite a while ago but never inked up until now.


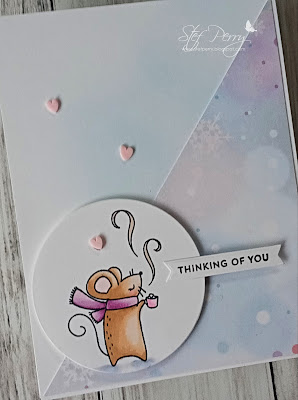
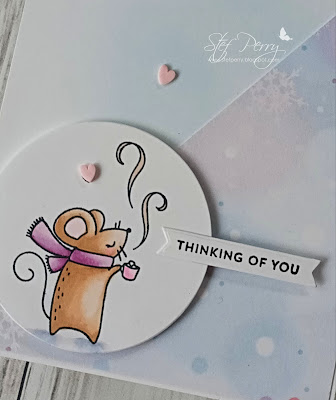
This little mouse with her mug of cocoa is just so cute and was a snap to color with my Copic markers.  I used colors for her scarf and mug to match the patterned paper.  With the coloring complete, the sentiment was stamped in black and die cut along with the mouse.


The bokeh design patterned paper was trimmed down to 5.25" x 4", then cut in half at an angle.  I ink blended a small amount of light blue ink on the panel for a bit of contrast on the plain side then adhered the patterned paper.  After the main image and sentiment were added with foam tape, three clay hearts were added for a little whimsical touch, and I was done!


Thanks for taking time to visit, I appreciate it!

Take care!

Stef


Stamps:  Thankful Mouse (Waffle Flower), Itty Bitty Basics (MFT)
Paper:  Neenah Solar White, Blurry Flurries 6x6 paper pack (Whimsey Stamps)
Ink:  Memento Tuxedo Black, Versafine Clair Nocturne, Blueberry (Altenew)
Other:  Nested Infinity Circle die (Hero Arts), Skinny Strips die (MFT), Pink Hearts Clay Confetti (Pretty Pink Posh)
Copics:  E31, 30, 0000, RV02, 01, 000, V05, 01, 000, BV20, 0000

Tuesday, October 26, 2021

Merry & Bright

Hello and welcome!  I'm working on those Christmas cards and the challenge at As You See It gave me inspiration to use less traditional colors for this one.  (This is my second post today - click here or scroll down if you want to see my card for Inspired By)


I love purple and green so it was fun using those colors to create with some new goodies.


This card came together super fast.  The sprigs were stamped, colored with Copic markers and die cut with the matching dies.  The sentiment shadow was die cut from Blackberry Bliss (such a yummy color), then the sentiment was die cut twice from white cardstock and once from silver holographic cardstock, and layered together onto the shadow.  I used a cover plate die to cut out the background - it has lovely swirls that I thought looked rather festive - then it was adhered to the card base.  The sprigs were adhered to the front then the sentiment tucked in between.  Glossy Accents was used to give a nice shine to the berries on the sprigs, then the final step was to add a few silver and crystal baubles.


Thanks for visiting, I always appreciate it!

Take care!

Stef


Stamps:  Holiday Sprigs (Simon Says Stamp)
Paper:  Neenah Solar White, Blackberry Bliss (SU), Silver Holographic (Tonic Studios)
Ink:  Memento Tuxedo Black
Other:  Merry and Bright dies (SSS), Detail Swirls Plate die (SSS), Holiday Sprigs dies, Crystal Collection-Night Sky (Little Things by Lucy's Cards), Glossy Accents (Ranger)
Copics:  V09, 06, 01, YG67, 17, 25

Saturday, October 9, 2021

Just a Hello

Hello and welcome! The card I'm sharing today was made for three challenges - Inspired By, As You See It and Color Throwdown.


I'm kind of on a kick of pairing of white and ivory/cream, so that's what I used on my card again today. Plus it worked so well with the color challenge colors. I hope you guys aren't tired of seeing it yet 😄.


I was indeed inspire by the white pumpkin photo, so I pulled out a cute fall border stamp set from Pretty Pink Posh.  I trimmed a panel of white cardstock to 3" x 4", then stamped the leafy image on the bottom and the pumpkins above, leaving room for the strip holding the sentiment.  Copic markers were used to color the images, then the gray strip layered across.  The sentiment was stamped and die cut then added to the strip with thin foam tape.


The base was made from the same gray cardstock, then an embossed panel of ivory was adhered directly to the base after adding the strip of textured Pumpkin Pie paper.  The colored panel was added with thin foam tape and I finished things up with some white enamel dots and an orange enamel heart! Quick and easy!


Thanks for visiting, I always appreciate it so much.  I hope you're having a great weekend - take care and stay safe!

Stef


Stamps:  Fall Borders (PPP), Just a Hello Floral (Pinkfresh Studio)
Paper:  Neenah Solar White, Ivory, Smoke (Simon Says Stamp), Textured Pumpkin Pie (ret. Stampin' Up)
Ink:  Gina K Chocolate Truffle Amalgam, Versafine Clair Pinecone
Other:  Lumber embossing folder (Tim Holtz), Lilly White Sprinkles (Doodlebug), Warm & Cozy enamel heart (Altenew), Just A Hello Floral die
Copics:  E29, 37, 35, 33, 19, YR27, 24, 23, 18, 16, 14, 21, W5, 3, 1

Wednesday, August 18, 2021

Bear Birthday

Hello and welcome!  I'm sharing a card that I made for the challenges at The Paper Players and As You See It.


Quite honestly I have many animals I consider my favorites and bears are one of them.  My card uses a real fun one that has lots of accessory stamp sets.


This was a fun and easy card to make.  The bear, his party hat and balloons were all colored with Copic markers.  I used the colors from the patterned paper as the inspiration for the hat and balloon colors.  They were all cut with the matching die set.  One of the things I love about the bear die is that it cuts around his arms to you can create scenes were he is holding things.  So cute!


After die cutting the bear and accessories, I stamped the sentiment and die cut the circle.  The strip of patterned paper was adhered to the navy card base, then the circle added with thin foam squares.  I determined where I wanted the balloons and also popped those up with thin foam squares after tying on the linen thread.  The bear was adhered to the circle with thin foam squares, making sure not to stick down his right arm (leg? 😁) before tucking in the strands of linen thread.  Some navy enamel dots finished off this quick, easy and relatively CAS birthday card.


Thanks for visiting, I really appreciate it!  Have a great remainder of your week!

Take care and stay safe!

Stef


Stamps:  All Inside and Bear Ware (Ellen Hutson), Watch This (sentiment/Colorado Craft Company)
Paper:  Neenah Solar White, Soft Navy (Simon Says Stamp), Enjoy the Ride 6x6 paper pack (Altenew)
Ink: Memento Tuxedo Black, Versafine Clair Nocturne
Other:  All Inside and Bear Ware dies, Nested Circle Infinity die (Hero Arts), Linen Thread (SU), Sakura White Gelly Roll pen, Glacier Caves Enamel Dots (Altenew)
Copics:  B99, 97, 95, 93, YG17, 05, 03, 01, E79, 57, 35, 33, 31