Showing posts with label The Paper Players. Show all posts

Sunday, February 2, 2025

Hugs & Kisses for The Paper Players

Hello friends! It's Sunday and time for a new challenge at The Paper Players.  This week, the lovely Ann has chosen a theme of love to start off the month of February.

The stamp set I used for this card is not new but it was unused until I was reminded of it and inspired by the lovely and talented Donna Mikasa when she posted this card. I initially used the stamp set for my card posted here yesterday and had so much fun making it that I created another with a slightly different layout for this challenge.


I started with the stamp set, which has three stamps that create different designs on nine hearts.  I then used the matching die to cut them all out.  I did this twice, once with the reds and once with the aquas.  

I thought I would layer them on a panel sprayed with Distress Mica spray but it was too busy.  So I searched through my unused embossed panels and decided on one with a wavy pattern, using the debossed side for adding the hearts.  All the layers were added to the card base with foam tape, including the hearts and sentiment, which is from the same stamp set.  Easy peasy (kind of) and I'll be sending this one off to one of my grandsons.  All three of my grands are adults but they still like getting Vday cards from their grandmother. 😍 


Thanks so much for stopping by. I hope you'll take a moment to visit the challenge blog (linked above) and see all the amazing cards the rest of the DT created.  The challenge remains open until Friday February 7th at 3pm EST and we hope to see your card in the gallery!

Take care!

Stef

  • Simon Says Stamp Printmaking Hearts stamps and dies
  • Stampin' Up Seaside embossing folder (ret.)
  • Spellbinders Postage Edge Rectangle die
  • Shiny Bauble Distress Mica Spray
  • SSS Guava, Watermelon, Cherry, Seafoam, Surf and Ocean inks

Sunday, January 26, 2025

Season's Greetings for The Paper Players

Hello friends!  The Paper Players has a new challenge starting today and we welcome you to play along.  The amazing Joanne is hosting our monthly sketch challenge, and she's created a great one.

I took this opportunity to add to my small stash for the 2025 holidays with a quick and easy card.  In fact, so easy that I made two!

I did use some "artistic license" with the layered section in the middle but hopefully Joanne will give me a pass lol!


I started with two panels of white and used the same colors on both to stamp the design using Concord & 9th's Turnabout jib and specifically designed stamps.  After the panels were stamped, I die cut the coordinating layered sentiment and some leaves.  I thought the card needed a little something more, so I used a fluted border die to create the decorative edges.

The panels were added to white card bases, then the sentiment and leaves centered in the middle and added with some foam tape.  To finish things off, I used a shimmer pen to paint sparkle on the leaves, frame and sentiment. Unfortunately, my camera didn't capture the sparkle in the photos.


How are you inspired to use this sketch?  For more inspiration, I encourage you to head over to the challenge blog linked above and see what my talented teammates have created!  The challenge remains open until 3pm EST Friday, January 31st.  

Hope to see your card in the gallery!

Stef

  • C&9 Holly Berry Turnabout stamps and dies
  • C&9 Turnabout jig
  • Spellbinders Fluted Classics Rectangle die
  • C&9 Evergreen, Cranberry and Tidepool cardstock

Sunday, January 19, 2025

Special Delivery for The Paper Players

Happy Sunday, friends!  We have a new challenge at The Paper Players and this week the lovely Jaydee is hosting our CAS challenge with a postage theme.

It's a great theme given that postal cards have been trending for a couple of years.  For my card, I used an older stamp from Stamping Bella.


That sweet little owl was stamped then colored with Copic markers. I ended up fussy cutting her so I could place her on the background stenciled with clouds.  The card design was inspired by this recent You Tube video by Jill Foster for Penny Black.  

I cut a panel to roughly 3.25" x 4.25", then stenciled it and added it to the white card base.  I cut a 1/8th inch strip of red cardstock, then adhered it next to the stenciled panel. The sentiment was stamped and die cut, then both the owl and the sentiment were added with thin foam squares.  Lastly, three tiny hearts die cut from the same red cardstock were adhered around the sentiment.  Super quick and easy card!


For more inspiration, please head over to the Paper Players blog and check out what my talented teammates have created!  The challenge remains open until Friday, January 24th at 3pm EST. Hope to see your card in the gallery!

Thanks for stopping by and take care!

Stef

  • Stamping Bella Special Delivery stamp
  • Hero Arts You're Mine stamps and dies
  • Taylored Expressions Hang-On Hearts die
  • MFT Rolling Clouds stencil
  • Salvaged Patina Distress Ink
  • SSS Schoolhouse Red cardstock
  • Copics - E29, 37, 33, 31, 30, R46, 14, BG49, 13, 11

Sunday, January 12, 2025

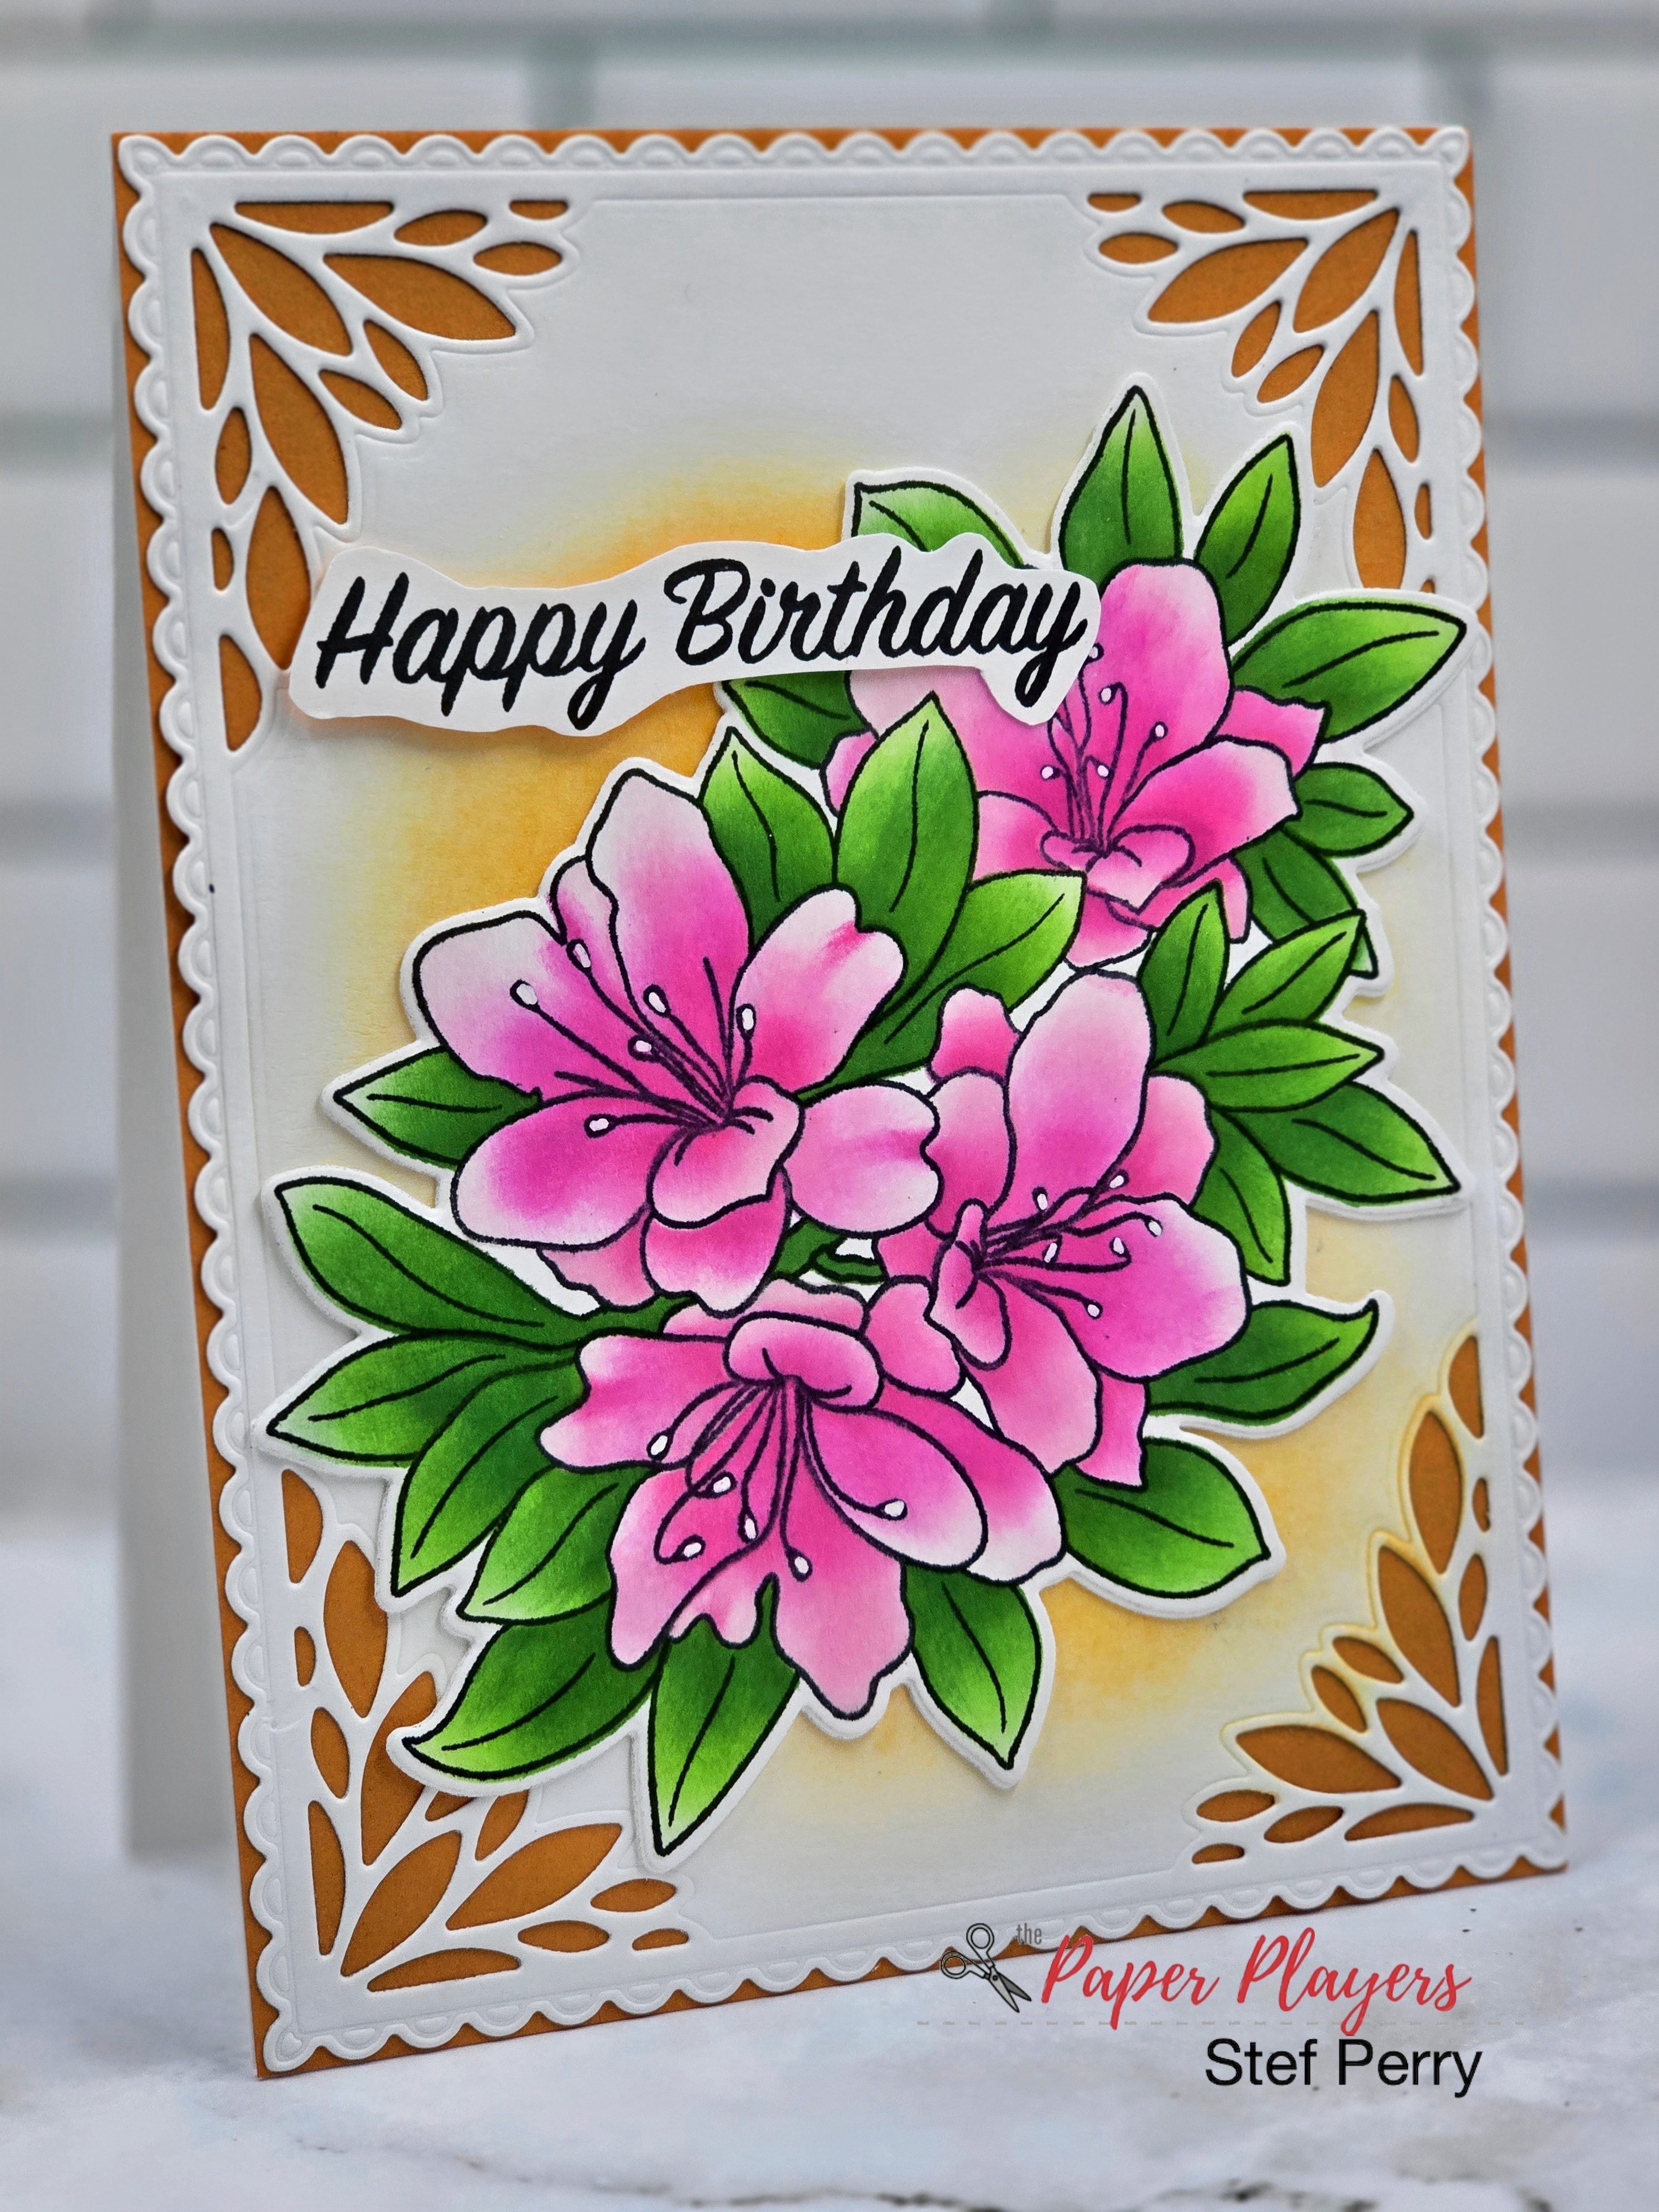
Azalea Bunch for The Paper Players

Hello friends! The team at The Paper Players is all ready to go for 2025 and our first challenge of the year, hosted by the lovely Elizabeth, starts today!  It's color week and she's selected three wonderful colors.  And neutrals are welcome too.


These colors definitely made me think of flowers and Spring, so that's the direction I took with this challenge.


I used products from many crafty manufacturers to create this.  The flowers were part of the Stamptember 2024 collaboration with Altenew and Simon Says Stamp. I have oodles of floral stamps but no azaleas until this stamp set made its way into my craft room.

I started by stenciling the stamped image with Altenew inks (listed below), then using the matching die to cut it out.  The background panel was die cut from white using a Honey Bee Stamps layering frame die, then I softly ink blended some orange in the middle so that it would highlight the floral arrangement.  It was then layered on a panel of Concord & 9th Clementine cardstock and added to the card base.  The floral image was added onto two additional die cut layers, then arranged on the card, along with fussy cut the sentiment to finish things off.


I hope to see your card in our gallery this week and definitely encourage you to visit the challenge blog for more inspiration and ideas from my talented teammates!  The challenge remains open until Friday 1/17 at 3pm EST.

Thanks for visiting and take care!

Stef


  • Simon Says Stamp/Altenew Azalea Bunch stamp, die and stencils
  • Stampendous Birthday Messages stamp set
  • Honey Bee Stamps Spring Vine Layering Frame die
  • Altenew inks - Pink Diamond, Pinkalicious, Rubellite, Snapdragon, Firefly, Green Field, Shadow Creek and Mountain Pine
  • White gel pen 

Sunday, December 8, 2024

Merry & Bright for The Paper Players

Hello friends!  I'm back with my card for The Paper Players' new challenge.  The lovely Ann is hosting our monthly Color Challenge and has chosen the luscious combination of Cherry Cobbler, Pretty Peacock and Gold, along with any neutral of your choice.

I actually ended up making three different cards for this challenge but decided this was the best of the bunch.


Not too long ago I'd purchased this leafy die set and loved how it filled an entire A2 card.  I started by die cutting the large die from both peacock and white cardstocks, then layered them up for a small bit of dimension.  The berries were cut from red glitter cardstock and adhered to the larger image.

A panel of white was then lightly ink blended with a color very similar to the peacock cardstock.  When the ink dried, the big leafy image was added to the panel, which was then glued to the card base.  The sentiment was die cut from matte gold metallic cardstock and then adhered to the vellum shadow die.  I'd used double sided adhesive on the back of the vellum before die cutting, which isn't visible from the front and made it a snap to adhere to the card front.  The last step was to add some gold pearls.


It would be wonderful to have you join us this week!  The challenge will remain open until 3pm ET Friday 12/13.  I do hope you'll be able to carve out a bit of crafty time for yourself this busy holiday season and play along with us, but before you do I encourage you to use the link above to see the fabulous cards by talented teammates have created for your inspiration!

This will be the final challenge of the year for The Paper Players and we can't tell you how much we appreciate your participation this year!  I hope you have a joyous holiday season and come back to see us on January 12th for our first 2025 challenge!

Thanks for visiting.  Happy holidays and take care!

Stef

  • Simon Says Stamp Abundant Leaf Background and Merry & Bright dies
  • Concord & 9th Peacock, Altenew Brillian Red Glitter and SSS Matte Gold cardstocks
  • Honey Bee Stamps mixed pearls
  • Altenew Teal Tempest ink

Sunday, December 1, 2024

Merry and Bright for The Paper Players

Hello friends!  Here we are on December 1st!  I don't know about you, but this year has literally flown by.  But the first Sunday of the month brings a new theme challenge to The Paper Players.  The lovely LeAnne is hosting and is asking everyone to use a deer on your card.


Of course, you needn't make a holiday card, but that is the direction I took with my card because I had some fun little stamps I've been waiting to use.


These cute images and the sentiment are all from the Tim Holtz Stamptember stamp and die set for Simon Says Stamp.  There are like 20 small stamps of different iconic holiday images plus a number of sentiments and two sizes of postage stamp dies.  I'm using the largest of the two here and my bonus card below uses the smaller postage die.  

I started by stamping images on four half sheets of cardstock then coloring them all with Copic and Olo markers, plus I used a gold gel pen for the Christmas tree star and garland. The images were all die cut with coordinating dies along with the postage stamp shapes out of white.  

I then put the postage stamp die cuts on a stick mat and puzzle pieced the die over them so I could ink blend them yet leave a white edge.  After using a white gel pen to add "snow", Rudolph, Santa and the Christmas tree were all added with thin foam squares.

Next a panel of red was cut with a postage edge rectangle die and the sentiment was white heat embossed.  White pigment ink was blended around the edges before mounting on the white card base.  The postage stamp images were added with thin foam squares and lastly I tied some red baker's twine around the top.


The bonus card is arranged just a bit differently.


Oh, so much fun and I have loads of images to make more cards!  Do you have a favorite?

What are you inspired to create using a deer?  It could be a holiday/winter card or it could be one for any time of year as long as a deer is present.  We look forward to seeing to your card in the gallery, the challenge remains open until 3pm EST on Friday December 6th.  For more inspiration, be sure to see what my talented teammates have created - the blog is linked above.

Thanks for visiting and take care!

Stef

PS Check back later to catch my Color Hues DT post!
  • Tim Holtz/SSS Stamptember 2024 stamp and die set
  • Spellbinders Postage Edge Rectangle die
  • Hero Arts Unicorn White and Salvaged Patina Distress inks
  • Copic and Olo markers
  • Altenew Gold and Silver gel pens


Sunday, November 24, 2024

Season's Greetings for The Paper Players

Hello friends!  It's time for a new challenge at The Paper Players and it's sketch week, which I am hosting.  I hope you're inspired by my sketch and play along us this week!

I'm also joining my friends over at Just Us Girls, where the sweet Carol Mc has chosen a great mood board for this time of year.  I don't have anything specific to tie my card to other than they are both wintery and Christmasy.


I created this sketch prior to deciding on what I was going to use and it worked out best for me to flip the sketch to a portrait layout, so feel free to do the same if you join us, which I hope you will!


When I received the Simon Says Stamp November card kit, I knew I had to use something from it with this layout and I ended up using this adorable deer.  I was definitely inspired by the card made by Nina Marie Trapini here, especially since I already had the scalloped dies she used.

I started by choosing a piece of patterned paper from the kit, then matched up Copic markers for coloring the banner, leaves, berries and the deer's bow, which were then die cut with matching dies.  

Next the rectangle dies were used to cut the patterned paper as well and a panel of vellum.  I glued together the stamped images then added them as one piece to the vellum piece, using foam squares, then used glue on the backside just where the images were to adhere the vellum panel to the background paper.  A strip of gorgeous turquoise glitter paper was adhered to the card base, then the main image adhered over it.  The final touch was to use Stardust Stickles to add glitter to the bow and the berries.  I love how this turned out.


What are you inspired to create with this sketch?  I hope you'll join us this week, the challenge remains open until 3 pm EST on Friday November 29th. For even more inspiration, take a moment to visit the challenge blog (linked above) to see all the beautiful cards my talented teammates created with this sketch.

Thanks for visiting and to those celebrating Thanksgiving this week, I hope you have a joyous day with family and friends!

Stef

  • SSS Christmas Cheer Stamp and Die set
  • Memory Box Fringed Scalloped Frame dies
  • Prima Candy Cane Lane Patterned Paper
  • Tonic Turquoise Lake Glitter cardstock
  • Copics - E37, 35, 33, 31, 30, R39, 37, 35, BG78, 75, 72, 70

Sunday, November 17, 2024

Noel Birds for The Paper Players

Hello friends!  I keep plugging away at making Christmas cards and have another one to share that I made for our current challenge at The Paper Players.  This week, the amazing Jaydee is hosting our CAS challenge with a fun theme that can help YOU work on your supply of holiday cards as well!

I always love quirky characters so when I saw the Stamptember set in collaboration with Simon Says Stamp and AALL & Create, I had to have it, especially for these funny birds.


Aren't they so funny?  Love them!  Anyway, before I started coloring the images, I went online and looked up trending colors for Christmas 2024 and saw this color palette of purple, pink, aqua and lime.  Perfect!  Of course I used my Copics to color the birds and the sentiment blocks, then used the matching dies to cut them out.

Since the birds were all decked out in their winter apparel, I thought an embossed snowflake background would be perfect.  It was a little busy behind the birds, so I used an arch die to cut a piece of white and then add a bit of aqua ink blending to create a background for the birds.  After the card was complete, I added a bit of Glossy Accents to their eye glasses - it looks great IRL.

So, while I did use layers, I kept a lot of "white" space around the image to maintain the CAS look.


I know many are still making holiday cards, so come share your CAS creation with us this week!  The challenge remains open until 3pm EST Friday November 22. And don't forget to check out the design team cards here for more inspiration. 

Thanks for visiting and take care!

Stef

  • Simon Says Stamp/AALL & Create Winter Bells stamps and dies
  • SSS Nested Domed Arches
  • SSS Snowflake Visions embossing folder
  • Altenew Aqualicious ink
  • Copics - E59, 57, 55, 47, 44,43, 29, 37, 33, YR24, 23, 21, 12, Y21, V09, 06, 04, 01, RV14, 13, 11, YG09, 07, 05, 01, BG49, 45, 01

Sunday, November 10, 2024

Shaker Snow Globe for The Paper Players

Hello friends!  It's Sunday and that means there's a new challenge at The Paper Players.  This week the lovely Claire is hosting our monthly color challenge and she's chosen some vibrant and beautiful colors.

I decided it was the perfect time to make a fun shaker Christmas card.  While I tend to go towards using traditional reds and greens, I thought it would be fun to "shake" things up (sorry, not sorry, for the pun lol!).


The colors in the photo are a bit off, however I will admit I don't have any true turquoise paper so I got as close as I could with the cardstock I have.  I began by die cutting Twig & Stump from white velvet luxury cardstock and their apparel and the ornaments from colored cardstock.  The backer for the snowmen was cut from black.  The snow globe, tree and snowflakes were die cut from white glitter cardstock.  I also used the snow globe die to created a shaped card for something fun and unique.

I saw this snow globe design two years ago when Twig & Stump were first released, created by the talented Nichol Spohr and found it so clever, and since I rarely make shaker cards, decided to use it.  You can find her original post here.

The background was ink blended with purple and turquoise-ish ink then splattered with white gloss acrylic spray.  When dried I put the snow globe together, adhering the top white glitter layer to an acetate sheet cut to fit, then 3 more die cuts then the ink blended background, after adding the shaker bits.  After assembling Twig & Stump, they along with the tree, ornaments, snowflakes and white heat embossed sentiment were adhered on top.  The final step was to add glitter using Stickles to the ornaments. Definitely not a card for mass production but it was fun and I'll likely make a few more if time allows. 

This photo was taken flat so I could capture the shaker bits inside.


My wonderfully talented teammates have some terrific inspiration for you over at the challenge blog, so I encourage you to check it out.  I hope you'll join us this week with however these colors inspire you - the challenge remains open until Friday November 15th at 3pm EST.

Thanks for visiting and take care!

Stef

  • Tim Holtz Twig & Stump dies
  • Honey Bee Stamps Snow Globe A2 Shaker dies
  • Hero Arts December 2020 card kit (sentiment)
  • Simon Says Stamp White Luxury Velvet and White Glitter cardstock
  • Concord & 9th colored cardstocks

Sunday, November 3, 2024

Thankful for The Paper Players

Hello friends!  This is theme week at The Paper Players and the lovely Elizabeth has chosen an appropriate one for this time of year.


I created a card that could be used for a number of occasions during the fall.


Three weeks ago I attended the Altenew Stay Cozy retreat and I've used some of the products from that were used to create this card, with the exception of the octagonal rectangle die.

I started by gold heat embossing the pumpkins and the sentiment.  I used the coordinating stencil to color the pumpkins and leaves, then everything was die cut with the matching dies.  It was fun to color the pumpkins in different colors - in fact I think it would be fun to used unexpected colors like pink or aqua on another card! 

The background panel was embossed with the pumpkin folder, trimmed down then I painted gold metallic ink around the edges to make it stand out a bit more before adhering to the white card base. After die cutting the white panel, I splatter it was a bit of gold paint as well before adding the pumpkins and sentiment.   


I hope you'll join us this week, it's the perfect time to create cards to send to friends and family during this month of Thanksgiving.  As always, my delightful and talented teammates have created some beautiful cards to inspire you, so I encourage you to stop by the challenge blog before heading off to your craft room!  The challenge remains open until Friday November 8th at 3pm EST.

Thanks for visiting and take care!

Stef

  • Altenew One-Go: Sweet Pumpkins stamps, dies, stencils and 3D embossing folder (not yet released)
  • Pinkfresh Studio Blanket Stitched Octagons die
  • Altenew Mandarin Burst, Red Jasper, Raw Amber, Lemon Ice, Sagestone & Onyx Green
  • Altenew Gold Metallic Paint and Antique Gold embossing powder

Sunday, October 27, 2024

Snowflakes for The Paper Players

Hello friends!  The last Sunday of the month is upon us and that brings a new sketch challenge at The Paper Players!  This time the lovely and talented Ann has given us this wonderful sketch with lots of options.

I'm also sharing my card over at Addicted to Stamps, where the theme is Any Occasion.


Since I'm still working on Christmas cards, that is the direction I took.  I kept things very simple; so simple I made two cards!


I decided to pull out some patterned paper that I hoard rarely use but knew it would work perfectly with the snowflakes I created.  I love the bokeh effect and the pretty colors.  

The snowflakes were die cut from silver and white glitter cardstock using various snowflake dies, with the exception of one small snowflake that was cut from light purple glitter paper.  The same cardstocks were used for the die cut sentiment and the vertical strip.  No need for embellishments with all that sparkle and shine, plus I think they would get lost against the background paper.


What are you inspired to create with this sketch?  For more ideas and inspiration, be sure to visit the challenge blog to see what my talented teammates have come up with.  I hope to see your card in the gallery this week - the challenge remains open until Friday November 1st at 3 pm EDT.

Thanks for stopping by and take care!

Stef

  • HoneyBee Stamps Lovely Layers: Snowflakes dies
  • Simon Says Stamp Aidan and Sophie Snowflake dies
  • SSS Handwritten Merry Christmas dies
  • SSS Glitter and Matte Silver cardstock
  • Whimsy Stamps Blurry Flurries 6x6 designer paper

Sunday, October 20, 2024

Peaceful Holiday for The Paper Players

Hello friends!  It's Sunday and time for a new CAS challenge over at The Paper Players where LeAnne is asking us to add a tag.

I am also sharing over at Inkspirational, where the theme is Seasonal.


I love to make cards with tags, so I was excited to see our tag challenge.  I am in desperate need of adding more cards to my holiday card stash, so that is where I went with this challenge.


I started by die cutting the tag then stamping and clear heat embossing the tree trio on the tag.  I created a mask using the circle die that comes with the set to cover the moon while I used inks to create the night sky, then removed the mask and used the moon stamps in light and medium yellow.  I grabbed a scrap of white cardstock, hand cut the top then used the tag die to cut the bottom.  After it was adhered to the tag, I added some Star Dust Stickles to the top of the "snow"

The stag and the sentiment were also stamped and clear heat embossed, then die cut with the matching dies.  A white gel pen was used to create "stars" in the sky then the die cut pieces were added to the tag. I found a leftover bit of white sparkle ribbon and added that to the top of the tag and tied it off with some silver baker's twine.  It was then added to a card base that I found in my stash with the embossed panel already adhered.  The final step was to add some of the Star Dust Stickles to the tree branches.  It sparkles so much IRL!


What are you inspired to create with this challenge?  We'd love to have you join us this week - the challenge remains open until Friday October 25th at 3pm EDT.  In the meantime, be sure to head over to the challenge blog, where my wonderful teammates have some fantastic inspiration to share with you!

Thanks for visiting and take care!

Stef

  • Simon Says Stamp/Gina K Stamptember 2024 Stay Cozy collaboration stamps and dies
  • SSS Snowy Pines embossing folder
  • Ellen Hutson Tag Trio die
  • Altenew Desert Night, Dusk, Lemonade Stand and Honeydew Glow inks
  • Lawn Fawn Silver Baker's Twine
  • Sakura White Gelly Roll pen

Sunday, October 13, 2024

Grateful for You for The Paper Players

Hello friends!  This week at The Paper Players the lovely Joanne has chosen an autumnal color combination for our inspiration.


I'm also joining the lovelies at Inkspirational with their gorgeous mood board inspiration.  I was inspired by the leafy photo and the fall colors.

 
I had many, many ideas for these colors but in the end, I played around with messy, wonderful mica sprays to create my card.  And yes I did have orange and brown fingers for a day lol!


Right off the bat, I have to say the photos do not do justice to the beautiful colors and shine of the background.  I began with a half sheet of mixed media paper from Vicky Boutin and used two brown and two orange Distress Mica Sprays on the paper, adding water so they would mix a bit then set it aside to dry.

When it was dry the colors had mixed more than I anticipated.  Don't get me wrong, it was really pretty but the browns had dominated the oranges.  I put the panel in my Misti, arranged all the leaf stamps, then used a brown pigment ink to stamp.  That didn't show up well, so ended up gold heat embossing the leaves then used gold metallic paint to add splatters.

Next, I poured a bit of the mica spray onto a palette and used a small brush to paint the lightest orange over some of the leaves and I was so happy with that small step! When everything dried a second time the panel was die cut, wrapped with some gold twine and matted onto a dark brown rectangle before adding to the 5"x 7" ivory card base.  The sentiment was also gold heat embossed, die cut with the matching die and added to the card front along with some copper-ish gems.


We would love to have you share what you create with these colors this week!  The challenge remains open until 3 pm EDT Friday 10/18.  In the meantime, please take a moment to see all the beautiful cards my talented teammates have created for your inspiration over on the challenge blog linked above.

Thanks for visiting and take care!

Stef

  • Simon Says Stamp Autumn Leaves and Graceful Florals (sentiment) stamps and die
  • Waffle Flower A7 Frames rectangle die
  • Spellbinders 5" X 7" Matting Basics A die
  • Rangers Jack-O-Lantern, Mulled Cider, Crooked Broomstick and Fallen Acorn Distress Mica Stain Sprays
  • SSS Ultra Fine Gold embossing powder
  • Altenew Gold Metallic paint
  • HoneyBee Stamps Fall Is In the Air gems


Sunday, October 6, 2024

Always for The Paper Players

Hello friends!  Here we are, the first Sunday in October and it's time for a new challenge at The Paper Players.  This week the lovely Jan has chosen the theme Love is in the Air.  

Last month my husband and I celebrated our wedding anniversary and I struggled a bit trying to decide what to make.  I usually create something rather fun or silly but this time I went for something a bit more elegant.  


My husband and I share a love of dragonflies, and I've had this die for a couple years and never used it, so I decided it would work.  I began with an A7 piece of Peacock cardstock and ink blended Black Soot Distress ink around the edges, leaving the center with a large "glow".  The dragonfly and the arched frame were all cut from black cardstock, and the wing layer from matte gold, then I positioned them on the panel so I could get the placement for the sentiment, which was heat gold heat embossed.

Before adhering everything, I added a bit of metallic gold paint splatter for some additional interest since this was a pretty simple card.  And the good news was that he really liked the card, so that made me happy. ;-)


So what are you inspired to create for this challenge?  There are plenty of options because love cards can be for all types of occasions.  Please be sure to check out what my wonderfully talented teammates have made, then hopefully join us this week!  The challenge remains open until 3 pm EDT on Friday, October 11th.

Thanks for visiting and take care!

Stef

  • Altenew Delicate Dragonfly
  • Simon Says Stamp Nested Domed Arches Frame die
  • MFT How to Say I Love You stamp set
  • Altenew Metallic Gold paint

Sunday, September 29, 2024

Gratitude for The Paper Players

Hello friends!  It's the fifth Sunday of the month and that means we have a Tic-Tac-Toe Challenge at The Paper Players this week!  The amazing Claire is hosting and created this fun TTT board to inspire you!


My initial choice was to go across the top row, but in the end, my card also fit left to right diagonal as well as the center column.


I couldn't decide which way to go but then I challenged myself to use some patterned paper.  I don't have a lot (I purged most of it years ago) but have since acquired some through card kits or very selective purchasing.  

The background is a piece of that pp that was included in a card kit about 3-4 years ago. This piece a pretty vintage style collage and even after trimming it down I was able to capture a sunflower and pumpkin for the background.  For the "table" I found a piece of brown from another paper pack and embossed it with a woodgrain folder, although you really can't tell in the pictures.  

Next, I went to my Fall dies and found the pumpkin already ink blended and assembled. The same thing happened when I was searching through my Autumn themed stamp sets.  The stamp set I pulled out had the leaves colored and die cut, and the sentiment already stamped, so I just used the coordinating die for it.  I used a rounded corner punch for the base and pp, then assembled all the elements, including the three enamel dots.  And I was really happy with how this turned out!


Claire's TTT board has many opportunities for a variety of cards.  I hope you'll find a column or row that suits your fancy and play along!  The challenge will remain open until 3pm EDT, Friday October 4th.  

Thanks for visiting and take care!

Stef

  • Simon Says Stamp Layered Pumpkin die
  • SSS/Memory Box Beautiful Moments Collaboration set (Stamptember 2022?)
  • Tim Holtz Lumber embossing folder
  • P13 Autumn and Honey Bee Stamps Harvest Festival patterned papers
  • Spellbinders Corner Rounder punch
  • Altenew Warm and Cozy Enamel Dots