Monday, February 6, 2017

Bella Valentine

Hello again!  I've made a Valentine's card for one of my grandchildren using the Bella & Friends stamps set.  This little dog is so sweet, I just love this stamp set.  It was a bit of a challenge for me as I used my new Zig Clean Color Markers, so it took 3 attempts to get the blending to work on the main focal image, but I'm happy with the end result.


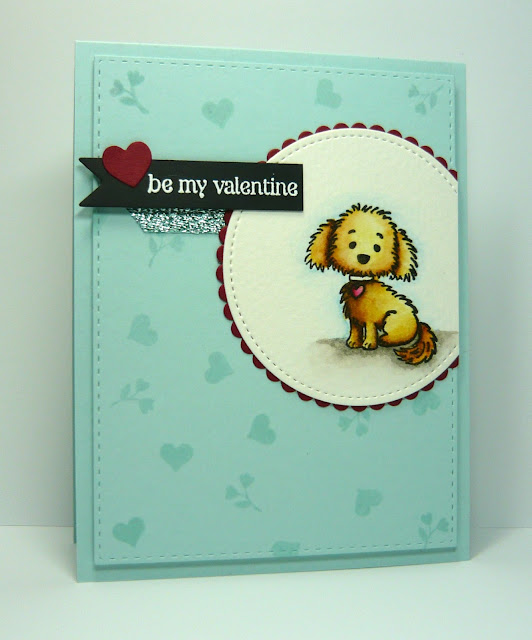
I started with a Soft Sky panel and created a background design with two small stamps from two different retired SU stamp sets (listed below), then cut it out with the largest Wafer Stitched Rectangle die from Simon Says Stamp.  For the Bella image, I stamped it with Versafine Onyx Black ink on water color paper, then used Zig markers and a water color paint brush to color it.  I started with the lightest color and added layers of the same color marker, then dried with my heat tool before applying the darker color for deeper shadows.  That's when it got a bit interesting as the darker color had a greener base so then I had to go back and add the original brown and blend in...I was grateful it ended up looking okay; it was a bit touch and go for a while! 


I added a light blue around Bella then used a gray to ground her.  After the panel was dry it was cut with a Stitched Shape Circle framelit and mounted on a Cherry Cobbler layer cut with the largest scallop circle Layering Circles framelit.  Before adding it to the Soft Sky panel, a piece of Soft Sky Glitter Ribbon was layered underneath.  Once the circle was in place and trimmed on the right side, the embossed sentiment on a banner of Basic Black card stock was added.


After all was adhered and added to the card stock base, it just seemed I needed one last addition, so I added a little heart to the sentiment that was cut from Cherry Cobbler card stock and cut a couple extra to add to the piece of white card stock added to the inside

I've used the current sketch challenge at Fab Friday for my card design.  I'm also entering this in the current challenges at Paper Player (Valentine theme) and Just Us Girls (Word Week - dog).  I've added the challenge graphics and links below, so be sure to use them to visit and check out all the amazing inspiration!


Thanks you so very much for visiting, and as always, your comments so are so appreciated!  Have a great week!

Stef


Product detail
Stamps:  Bella & Friends, Tin of Cards (heart), P.S. I Love You (sentiment), Bloomin' Love (flower and heart)
Paper:  Whisper White (interior), Soft Sky, Cherry Cobbler, Basic Black, Strathmore Watercolor
Ink:  Versafine Onyx Black, Versamark, Soft Sky
Other:  Stitched Shapes, Layering Circles and Gift Card Envelope and Trims Framelits, Wafer Stitched Rectangles (SSS), Soft Sky Glitter Ribbon, Hero Arts White Embossing Powder, water color paint brush, Zig Clean Color Markers:  Light Brown, Mid Brown, Deep Red, Haze Blue, Gray Tint.

Saturday, February 4, 2017

Happy Birthday, Little Fox

Hello again!  We have a great nephew that is going to have his 3rd birthday next Friday, so today was the day I had to get his card made.  I decided to use the Foxy Friends stamp set to create a cute little scene.


Using my Misti, the fox, tree stump, large tree and those cute mushrooms were stamped on white card stock.  Thank goodness for that tool, as I was FINALLY able to get to get a good stamped image of that cute little fox, plus easily align the eyes, nose and front legs.  Next I fussy cut all those stamped images so I could pop them up on foam tape on the panel where I can created the scene with trees, clouds and grass.


The Calypso Coral base was layered with a piece of the designer series paper from A Little Foxy paper stack, then the scene was added along with a horizontal piece of White Corrugated paper and the sentiment.  I was happy with how quickly this card came together once the fussy cutting was complete. 

I used this week's sketch Sketch Challenge at Splitcoaststampers for inspiration for my card layout.  I've added a link below so be sure to head over there and check out all the amazing inspiration!


Enjoy the rest of your weekend!  I hope to be back with one more card in the next two days before heading back to work on Tuesday.

Stef


Product details
Stamps:  Foxy Friends, Petite Pairs, Sky's the Limit, In the Meadow
Paper:  Whisper White, Calypso Coral, Pool Party, White Corrugated, A Little Foxy dsp
Ink:  Calypso Coral, Pool Party, Garden Green, Smoky Slate, Tip Top Taupe, Wild Wasabi, Chocolate Chip, Memento Tuxedo Black
Other:  Stitched Shapes and Layering Ovals Framelits, Misti, Paper Snips

Friday, February 3, 2017

Color of Love

Hello again!  I recently acquired some Zig Clean Color Brush Markers and had a chance to play around with them a bit.  Actually, I made myself a color chart so I could get to know the colors and how I think I might blend them.  I tried water coloring with them on various types of paper, and came up with the main focal point of my card today. 


I started with a larger piece of watercolor paper, two of the Zig markers and a watercolor paint brush.  I moved the first marker back and forth across the top of the panel, with more complete coverage up above then less so as I moved it down towards the middle, then used my wet brush to blend and lighten.  Next I turned the paper around and started with the 2nd marker on the other end and worked towards the middle, again blending with water towards the middle.  After it dried it was trimmed down to roughly 2 x 2.25 inches.


Next, I used my Misti to center and stamp the sentiment on a 4 x 5.25 inch panel, then used foam tape to add the water colored piece.  All along my plan was to add either stenciled or die cut hearts under and around the water colored panel but once the panel was added just above the sentiment, I loved how it just popped against the white background and decided not to add any embellishments. 


I love how spare and totally CAS it is, plus your eye has plenty of white space to rest after looking at that very bold water colored piece LOL!!

My card was inspired by this week's challenge at Freshly Made Sketches and I've also entered it in the Wednesday Challenge at Simon Says Stamp, which the theme is...The Color of Love.  ;-).  I've added links below so be sure to head over to both challenges and enjoy all the amazing inspiration.


Thanks so much for visiting!  Have a great weekend!

Stef


Product details
Stamps:  Painted Greetings (Altenew)
Paper:  80# & 110# Neenah Solar White, Watercolor
Ink:  Barn Door (Distress)
Other:  Zig Clean Color Markers (Red, Carmine Red), water color paint brush, Misti

Sunday, January 29, 2017

Big on Birthdays


Hi there!  Tonight I have a card to share that was made for a co-worker's birthday.  I needed a masculine card and was struggling with my mojo, so I searched Pinterest for ideas and found this card (https://www.pinterest.com/pin/501869952210965546/), which I decided to CASE.

 
I love the clean look of it, which was enhanced by using a monochromatic color scheme.  The layout from the original card was used, but the colors and stamp sets are different.  I used my Misti to stamp the sentiment and the hardest part in putting the card together was making sure to line up all the squares when I adhered them.  I know I will use this layout again in the future.

Thanks for visiting and I hope you have a great week ahead!

Stef


Product details
Stamps:  Big On Birthdays, By the Sea, From Land to Sea
Paper:  Whisper White, Smoky Slate
Ink:  Smoky Slate
Other:  Stitched Shapes and Layering Squares Framelits, Smoky Slate 1/8" Stitched Ribbon

Saturday, January 28, 2017

Congratulations for Freshly Made Sketches

Hello, yes a second post tonight!  This card is for the current challenge at Freshly Made Sketches.


I love all of the circles in the sketch and started with a Lace Doily followed by a small Gold Metallic Foil Doily.  Adding the gold doily set the direction for this card, and I then added retired gold Washi tapes for the horizontal piece. 


After that I was trying to decide what the next additions should be when I saw a leafy branch cut from Vellum left over from another project, and decided to also add one of the flowers from the same die set, also cut from Vellum.

The vellum flower was layered on a circle cut from Shimmer card stock, then I added a bow of Gold Baker's Twine.  The sentiment was heat embossed on Basic Black card stock with gold embossing powder, trimmed down and a fish tail hand cut on one end before popping up on foam tape.


Thanks so much for visiting!  I've added a link above to the challenge, so be sure to head over there and enjoy all the beautiful inspiration!

Stef


Product details
Stamps:  Balloon Celebrations
Paper:  Thick Whisper White, Shimmer White, Vellum, Basic Black
Ink:  Versamark
Other:  Gold Stampin' Emboss powder, Metallic Foil and Lace Doilies, Flourish Thinlits, Layering Circle Framelit, Gold and Metallic Gold Washi Tapes (retired), Gold Baker's Twine.

Magical Day

Hi there!  I have long been smitten with a stamp set called Fairy Friends from Lawn Fawn and I finally broke down and bought it earlier this month.  The images are just so adorable and work well to make cute scenes and such (I mean Fairy house, toadstools, flowers - just so, so cute!).  But for today's card I kept it fairly simple, just water coloring and adding two of the fairies and one of the sentiments.


The fairies were first stamped with Versamark ink then heat embossed with Hero Arts white embossing powder.  Strathmore Mixed Media paper was used for creating the fairies so that I could get nice blending of the Distress inks when I water colored them.  Because these adorable image are so small I didn't do a lot of color layering, rather just one color was used for coloring their dresses and wings.  For the wings, I took my clear Wink of Stella pen, picked up a bit on distress ink, then colored away (saw Jennifer McGuire do that on a video sometime in the last month or so, and it worked well).  After all was dry, they were cut out with the matching dies.


The panel behind the fairies was cut from Neenah Solar White card stock with a Simon Says Stamp Wafer Stitched Rectangle die.  Love that look!  The "fairy dust" or sparkles stamp was heat embossed onto the panel, then Tumbled Glass Distress Ink was blended into the background.  I wanted a border of some sort behind it so I took one of the Lots of Labels Framelits (SU), cut a piece of white card stock then trimmed down the sides so only the rounded ends would show.  It wasn't long enough to pop out on both ends so I cut it in half and then adhered it to the short ends of the rectangle panel.  After that was popped up on the Soft Sky card base, the embossed sentiment and sequins were added to finish things off.

I'm entering this into the Simon Says Stamp Wednesday Challenge where this week the challenge is "Anything Goes" (SSS Wednesday Challenge) Be sure to visit and check out all the beautiful inspiration!

Thanks for visiting and I'd love to hear from you if you have a moment to leave a comment!

Stef


Product details
Stamps:  Fairy Friends (Lawn Fawn)
Paper:  Soft Sky, Basic Black (SU), Neenah Solar White, Strathmore Mixed Media
Ink:  Versamark, Spun Sugar, Seedless Preserves, Ground Espresso, Scattered Straw, Tumbled Glass, Tombow Marker 850 (skin tone)
Other:  Pretty Pink Posh sequins, Hero Arts White Embossing Powder, Lots of Labels Framelit (SU), Wafer Stitched Rectangle die (SSS), Clear Wink of Stella

Sunday, January 22, 2017

Leaf Circle Birthday


Hello and welcome back!  Over at Splitcoaststampers, the current sketch challenge really caught my eye this week so I decided to use it as inspiration for the card I'm sharing with you today.  I recently acquired some new dies from Simon Says Stamp, including the Circle of Leaves die that produced the beautiful leaf silhouette.  When thinking about creating this card, I thought the retired Brushed Gold (SU) card stock would look spectacular behind the silhouette, then I hit on the idea of using Shimmer White card stock for the top panel.  Although I couldn't pick it up with my photos, they two papers look beautiful together.


Next the sentiment was cut from the Brushed Gold card stock and my intent was to adhere it to the top panel, then I decided to try the die cut inlay technique, which I originally saw done on Jennifer McGuire's blog last month (http://www.jennifermcguireink.com/2016/12/stretching-supplies-dies-giveaway.html).  Be sure to head over there and enjoy her wonderful video!  Before cutting the sentiment from the Shimmer panel, I put post it tape on the backside to hold all the little pieces needed after the gold letters are laid into the die opening.  Once the white sentiment was removed, I added tape behind the opening, so that when the gold letters were layered in, they would stay in place.  After the sentiment was added, I layered in all the white pieces into the letter loop openings.


After the inlay portion was complete, the panel was popped up on foam tape and layered over the gold panel, then added to a Thick Whisper White card base.  The final touch was adhering a gold sequin and some pearls.  Very quick and CAS.

Below is the sketch and link to Splitcoaststampers, so be sure to head over there and enjoy all the beautiful inspiration!


As always, your visit and comments are so appreciated!  Thanks for taking a look and have a great week!

Stef


Product details:
Stamps:  None
Paper:  Brushed Gold, Shimmer White, Thick Whisper White
Ink:  None
Other:  Circle of Leaves (SSS) and Brushstroke Birthday Greetings (MFT) dies, pearls, Metallic Sequin

Saturday, January 14, 2017

Helping Thoughts

Hi there!  Today the card I'm sharing was made for the current challenge at Freshly Made Sketches.  I never seem to have sympathy or sympathy type cards on hand when I need them, so I thought I would make one that could be used for that purpose.


I started by masking off a portion of the daisy stamp from Helping Me Grow, inking the unmasked part with Basic Black ink, pulled off the mask and then stamped on watercolor paper.  Using a watercolor paintbrush, the flower was colored with a very watered down Cherry Cobbler, after adding a So Saffron center.  Pear Pizzazz was used for the stem and then Soft Sky was painted around the images.


After the panel dried it was mounted on a slightly larger rectangle of Soft Sky card stock, then a slim piece of Textured Cherry Cobbler was added to the side, then the entire piece was popped up on Dimensionals.  I tried running various sentiments up the side of the focal point to follow the sketch but they were either too big or too small - nothing in the Goldilocks size  ; - ) because I wanted to keep the focal point to the left side of the card.  So I ended up using a sentiment from Wherever You Go, stamping it on a small oval of watercolor paper, added an accompanying oval of Soft Sky underneath and attached it to the panel.


After mounting the panel on a Thick Whisper White base, a few Soft Sky and Silver sequins were scattered around the card.  I finished the card by wrapping Linen Thread around the upper part and tying a small bow.

Thanks so much for your visit, I really appreciate it!  I've added a link above to the FMS challenge, so be sure to head over there for all the beautiful inspiration!

Stef


Product detail
Stamps:  Helping Me Grow, Wherever You Go
Paper:  Soft Sky, Textured Cherry Cobbler, Thick Whisper White, Watercolor
Ink:  Basic Black, Soft Sky Cherry Cobbler, Pear Pizzazz, So Saffron
Other:  Fancy Frost and Metallic Sequins, Small Oval Punch, Linen Thread

Friday, January 13, 2017

Birch Winter Greetings

Hello and welcome back!  Today I have two cards to share with you, both of which used the sketch from the current Fusion Card Challenge (celebrating their 3rd anniversary!), and the first one also uses the color inspiration from Sunday Stamps. 


The process for both cards was very similar and I used the same die on them both as well.  For this first card, I started with a panel of Strathmore Mixed Media paper and blended four colors of Stampin' Up ink that I thought matched fairly well with the color challenge at Sunday Stamps.  I started at the top with Peekaboo Peach, then below that added some Wisteria Wonder.  Next was Sweet Sugarplum and at the bottom some Rich Razzleberry.  I love how it turned out except I think I blended a little too much peach into the wisteria so it doesn't stand out as well.


While I was working on the blended panel, I let dry a piece of white card stock that was sprayed with a shimmer spray to add some wintery sparkle as you see in both challenge pictures.  After the shimmer panel was dry and my sponged panel took its turn drying, I die cut it with the new Birch Column die from Simon Says Stamp.  LOVE this and look forward to playing with it more.  When the sponged panel was dried, I adhered the die cut panel on top.  I thought about popping it up on foam tape, but was dissuaded by the idea of all the little tiny pieces I'd have to cut and adhere to the trees and limbs when I really didn't have the time at that moment.


Next I used Hero Arts Gold embossing powder for the sentiment from Altenew on vellum, attached by wrapping one end around the left side of the panel, then hiding my adhesive under the letters.  The final touch was adding the snowflakes and gold enamel dots around the card, then mounting on a card base of Sweet Sugarplum card stock.


For the next card, which is only for the Fusion challenge, I similarly blended inks on a panel of Mixed Media paper, only this time using Dapper Denim and Melon Mambo, which created a lovely purple when I overlapped the colors in the middle.  The die cut panel here is out of Neenah Solar White card stock and after adhering to the sponged panel I took a gel pen and created small snow flakes in between the trees.


The sentiment is from a long retired SU Hostess stamp set where I used stamping surgery to separate the Just for You from the remainder of the greeting.  After heat embossing on Dapper Denim card stock, it was cut out with a SU Stitched Shape Framelit and added to the panel along with some sequins from Pretty Pink Posh.  I used foam tape to pop it all up on a Dapper Denim card base.


So great you came by!  As always, your visit and comments are so appreciated!  I've added links above to both challenges, so be sure to head over there and enjoy all the amazing inspiration!


Stef


Product details
Card 1
Stamps:  Painted Greetings
Paper:  Whisper White, Sweet Sugarplum, Strathmore Mixed Media, Vellum
Ink:  Versamark, Peekaboo Peach, Wisteria Wonder, Sweet Sugarplum, Rich Razzleberry
Other:  Hero Arts Gold ep, Birch Column Wafer Die (SSS), Frosted Sequins (retired SU),
Metallic Enamel Shapes, Tattered Angels Pearl Glimmer Mist, Tim Holtz Mini Blending Tool


Card 2
Stamps:  Afterthoughts
Paper:  Neenah Solar White, Dapper Denim, Strathmore Mixed Media
Ink:  Dapper Denim, Melon Mambo, Versamark
Other:  Hero Arts White ep, Stitched Shape Framelit (SU), Birch Column Wafer Die (SSS), Tim Holtz Mini Blending Tool, Sparkling Clear and Sweet Pea Mix Pretty Pink Posh Sequins, White Gel Pen, Clear Wink of Stella

Saturday, January 7, 2017

Hello, Spring!


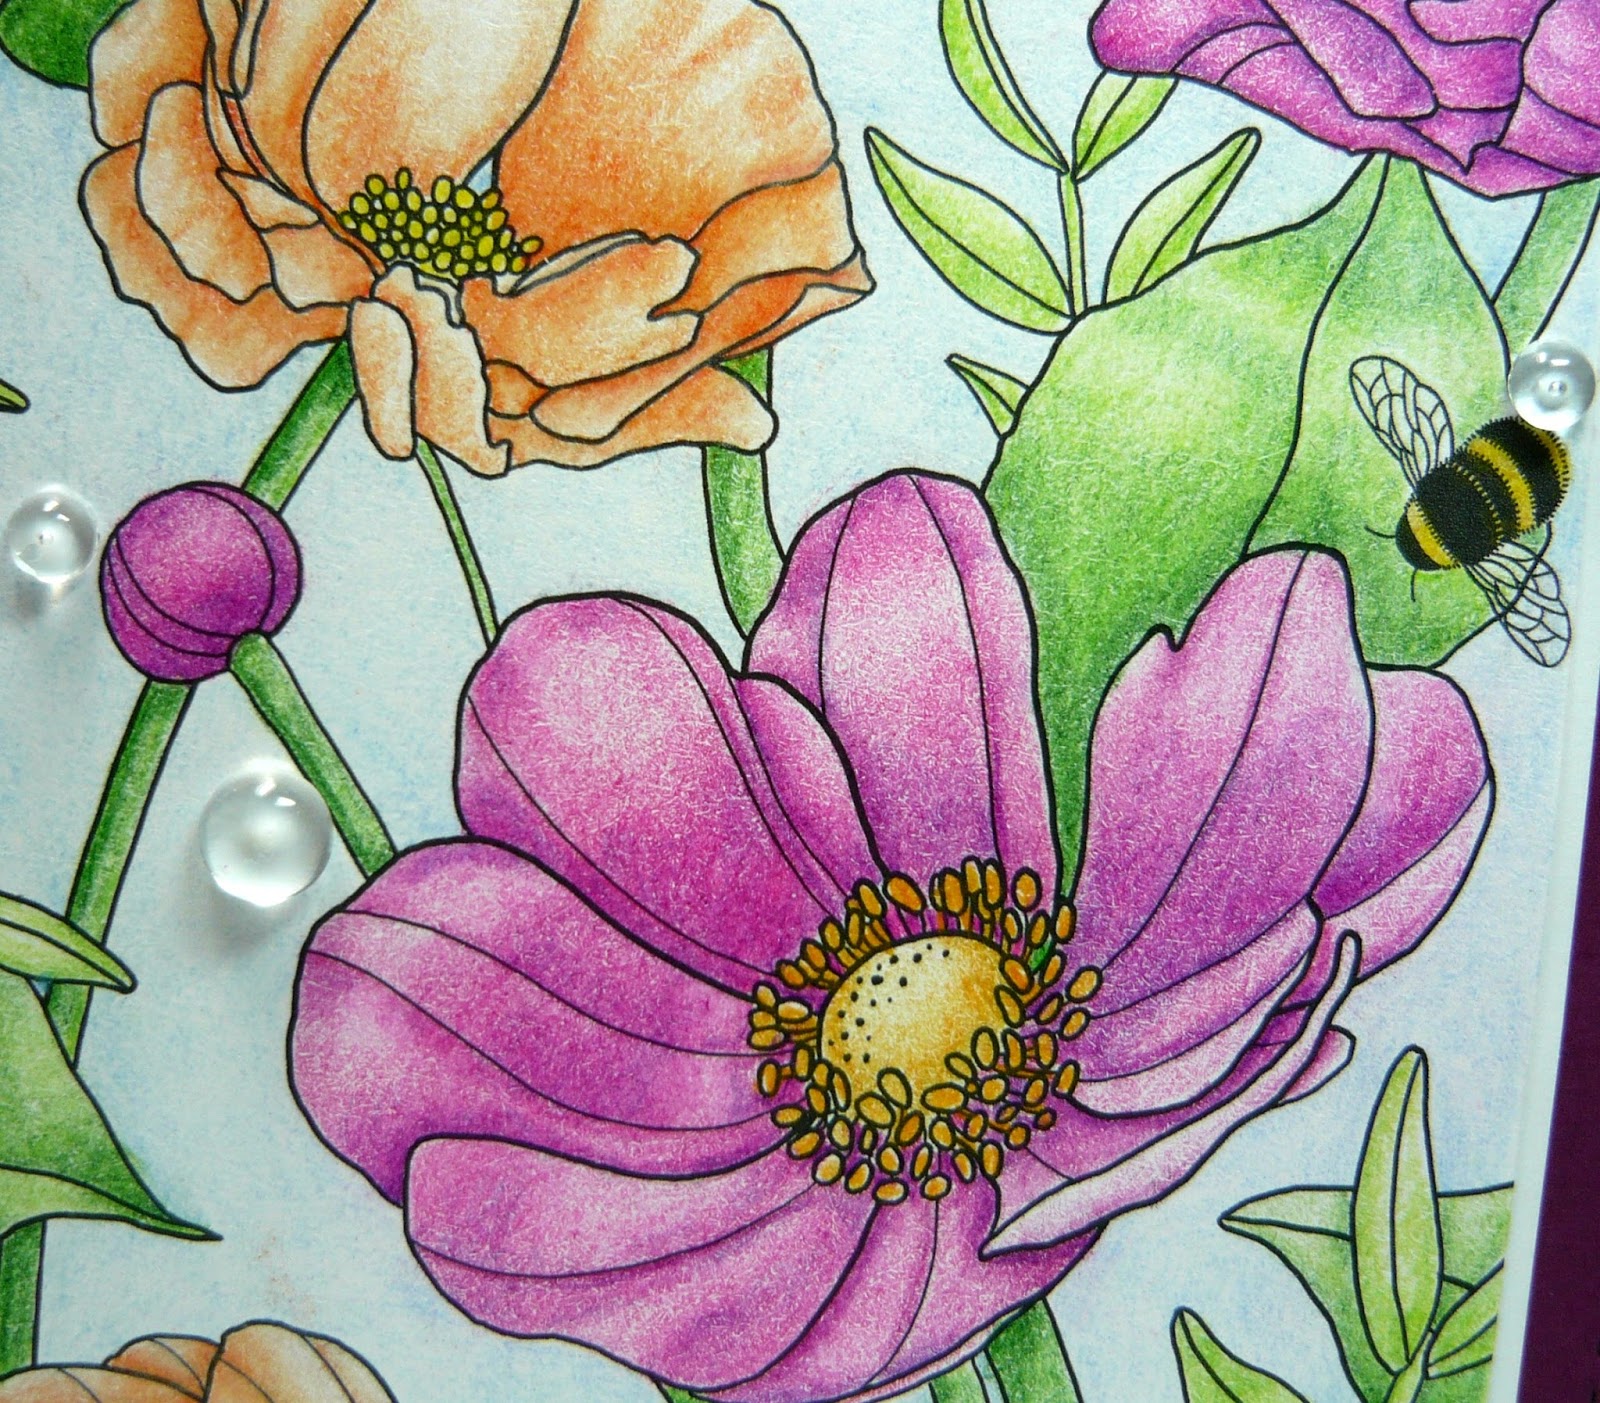
Welcome back!  I've had some fun coloring one of the lovely floral scenes from the Inside the Lines designer series paper that is available for free from Stampin' Up! with a purchase of $50 or more.  I experimented with my new Prismacolor Colored Pencils and had a great time putting the colors together.  I've also used one of the fabulous Handlettered Greetings dies from Simon Says Stamp that I purchased last month but had not had the chance to use until now.  Love all the dies in the set and I'm sure I'll be using them frequently.


I was very nervous about using my colored pencils - I acquired a couple of "how to" books about the proper way to color and shade, which seemed a bit intimidating, and I found myself afraid of doing things the "wrong way".  So I decided to just trust my instincts and jump in with both feet, and I'm happy with how the coloring turned out.  ;-)


After the coloring was complete, I built the card using a very bright Crushed Cucumber base.  It's not my favorite SU card stock but it looked great with the leaf colors and it's vibrancy really screams Spring.  Next I added a panel of Rich Razzleberry cut with a Simon Says Stamp Wafer Stitched Rectangle die (also part of my new crafty stash!) and added the next layer with the colored dsp framed by a slightly larger piece of Neenah Solar White card stock.  I also used Neenah Solar White to cut the sentiment die 3 times, then glued them together before adhering to the card.  The final touches were a button (who uses those anymore, right?) and some Pretty Pink Posh Clear Droplets.

I'm entering this into a couple of challenges - Simon Says Stamp Wednesday Challenge to use a "New Something" and Stamp Ink Paper Card Maker's Challenge to use your favorite stamping products, which this new DSP, my Prismacolors and Handlettered Greetings die meets the criteria of both challenges!  Please be sure to use the links below to visit the respective challenges and enjoy all the totally gorgeous inspiration.

SSS Wednesday Challenge - New Something

Stamp In Paper - SIP Card Makers Choice

Thanks so much for visiting, it's so appreciated!

Stef


Product details
Stamps:  None
Paper:  Neenah Solar White, Rich Razzleberry, Cucumber Crush, Inside the Lines dsp
Ink:  None
Other:  Wafer Stitched Rectangle and Handlettered Greeting Dies, SU Brights Button, White Baker's Twine, Pretty Pink Posh Clear Droplets, Prismacolor Colored Pencils, Corner Rounder punch

Gorgeous Birthday

Hello again!  Today I have a very CAS card that I made for the current challenge at Freshly Made Sketches.  This card is for my best friend's birthday.  She was my total fashion icon when we were young and she's still beautiful and stylish decades later.


I went through a few renditions before deciding on all these components.  Because the stamped image is so stylish I wanted to make this as sophisticated looking as possible.  I sorted through various pieces of designer series paper, ribbon, washi tape, but finally settled on the retired textured card stock and Black Glimmer paper, with sequins for embellishments.


For the focal point, I stamped the figure and sentiment in Archival Basic Black, then used a Stampin' Up Watercolor Pencil in Melon Mambo to color the dress and hat, then lightly added some Bermuda Bay around the outside of the image.  I chose a Blender Pen to blend the color on the figure for better control of the shading, then taped down the card stock to a board with some Painter's tape to minimize warping as I used an Aqua Painter to spread the Bermuda Bay pencil color in the background.  After it dried (with help from my heat tool), the vertical strips of paper and the sequins were adhered, then the panel was popped up with foam tape on a Melon Mambo card stock base.

Here's the sketch and the link to the Freshly Made Sketches Blog.  Be sure to go over there and check out all the amazing inspiration!


Thanks for looking!  As always your visit and comments are so appreciated.  Have a great day!

Stef


Product details
Stamps:  Beautiful You
Paper:  Whisper White, Plain and Textured Melon Mambo, Black Glimmer
Ink:  Archival Basic Black
Other:  Stampin' Up! Watercolor Pencils in Melon Mambo and Bermuda Bay, Frosted Sequins, Aqua Painter, Blender Pen

Monday, January 2, 2017

Dragonfly Dreams

Hello and a Happy New Year to you!  Over this holiday weekend I've had a chance to play with a new stamp set that will be available on Wednesday in the Stampin' Up! Occasions catalogue - Dragonfly Dreams.  It has such beautiful images and matching dies, plus wonderful sentiments.  I've created two cards that I will share with you, the first one made using the current challenge at Mojo Monday. 


I wanted to use both the Copper Foil paper and Copper embossing powder for my cards, so I did a search on Pinterest for color combinations with copper.  While copper looks lovely with turquoise, and I do love that combination, I came upon a couple of pins that used blush, light gray and copper.  That was a color combo I would not have thought of so I decided to go with it and see what I could make.


I started by heat embossing the dragonfly and sentiment in Copper embossing powder, then used respective Framelits to die cut.  I set those aside and started on the base, adhering a 1" strip of Copper Foil on a panel of Whisper White.  Next the Slate Gray rectangle was embossed with the Woodgrain embossing folder.  I wanted to add some more warmth and texture to the card, so a piece of Burlap ribbon was cut for the cross piece in the sketch.  All that was good but it seemed a bit bare, so I found the dragonfly from Awesomely Artistic and used 2nd generation stamping in Blushing Bride to create a subtle background on the white panel.


Next the white card stock circle was cut with a Stitched Shapes Framelit, stamped (again 2nd generation) with the spots stamp from the new set, that added to a scallop circle die cut.  The dots have a neat effect, almost like Bokeh.  Definitely something to experiment with in the future.  The embossed dragonfly was added with foam tape, and pearls finished things off.

My next card was actually the first card I made with this color combination.  This time I created the base dragonfly by stamping in Blushing Bride and using the matching die to cut out.  After the intricate dragonfly was cut from Copper Foil paper it was adhered to the top of the stamped image.


Very similar details in creating this card other than the different dragonfly images, plus I used another of the sentiments in the set.  Some Blushing Bride ribbon was also added, along with some sequins and droplets.  Here's a good close up view of the dragonfly layers.


Thanks so much for your visit, and as always, your comments are very appreciated.  I've added a link to Mojo Monday above, so be sure to head over there and enjoy all the beautiful inspiration!

Stef


Product details
Stamps:  Dragonfly Dreams, Awesomely Artistic (card 1)
Paper:  Whisper White, Blushing Bride, Smokey Slate, Copper Foil
Ink:  Blushing Bride, Versamark
Other:  Woodgrain embossing folder, Layering Circles, Stitched Shapes and Gift Card Envelope Trim Framelits, Detailed Dragonfly Thinlits, Burlap and Blushing Bride grosgrain ribbon, Copper Stampin' Emboss powder, Pretty Pink Posh Sequins and Droplets (card 2)

Wednesday, December 28, 2016

Little Star

Hi there!  I thought I would quickly slip in tonight and post a card I made with the new Moon Baby stamp set, available in the upcoming Stampin' Up! Occasions catalogue.  I'm in love with the sweet images in this set and hope to make some more cards with it soon.  I've used the current sketch from Freshly Made Sketches for my card layout.  I'm also entering it in the current challenge at Stamp Ink Paper, where the theme is Anything But Christmas.


I had this idea of creating a sky behind the baby on the moon and decided I would sponge it with Distress inks.  I began with a panel of watercolor paper, used a liquid mask over the parts that I wanted to keep clear of ink and sponged away.  However, after everything dried and I peeled off the mask, it also peeled off pieces of the watercolor paper!!  So, the next step was to stamp the baby and moon image on a separate piece of card stock, which I water colored with Distress inks, fussy cut and mounted with tape foam on the sponged panel.


Picking up on the lilac colored sleeper and the Dusty Concord in the background, the retired Blackberry Bliss and Pale Plum card stock seemed to work nicely for the vertical panel and base, respectively.  I used the Stars embossing folder on the Blackberry panel, then painted Clear Wink of Stella on the raised images. 


That image just makes my heart happy (must be part of being a grandma or something) and I loved water coloring it.  I realize this scene is probably not as "clean" as the FMS team is seeking for the challenge but I hope it's not a disqualifier for the challenge!  😉 

Sorry, not too many other details about the water coloring and sponging, or the embellishments but I've listed all the products used down below.  I've also added links above to both challenges, so be sure to head over to them and check out all the amazing inspiration!!

Have a great remainder of the week and of course, Happy New Year this weekend!

Stef


Product details
Stamps:  Moon Baby
Paper:  Pale Plum, Blackberry Bliss, Watercolor
Ink:  Versafine Onyx Black; Ranger Distress Inks:  Tumbled Glass, Mermaid Lagoon, Chipped Sapphire, Dusty Concord, Shaded Lilac, Scattered Straw, Dried Marigold, Spun Sugar, Tombow 850 marker (skin tone)
Other:  Fancy Frost Sequin; Pretty Pink Posh Clear Droplets, 3MM Sparkling Clear and Wisteria Blossom Mix Sequins, Star embossing folder, Clear Wink of Stella

Sunday, December 25, 2016

The Last Christmas Cards of 2016

Hi there friends!  Merry Christmas and Happy Hanukkah...and Happy Festivus for the rest LOL!  I hope your holidays have been wonderful.  My daughter and her family joined us yesterday and we had lots of fun, then today my husband and I enjoyed a quiet day together.  Tonight I thought I would share the final two Christmas cards I made this year.

The first card was made with the cute Holiday Home stamp set from Stampin' Up! that came out a couple of years ago.  The variety of stamps are amazing for making cute scenes like this one.  I started by taking a small panel of Neenah Solar White card stock, stamping the stars and Santa in Versamark and Versafine Onyx Black inks, respectively, heat embossed with clear embossing powder, then sponging the sky with various Distress inks (listed below).  I hand cut the snowy hills from white card stock, then stamped that cute little snowman.


The little house was colored using a Blender pen, using Abandoned Coral for the door, Worn Lipstick for the frames and chimney, and Hickory Smoke for the roof.  I added Scattered Straw to brighten up the window interiors.  The string of lights stamp was first stamped in Mowed Lawn, then went over the "string" with a Basic Black marker.  It was then die cut with the matching Homemade Holiday Framelit and mounted on foam tape. 

Next I created the frame from a panel of Riding Hood Red card stock that was cut in the middle with a Wafer Stitched Rectangle from Simon Says Stamp, the frame then adhered to the white card stock base, and then the inked panel centered in the middle and mounted with foam tape.  The sentiment is from the old tried and true Teeny Tiny Wishes stamp set and was punched out with the Word Window punch.  Snow flakes from Frosted Sequins were the final addition.


The next card was made without any stamps.  Starting with a panel of Crumb Cake card stock and using the Tim Holtz Woodland Stencil, Pineneedles and Peeled Paint Distress inked up the stencil fir trees, adding a bit of Ground Espresso for the tree trunks.  After letting that thoroughly dry, I took a tool and smoothed embossing paste over different images of the same stencil to create snow on the trees.  I removed the stencil and added snow drifts underneath the trees, then covered all the embossing paste with Dazzling Diamond Glitter before it all dried.  I've based my card largely on the design of this gorgeous card from Kristina Werner, who first presented it as part of her Holiday Card series (Holiday Card Series - Day 16).  In her video she indicates that the Distress inks will seep into the embossing paste, but I forgot about that when making my card, and of course it happened.  So, to cover up the rather greenish tint of the "snow" on the trees, I took a small paint brush and added some Ranger Pearl Metallic Paint, which pretty much took care of that problem.  Evidently, using Tim Holtz Grit Paste eliminates this problem.  So maybe for next time...


Isn't that pretty with all the glitter and metallic paint?  After everything dried, I used a white gel pen to add snowflakes in the background, die cut the sentiment from Dazzling Diamonds glitter paper and adhered to the panel, then mounted the panel with foam tape onto a Crumb Cake card stock base that was sponged with Craft Whisper White pigment ink around the edges.


Thanks so much for looking - as always, your visit and comments are so appreciated.  I hope to be back in the next few days with another card to share. 

Stef


Holiday Wishes
Stamps:  Holiday Home, Teeny Tiny Wishes
Paper:  Neenah Solar White, Riding Hood Red
Ink:  Versafine Onyx Black, Versamark, Chipped Safire, Mermaid Lagoon, Tumbled Glass, Abandoned Coral, Worn Lipstick, Hickory Smoke, Mowed Lawn, Scattered Straw
Other:  Homemade Holiday Framelit, Clear Stampin' Emboss Powder, Basic Black marker, Wafer Stitched Rectangle, Frosted Sequins, Word Window punch

Peaceful Pines
Stamps:  None
Paper:  Crumb Cake, Dazzling Diamonds Glitter Paper
Ink:  Pineneedles, Peeled Paint, Ground Espresso, Craft Whisper White
Other:  Tim Holtz Woodland Stencil, Stampendous Dreamweaver Embossing Paste, Dazzling Diamonds Glitter, Ranger Pearl Metallic Paint, Christmas Greetings Framelit