Saturday, October 29, 2016

Grateful for Pals Paper Arts

Hi there!  Today's post is kind of sad - Pals Paper Arts is ending and this week's sketch challenge will be the final one.  PPA has been one of my go to challenge blogs for years and I have been so inspired by many of the great DT members each week.  So of course I had to join in this final challenge with a card that expresses my gratitude.


I started by choosing the gray, rainy pattern of designer paper from A Little Foxy dsp stack (reflective of how sad I am about PPA ending ; -( ).  I adhered it to a piece of Whisper White card stock to give it some girth so it could be popped up on Dimensionals after trimming it down and cutting the slanted separation in the middle.  Before adding the panels to the card base, a border stamp from Tin of Cards stamp set was stamped up the right edge of the base.


Next the fox, tree stump and heart word bubble were all stamped then fussy cut and added to the card using  Dimensionals.  The die cut sentiment from Seasonal Frame Thinlits was cut three times then layered so it would really stand out.  Sequins and pearls finished things off.


Thanks for visiting.  Be sure to use the link above and head over to PPA to enjoy all the fabulous inspiration from the DT! 

Stef


Product details
Stamps:  Foxy Friends, Tin of Cards
Paper:  Whisper White, Calypso Coral, A Little Foxy dsp stack
Ink:  Calypso Coral, Memento Tuxedo Black, Tip Top Taupe
Other:  Seasonal Frame Thinlits, Paper Snips, Metallic and Frosted Sequins, Pearl Basic Jewels

Sunday, October 23, 2016

Spice Cake Birthday

Hi there!  Today I'm sharing a card I put together this afternoon.  I needed a card for a co-worker's birthday this week and here's what I ended up with.


I pulled out a piece of Spice Cake designer series paper and used the colors in it for coloring the Bonsai tree image.  I know - Bonsai and paisley? - call it artistic license, LOL!!  I just love that beautiful tree and enjoyed coloring it with reinkers and a Blender pen. 


The layout is from the current challenge at retrosketches.  I'm also entering my card in the current challenge at Seize The Birthday.  I've added links below to each challenge, so be sure to head on over and admire all the amazing inspiration!


Thanks for visiting!

Stef


Product detail
Stamps:  Plant Hope, Small Phrases (Verve)
Paper:  More Mustard, Soft Suede, Pool Party Core-dinations, Spice Cake dsp, Strathmore Mixed Media
Ink:  Pool Party, Old Olive, Pear Pizzazz, Soft Sky, More Mustard, Sahara Sand, Versamark, Timber Brown Stazon
Other:  Blender Pen, Tags & Labels and Bitty Banners Framelits, Pool Party Stampin' Emboss Powder, Ornate Tag Topper punch, Hemp Twine (Hemptique)

Saturday, October 22, 2016

Kind You

Hello!  Hope your day has gone well.  I've been a bit under the weather the last couple days so I was happy to start feeling better this afternoon and was able to complete the card I'm sharing with you.  I made it using the current Splitcoaststampers Color Challenge, with beautiful autumn-type colors of Cherry Cobbler, Pumpkin Pie, Crushed Curry and Garden Green.  I've been seeing these colors all over the city and have been relishing the beauty of fall.  However, I chose to create a decidedly non-autumn card.


Originally I masked the flower from Remarkable You with some masking fluid, then created a background with a watercolor paint brush and reinkers.  But I didn't like how it turned out, so after coloring the flower with Cherry Cobbler and Garden Green (yes, I fit in a tiny bit of it on the one leaf!) I fussy cut the flower and went about creating a new background panel.  I took a new piece of watercolor paper, taped it down to a hardboard panel with Painter's Tape, thoroughly wet the paper with water, then started applying ink with my paint brush, letting the water carry it across the paper.  I started with Crushed Curry, then added Pumpkin Pie in the middle and finally Cherry Cobbler on the bottom.  I used lots of water to dilute the colors, then added back in some Pumpkin Pie for a bit of pop behind where I knew I wanted to place the flower. I used my heat tool a bit to dry it but let it completely dry overnight still attached to the board, which significantly reduced the warping of the watercolor paper.


After the watercolor panel dried I trimmed it down and used my Misti to stamp the sentiment.  I finally broke down and bought a Misti - I think it will pay for itself in no time with a significant reduction in card stock being ruined because an image or sentiment didn't stamp completely!  I wrapped the Baker's Twine around the panel, after attaching it to a piece of Basic Black card stock, in order to ground the flower that was popped up on Dimensionals.  Sequins and pearls finished things off, then the entire piece was added to a base of Thick Whisper White card stock.

I've added a link below to the SCS Color Challenge, so be sure to head over there and enjoy all the beautiful inspiration.


Thanks for visiting!

Stef


Product details
Stamps:  Remarkable You, Mixed Borders
Paper:  Thick Whisper White, Basic Black, Watercolor
Ink:  Pumpkin Pie, Crushed Curry, Cherry Cobbler, Garden Green,
Other:  Basic Black Baker's Twine, Metallic Sequins, Pearl Basic Jewels, Paper Snips, Paint Brushes, Misti

Sunday, October 16, 2016

Merry Mouse

Hello again!  Today I have a Christmas card to share with you that I made using the current sketch challenge at Pals Paper Arts.  I pulled out my Merry Mice stamp set and a piece of the Warmth and Cheer designer series paper stack to use with this terrific sketch.


The Merry Mice stamp set has three mouse images, two individuals and a stamp with three mice lined up walking.  For this card I decided to use one of the three so I could keep my circle fairly small.  I started by inking him up with Versamark Onyx Black and stamped on a piece of Strathmore Mixed Media paper.  I like this paper when I use a Blender Pen to color because, like water color paper, it doesn't absorb ink as quickly as regular card stock.  That way you can blend your colors better and avoid pilling plus it has a nice smooth finish to it.


His hat and jacket were colored in Soft Sky ink, then used Garden Green on the scarf and Memento Tuxedo Black for his pants.  Crumb Cake was used to color the mouse, with a bit of Flirty Flamingo on his nose and ear. I wanted to give him some ground to walk on, so I lightly applied some Sahara Sand, intentionally giving a look of some texture.  Layering Circle Framelits were used to cut out the colored image and the card stock scallop circle layers.

I thought I would use one of the untraditional holiday designs in the paper stack, with a Crumb Cake background and black trees.  It was layered it on a 4.25" x 5.50" panel of Crumb Cake that wrapped with three separate pieces of the beautiful Cherry Cobbler Silky Taffeta ribbon that is part of the combo pack in the holiday catalogue.  I used a pencil on the back of the card panel to where I wanted the tops of the ribbon to line up so they would be lined up evenly, then Dimensionals were used to pop up the mouse image over the top of the ribbon.


The word "Merry" was die cut in both white card stock and Cherry Cobbler and layered with the white underneath so it would stand out against the dsp.  Then, inking up just part of a sentiment from the stamp set, the word "Christmouse" was stamped a piece of Strathmore, cut with a Bitty Banner framelit, then one end was trimmed off.  The finishing touches were to add some enamel dots.

I've included a link above to the PPA challenge, so be sure to head on over there and check out all the wonderful inspiration!

Thanks for visiting!

Stef


Product details
Stamps:  Merry Mice
Paper:  Thick Whisper White (base), Crumb Cake, Warmth and Cheer dsp stack, Strathmore Mixed Media
Ink:  Versamark Onyx Black, Memento Tuxedo Black, Crumb Cake, Cherry Cobbler, Soft Sky, Garden Green, Flirty Flamingo, Sahara Sand
Other:  Layering Circles and Bitty Banner Framelits, Christmas Greetings Thinlits, White and Gold gel pens, 3/8" Silky Taffeta Ribbon Combo Pack, Perfect White Accents, Home for Christmas enamel dots, Metallic Enamel Shapes

Saturday, October 15, 2016

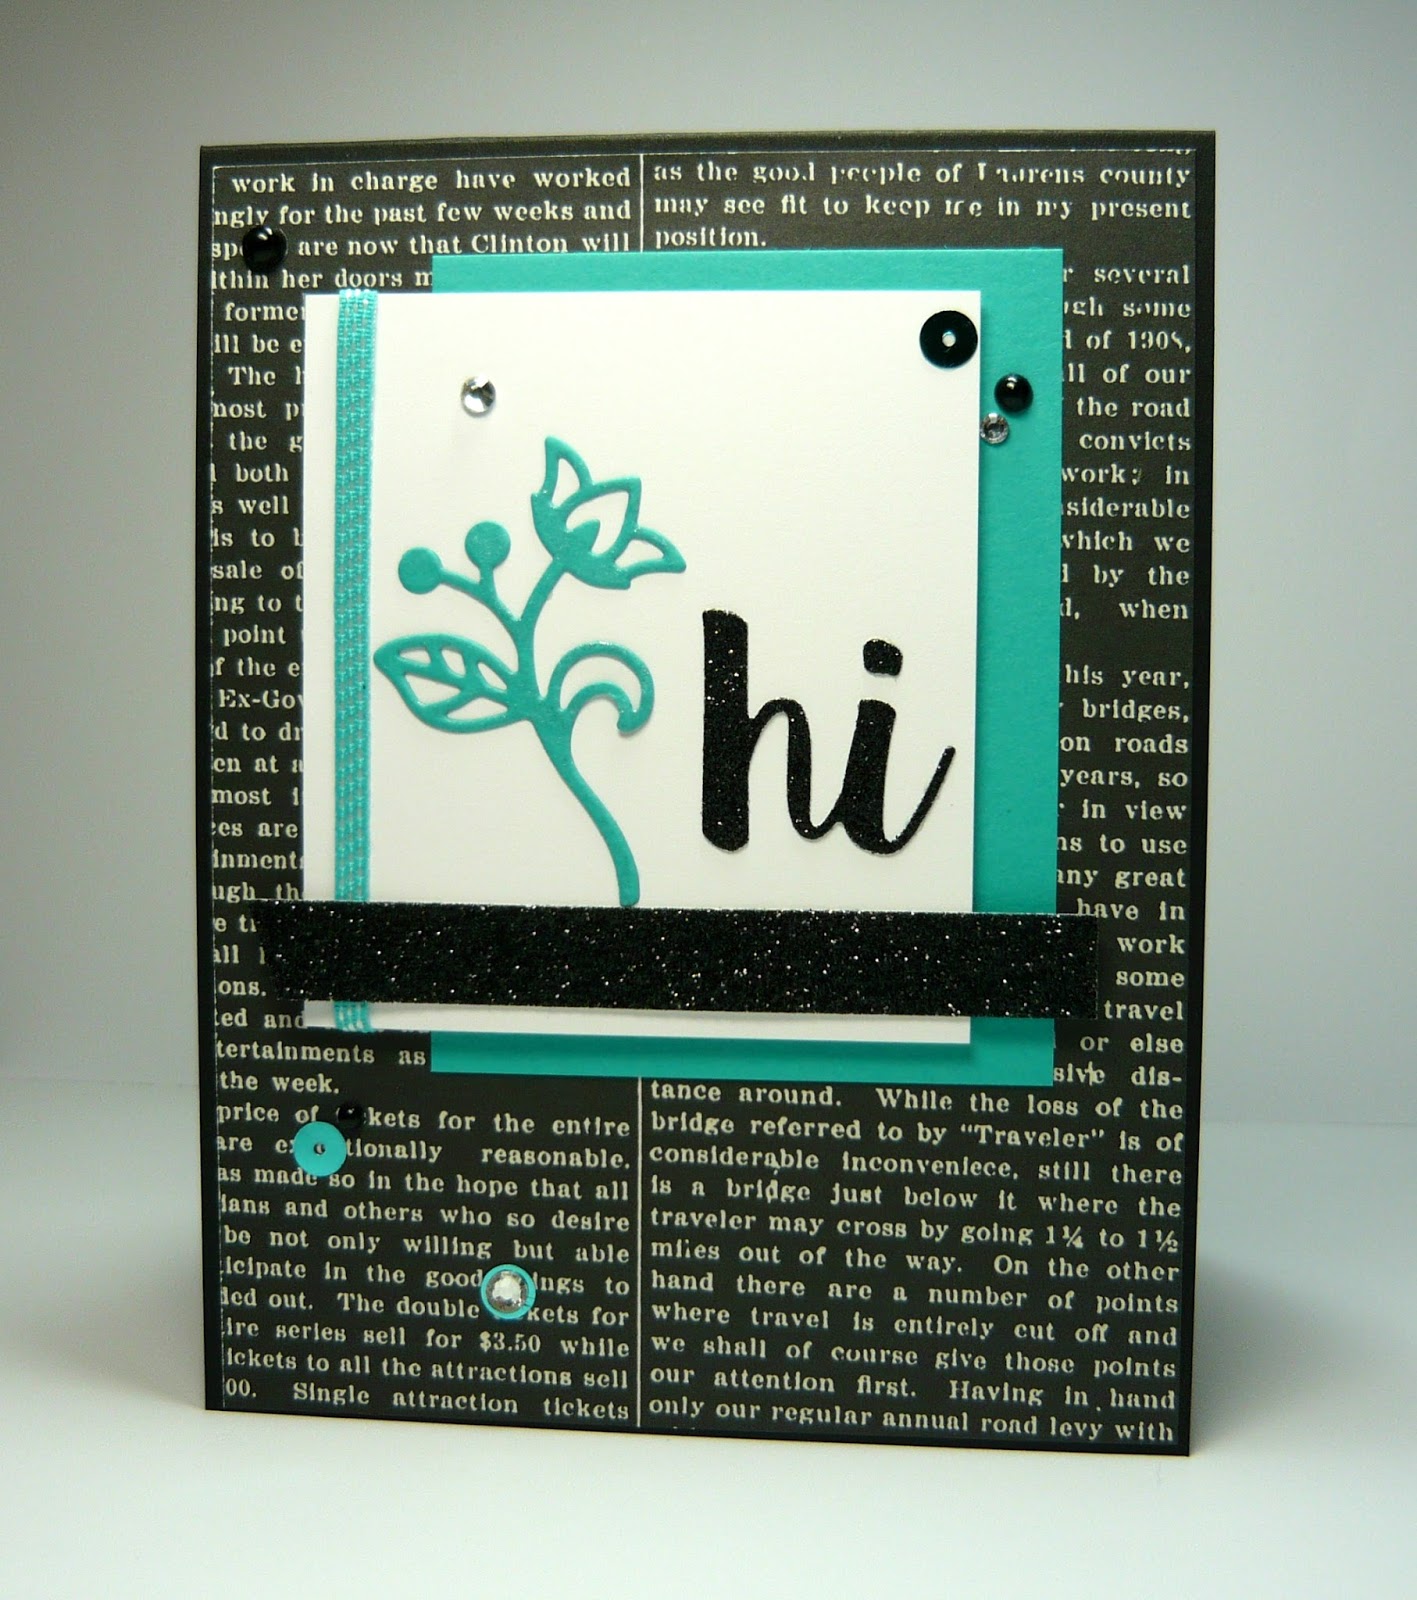
Medley Hi

Hi there!  I hope you're having a good weekend thus far!  Today I made a card for two challenges - ColourQ and Freshly Made Sketches.


I still have a LOT of "newsprint" style designer series paper from years past, so when I saw the ColourQ challenge I was excited to use a piece of it.  As it turned out, I ended up with a piece from the retired Modern Medley dsp with a reverse newsprint look that I absolutely love.  Guess that's why I've held onto it.


I tried a few design ideas (colors, paper, focal point) before settling on this one after I found the background dsp.  I love matching Bermuda Bay with black, and the added sparkle from the Glimmer paper really makes the sentiment pop against the white background.  For some additional sparkle I covered the Flourish Thinlit die cut flower with clear Wink of Stella.


After all the layers were adhered to the base, I added some sequins, pearls and rhinestones.

I've added links above to both the challenges so you can hop on over there and enjoy all the beautiful inspiration.  Thanks for visiting!

Stef


Product details
Stamps:  None
Paper:  Whisper White, Basic Black, Bermuda Bay, Black Glimmer, Modern Medley dsp
Ink:  None
Other:  Flourish Thinlit, Die-namic Hello There (MFT), Bermuda Bay Sequins, Rhinestone Basic Jewels, Black Pearls (Kaisercraft), Bermuda Bay 1/8" Stitched Ribbon

Wednesday, October 12, 2016

Halloween Fun

Hi there friends!  Tonight I have a quick post with another Halloween card.  This time is was very quick and pretty CAS with layers.  I made it for the family next door who have a 3 year old daughter so I wanted to make it more fun rather than spooky looking.


The dies rule in this card!  I used the Halloween Scenes Edgelits to cut the tree, fence, pumpkins and witch.  The moon was stamped with So Saffron ink on the same color card stock and cut out with a 1 3/8" circle punch.  The pumpkins and their faces are separate stamps in the Spooky Fun stamp set.  I used both with Memento Tuxedo Black before using the die to cut them out.  The sentiment is from the same set.  I didn't take a picture of it, but the interior piece of white card stock was stamped with the Happy Halloween greeting, plus a spider web with a little spider hanging down.  An adorable stamp set and because it is photopolymer, it's easy to stamp layers, or accurately stamp sentiments straight.


Thanks for visiting!  I'll be back in the next night or two with another card to share.

Stef

Sunday, October 9, 2016

Merry Mice Falala

As you can see from the title of this post I have another Christmas card to share starring one of the cute mice from the Merry Mice stamp set.  I've used the great sketch from the current challenge at Fab Friday as the basis for the card design.

Recently I picked up the retired Seasonal Frame Thinlits from the Stampin' Up! Clearance Rack primarily for the greetings, which includes the "falala" cut from Emerald Envy card stock.  I thought it was perfect to match up with the caroling mouse.  I {heart} this plaid pattern from the Warmth & Cheer designer series paper stack!  While the colors in the paper stack include Garden Green, this particular design had no green in it, so I chose to instead use the lovely Emerald Envy for this card.


To water color the mouse, I started by pressing the corner of a Memento Tuxedo Black ink pad onto an acrylic block then used a wet paint brush to pick up some ink and color his pants.  Next I moved onto using Cherry Cobbler for the jacket and hat, and Emerald Envy for the scarf.  Chocolate Chip was used for the book of carols, and the mouse itself was colored with Crumb Cake, with a tiny bit of Flirty Flamingo for his nose and ears.  I didn't want to leave him floating in mid air, so I used  Sahara Sand to create some ground underneath, then added a bit of a shadow with Smoky Slate.  Last I added a light "glow" with some Tumbled Glass Distress Ink.


Since I'll be mailing this card, I want to keep it relatively flat and embellishments to a minimum.  I added some enamel dots that don't seem to have the same issue of moving or falling off as jewels and sequins do.  But I did add a small bow of 3/8" Silky Taffeta ribbon in Emerald Envy.  Although not visible in the photos, I painted clear Wink of Stella over the greeting and on the "snow flakes" and musical notes around the mouse.

I've added the Fab Friday sketch and a link to the blog.  Be sure to head over there and enjoy all the amazing inspiration!


Thanks for visiting!

Stef


Product details
Stamps:  Merry Mice
Paper:  Cherry Cobbler, Emerald Envy, Watercolor, Warmth & Cheer dsp stack
Ink:  Basic Black, Memento Tuxedo Black, Crumb Cake, Cherry Cobbler, Emerald Envy, Chocolate Chip, Flirty Flamingo, Sahara Sand, Smoky Slate, Tumbled Glass (Ranger)
Other:  2016-2018 In Color Enamel Shapes, Layering Oval framelits, Seasonal Frame Thinlit, 3/8" Silky Taffeta Ribbon Combo Pack, White Gel Pen, Clear Wink of Stella

Friday, October 7, 2016

Brushstroke Birthday

Hello again!  I'm always in need of masculine birthday cards and the fabulous current challenges at Color Throwdown and Freshly Made Sketches provided the perfect inspiration to get one made.


Once I settled on what the design would be on the white panel, this card came together very easily.  Using stamps from Timeless Textures and Gorgeous Grunge, some design, splatters and colors were added to the two opposing corners.   Next, Pumpkin Pie card stock was cut with a Starburst framelit and popped up on the panel with Dimensionals.  Using the Brushstroke Birthday Greetings dies, the sentiment was cut from Night of Navy card stock twice, layered on top of one another, then adhered to the circle.


The Kraft card base was covered with a slightly smaller Night of Navy panel embossed with the Boho Chic Textured Impression Embossing Folder.  After everything was adhered to the base, it still needed "something".  I tried to use some of the new Kraft Rope but it is so thick it just didn't work with this layout.  And while I'm not fond of sequins for masculine cards, I found that adding the Metallic Enamel shapes worked out perfectly.

I've added links to the challenges below, so be sure to head over there and enjoy all the amazing inspiration!


Thanks for visiting!

Stef

Thursday, October 6, 2016

Spooky

Hi there and welcome back!  What I'm sharing with you today is the card I made for The Paper Players current challenge to make a Halloween card.  Lots of fun mixing retired and new stamps for this scene.


A while back Stampin' Up! had the retired Among The Trees stamps set available in the Clearance section so I snapped it up.  I love the moon with the sentiment and scary eyes staring out.  I inked it up in So Saffron, stamped it on the Whisper White panel, then masked it so I could sponge the rest of the background.  After that was complete, I used a sponge with some Delightful Dijon around the edge and blended it into the sky.


After the background and moon were done, I stamped the owl on the panel, then stamped the branch on Whisper White and fussy cut it.  I did that because I wanted to be certain of the placement.  I'm absolutely in love with the fence from Halloween Scenes Edgelits - don't know why except maybe the fence sets the scene, this time with the ghosts from the Spooky Fun stamp set popping out from behind.  In finishing the card, I decided not to add anything other than some designer series paper in the back so the scene would be the main focus.

I've added a link below to the challenge - be sure to head on over there and enjoy all the fabulous inspiration!


Thanks for visiting!

Stef


Product details
Stamps:  Spooky Fun, Among the Branches
Paper:  Whisper White, Basic Black, Halloween Night Specialty dsp
Ink:  Basic Black, Old Olive, Rich Razzleberry, Cajun Craze, So Saffron, Delightful Dijon
Other:  Halloween Scenes Edgelits, Sponges, Paper Snips

Sunday, October 2, 2016

Autumn Leaf Birthday

Hello again!  I hope you've had a lovely weekend thus far.  It turned rainy and cool here yesterday, perfect for paper crafting, yes?  I am sharing a card that I made for a hole in my stash that needs to be filled - masculine birthday cards.  I dug out some long retired designer series paper to give this card a nice fall vibe.


I love the wood pattern in this paper.  The actual colors in the dsp description indicates the blue is Taken with Teal but when comparing it to card stock, Tempting Turquoise was hands down a closer shade, so that's it was layered upon, along with a cross piece of another design from the same dsp collection.


The leaf was stamped with Stazon Timber Brown on a piece of Strathmore Mixed Media paper and water colored with reinkers in Pumpkin Pie, Cajun Craze and More Mustard.  After drying with my heat tool, I added a faint bit of Tempting Turquoise around the leaf, then mounted the panel on a slightly larger piece of Chocolate Chip.  The sentiment was stamped with Versamark on a scrap of Tempting Turquoise and heat embossed with white embossing powder.  After cutting out with the Large Oval punch, it was layered on a slightly larger oval of Kraft card stock.


I wrapped some Kraft rope around the cross panel and was surprised that because of it's thickness I had to use the 1/8" Stampin' Up Foam Adhesive Strips rather than Dimensionals to mount both the focal point point and the main panel onto the Chocolate Chip base.  Because I photograph my cards from a lower angle, the thicker adhesive strip made it look like the Turquoise piece lines up with the base at the top but in real like there is a 1/16th inch bit of the base showing.

I'm joining three challenges with this card - the ColourQ color challenge, used the sketch from Stamp, Ink Paper and joining for the first time Just Us Girls, where Leaves is the Word Week inspiration.  I've included links below so be sure to head over to the respective challenges and admire all the beautiful inspiration!


Thanks for looking!

Stef


Product details
Stamps:  Vintage Leaves, Simply Sketched
Paper:  Tempting Turquoise, Strathmore Mixed Media, Autumn Meadows dsp
Ink:  Versamark, Stazon Timber Brown, Pumpkin Pie, Cajun Craze, More Mustard, Tempting Turquoise
Other:  Large Oval punch, Layering Ovals Framelit, White Stampin' Emboss Powder, Kraft Rope

Friday, September 30, 2016

Basket of Wishes

Hi there!  I'm sharing a card tonight that I made for the challenges at Freshly Made Sketches and Color Throwdown.  The sketch is fabulous in the endless varieties of how you could use it and the colors at ctd are gorgeous and bright!


I started out by cutting a piece of Strathmore Multi Media paper for the banner then stamped the basket and flowers from Basket of Wishes in Memento Tuxedo Black.  Once dried the images with my heat tool I colored them with various inks and a Blender pen.  I truly did use Melon Mambo for the large flower but it came out more a purple than a pink.  Very weird.  But I still like how it turned out.


I love this stamp set!  It has all sorts of options for mixing flowers and containers, plus some wonderful sentiments.  After the coloring was done I stamped the sentiment, added the Baker's Twine, then popped it up with Dimensionals.  White Enamel dots and clear sequins from the Metallic Sequins group were added as the final touch.


Thanks for your visit today!  I've added links above to both challenges so do be sure to head on over and enjoy all the beautiful inspiration (there's lots!).  Enjoy your weekend!

Until next time...

Stef


Product details
Stamps:  Basket of Wishes
Paper:  Marina Mist, Strathmore Mixed Media
Ink:  Memento Tuxedo Black, Cucumber Crush, Calypso Coral, Melon Mambo, Marina Mist, Crumb Cake
Other:  Calypso Coral Baker's Twine, White Enamel dots, Metallic Sequins

Monday, September 26, 2016

Leaf Scene

Hi there.  Today I'm sharing a couple of fall/Thanksgiving cards.  I used the fall scene from the retired Happy Scenes stamp set and cut it out with one of the framelits from Leaflets.  I saw several cards last year using this same technique and thought it would be fun to try out.

The first card I finished on Saturday but hadn't had time to post yet.  I incorporated a piece of the new Warmth and Cheer designer series paper stack, using those colors in the water colored scene.  As I was putting the card together I first cut a couple of leaves from embossed Delightful Dijon card stock to place under the main focal point, but it looked way too drab. So I tried again with Crushed Curry, sponging with Cajun Craze around the edges, and that just made everything pop!  So while the dsp has Dijon in it, the Curry blends just fine IRL.


The focal point was inked up with Stazon Timber Brown then Pool Party was used for the sky and Garden Green the grass.  After using a heat tool to dry, I used a small paint brush to color the leaves in Delightful Dijon and Cherry Cobbler and the pumpkins in what else...Pumpkin Pie!


For my next card I used a similar idea but changed the card layout to use the current sketch challenge at The Paper Players.  I also changed the inks used to color the scene due to the dsp which came from the retired Spice Cake.  When I saw Nance's card (link to her blog) using a different pattern of this dsp I was inspired to dig out what I had left and find a pattern that would work for my card.


While the dsp uses Soft Suede, I liked the contrast using Early Espresso for my card base and panel embossed with the new Cable Knit Dynamic Texture Impression Embossing Folder.  A very deep design to add great texture to a card.  For this scene I incorporated the colors included in the Spice Cake - Pool Party for the sky, Pear Pizzazz for the grass and More Mustard for some of the leaves along with Cajun Craze.


Last week I picked up the retired Seasonal Frame Thinlits on the Clearance Rack at Stampin' Up, primarily for the greetings.  I love the font and while it doesn't seem to stand out against the dsp in the picture, in real life it looks much better.

Thank you so much for visiting!  I've added the sketch and link to The Paper Players, so be sure to head over there and enjoy all the beautiful inspiration.


Until next time...

Stef


Product details
Card #1
Stamps:  Happy Scenes, Thankful For...
Paper:  Garden Green, Crushed Curry, Textured Pumpkin Pie, Warmth and Cheer dsp, Watercolor
Ink:  Pool Party, Pumpkin Pie, Garden Green, Delightful Dijon, Cajun Craze, Cherry Cobbler, Memento Tuxedo Black, Stazon Timber Brown
Other:  Woodgrain TIEF, Leaflets Framelits, Pumpkin Pie 1/4" Cotton ribbon, Regals Candy Dots

Card #2
Stamps:  Happy Scenes
Paper:  Early Espresso, Pumpkin Pie, More Mustard, Spice Cake dsp, Watercolor
Ink:  Pool Party, Pumpkin Pie, More Mustard, Cajun Craze, Pear Pizzazz, Stazon Timber Brown
Other:  Cable Knit DTIEF, Pool Party twine, Leaflets Framelit, Seasonal Frame Thinlit

Saturday, September 24, 2016

Birthday Bloom

Hi there!  I hope you're having a good weekend thus far.  Today is was truly one of those quintessential early fall days in Western Oregon....cold and foggy this morning, the sun burning through by noon and a crystal clear but still cooler day this afternoon.  I loved it so much I put down my crafting and went for a nice walk to enjoy the day.  The trees are just starting to change here...fabulous!

But you came by to see a card and I have one to share that is reflective of some of those fall colors.


I started by stamping the dahlia with Versamark ink and heat embossed with Stampin' Up's newest embossing powder in Copper (oh, swoon!).  I then decided the sentiment would look lovely embossed in Copper as well, so it received the same treatment.  Next, pushing on a closed Peekaboo Peach stamp pad, I got some ink in the lid, added water with my paint brush and colored the flower.  I started with a light layer then went back in with another layer of color on the outer edges.  It's such a pretty color and looks great for fall.


Originally I planned on using a piece of designer series paper under the embossed panel but then remembered I had not yet used any of the masks from the Seasonal Decorative Masks.  I pulled out this pretty design, taped the mask down over my card base, inked up a sponge dauber with Versamark ink and created that soft design.  I love how it turned out - much more subtle than dsp, and keeping things a bit more CAS.  After adhering the embossed panel to the base, a half ink strip of Copper Foil was added, along with a scattering of pearls.

I'm joining a couple of challenges with this card.  I've use the current challenge at Freshly Made Sketches and the current inspiration challenge at Inspired By All the Little Things.  I've added links below so be sure to pop on over and check out all the beautiful inspiration by both design teams!


Thanks for visiting!

Stef


Product details
Stamps:  Birthday Blossoms, Blooming With Kindness Flower
Paper:  Cajun Craze, Watercolor, Copper Foil
Ink:  Versamark, Peekaboo Peach
Other:  Copper Stampin' Emboss Powder, Seasonal Decorative Mask, Pearl Basic Jewels, Sponge Dauber, Heat Tool

Sunday, September 18, 2016

Distress Birthday

Hello and welcome back!  Tonight I'm sharing a card made for this week's Featured Stamper at Splitcoaststampers, Gail aka mamasix.  Each week on SCS a Fan Club member is chosen as the Featured Stamper.  The challenge is to search that person's gallery and find a card to CASE, changing two or more elements.  Well, Gail has an amazing and HUGE gallery but I as soon as I saw her card with a tag here (Birthday Writing), I knew that was the one I wanted to CASE.

I needed a masculine birthday card for a co-worker's birthday this week and decided on using some old Graphic 45 papers and give a distressed look to the card.  I used Gail's basic layout, omitting just a couple of small pieces behind the tag, but changed all other elements (papers, inks, colors).  Where she had a flower off the edge of her tag I added the flying clock that was fussy cut from the Steampunk Debutante Collection dsp.

The colors in the G45 papers don't exactly align with Stampin' Up color collections, but I did find that Delightful Dijon looked nice with the dsp.  After all the pieces were distressed with my Cutter Kit, I sponged with Tim Holtz Distress Inks to make the nice shabby look.  The tag is a shipping label that I trimmed down to fit the card.  It was then stamped with Timeless Textures and Gorgeous Grunge stamps along with the sentiment from the Wetlands stamp set.


Thanks for taking the time to visit and as always, I'd love to hear from you if you have a moment to leave a comment!  I hope you have a great week ahead!

Until next time...

Stef


Product details
Stamps:  Timeless Textures, Gorgeous Grunge, Wetlands
Paper:  Very Vanilla (interior), Basic Black, Delightful Dijon, Graphic 45 designer series papers collections (Steampunk Debutante and Olde Curiosity Shoppe)
Ink:  Memento Tuxedo Black, Chocolate Chip, Tim Holtz Distress Inks (Antique Linen, Tea Dye, Vintage Photo, Frayed Burlap)
Other:  Hemp Twine, Shipping Tag, Cutter Kit