Sunday, November 16, 2014

Bearing Gifts

Here it is, Sunday night again already!  The weekend always flies by, it seems.  But a good thing about Sundays is Karen Giron's Sweet Sunday Sketch Challenge.  This week she has created a super flexible sketch that I used to make a couple more Christmas cards.

I pulled out the darling Bearing Gifts stamp, inked it up with Memento Tuxedo Black and stamped it on Whisper White card stock.  A blender pen and reinkers were used to color the image.


The card was assembled with a Kraft card based topped with a piece of Under the Tree dsp and wrapped with three strands of Gold Bakers Twine.  The flags were cut from Brushed Gold scraps and attached to the Mossy Meadow mat under the main image.  The stars were punched from Gold Glimmer paper with the Confetti Stars punch.  After taking the time to color the image, this card went together very quickly.  So much so, I made a second card that is just slightly different.


For this card, I used some retired Gold Elastic Cord, plus the card stock for the mat and flag were changed up.  I discovered that I really love Soft Sky and Mossy Meadow together, along with Cherry Cobbler.  They especially marry well in the colored image.  Because the main image is so engaging (and large) I didn't feel the need for a lot of additional embellishment, making it perfect for mailing.

As always, your visit and comments are so appreciated!  Please be sure to use the link above to visit Karen's blog and check out all the great inspiration.  I hope you have a great week ahead!

Hugs.

Stef


Product details:
Stamps:  Bearing Gifts
Paper:  Kraft, Whisper White, Mossy Meadow, Soft Sky, Brushed Gold, Gold Glimmer, Under the Tree dsp
Ink:  Memento Tuxedo Black, Cherry Cobbler, Soft Sky, Mossy Meadow, Crumb Cake, Sahara Sand, Blush Blossom, Chocolate Chip
Other:  Gold Baker's Twine, Gold Elastic Cord, Confetti Stars punch

Cheerful Decor

Welcome back!  Today I have some fun 3-D items to share with you.  I recently tried out my new Gift Box Punch Board and also made my first star from the Many Merry Stars Simply Created Kit.


The largest box of the group, which ends up measuring 4 x 4 x 4 inches' was created from a 12 x 12 inch piece of retired textured Garden Green card stock.  It was topped with the fabulous new Cherry Cobbler Sheer Linen ribbon and a tag made with the Cheerful Tags stamp set.  Once I truly understood the instructions for making the box, it was easy.  But it does take a careful reading of the instructions to follow the score lines correctly.


The tag, punched with the Note Tag punch, was first stamped with the snow flake stamp in Versamark on Very Vanilla, then heat embossed with gold embossing powder.  The word Merry was then added in Cherry Cobbler and the line of trees in Garden Green.  It was then attached to the ribbon with Gold Baker's Twine.


The smaller box was created from a 8 x 8 inch piece of Under the Tree dsp.  The final size of the box is 1.75 x 1.75 x 3.25 inches.  It was topped with Cherry Cobbler Waffle Weave ribbon, Chantilly Crochet Trim (both retired) and a string of Gold Sequins.  The wood embellishment and gold star were borrowed from the Many Merry Stars Simply Created Kit.


I am so enamored with the Many Merry Stars Simply Created Kit!!!  Typically I am not a purchaser of the kits that Stampin' Up! sells, but this one really caught my attention as it is one I knew I could not replicate easily or economically on my own. This is the first star I made and it taught me how crucial it is to make all the angles are true as possible so the star will stand evenly.  There are soooo many fun embellishments, including those sweet wood snow flakes, plus plenty of red and gold glimmer stars, along with several tags, banners and pennants that can be decorated with your choice of stamps, plus several die-cut sentiments.  The sizes of the stars range very small to one extremely large star, and I plan on using most either as decorations around the house or as fun holiday gifts.


Thanks for dropping by!  As always, your visit and comments are so appreciated.

Hugs,

Stef


Product details:
Stamps:  Cheerful Tags
Paper:  Very Vanilla, Garden Green (textured), Under the Tree dsp
Ink:  Cherry Cobbler, Garden Green, Versamark
Other:  Many Merry Stars Simply Created kit (star and embellishments)  Chantilly Crochet Trim, Gold Sequins, Cherry Cobbler Sheer Linen and Waffle Weave ribbons, Note Tag punch, Gold Baker's Twine, Gift Box Punch Board, Stampin' Emboss Gold embossing powder

Saturday, November 15, 2014

So Thankful

Well, I thought I was done with Thanksgiving cards (hence my post yesterday LOL) but I realized I needed one more card to send to a family member, so it was the FMS sketch to the rescue.


The Best of Autumn stamp set provided the stamp used to create this card.  While I love the sentiment that is included in the set, it was too large for this layout, so I used a Soft Suede marker to ink up just part of a sentiment from I Like You.


The tree was heat embossed and colored with a reinkers and a blender pen.  A sponge dauber was used to color the sky after lightly touching a Soft Sky ink pad.


You may be wondering how the cloud images were applied to the Pool Party panel behind the main image.  I used an idea I saw in the large catalogue.  I took my Pool Party ink pad and used it to ink up the raised portion of this retired embossing folder, then laid the folder across the card stock panel and the cloud images came out perfectly!  It was a fun experiment.


I was done with the card but it just seemed too heavily weighted to the bottom right corner.  I tried adding Candy Dots or Basic Jewels to the upper area but nothing looked right.  Then I came across this non-Stampin' Up piece of lace that I bought years ago and somehow it just seemed to fit at the top, almost giving the feel like you're looking out Grandma's window at the tree in the back yard or something.  Or maybe that's just me.  Anyway, I would love to hear what you think, if it adds or detracts from the card.

Thanks for coming by today!  I love reading your comments, so please take a moment and share your thoughts.  Be sure to use the link above to visit the FMS blog and check out all the wonderful inspiration!

Hugs,

Stef


Product details:
Stamps:  Best of Autumn, I Like You
Paper:  Soft Suede, More Mustard, Pool Party, Confetti White, Spice Cake
Ink:  Crumb Cake, Soft Suede, Soft Sky, More Mustard, Pumpkin Pie, Pool Party, Versamark
Other:  Stampin' Emboss Clear embossing powder, Word Window Punch, Bitty Banner framelit, Clouds embossing folder, Gold Baker's Twine, Gold Basic Metal button, Sponge Dauber, Blender Pen, Lace (non-SU)

Friday, November 14, 2014

The Last Two.....

...Thanksgiving cards for this year (I think).  At least the final one using Autumn Splendor!  Yeah!!  Don't get me wrong, I love that set, but after coloring multiple panels of leaves and making multiple cards with the same stamp set (boring!), I'm ready to move on.  But first let me share that last card, using this week's sketch from Mojo Monday.  Further down is a second Thanksgiving card using the new Holiday Home stamp set.


My card starts with a Cherry Cobbler base that is then topped with a panel of Early Espresso Core'dinations paper previously run through the Big Shot with the Stylish Stripes embossing folder.  The tilted panels are Cajun Craze card stock and the stamped and watercolored panel.


Can I just say I am in love with the Cherry Cobbler Sheer Linen ribbon available in the Holiday Catalogue?  I resisted at first, I mean I have soooo much ribbon already, did I really need more?  But I decided it would not go to waste between cards and boxes made with the new Gift Box Punch Board, so I went ahead and ordered it.  I'm so glad I did - it is beautiful ribbon that is so easy to work with.  And while it is sheer, it is substantial enough not to fray terribly on the ends, which I find happens with Seam Binding ribbon.  Okay, done with the editorializing and on to the next card.


I call this "The Card That Took FOREVER".  Seriously.  I spent hours designing, discarding, redesigning and revamping before ending up with this very simple design.  I tried to couple the busy dsp, which I ended up using anyway, with a somewhat elaborate scene using the stamps from Holiday Home, and it just didn't work, of course.  Different dsp, no dsp, change the scene...drove me crazy (of course, my husband reminds me that is a very short trip - ha, ha!).  I finally came back around to this dsp with just blowing leaves behind the house that had been colored with a mix of Blendability markers and Classic Ink.  Still don't love the card, but I do like the house...


...and the interior with dancing leaves decorating the edges.

Well, thanks for sticking with me and I hope your adventures in crafting go easier than mine on that last card!  As always, your visit and comments are so appreciated!

Hugs,

Stef


Product details:
Card 1
Stamps:  Autumn Splendor, Teeny Tiny Wishes
Paper:  Cherry Cobbler, Early Espresso Core'dinations, Cajun Craze, More Mustard, Watercolor
Ink:  Cherry Cobbler, Cajun Craze, More Mustard, Hello Honey, So Saffron, Soft Suede, Early Espresso, Tangelo Twist, Versamark
Other:  Stampin' Emboss Early Espresso embossing powder, Stylish Stripes embossing folder, Blender Pen, Basic Rhinestones, Pumpkin Pie Blendability marker, Cherry Cobbler Sheer Linen ribbon

Card 2
Stamps:  Holiday Home, Holiday Wishes
Paper:  Very Vanilla, Naturals Ivory, Early Espresso, More Mustard, Pool Party, Spice Cake dsp
Ink:  Tangelo Twist, More Mustard, Cajun Craze, Early Espresso, So Saffron, Pool Party, Memento Tuxedo Black
Other:  Skin Tone Assortment & Pumpkin Pie Blendability markers, Gold Basic Metal Button, Linen Twine, More Mustard 1/4" Grosgrain ribbon, Ovals Collection and Holiday Home framelits, Blender Pen

Gift Card Envelopes

Welcome back!  A few weeks ago I received my new Gift Card Envelope & Trims Thinlit and decided to try it out with a variety of new and retired designer papers.  My grandkids love getting gift cards for music or other shopping, and I like giving gift cards for other occasions, so I knew the investment in this thinlit would yield plenty of use!  I have three to share with you today.  All three are a case of the example shown in the Holiday catalogue.


The first envelope was made from Under the Tree dsp.  It's a bit thick to use with this thinlit only because it doesn't fold as well as the thinner designer papers.  The tree from Festival of Trees was heat embossed with Whisper White Craft ink on Mossy Meadow card stock, then punched out with the coordinating Tree punch.  Stars in Red Glimmer paper, punched with the Confetti Stars punch, were adhered to the tree, envelope and card with a tiny drop of Crystal effects.  Love those tiny little stars!  The tag uses a stamp from Cheerful Tags and is punched out with the coordinating Note Tag punch.  Both the stamp and tag are used on the next two examples as well.


Next is an envelope created with Winter Frost dsp from the 2013 Holiday catalogue.  For the tree on this card, it was stamped in Island Indigo on Pool Party then topped it with a garland stamped with Encore Silver.  This time Silver Glimmer paper was used for the star atop the tree; sequins from Frosted Sequin were used for added embellishment.


The final gift envelope uses the long retired Christmas Cocoa dsp.  The Red Glimmer stars look fabulous against it and atop the tree from Festival of Trees embossed with Pewter embossing powder.  Some silver thread from Silver Baker's Twine was added for a bit of additional interest.


Here's the back of the envelope.  The circles are cut out of Whisper White card stock with one of the thinlit trim pieces and then attached with Mini Silver brads.  Silver Baker's Twine was then wrapped around each brad to secure.  Before attaching with the brads, I closed the envelope and estimated where to attach the circles so the bottom one did not overlap the top flap.  You'll want to use a firm adhesive to secure the bottom flap to the sides.  I used Sticky Strip, which worked perfectly.

Thanks so much for visiting today!  I hope you have a great weekend and are able to spend at least some time crafting!

Hugs,

Stef


Product details:
Stamps:  Festival of Trees, Cheerful Tags
Paper:  Whisper White, Mossy Meadow, Pool Party, Red and Silver Glimmer, Under the Tree dsp, Winter Frost dsp, Christmas Cocoa dsp
Ink:  Cherry Cobbler, Island Indigo, Real Red, Silver Encore, Versamark
Other:  Stampin' Emboss Whisper White and Pewter embossing powders, Note Tag, Tree and Confetti Stars punches, Gift Card Envelope & Trims Thinlit, Silver Mini brads, Cherry Cobbler, Pool Party and Silver Baker's Twine, Frosted Sequins


Sunday, November 9, 2014

Be of Good Cheer

Hi there again!  Today I'm sharing a couple of Christmas cards that were super quick, easy and fun to make.  I used the deconstructed sketch as the basis for my design.


I started with a Soft Sky base that was stamped in the same color ink with snow flakes from Endless Wishes.  A piece of Pear Pizazz card stock was layered on top after being embossed with the cute Decorative Dot embossing folder (it kind of reminds me of snow falling??  Am I the only one?).


The tag is a 2" x 4" piece of Lost Lagoon card stock punched with the Scallop Tag Topper punch.  I used washi tape to add some color and added a bow tied with some retired Soft Sky ribbon.  The final touch was the sequins and snowflakes from Frosted Sequins.


See, I told you it was quick and easy!  I always add a piece of white or vanilla card stock to the interior for the message and this photo gives you a peek of the washi tape I used to decorate the edge.


The second card mirrored the first with the exception of the ribbon, where I utilized some retired Pear Pizazz grosgrain ribbon, and lined the interior with washi tape of the same color.

Thanks so much for visiting!  Won't you take a moment to leave a comment?  I'd love to hear from you!  Also, be sure to use the link above to check out Deconstructed Sketch challenge!

Hugs,

Stef


Product details:
Stamps:  Endless Wishes
Paper:  Whisper White, Soft Sky, Pear Pizazz, Lost Lagoon
Ink:  Soft Sky, Pear Pizazz, Lost Lagoon
Other:  Scallop Tag Topper, Scallop Border and Decorative Label punches, Decorative Dots embossing folder, All is Calm Designer Washi Tape, Frosted Sequins, Soft Sky Saddle Stitched Grosgrain ribbon, Pear Pizazz Grosgrain ribbon.

Saturday, November 8, 2014

Autumn Wishes

A second post!  I was a busy card maker this afternoon :-) on my quest to make a dent in cards for Thanksgiving.  This week's sketch at Freshly Made Sketches sure helped that process!


Lots of options with this sketch, and I chose to fill the top panel with leaves from Autumn Splendor.  After heat embossing they were colored with various reinkers.


We have a couple of bushes with leaves that look spectacular right now, which inspired the Cherry Cobbler colored leaves. The panel was adhered to a slightly larger one of More Mustard card stock and topped with a piece of the gorgeous Tangelo Twist Stitched Satin ribbon.


The sentiment is a mix of Teeny Tiny Wishes and Endless Wishes.  I love having mixed fonts!  The Rhinestones were adhered after coloring with the darkest Pumpkin Pie Blendability marker.


As always, your visit and comments are so appreciated!  Now use the link to get over to the FMS blog and check out all the amazing inspiration!

Hugs,

Stef


Product details:
Stamps:  Autumn Splendor, Endless Wishes, Teeny Tiny Wishes
Paper:  Early Espresso, More Mustard, Tangelo Twist, Very Vanilla, Watercolor
Ink:  Cherry Cobbler, Early Espresso, Soft Suede, Cajun Craze, So Saffron, Hello Honey, Tangelo Twist, More Mustard, Versamark
Other:  Blender Pens, Large Oval and Scallop Oval punches, Hemp Twine, Tangelo Twist Stitched Satin ribbon, Brushed Bronze Designer button, Basic Rhinestones, Pumpkin Pie Blendabilities marker, Corner Rounder, Woodgrain embossing folder

Thanksgiving Comfort

Hi there!  Today's card is for the challenge at CAS(E) this sketch!  I haven't had a chance to join many challenges lately, but I really wanted to make the deadline for this one.


I've been preparing to make Thanksgiving cards by embossing and coloring leaves from Autumn Splendor.  Yup, I keep pulling out these retired stamp sets because I love using the beautiful colors of fall to color these great leaf images!  For today's card, in order to keep in the spirit of CAS, I cut out a couple with my paper snips and kept my card pretty spare.


The leaves and a button topped a strip of Comfort Cafe dsp.  I used my Stampamajig to stamp the sentiment directly on the card base.


Thanks for taking the time to visit today!  I love hearing from you, so please leave a comment if you have a chance.  Be sure to use the link above to check out the amazing inspiration at CTS!!

Hugs,

Stef


Product details:
Stamps:  Autumn Splendor, Holidays & Wishes
Paper:  Confetti Cream, Watercolor, Comfort Cafe dsp
Ink:  Early Espresso, Soft Suede, So Saffron, Tangelo Twist, Cajun Craze, Versamark
Other:  Stampin' Emboss Early Espresso embossing powder, Blender Pens, Natural Designer button Hemp Twine, Paper Snips, Stampamajig

Friday, October 31, 2014

Dapper Stars

Welcome back!  The card I have to show you today was made for a friend who retired this week.  I wanted it to be a classy and clean masculine card, so I turned to this week's sketch at Freshly Made Sketches for inspiration.


I knew I wanted to use silver and black but as I was deciding on the different layers, I opted to add some Cherry Cobbler for a pop of color.


The large sentiment was created by stamping the image from Starburst Sayings in Versamark, then heat embossing with Pewter embossing powder, and finally was cut out with a Starburst framelit.  A similar process was used for the smaller stamped image, only embossed with Cherry Cobbler ep.


The Lucky Stars embossing folder was used to add some texture to the piece of Cherry Cobbler card stock.  Hard to see in the photos, but the banner is Textured Basic Black card stock.  The only embellishment is a slim piece of black grosgrain ribbon.

Well, I didn't expect to get this post done so soon after my earlier one, but it worked out perfectly.  Please be sure to use the link above to check out the FMS challenge and all the fabulous inspiration!  As always, your visit and comments are so appreciated!

Hugs,

Stef


Product details:
Stamps:  Starburst Sayings
Paper:  Basic Black, Whisper White, Cherry Cobbler, Silver Foil
Ink:  Versamark
Other:  Basic Black 1/8" Grosgrain ribbon, Lucky Stars embossing folder, Starburst framelits, Pewter and Cherry Cobbler embossing powder.

Snowy Wishes

Hi there!  I feel like it's been forever since I posted, but in reality it's only been about two weeks. Today is Halloween and we're all ready to greet the trick or treaters in a couple of hours.  But before all the action starts, I want to share a card I made for Mojo Monday this week.


I thought this fun sketch would be perfect for making a Christmas card using Endless Wishes. So I played around with different images, then decided to add the snowman from Best of Snow.  Now things began to click!


I started with Soft Suede and Real Red card stock, drawing the colors from the long retired Christmas Cocoa dsp.  The snowman is so cute, he really livens up the card.  After coloring him with a blender pen and reinkers, Silver Dazzling Details was added to the ground and the brim of his hat.


The top snowflake was heat embossed with Pewter embossing power, the bottom snowflake stamped in Encore Silver.  I wrapped the Real Red Polka Dot ribbon around the second layer and then a knotted piece was adhered on top.

Thanks for visiting today!  I hope you have a great weekend and check back here, I hope to post my card for Freshly Made Sketches later tonight or tomorrow.

Hugs,

Stef

Product details:
Stamps:  Best of Snow, Endless Wishes
Paper:  Whisper White, Real Red, Soft Suede, Christmas Cocoa dsp
Ink:  Real Red, Mossy Meadow, Pumpkin Pie, Memento Tuxedo Black, Encore Silver, Versamark
Other:  Stampin' Emboss Pewter embossing powder, Real Red Polka Dot Grosgrain ribbon, Silver Dazzling Details

Saturday, October 18, 2014

Pool Party Birthday

Hi there and welcome back!  I can't believe it's been nearly 2 weeks since I last posted.  That hasn't happened for almost a year.  But "real life" took over, plus I was busy making Christmas gift tags and gift card envelopes last weekend (which I will share in a future post) and just ran out of time.

But today I have a card that was made for this week's challenge at Freshly Made Sketches.  As a break from all the holiday items, I decided to pull out a scrap of my favorite Sweet Sorbet paper and use it to make a decidedly un-fall like card!


I love the Pool Party and Basic Black combination of the Sweet Sorbet dsp, so I carried that through to the card stock, butterflies and ribbon.


The butterflies were cut out of retired 2011-2013 In Color Paper Pack dsp with the also retired Beautiful Wings Bigz die.  A bit of texture was added to the card using the Woodgrain embossing folder.


A pretty straightforward card using a very versatile sketch.  I had lots of ideas but not much time, so I will keep this sketch in mind for future use.  Be sure to click on the link above to check out all the tremendous inspiration at FMS!!

Take care and have a great week ahead!  I'll be traveling to Minneapolis for business this week, and am grateful to do so in October and not January!!  I'll be back next weekend to share some of the Christmas tags and gift card envelopes I've been making.

Hugs,

Stef


Product details:
Stamps:  Petite Pairs
Paper:  Whisper White, Basic Black, Pool Party plain card stock and Core'dinations, Sweet Sorbet and 2011-2013 In Color Paper Pack dsp
Ink:  Memento Tuxedo Black
Other:  Beautiful Wings Bigz die, Small and Large Oval punches, Scallop Border punch, Basic Black Satin Ribbon, Woodgrain embossing folder, Basic Rhinestones, Occasions Paper Piercing Pack

Monday, October 6, 2014

Spooky Home

Hi again!  I took a vacation day today  (probably our last 80 degree day until late next spring, sniff, sniff) and after a nice, long walk with my husband midday at the local wildlife reserve, I retired to my craft room to make a card combining two challenges.  Jaydee at Paper Players has chosen a Halloween theme for this week's challenge, and I combined it with the current sketch at Mojo Monday.


One of the reasons I ended up ordering the new Holiday Home stamp set is how versatile it is, with options for fall, Christmas, and Halloween!  The images are so cute, I had fun putting together another scene, this time a "spooky" one!


To create a scene for the main image, I started with a rectangle of Very Vanilla, masked off the moon and the ground, and sponged with More Mustard, Cajun Craze, Rich Razzleberry and Basic Black.  The ground was then sponged with Old Olive and Mossy Meadow.  A sponge dauber was inked up with So Saffron to color the moon.


The house was stamped on Very Vanilla in Memento Tuxedo Black, then colored with a blender pen in Classic inks.  I stamped the ghost on Whisper White so he'd really pop against the scene, then fussy cut him with my paper snips.  Retired dsp and washi tap were used for the base and lower panels.  Assessing the card after it was all assembled, I think the washi tape makes it a bit too busy.  Fortunately, I don't think my grand kids (the intended recipients) will mind LOL!

As always, your visit and comments are so appreciated!  Be sure to use the links above to visit each blog - there's a lot of amazing inspiration for your viewing pleasure.

Hugs,

Stef


Product details:
Stamps:  Holiday Home
Paper:  Very Vanilla, Whisper White, Basic Black, Rich Razzleberry, Pumpkin Pie, Wicked Fun dsp
Ink:  Memento Tuxedo Black, Early Espresso, Pumpkin Pie, Rich Razzleberry, More Mustard, Old Olive, Mossy Meadow, Smoky Slate, Basic Gray, So Saffron, Basic Black
Other:  Witches Brew Designer Series Washi Tape, Blender Pen, Sponges, Sponge Dauber, Paper Snips, Holiday Home framelit

Saturday, October 4, 2014

Ho, Ho, Ho Home

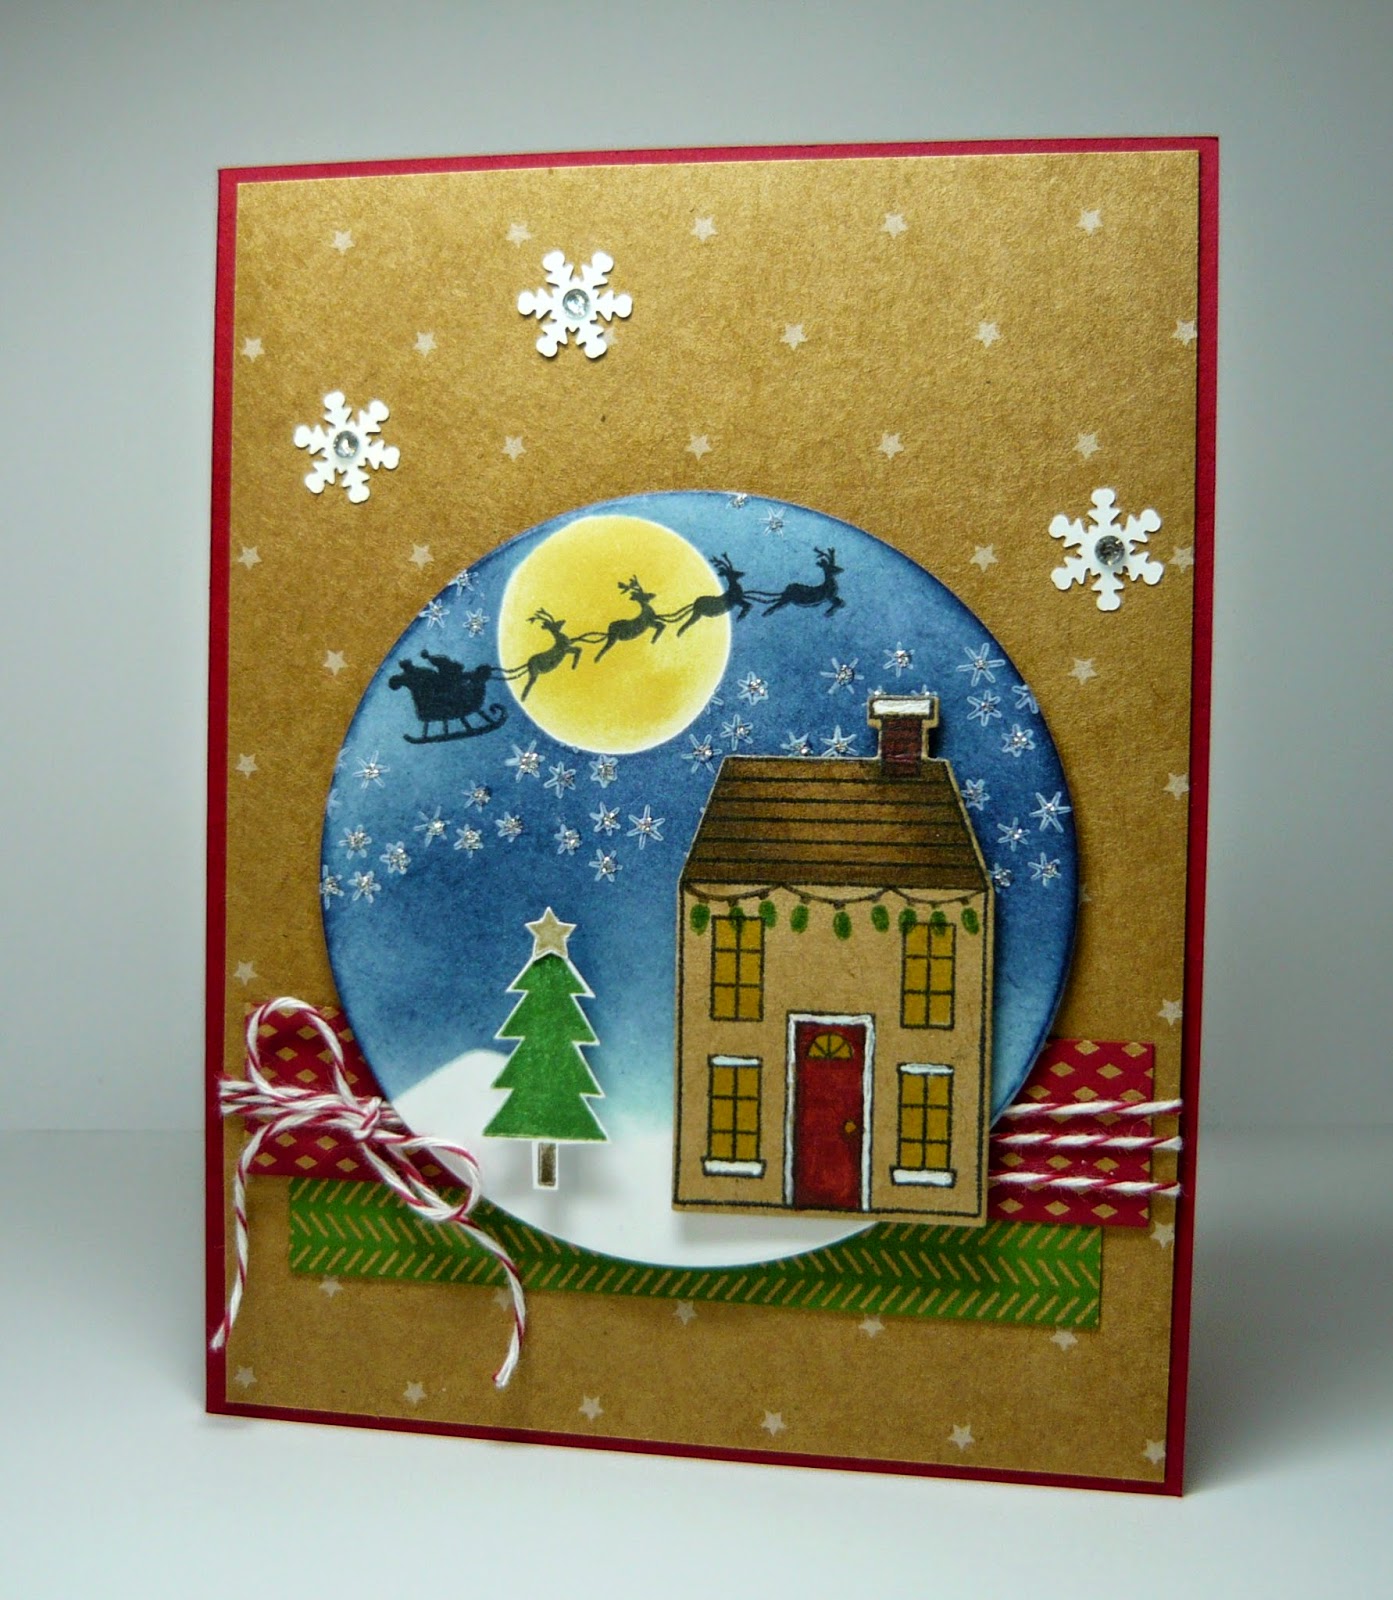
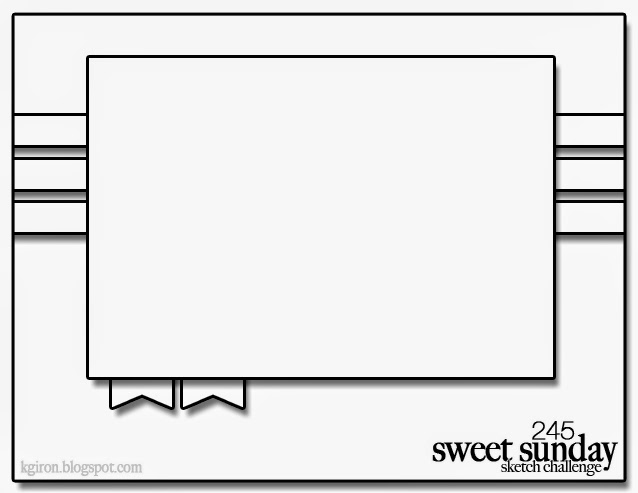
Hello and welcome back!  I hope you were able to get crafty today in celebration of World Card Making day!  I worked on several cards for an upcoming bazaar, and also made time to finish a card using this week's challenge at Freshly Made Sketches.


I knew immediately what I wanted to make when I saw this fabulous sketch.  I recently ordered the Holiday Home bundle and was thrilled to be able to break it out for this card.


I started with a Cherry Cobbler base, then layered on a piece of Under the Tree dsp.  The cute little house was stamped on a scrap of Stampin' Up! Kraft in Memento Tuxedo Black, then colored with Blendabilities.  Once that was done, I used Basic Black and Garden Green markers to color the string of lights and stamp just under the eaves of the roof (this set just tickles me with all it's small details).  A white gel pen colored the window and door frames and the top of the chimney.


The background was made by masking off the areas for the snow and the moon with a Post It note, then sponging Soft Sky and  Night of Navy.  Santa and the reindeer were then stamped across the full moon that was inked up with a sponge dauber and So Saffron ink.  The stars were stamped in Whisper White Craft ink.  I knew there was a good chance that they would not be terribly vibrant atop the dark sky, so when they were mostly dry I added Silver Sparkle Dazzling Details to make them really pop from the sky.


I tried to add a sentiment to represent the small circle in the sketch, but after trying different placements of the tree, the sentiment and the house, I instead settled for a Baker's Twine bow, and stamped the sentiment on the inside.

Thanks so much for the visit and I would love to hear from you if you have a moment to leave a comment.  I hope the remainder of your weekend is enjoyable!

Hugs,


Stef


Product details:
Stamps:  Holiday Home
Paper:  Cherry Cobbler, Kraft, Whisper White, Under the Tree dsp
Ink:  Memento Tuxedo Black, So Saffron, Soft Sky, Night of Navy, Garden Green, Basic Black, Whisper White Craft
Other:  Holiday Home framelit; Frosted Sequins; Silver Sparkle Dazzling Details; White Gel pen; Cherry Cobbler, Crumb Cake and Daffodil Delight Blendabilities; Basic Rhinestones

Wednesday, October 1, 2014

Starburst Birthday

Hello!  Hope you're enjoying a pleasant evening!  I have a card to share that was made using the sketch from the Sweet Sunday Sketch Challenge.


I was looking through remnants of retired dsp and found this pretty piece from Quatrefancy with Pool Party and Island Indigo.  All of a sudden, the card using Karen's sketch came to life in my mind.


It's a pretty simple card with lots of easy components.  The sentiment from Starburst Sayings was stamped on Whisper White in Versamark and heat embossed with Pool Party, then cut out with the matching Starburst framelit.


The cross piece under the circle is Pool Party Core'dination card stock embossed with the Lucky Star embossing folder, then sanded with the Stampin' Sanding Block.  Bling was added in the form of the Silver Glimmer paper star and scattered rhinestones.

Thanks for visiting!  I hope the remainder of your week goes well!  I look forward to the nice weather that is supposed to arrive by Friday and stay all weekend...our last hurrah before Fall weather seriously kicks in, I'm afraid!

Hugs,

Stef


Product details:
Stamps:  Starburst Sayings
Paper:  Very Vanilla, Island, Indigo, Pool Party Core'dination, Quatrefancy dsp, Silver Glimmer
Ink:  Versamark
Other:  Pool Party embossing powder, Basic Rhinestones, Lucky Stars embossing folder, Starburst Framelit, Extra Large Star punch