Sunday, August 25, 2024

Merry Christmas for The Paper Players

Hello friends!  It's time for a new challenge at The Paper Players and this time we have a sketch from the lovely Jaydee!  She is off this week, so I am filling in for her as hostess.  I hope you have fun with this one!


I am now feeling crunch time to start working on Christmas cards in earnest, and this sketch worked well with the image I wanted to use.


I used my new Pinkfresh Studio press plates to create the leaf and berry border as well as the senitment.  I used some cotton watercolor paper thinking I might try to use watercolor or colored pencils but on my trial piece I didn't like either, so I went to my go to Copic markers.  Because of the type of the paper, one must use a light hand when coloring or it will bleed.

I then die cut the sentiment and used partial die cutting so the die wouldn't cut the bottom edge of the border so I could have a larger panel to make sure the border was somewhat close to the middle.  On a separate panel of cardstock, I adhered the red glitter paper, then added the die cut panel, then adhered it all to an ivory card base.  My intention was to use the sketch as Jaydee created it, but when I started arranging the sentiment, I realized it looked so much better with the sketch flipped on its side.  A few green sparkly gems completed the card.


What are you inspired to create with this sketch?  We would love to see your card in the gallery this week!  Before you head off to your craftroom, please be sure to visit the challenge blog where my talented teammates have some more inspiration on how to use this sketch.  The challenge will remain open until 3 pm EDT on Friday 8/30.

Thanks for visiting and take care!

Stef

  • Pinkfresh Studio Magical Holiday Pressplates and Dies
  • Spellbinders Betterpress Cotton card panel
  • Altenew Brilliant Red Glitter cardstock
  • Picket Fence Studios Candy Lane Gem Mix

Sunday, August 18, 2024

Cheers for The Paper Players

Hello friends!  Today we have a fun new challenge at The Paper Players.  The amazing Claire is hosting our CAS challenge and is asking us to use fruit on our cards.

I decided to make a very vibrant card to share, which seemed fitting for summertime.


The glass and fruit were all foiled in gold using a pressplate, colored with Copic and Olo markers then die cut with the coordinating die.  The stamp set and pressplate create all the images at once and then there is only one die to cut it all out, which I love since it's all done in one pass.  

After I had all the elements colored, I ink blended the front of a white card base with super vibrant colors, then let that dry as I gold heat embossed the Cheers sentiment and stamped out the sub sentiment.  When I started to assemble the card, it just seemed to need a bit something more, so I added the foiled and die cut frame directly to the edge of the card, then added everything else.  Some things were adhered directly to the card front and some elevated with a bit of foam tape, but I made sure to leave lots of "white" space.  I love the bright colors and the festive, fruity elements!


Thanks for taking time to stop by and I hope that you'll join us this week!  My talented teammates have some amazing inspiration for you over on the challenge blog, so please be sure to stop by and take a look.

Take care!

Stef

  • Pinkfresh Studio Cheers Stamp, Dies and Pressplate
  • Pinkfresh Studio Decorate Frames Pressplate and Die
  • MFT Skinny Strips sentiment lable die
  • Simon Says Stamp Peony, Sherbet and Lemonad inks and Ultra Fine Gold embossing powder
  • Olo markers:  RV1.7, 1.5, 1.3, YG1.6, 1.4, 1.2, G1.5, 1.4, 0.1
  • Copic markers: Y26, 38, 08, 04, 00, R39, 37, 35, YR09, 16, B000, 0000

Friday, August 16, 2024

Summertime Silhouette for Color Hues

Hello friends!  We have a new, beautiful color combination for your inspiration at Color Hues.  This time the amazing Tracey has chosen something I think is perfect for summer, yellow and orange.

To me, these colors say either a beautiful summer sunrise or sunset, although fruit would be an equally good choice.  But I chose I sky scene.


I used an older Simon Says Stamp/CZ Design stamp set with these gorgeous colors to create a little summery scene.  Starting with the silhouette image, it was stamped with black pigment ink on a panel of Koh-I-Noor Bristol paper, then I ink blended a few Distress inks to create the background.  I put the paper back in my Misti and stamped a second time to darken the silhouette.

Because the stamp is narrow, a mini slimline seemed most appropriate, so the panel was trimmed down.  It was at this point that I decided to add some new Distress Spritz sprays in Spiced Marmalade and Fossilized Amber.  I add some light spray and also did a bit of splattering then set it aside to dry.  The sentiment from the same stamp set was white heat embossed on black and die cut along with two butterfly dies, also from the same set. The dried panel was added to the black card base, then the sentiment and butterflies were adhered with some foam tape.  To complete the look, three tiny gems were added to each butterfly.  My only regret is not restamping the silhouette image after the spray dried, but I tell you, in real life all the shimmer and sparkle don't really diminish the silhouette like the photo does.


This is such a great color combo, I hope you're inspired to create along with us!  I know you'll love to see what my very talented teammates have created, so head over to the challenge blog before heading to your craft room!  The challenge will remain open until 9 a.m. Thursday August 29th.

Thanks for visiting.  Take care!

Stef
  • Simon Says Stamp Silhouette Sentiments Stamps and Dies
  • Squeezed Lemonade, Mustard Seed, Spiced Marmalade and Wild Honey Distress inks
  • Spiced Marmalade and Fossilized Amber Distress Spritz sprays
  • Spellbinders Aura Color Essential Gems

Thursday, August 15, 2024

Sulfur Cosmos for The Flower Challenge

Hello friends!  I'm here with my mid-month reminder card for The Flower Challenge.  This month we are using the beautiful mood board colors, of which you need to use at least three with your floral card.

 
Last time I used the pink, coral and sage, so for this card I went with peach, sage and gray.


I fell in love with these Sulfur Cosmos blooms and stencils from Altenew.  Along with stencils to color the flowers, it also included the pattern in the background of my card, which I created using paste on a gray panel.  The flowers were stenciled with soft peach and sage inks, then die cut with the coordinating die.  I did fussy cut the space between the upper and lower flowers because I didn't care for the big section of white against the gray panel.  I also went in with a few Copic markers to enhance the shading and create more dimension.  

After adding the floral image to the gray panel, the overhanging parts were trimmed off then it was adhered directly to the front of a white cardbase.  The sentiment, also from the same stamp set, was stamped, die cut and added to the card front.  To complete things, I added three iridescent drops around the sentiment.


Thanks so much for stopping by.  I encourage you to use the link above to be inspired by the beautiful cards by my amazing teammates and hopefully join us!  There's still plenty of time; the challenge will remain open until Sunday, August 25th.

Take care!

Stef

  • Altenew Sulfur Cosmos Stamps, Stencils and Dies
  • Hero Arts White Pearl paste
  • Altenew Orange Sorbet, Pastel Sunrise, Canyon Clay, Peachy Glow, Golden Honeycomb, Silver Sage, Jade and Eucalyptus dye inks
  • Copic markers
  • Pinkfresh Studio Iridescent Clear Drops


So Sweet for Time Out Challenges

Hello friends!  I'm so very pleased to be the Guest Designer at Time Out Challenges #270 for the next two weeks!  They have a wonderful photo to inspire in so many ways.


I was literally inspired by the berries and in retrospect, wish I had used a heart too.


Just prior to being asked to GD, I purchased the cute House-Mouse Berry Good stamp, so it was a perfect match.  The image (which is bigger than you see here - more on than in a minute) was stamped then colored with Copic and Olo markers. I had trimmed it down to a rectangle and was getting ready to put together my card when I dropped an ink pad on a portion of the colored image!  AAWWWKK.  I'd had a hold of the lid, thinking it was secure but nope, it wasn't.  So I went to Plan B.

I was inspired by a card on the Spellbinders website (where they now sell the House-Mouse products) that spotlighted a portion of the image in a circle, so that is what I did.  I had a white woodgrain panel already trimmed down with a rounded rectangle die, so I used a circle die to cut a hole then layered the colored panel beneath.  Here is where I wish I'd used a heart rather than a circle but, you know, hindsight.  Everything was added to a plum card base, then I decided to create a frame around the window and that really made things pop.  Last came the sentiment which is also from the same stamp set.


Thanks for taking time to stop by and I encourage you to check out the challenge, where the DT have fabulous cards to further inspire you plus there are prizes to be won if you play along!

Take care!

Stef

  • Spellbinders House-Mouse Designs stamp set
  • Hero Arts Infinity Circle and Rounded Rectangle dies
  • Copics:  Sky - B00, 000, 0000; Berries - RV69, 66, 55, 52; Basket - W5, 3, 1, 0; Mice - E37, 35, 33, 31, 30; Leaves - G29, 21, YG45
  • Olos - Grass - YG 1.6, 1.4, 1.2

Sunday, August 11, 2024

Divine Peony for The Paper Players

Hello friends!  It's a color challenge this week at The Paper Players and this time the lovely Jan has chosen a soft color combination of Lemon Lolly, Flirty Flamingo and Soft Sea Foam and one neutral.


I'm also joining the current challenge at Addicted to Stamps and More.


I had an as yet unused die set that seemed like the perfect match for this colors.


Do you start your card making with a plan?  I usually don't have more than a rough idea and start with the focal image and go from there.  For this card, it was the flower and leaves, which were die cut from white cardstock then ink blended with colors similar to the SU ones.  I started with pink in the flower centers, fading it out to white then coming in from the edge with a light yellow.  My neutral is the brown center.  The leaves on the left are from the same die set as the flower and the two on the right from a separate die set.

I settled on the Ornate Nesting die for the center piece, which was cut 3 times from white cardstock, inked with the same pink, then the flowers and leaves adhered to it.  A white panel was embossed with the leaf 3D folder, trimmed down to A2 size and adhered to the card base.  The two addition Ornate Nesting die cuts were adhered under the main image for a small bit of dimension then added to the card front.  

For the sentiment I found one that fit from a press plate set, but all of the ones I'd previously made were either foiled or in black ink, which didn't look right, so I ended up making one using the same brown used for the flower center and I liked that so much better.


We would love to see your card in the gallery this week!  My talented teammates have loads of inspiration for you over on the blog, so I hope you'll take a moment to visit, then head to your crafty space and play along with us!  The challenge will remain open until noon PDT Friday August 16th.

Take care!

Stef
  • Simon Says Stamp Divine Peony and Lush Leaves dies
  • Altenew Orante Nesting die
  • Spellbinders A Little Message Betterpress Sentiment & Die set and Leafy 3D embossing folder
  • Altenew Frosty Pink, Coral Berry, Lemon Ice, Pistachio, Misty Sage and Rhodolite ink.

Sunday, August 4, 2024

Framed Hibiscus for The Flower Challenge

Hello friends! It's a new month and time for a new theme at The Flower Challenge.  For August, we have a color challenge (you must use at least 3 of the colors), and it is a beauty for all types of summer florals.

I'm still not over being enamored with embossing folders and this time I used the matching stencil set.


The embossed image is about 5" x 5" but I ended up trimming it down to fit an A2 sized card.  I used the stencil to color the large flowers in coral tones and the petite blooms in more of a peachy-pink color.  There are two types of leaves so they were colored with two sage-like ink families.  I used a brown for the hibiscus stamen and then added the white with a gel pen.

The embossed panel was matted on a slightly larger one in light peach, then added to an ivory card base using a few layers of scrap cardstock for a small amount of dimension.  It seemed to be missing something so I decided to add a frame cut from Brushed Rose cardstock.  At this point I was satisfied with the design and decided not to add a sentiment or embellishments, which I can include later when it is sent.


I hope these colors inspire you to join us this month and to further generate your creative juices, please visit the challenge blog and see how my wonderfully talented teammates used these colors!  The challenge will remain open until Sunday August 25th.

Thanks for visiting.  Take care!

Stef

  • Altenew Sun-Kissed Blooms 3D embossing folder and layering stencils
  • Simon Says Stamp A2 Nesting Frames
  • Altenew Brushed Rose cardstock
  • Concord and 9th Nectar cardstock
  • Altenew Fresh Dye inks in Blush, Rouge, Rhodolite, Silver Sage, Jade and Eucalyptus
  • Altenew Crisp Dye inks in Coral Bliss and Heart Beat
  • SSS inks in Aspen, Sage and Pine
  • Sakura White Gelly Roll pen


Beach Time for The Paper Players

Hello friends!  Today at The Paper Players we have an appropriate theme - Beach Time!  I'm hosting this week and would love to see your beautiful cards depicting time at the beach.


I'm also playing along with Time Out Challenges and their words of inspiration "It's always summer somewhere"

I love the beach on the Oregon Coast, where I've spent lots of time, but today my card has a more tropical vibe and I would love to spend time on this beach too!


Isn't that little beach house the cutest?  It's one of three beach houses included in Honey Bee Stamp's Lovely Layers: Beach House die set. It also includes to two smaller palm trees; the larger one is from the Lovely Layers: Hammock set.

To start, every piece was die cut from white cardstock, then I used my Copic and Olo markers to color everything.  It's a bit more work but I find I get more texture in things such as the palm trunks and fronds.  Plus, many of the pieces are so small I find it easier to color than ink blend.  With the coloring complete, everything was assembled and I moved onto the background.

I kept the background very simple to keep the focus on the die cut images, just ink blending what might be perhaps a little lagoon away from the main beach, then adding the sand and the sky. I used a white gel pen to create the gentle waves and add a bit of detail to the flag.  The sentiment was stamped and then the scene was created.  I had created a second beach house but the scene just seemed to busy to I will hold onto it for another card, maybe on a 5" x 7" size - this one is 6" x 4.5".


So what do you enjoy when you're at the beach?  We would love to have you share your beach-y themed card this week.  The challenge stays open until noon Friday 8/9.  In the meantime, my teammates have some fabulous cards to inspire you at the challenge blog, so I encourage you to pop over and take a look.

Also, if check back later, I'll have a second post with my card for The Flower Challenge.

Take care!

Stef
  • Honey Bee Stamps Lovely Layers: Beach House and Lovely Layers: Hammock
  • HB Sunkissed Summer Stamp Set
  • Altenew Sea Glass, Sea Breeze and Turquoise inks
  • Simon Says Stap Latte Ink
  • Sakura White Gelly Roll pen
  • Olo markers - R2.4, 2.2
  • Copic markers - BG07, E75, 55, 37, 33, 31, 30 YR23, Y13

Thursday, August 1, 2024

Bring On the Treats for Color Hues

Hello friends!  Welcome to August and to the latest Color Hues challenge!  This time I am your hostess and have chosen pink and brown as our hues of color.

I'm also sharing my card over at Addicted to Stamps, where the current theme is "Birthdays".


I had fun making a "sweet" slimline birthday card with cute mice!  


Yes, we have some mice bringing treats for the birthday party!  The first step was to find ink and Copic marker colors that went well together.  Once that was done, the background was ink blended with pink and brown, then I went over the pink with a polka dot stencil.  I varied my inking pressure to create a non-uniform look.  I then splattered the stenciled portion of the background with white iridescent shimmer spray using a paint brush reserved specifically for that task.

Next, all the mice were stamped, colored and die cut.  I used gray for the mice so they would stand out from the background and used various light and dark pinks and browns for the treats.  After stamping the sentiments, the sub-sentiment was cut out with a label die and I fussy cut the happy birthday to give it a fun look.  

The card was assembled with the three middle mice popped up on foam tape, as well as both sentiments.  I used a brown marker to darken the "ground" as it was too light with just the ink blending.  I then colored over the white borders of the die cut images with a brown and pink marker so the die cuts would blend into the background.  I have mixed feelings about doing that; I think next time I would stamp and mask where necessary rather than add die cuts.  But all in all, it still turned out as cute as I'd hoped.  Pink gems were added and an aqua shimmer pen was painted on all the confections for a bit more sparkle.


What are you inspired to create with these colors?  My super talented teammates have a bevy of fabulous cards that will spark your creativity, so be sure to visit the challenge blog before heading off to your crafty space!  The challenge will remain open until 9am EDT Wednesday August 14th.  Hope to see your card in the gallery!

Take care!

Stef

  • Colorado Craft Company/Anita Jeram So Sweet Slimline stamps and dies
  • Simon Says Stamp Slimline Borders Stencil
  • MFT Slimline Skinny Strips die
  • SSS Latte ink
  • Altenew Baby Pink ink
  • Altenew Pink Tourmaline Gem Sparkles
  • Hero Arts White Iridescent Shimmer Mist
  • Tonic Aqua Shimmer pen
  • Sakura White Gelly Roll pen
  • Copics:  E59, 57, 53, 37, 35, 33, 31, 30, RV06, 04, 02, 10, T2, 0

Sunday, July 28, 2024

Wildwood Florals for The Paper Players

Hello friends!  Today at The Paper Players we have a great sketch created by the lovely LeAnne.  We're also celebrating our 700th challenge - woo hoo!  Here's to many, many more.

The three circles could certainly be anything but I decided to pull out an as-yet-unused stamp and die set that was certainly deserving of some ink!  


The set from The Greetery has layering stamps for many of it's images and I was so pleased to see how easily they layered.  Sometimes it can be a challenge, at least for me, but these stamps required just a couple of tries before getting the results I was pleased with. After stamping, including the sentiment, everything was die cut with the matching dies. 

Along with the three flowers representing the circles on the sketch, I also added a few sprigs and leaves for interest.  The white panel was first run through with a cover die that only creates a stitched look to the images, then it was cut down with a rounded rectangle die.  That was layered onto a sage-like card base that went well some of the leaf colors, then the arrangement added with both foam tape and glue. The sentiment was partially layered on top of the largest flower and I was done.  I liked the clean look of this, so I didn't add any embellishments.


I hope you'll join us this week to celebrate our anniversary with this fabulous sketch!  Be sure to visit the challenge blog, where my wonderful teammates have some fabulous inspiration for you!

Take care!

Stef
  • The Greetery Wildwood Stamps and Dies
  • Pinkfresh Studio Floral Tiles Cover die
  • Hero Arts Rounded Rectangle die
  • Altenew Pastel Sunrise & Canyon Clay Crisp die inks and Peachy Glow, Golden Honeycomb, Amber Breeze, Melted Butterscotch, Silver Sage and Eucalyptus Fresh Die Inks
  • Simon Says Stamp Mocha ink

Sunday, July 21, 2024

Birthday Queen for The Paper Players

Hello friends!  This week The Paper Players brings you a CAS Birthday challenge.

Summertime is the height of birthday season for my family, so it was no trouble making a CAS birthday card.  This one went to my granddaughter, who loved the humor of it.


The stamp set is from Stamping Bella and all of their packaging has a colored example on the front, so this one was relatively easy to recreate.  I knew the pleats were going to be a challenge for me to color, so I stamped the image twice, practiced on one then set about coloring the final image, for which I used Copic markers.

Next the panel was cut with a diagonal stitched rectangle die, then matted on a light purple card stock.  I cut two additional panels from scrap cardstock and layered the behind the main image, then adhered it to the black card base.  The sentiment was stamped and fussy cut in a wonky fashion befitting the script and the "queen", and added to the card front with foam tape.  The last touch was to add some black rhinestones and using a shimmer pen on her crown and dress, because who doesn't need a bit of sparkle on their birthday?


Thanks for visiting, now pop on over to the challenge blog, where my talented teammates have some wonderful inspiration to share with you!

Take care!

Stef

  • Stamping Bella Oddball Birthday Queen stamp
  • Pinkfresh Studio Diagonal Stitched Rectangle die
  • Honey Bee Stamps Obsidian Rhinestones
  • Tonic Aqua Shimmer pen
  • Copics: Crown- YR24, 23, 15, 11; Hair-E29, 37, 33; Skin-E04, 11, 01, 00; Dress-V17, 15, 01; Shoes, Skulls, Plate and Fork-T8, 6, 4, 2, 0; Cake-E59, 57, 55, 53; Shadow-W3, 1, 0

Tuesday, July 16, 2024

Christmas Bird Poinsettia for Color Hues

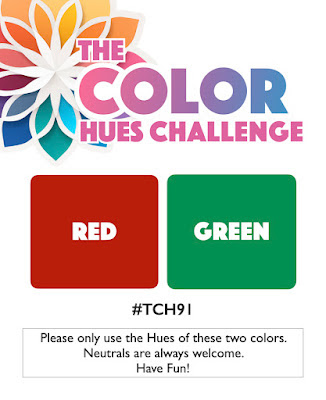
Hello friends!  For the next two weeks at Color Hues we have a wonderful combo of red and green from Sheri.  This led me to create make a Christmas card because I love doing Christmas in July, but of course there are plenty of other options with these colors.


This was the perfect opportunity for me to break out the Christmas Bird Poinsettia die set that I'd bought on sale a while ago.


I began by die cutting multiples of everything from white cardstock, then used a variety of Copic and Olo markers to color the pieces.  I love to either use markers or ink blend my die cuts, I feel like I get much more dimension on the pieces.  I decided to use gold for the poinsettia center and also some of the sprigs.

A panel of bright green was embossed with a pine branch folder, then the poinsettia was popped up with foam tape in the center.  Each piece of the arrangement was then added.  These is a bird die cut with this set (hence the name of the set and my blog post) but I decided not to use it on this card.  I really love the candy canes, so I wanted them and the poinsettia to be the main points of interest.  The sentiment was die cut from dark red cardstock added below the arrangement, then the panel was trimmed down and adhered to a white card base.  The final step was to use an aqua shimmer pen to add sparkle to the poinsettia, some of the leaves and the red stripes of the candy canes.


So how do these colors inspire you?  We'd love to have your card in the gallery - the challenge remains open until 9 am EDT on Monday July 29th.  But before you run off to your crafty spot, be sure to stop by the challenge blog to catch all the wonderful inspiration by my talented teammates!

Thanks for visiting.  Take care!

Stef

  • Spellbinders Christmas Bird Poinsettia die set
  • Simon Says Stamp Holiday Words on a Line die
  • Honey Bee Stamps Snowy Pines ef
  • Tonic Aqua Shimmer pen
  • Copics - R39, 37, 35, YG67, 17, 03, C1
  • Olos - YG8.7, 8.5, 8.3, G1.8, 1.7

Monday, July 15, 2024

Chelsea Floral for The Flower Challenge

Hello friends!  Today I'm sharing my reminder card for The Flower Challenge, where this month the theme is to create a birthday card.  

As I shared in my blog post for TFC at the beginning of the month, I decided to play with a couple of as yet unused embossing folders, so today I reveal the 2nd of the two.


For this card, I reached for something I rarely use, which are my Distress Watercolor Pencils.  If you follow my blog, you know my favorite coloring medium is alcohol markers, but I knew it would be relatively easy to use some simple water coloring for this panel.  It was embossed using watercolor paper, then I set about using some bright and cheerful colors.  I really love how the peachy flowers turned out by mixing Tattered Roses and Wild Honey. I finished it off with a tiny bit of splatter using Picked Raspberry and Wild Honey.

After the water coloring dried, the panel was trimmed down then layered on two additional panel of scrap paper for a bit of dimension.  It was then matted on a bright green A2 panel before adhering to the card base.  The sentiment was stamped then die cut with a label die and the last step was to add a few embellies around the sentiment that matched to peachy flowers.


There's still plenty of time to join us this month; the challenge remains open until Thursday July 25th.  In the meantime, please be sure to visit the challenge blog, my teammates have new cards to further inspire you!

Take care!

Stef

  • Simon Says Stamp Chelsea Floral embossing folder
  • Concord & 9th Pop-Up Par-Tay stamp set (sentiment)
  • Distress Watercolor Pencils in Picked Raspberry, Tattered Rose, Wild Honey, Twisted Citron and Rustic Wilderness
  • Picked Raspberry Distress Oxide ink
  • Stampin' Up Polished Dots
  • MFT Fishtail Foundations

Sunday, July 14, 2024

Thinking of You for The Paper Players

Hello friends!  This week brings our Color Challenge to The Paper Players.  Jaydee is hostess this time and she chose black, grey, red and white.

I had plans for a totally different card with these colors but then I happened upon a floral image that I'd stamped in ink intended for "no line" coloring.  I normally shy away shy away from "no line" because I find it much more difficult than coloring a stamped image. It took me much longer to make, however I was pleased with how it turned out. 


The full image is much larger, so I trimmed down the panel, which was less intimidating lol!  It was stamped on white, and I started with the leaves, which I colored in warm greys.  I continually referenced the stamp packaging to be sure I knew what I was coloring, which was extremely helpful when I began working on the flowers, and even then I think I changed a couple of the petals, but no one will ever know except you and me wink, wink. 

After I thought I was done coloring, I felt like it needed something more, so I colored in the background with a black marker and it really made the floral image pop!  I adhered it to a white card base and created a frame to add some interest.  Lastly, I added the sentiment with some thin foam squares, and while I thought about adding some sequins or gems, ultimately decided not to now.  I always do that later when I go to mail it.


Thanks for stopping by and I hope you'll join us this week!  Be sure to pop over to the challenge blog, my wonderful teammates and guest designers have oodles more inspiration for you.

Take care!

Stef

  • Simon Says Stamp Celebrate Rose Corner stamp
  • Altenew Cascading Flowers stamp (sentiment)
  • SSS A2 Nesting Frames and Sentiment Label die
  • Copic Markers - R39, 37, 35, W3, 1, 0, Black 100

Sunday, July 7, 2024

Summer Fun for The Paper Players

Hello friends!  I am thrilled to be here with my very first card for The Paper Players as a new member of their design team!  Also joining the team are the super talented Elizabeth Stewart and Jan Clothier.  After spending a year as a Guest Designer a few years ago (as did Elizabeth and Jan), it's a wonderful moment to be back as a permanent part of the team with the amazing ladies that have inspired us all for many years! ❤️ 

So, shall we get on with the challenge?  The lovely Claire has chosen Summer Fun for Theme week.

So many options for that theme and I chose one of my favorite things to do in summer, which is hanging out by the ocean.


I decided to use a fun Anita Jeram illustrated stamp set to create a beach scene.  I began by stamping and coloring the images, including the buried cat and the sandcastles, then cut them out with the coordinating dies.  The sentiment was stamped and fussy cut.

The background was masked off as I created each section - sand, water, and sky.  Copics were used to color the sand so they would match the buried cat and sandcastles, then I used a light, medium and dark in Distress ink to create the sky and water, deliberately not fully covering the sky to give the illusion of clouds.  The water was enhanced with a couple of blue Copic markers, then I used a white gel pen to create the "seafoam".  

The row of walking friends was adhered directly to the background, then the buried kitty added with thin foam tape.  The sandcastle was then popped up on regular foam tape.  The sky to the left looked a bit empty, so I added three die cut birds and called it finished.


Won't you come join us and show us your version of fun in the summer?  We'd love to see what you're inspired to make!  The challenge will remain open until open until Noon PST on Friday, July 12th.

Take care!

Stef
  • Anita Jeram/Colorado Craft Company Beach Life stamps and dies
  • Hero Arts Cloudy Sky Scene Fancy Dies
  • Tumbled Glass, Broken Chine and Salty Ocean Distress Inks
  • Copics - CATS - YR27,24, 23, 31, N4, 2, 0, R21; NECKTIE and HAT - B16, 12, R39, 29, 24; DOGS - E27, 23, 21, C7, 5, 3, 1; SAND - E37, 35, 33, 31, 30; OCEAN - B26, 16, 12, 000; SHOVELS - YR26, 08, B16, 12; BUCKETS - R39, 29, 24, B16, 12, Y26, 08